• Ships of Scale has incorportated an extra level of security when you log In. Please follow on-screen prompts to acknowledge that you are not a robot via a "Check Box" or a "Pictorial Check Box Puzzle". This is needed due to higher level of AI Activity Security.
  • SUBSCRIBE TO SHIPS IN SCALE TODAY!

    The beloved Ships in Scale Magazine is back and charting a new course for 2026!
    Discover new skills, new techniques, and new inspirations in every issue.

    NOTE THAT OUR NEXT ISSUE WILL BE July/August 2026
  • Win a Free Custom Engraved Brass Coin!!!
    As a way to introduce our brass coins to the community, we will raffle off a free coin during the month of August. Follow link ABOVE for instructions for entering.

The Mighty Panokseon (Plank Board Ship)

I think it was Napoleon Hill that once said something along the lines of "fear is the enemy of progress." It is a paralyzing force that stops you from going forward and begs you to stay in the comfort of the familiar, insidious in it's disguise of logical reason. I've been sort of dreading taking the next steps on this ship because it's a sort of point-of-no-return. If I screw up here or anything else going foward, I'm not sure I'll be able to fix it. So that's it, not excuses, just me being a wuss!

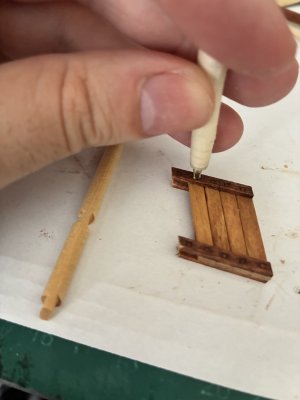
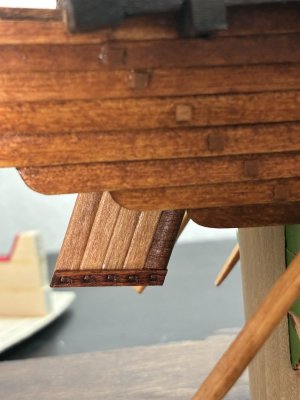
Far starters, I had to redo the rudder. I realized I made a mistake attatching the tiller to the rudder shaft first. The angle of the rudder with the rest of the ship also greatly bothered me, so I took the opportunity to redo it and try something I wish I had tried earlier. Rather than attatching small bits of wood along it's framing to appear as wooden pegs, I made a square imprinting stamp and pressed it into the wood to imitate the pegs instead. I now wish I had done this along the hull as well as attatching those little b******* took forever and I have to be carefull to not accidentally knock them off
IMG_6962.jpegIMG_6993.jpeg
Overall, the results came out okay I think.

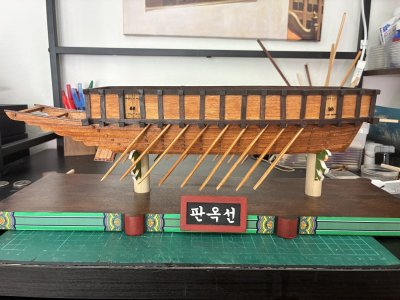
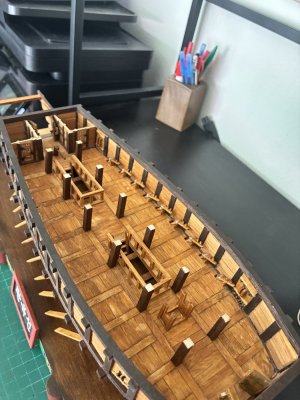
But the part that made me nervous was fixing the oars. If I'm not careful, it would only be too easy to snap them off or get them misaligned. This will become especially nerve wracking once I lock in the lower deck and start working on the upper deck, effectively sealing any chance I'll have of reafixing them if I ever do knock them out of place accidentally. But as I look back, it's been about 6 months without making any real progress because of that damned fear! So I finally nutted up, began to tedious process of shellacking and sealing the lower hull and oars (nothing to really photgraph there) and am now getting everything in place. I have four in place and plan to do only a few at a time to allow them to set so I don't risk knocking them off while I put in the others. Hopefully I'll be done with them all in the next few days.
IMG_6994.jpegIMG_6992.jpeg
Yes, it does bother me that the oars will probably not descend down to exactly the same level or angle, but damn it all, I need to do something. I'll just have to repear the following mantra "I must not fear. Fear is the mind-killer."
 
Last edited:
I’m with you. I was pretty much at all-stop on Fair American for fear of making an irreversible mistake that would ruin the build. But eventually I got the gumption to get started on the deck planking, which is now nearly complete.

Turtle boat is looking great!
 
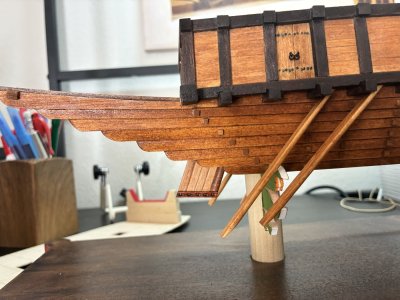
The oars are now in place, using generous amounts of the strongest freaking wood glue I have, but I’ll still need to be careful from now on. I wish I could secure them more mechanically rather than just relying on glue, but with the scale I’m at, it requires more finesse than I am capable at.IMG_6997.jpeg
(I really need to finish up that stand!)

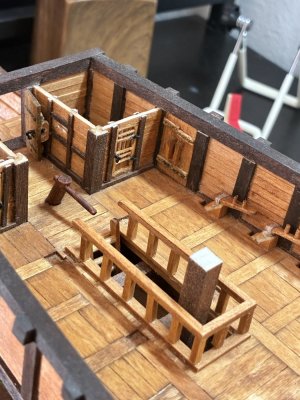
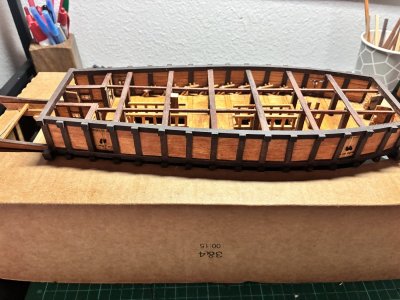
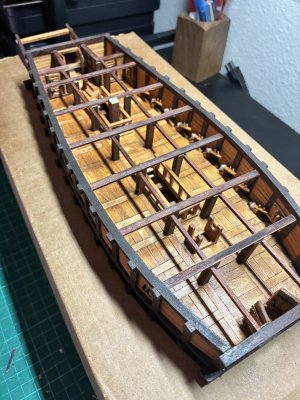
I’m also getting the internal supports in place so I can finally get to the battle deck. Assuming I keep up the pace, all the internal work should be done within the next week.IMG_6998.jpeg
 
You might consider building a box without a bottom to go around the base . Make it just tall enough to protect the oars from an accidental bump or poke, but still leaving the top of the hull accessible.
 
You might consider building a box without a bottom to go around the base . Make it just tall enough to protect the oars from an accidental bump or poke, but still leaving the top of the hull accessible.
That makes sense. I considered that in the past, cutting out a hole that the main hull fits inside and the mid deck structure can sit on top of, but the stern with its upswept wings makes it a bit trickier. That, and I need to find a box sturdy enough and of the right size. But I'll give it some more serious thought again. Thanks for the suggestion.
 
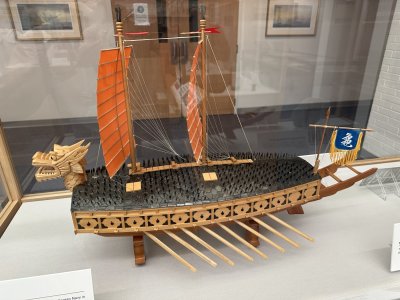
The Naval War College set up a display in the lobby of the building in which I used to work while in Newport. It features a number of ship models, including this one:
Nice! I'm tempted to try to make one of those next, though part of me is leaning towards a Homeric black ship, just to for a change of pace.
 
So I took Namabiiru’s advice and made a box frame for the ship. I had to steal a few from Costco, but I finally found one about the perfect size and figured out how to measure out the hole holding it.
IMG_7008.jpeg IMG_7009.jpeg
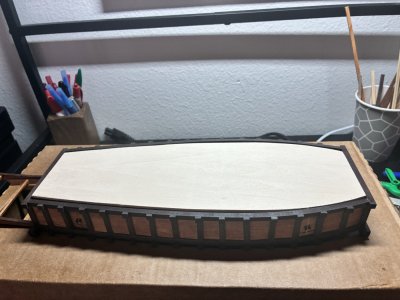
Anyway, the mid-deck is finally about done. I had to coat it a bit before adding the upper deck supports. Up close, it all looks like crap, but not much will be visable in the final product anyway. It almost seems to be a shape to cover it up, but I need to start figuring out the layout and planking of the upper deck.
IMG_7010.jpeg
 
Last edited:
So I took Namabiiru’s advice and made a box frame for the ship. I had to steal a few from Costco, but I finally found one about the perfect size and figured out how to measure out the hole holding it.
View attachment 632582 View attachment 632584
Anyway, the mid-deck is finally about done. I had to coat it a bit before adding the upper deck supports. Up close, it all looks like crap, but not much will be visable in the final product anyway. It almost seems to be a shape to cover it up, but I need to start figuring out the layout and planking of the upper deck.
View attachment 632587
Could you build the upper deck to be removable so you can show off the detailed lower deck when desired?

 
Could you build the upper deck to be removable so you can show off the detailed lower deck when desired?

Not fully removable, unfortunately. But I do have an idea of building in hidden removable panels in the top deck that will reveal the inner deck, which is why I need to really plan this top deck more carefully.
 
Last edited:
I haven't made a huge amount of progress this week, but figured I'd at least add a weekly update, if only to keep myself on track. I'm actually getting to work on the masts right now. The reason is that the panokseon featured two tabernacle masts, that were lowered down during battle on a pivot pin, which would allow sharper manuevering with the lower center of gravity, as well as protecting the masts during battle.
1789322215950.png1789322337819.png
Left: A 18th century Korean diagram showing both fore an main masts lowered. Right: An 18th century Japanese painting depicting a panokseon with only the main mast lowered, resting on a cradle.

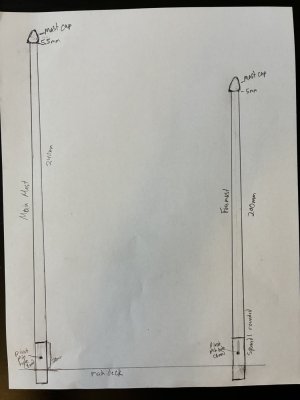
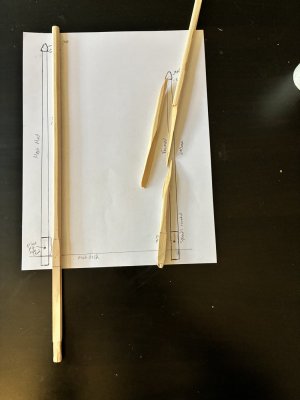
Sadly, there's little literature on this. Most modern reconstructions, and even films, depict permanant masts, making them little more than lifesized static models than faithful reproductions. So I've had to do a bit of guesswork using my limited knowledge of engineering and, my most hate of subjects, math. Realistically, the masts extended below the main battle deck a bit for counter weight and rested on a mast heel that extended from the lowest deck up through he mid, rowers deck. Caculating everything out based on realistic center of gravity, weight of the actual materials , and the small amount of literature I did find...ah, what am I doing? Just know I mathed it out and came up with what I believed to be the proper dimensions. Below is my mock of the general mast sizes and shape.
IMG_7014.jpegIMG_7016.jpeg

I'm using 5/16" squared dowels of pine which I will have to round out and taper just above the bottom 3cm of the mast. As you can see, I have some work to do on my wood turning technique with the ole' Black and Decker drill. (Admittedly, it only split in one spot, and I may have shattered the rest out of frustration.Cautious). Luckily I have plenty of dowels! I'll make them a bit longer for now so I can cut them own later.
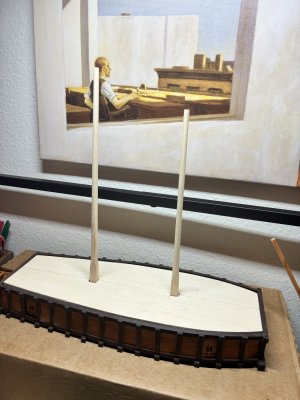
 
Trying to keep my self on pace by committing to one upate a week. Not much to show, but it takes a while to shave off 3mm of wood by turning with 180 grit sandpaper.
IMG_7025.jpeg
I left them intentionally a bit longer for now, but I do feel like I should have thinned them out a bit more. I guess I was nervous about them getting too thin and snapping. Next, I need to figure out how I will design that dang tabernacle.
 
Last edited:
Are you using a mechanical device to spin the masts as you abrade them?
Grip in a drill chuck on slow speed - that sort of thing.

You could start with a coarser grit and gentle hand to remove material more quickly. maybe 80 grit, then polish through 120, 180 to 240.


I'm constantly being impressed by your build - the subject as much as your steady overcoming of the problems your choice of scale and subject create for you.

J
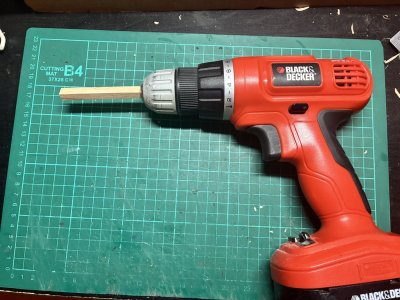
 
Are you using a mechanical device to spin the masts as you abrade them?
Grip in a drill chuck on slow speed - that sort of thing.

You could start with a coarser grit and gentle hand to remove material more quickly. maybe 80 grit, then polish through 120, 180 to 240.


I'm constantly being impressed by your build - the subject as much as your steady overcoming of the problems your choice of scale and subject create for you.

J

IMG_7029.jpeg
This is my mechanical device: my trusty Black & Decker. 80 grit probably would have shorted my time considerably, but 180 was the lowest grit I had and I was too lazy/cheap to go out and get a bunch of sheets of 80 that I'll rarely use. But as I write that, I just realized probably have to do more turning work for the cannons. Oh well, lived and learned. But thanks for the advice and kind words.
 
Back
Top