• Ships of Scale has incorportated an extra level of security when you log In. Please follow on-screen prompts to acknowledge that you are not a robot via a "Check Box" or a "Pictorial Check Box Puzzle". This is needed due to higher level of AI Activity Security.
  • SUBSCRIBE TO SHIPS IN SCALE TODAY!

    The beloved Ships in Scale Magazine is back and charting a new course for 2026!
    Discover new skills, new techniques, and new inspirations in every issue.

    NOTE THAT OUR NEXT ISSUE WILL BE July/August 2026
  • Win a Free Custom Engraved Brass Coin!!!
    As a way to introduce our brass coins to the community, we will raffle off a free coin during the month of August. Follow link ABOVE for instructions for entering.

Bluenose Schooner 1921 - Model Shipways 1:64 by TexBilly

This is looking great… and don’t worry about time. I started mine in 2000ish and am only working on the deck furniture now (or when I work on it again as I’m knee deep in my first rigging of a different ship).
Thanks so much, Hugh, and I agree it's not a race - God knows I'm not exactly running on this build. :p I've surprised myself on how many tasks I think are easy/straightforward on the surface but actually take much longer to do them right. In the end, I'm glad I did take that time.
 
Bill, I am a few weeks away from this point. I was curious how you shaped those "the arched end pieces at the ends of the rails" of the monkey rails. They look wonderful and I want to shamelessly steal your technique.
Rob
Hey Rob, thanks for your kind words and yes, we're here to help each other!

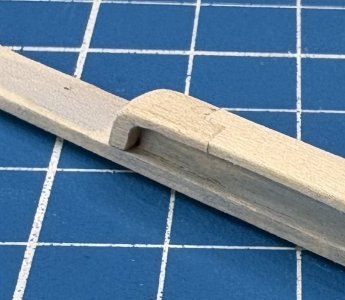
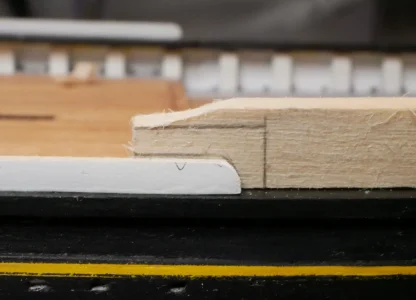
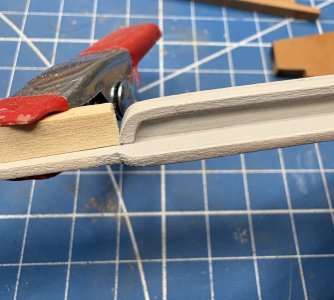
After very briefly trying to bend the arch, I switched to cutting the pieces, similarly to how a few modelers have done:
  • Shape the monkey board ends to the geometry you like (mine are basically soft chamfers)
  • Trace the monkey board outline onto a thick wood strip that is ideally the same width as the monkey rail and at least as thick as the monkey board + rail dimension. In my case, I got lucky as my height is an even 3/16" so I used 3/16" x 3/16" strip.
  • Then I gradually sliced away the waste with a chisel blade and snuck up to the traced profile using a rounded file and sandpaper.
  • After I matched the inside profile I did the same on the outside until the thickness matched that of the monkey rail.
  • (I later chose to cut a scarf joint to join the preinstalled end pieces with the long monkey rails)
I forgot to take photos along the way but I think this general approach was mentioned in the MS instructions. I also found it in The Suburban Ship Modeler site, who I credit with the last photo below.

Hope this helps!

IMG_1771.jpeg IMG_1764 Closeup.jpeg Qtr Deck End Piece.webp
 
Last edited:
Hey Rob, thanks for your kind words and yes, we're here to help each other!

After very brieflky trying to bend the arch, I switched to cutting the pieces, similarly to how a few modelers have done:
  • Shape the monkey board ends to the geometry you like (mine are basically soft chamfers)
  • Trace the monkey board outline onto a thick wood strip that is ideally the same width as the monkey rail and at least as thick as the monkey board + rail dimension. In my case, I got lucky as my height is an even 3/16" so I used 3/16" x 3/16" strip.
  • Then I gradually sliced away the waste with a chisel blade and snuck up to the traced profile using a rounded file and sandpaper.
  • After I matched the inside profile I did the same on the outside until the thickness matched that of the monkey rail.
  • (I later chose to cut a scarf joint to join the preinstalled end pieces with the long monkey rails)
I forgot to take photos along the way but I think this general approach was mentioned in the MS instructions. I also found it in The Suburban Ship Modeler site, who I credit with the last photo below.

Hope this helps!

View attachment 632288 View attachment 632285 View attachment 632281
Thanks Bill! You explained it well!

Rob
 
Hey Rob, thanks for your kind words and yes, we're here to help each other!

After very briefly trying to bend the arch, I switched to cutting the pieces, similarly to how a few modelers have done:
  • Shape the monkey board ends to the geometry you like (mine are basically soft chamfers)
  • Trace the monkey board outline onto a thick wood strip that is ideally the same width as the monkey rail and at least as thick as the monkey board + rail dimension. In my case, I got lucky as my height is an even 3/16" so I used 3/16" x 3/16" strip.
  • Then I gradually sliced away the waste with a chisel blade and snuck up to the traced profile using a rounded file and sandpaper.
  • After I matched the inside profile I did the same on the outside until the thickness matched that of the monkey rail.
  • (I later chose to cut a scarf joint to join the preinstalled end pieces with the long monkey rails)
I forgot to take photos along the way but I think this general approach was mentioned in the MS instructions. I also found it in The Suburban Ship Modeler site, who I credit with the last photo below.

Hope this helps!

View attachment 632288 View attachment 632285 View attachment 632281
A very nice approach and nicely documented, Bill. The time invested will certainly pay off.
Regards, Peter
 
Good morning Bill. This is seriously good work. I think anyone who has or will purchase this kit now has a “blue print” on how to get these rails spot on. Kudos. Cheers Grant
You're way too kind, Grant, much appreciated. To be honest, a big motivator to build the railing assembly off-ship was to be able to do most of the work on my solid bench rather than the relatively unstable hull, with the added risk of marring my finished surfaces! :oops: Thanks again!
 
Bill. While I am still a bit away I am contemplating putting in the bowsprit. The plans are fairly unclear, at least to me how to place it. I can see cutting a 1/4" hole in the bulwarks for it but there appears to be some sort of possible metal piece on the hull right where the bowsprit enters the hull. I don't really see it mentioned in any way in the instructions.

Have you thought about what to do to position and fix the bowsprit in place?

Rob
 
Bill. While I am still a bit away I am contemplating putting in the bowsprit. The plans are fairly unclear, at least to me how to place it. I can see cutting a 1/4" hole in the bulwarks for it but there appears to be some sort of possible metal piece on the hull right where the bowsprit enters the hull. I don't really see it mentioned in any way in the instructions.

Have you thought about what to do to position and fix the bowsprit in place?

Rob
Hey Rob, good timing on your question as this is one of a few things on my radar. In the case of the bowspirit, it will enter the bow under my main rail/buffalo rail so it's time for me to prepare for this as I'm hoping to install my rail assembly soon. Between that pesky thing called work :rolleyes: and some time off, I've been painting and adding some new details to my railing and hope to install it later this week. So, my bowspirit and possibly the samsons post on deck need attention.
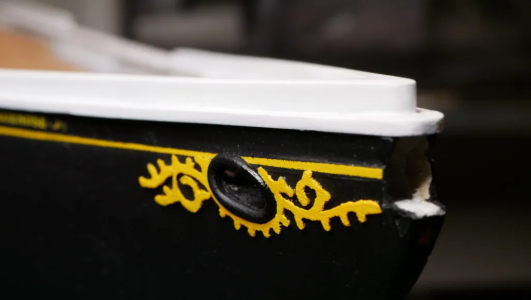
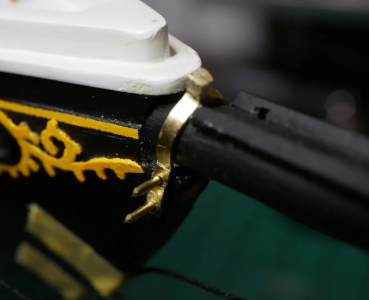
I agree on the MS kit's plans - not much there - but I have lightly reviewed the bowspirit build/installation at The Suburban Ship Modeler site, where he goes into some nice detail about the bowspirit details, including the metal gammon iron at the tip of the bow (I think this is the metal piece you're referencing). In the first pic you see the hole he cut to accept the bowspirit but so far, I haven't found where he actually cuts it.

I also have the Hunt practicum and his details are not extensive but he does show how he cut away part of the bulwarks and installed a solid block, through which he drilled/filed a hole to accept the bowspirit. I like this general idea to give the bowspirit a solid channel in which to rest.

So, I'm not an immediate help but I hope these resources help a bit if you decide to do the same prep soon. (I'll watch your progress too).

Bill


1789398949996.png1789399100296.png
 
Last edited:
Hey Rob, good timing on your question as this is one of a few things on my radar. In the case of the bowspirit, it will enter the bow under my main rail/buffalo rail so it's time for me to prepare for this as I'm hoping to install my rail assembly soon. Between that pesky thing called work :rolleyes: and some time off, I've been painting and adding some new details to my railing and hope to install it later this week. So, my bowspirit and possibly the samsons post on deck need attention.

I agree on the MS kit's plans - not much there - but I have lightly reviewed the bowspirit build/installation at The Suburban Ship Modeler site, where he goes into some nice detail about the bowspirit details, including the metal gammon iron at the tip of the bow (I think this is the metal piece you're referencing). In the first pic you see the hole he cut to accept the bowspirit but so far, I haven't found where he actually cuts it.

I also have the Hunt practicum and his details are not extensive but he does show how he cut away part of the bulwarks and installed a solid block, through which he drilled/filed a hole to accept the bowspirit. I like this general idea to give the bowspirit a solid channel in which to rest.

So, I'm not an immediate help but I hope these resources help a bit if you decide to do the same prep soon. (I'll watch your progress too).

Bill


View attachment 636033View attachment 636034
Bill thank you for your reply!
I believe you are correct that the metal piece I am referring to is the gammon iron (which Ill have to look up :rolleyes: ) I also like the idea of some kind of small solid block for the bowsprit as it may be under some tension from the rigging. I may also try to pin it in place with some small pins between the bowsprit and the deck, although space limitations to movement may not allow that.

Rob
 
Hi Folks, it's been a busy few weeks with work so it's time to catch up...

Rail Edges

This is a chapter that turned into WAY more of an adventure than I bargained for — painting my main rails and specifically what to do with the edges.

Now, a smart builder would've slapped some paint on these and moved along. But apparently I looked at my already "behind schedule" build and thought, "you know what this needs? Something FAR more complicated and time-consuming." So down the rabbit hole I went. You're welcome. ROTF

It started with a question. One of my references is the 1970 letter from Smith & Rhuland — the Lunenburg yard that actually built the original Bluenose in 1921 — listing the color scheme from memory. For the rails it says "white top, varnished edges." That "varnished edges" bit stuck with me: a white rail with a natural, varnished-wood edge sounded both authentic and handsome.

Trouble is, we don't have color photos of the original and a builder's memory from 1970 is a soft source. So I gave myself a little artistic license — white tops for sure, and a warm wood-toned edge: not black, not stark, something that reads as varnished oak sitting between the white top and the black hull.

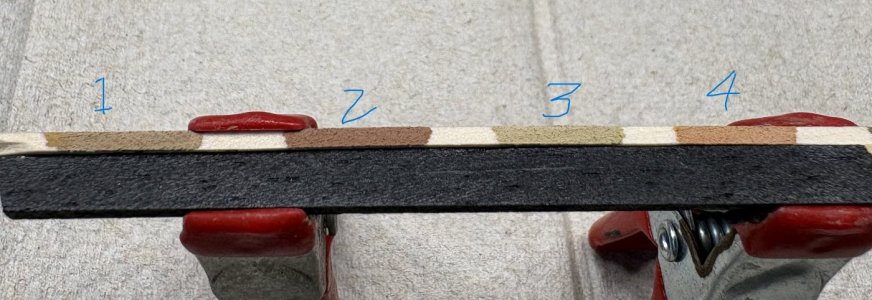
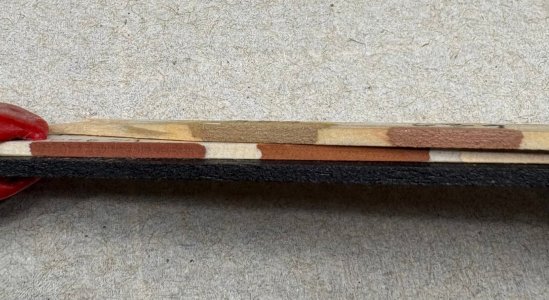
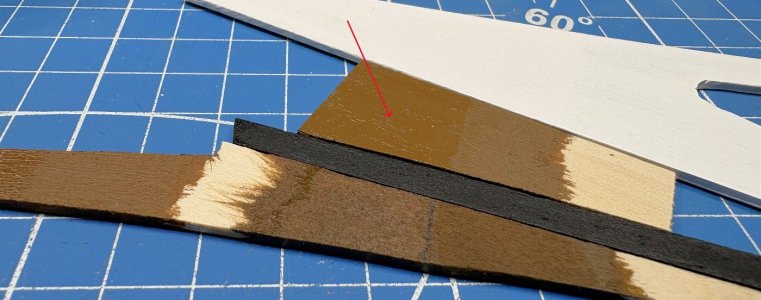
That one small decision sent me on a color hunt I did NOT see coming (or maybe I should have :rolleyes:). And even once I had a warm edge I liked against the black hull (the first sample below), a nagging worry set in: sure, it works against the hull — but what about all that added color and extra lines right up against the deck and the white bulwarks? Would it look rich, or just busy? I finally quit fretting and laid a painted sample right along the deck to see for myself… and let out a big sigh of relief (the second sample below).
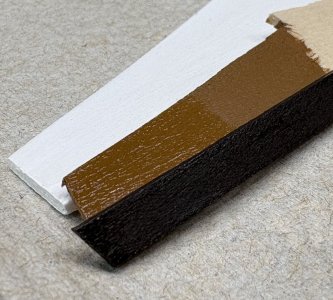
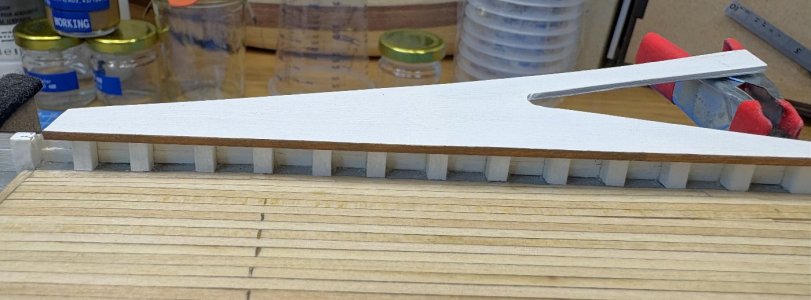
IMG_1834.jpeg IMG_1867.jpeg

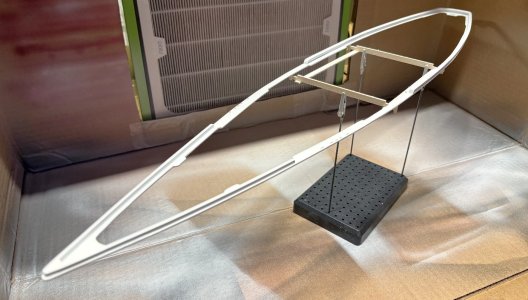
But I'm getting ahead of myself —let me back up to where this all started, which was painting my rail assembly with white primer (to eliminate gray primer bleed through when I spray my final white rails).

Back soon with more...

IMG_1877.jpeg
 
Last edited:
…Continued

The Color Hunt or...how I learned to stop guessing and start mixing

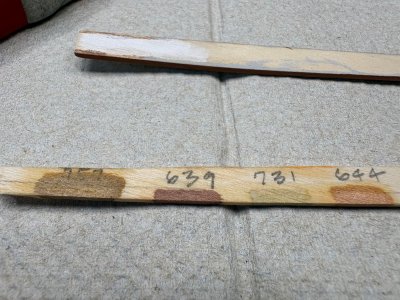
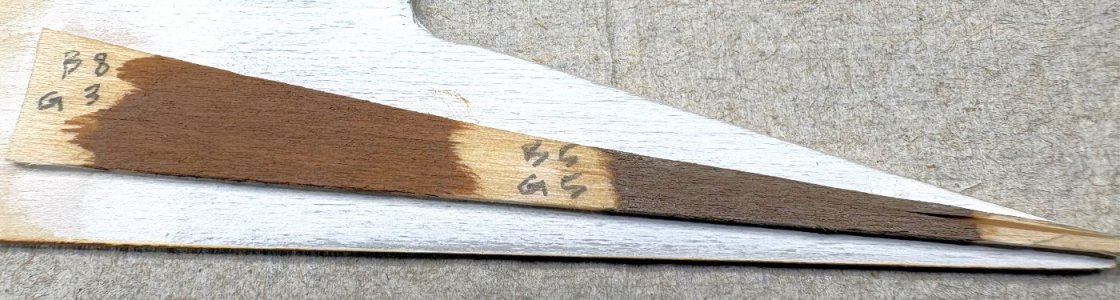
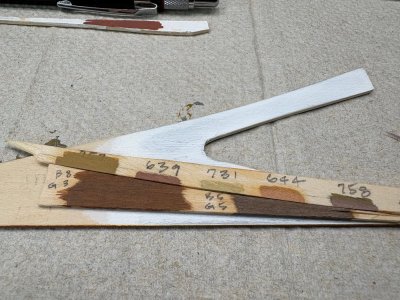
I first chased the color with acrylic paint markers as I liked the relative neatness of drawing (especially with chisel tips) vs painting. I had some Posca markers and bought a few others, including a set of inexpensive off brands (which for a while proved to be a good purchase, more on that soon). I dabbed browns on basswood scraps and judged them against a black offcut (the hull) and a white strip (the rail top). That light brown sample on the left of the first two photos (labeled 757) was the leading candidate for a bit and came from the cheap off brand set.

IMG_1805.jpegIMG_1808.jpegIMG_1815.jpeg

I even "decanted" two markers (multiple presses of its spring loaded paint release) to get different, in between tones: B8=8 presses of Brown, G3=3 presses of gray, and so on. Not really reproducible in any volume and definitely not precise. I abandoned this approach.

IMG_1821.jpeg IMG_1822.jpeg

Two lessons landed fast:

Substrate matters - The same marker reads browner over bare wood (the wood warms it) and redder over white. And the neighbors matter — go too light and the edge washes into the white top; too dark and it fights the black hull.

Chemistry matters - The inexpensive 757 marker looked great… until I brushed clear over it and it smeared and reactivated. Lesson learned — pigment is good but the dye may be risky under a clear coat.

I've shared only a portion of my trials and I kept almost nailing it, but never quite there, so I finally did what I probably should have done sooner: switched to artist acrylics and mix my own.

More on that soon...
 
Last edited:
More Color Hunting...

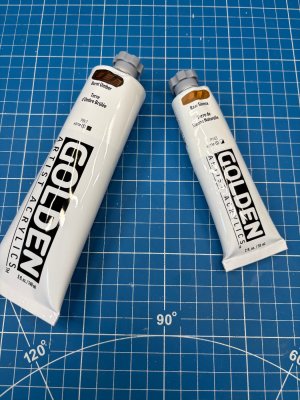
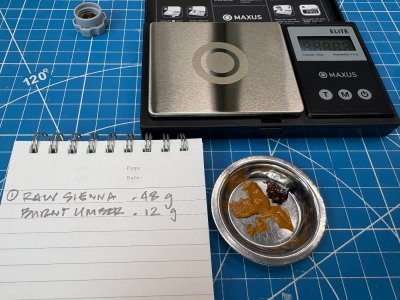
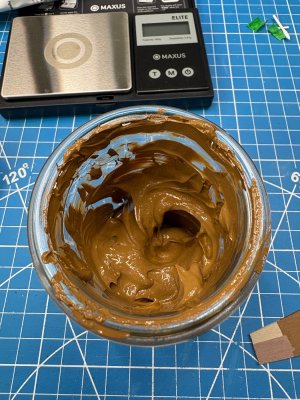
After a bunch of weighed test batches with Golden Heavy Body acrylics, I landed on a custom mix I like - I'll call it "Varnished Oak"

Base ~4:1 Mix (sample):
Raw Sienna 0.44 g (I nudged it down from .48g in the sample shown)
Burnt Umber 0.12 g

IMG_1825.jpeg IMG_1827.jpeg IMG_1828.jpeg

Later, after some internet and AI help, I added the following to lighten it:
Raw Umber 0.05 g
Titan Buff 0.07 g


IMG_1840.jpeg

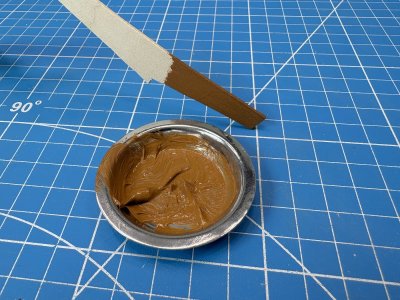
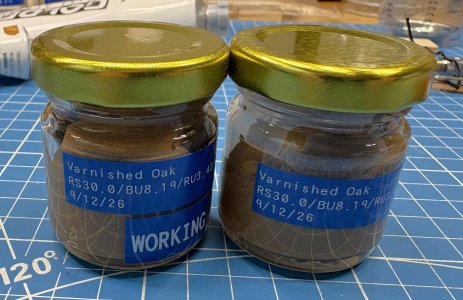
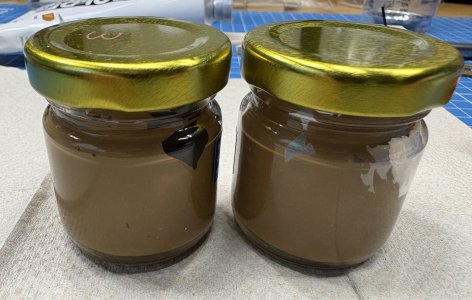
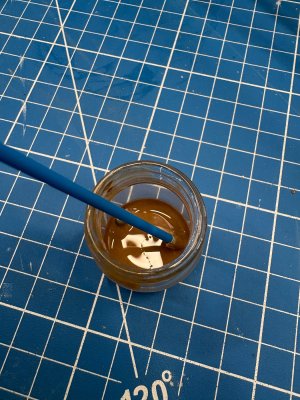
The Raw Umber was the key — it grayed the golden warmth down into a muted, believable oak instead of a candy brown. I mixed a master batch by weight (so it's repeatable), jarred it without thinning, and labeled it with the recipe and date. Transferring to those small jars was a mess but I got there.

I take out a dab when I need it and the master mix hasn't shown any signs of hardening/skinning with those lids in place. I also have WAY more than I need for the rails but I like the color and I'm sure I'll find plenty of uses. Deck structures perhaps? :cool:

IMG_1844.jpeg IMG_1848.jpeg

IMG_1851.jpeg IMG_1853.jpeg

Lesson: good paint + a decent scale + a written recipe beats eyeballing of any kind.
 
Last edited:
Getting it ON the Rails

Color settled — now how do I apply it? These edges are a whisper (about 1/16"), so it was fiddlier than it sounds.

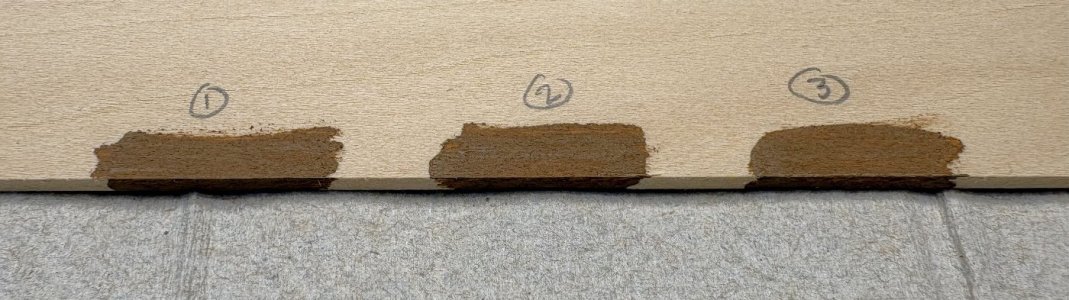
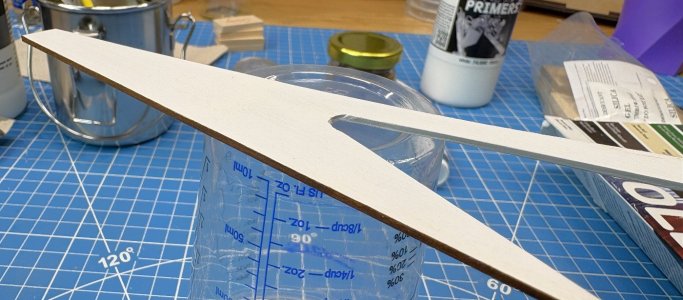
My first passes went on quite opaque. I went through a series of samples with more and more drops of airbrush medium - I got up to about 10 drops added to my dollop of base mix, nothing too measured during this phase. This helped the flow but didn't result in much transparency and remained too dark and a bit flat — "painted," not "varnished."

IMG_1857.jpeg IMG_1861.jpeg
IMG_1865.jpeg

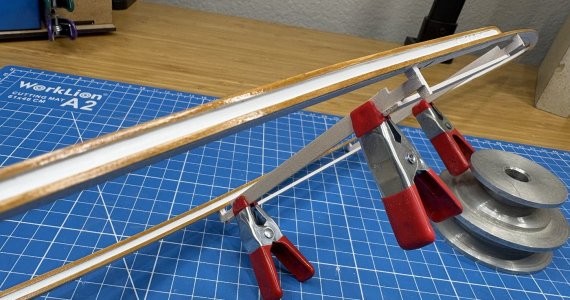
On my rails, I applied the glaze (1st pic) and tried lightly sanding it back to fake some transparency (2nd pic). Looked OK at arm's length…

IMG_1883.jpeg IMG_1884.jpeg

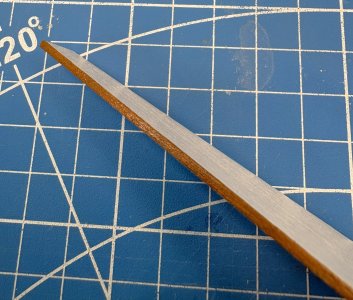
but a close-up told the truth: sanding a 1/16" edge rounds that crisp top corner and leaves a, well, sanded look. Not what I was after.

IMG_1885.jpeg

The fix turned out to be the real breakthrough: instead of semi-opaque paint, thin it WAY down — to a skim-milk glaze/wash — and build the color in thin, transparent layers, letting each flash off. It now reads like real varnished oak, grain and all, because the color tints the wood instead of covering it.

IMG_1897.jpeg

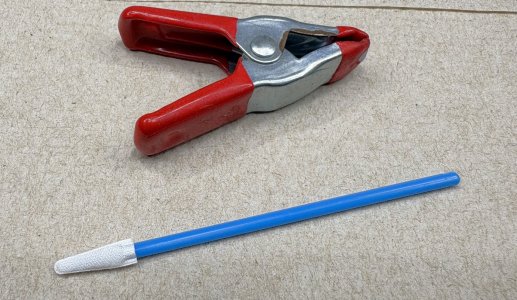
Here's my microfiber applicator and one coat of my glaze applied:

IMG_1895.jpeg IMG_1896.jpeg

A few glaze notes if anybody is crazy enough to go there, like me :oops: :
  • Thin with a proper acrylic/airbrush medium, not water — water beads and dries patchy on a narrow edge.
  • The watery glaze raises the grain a touch; a LIGHT buff with a 400 pad knocks it back - do this between every dried coat.
  • A wash settles fast — stir/shake your jar of mix constantly or your layers go uneven.
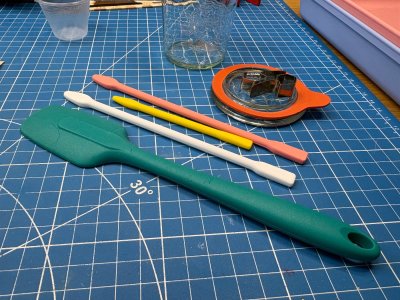
  • I'm applying it with lint-free cleanroom swabs (microfiber tips) — no fibers shed into the finish, and a clean dampened one doubles as a cleanup tool for stray paint on the white.
  • A clear coat (I'm using Mr. Color GX100) deepens it and locks it in
 
Last edited:
I introduced so many complications to this chapter, writing down a process was non-negotiable! :p
  1. Prime the whole assembly white (Vallejo Surface Primer, airbrushed) — based on some smapling, I wanted to kill the previously sprayed gray and any chance of ghosting.
  2. Base-coat the tops white (Golden Titanium White, airbrushed). I knew I'll come back and spray the final white AFTER the edges are done, so any edge-color slop lands on not-yet-final white and gets buried.
  3. Sand the edge faces back to bare wood (150 to knock it off, then 220/320/400 to refine). Keep the top corner (the arris) as crisp as possible as it's the finished color line later. Hard sanding blocks for the straights, flexible sanding sticks for the bow/stern curves.
  4. Glaze the edges with the thinned "Varnished Oak," built in thin transparent layers to the tone I want, letting each flash off. Light 400-pad buff to knock back raised grain.
  5. Clear the edges (thinned Mr. Color GX100)
  6. Mask the crisp white/oak line (fine-line tape right at the arris) <<My next step
  7. Brush a thin clear "locking" pass along the tape edge first — helps the final white coat from bleeding under.
  8. Spray the final white top coat (plus bottom edges)
  9. Unmask, touch up, spray clear on entire assembly (optional, game time decision)
  10. Ready to install.
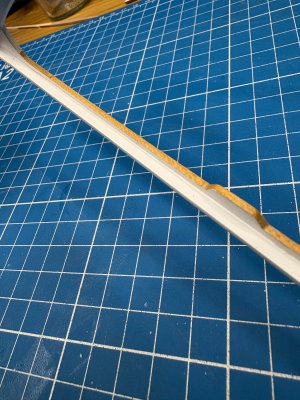
I've now applied 3-4 coats of my glaze and 4 coats of clear - all with microfiber swabs.

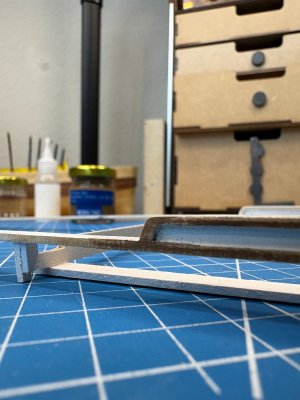
IMG_1923.jpeg IMG_1927.jpeg

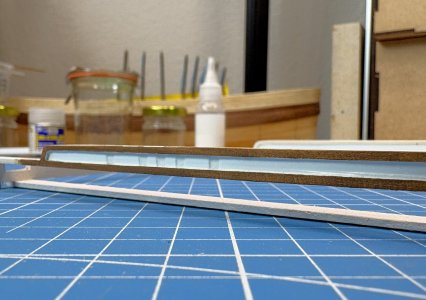
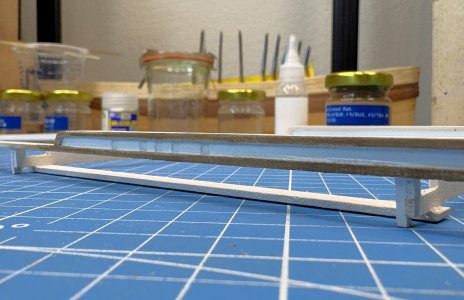
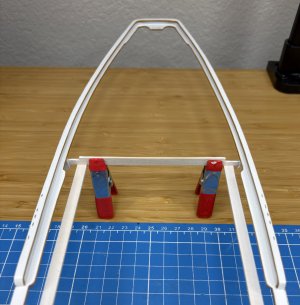
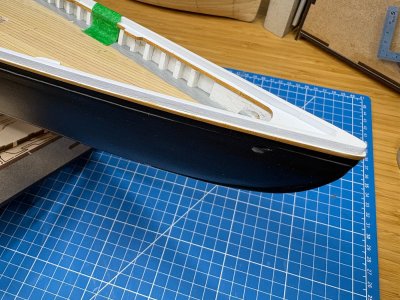
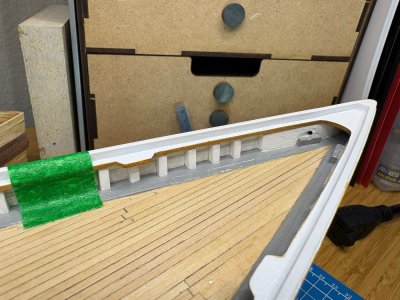
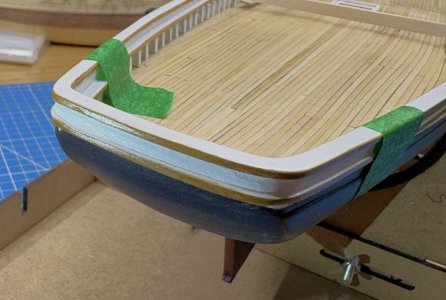
I still need to spray my final white coat - so my holding brace is still attached - but I managed to tape it in place at bow and stern to see how she looks. I suppose my color scheme is relatively unconventional for most Bluenose builds but I'm pretty happy with it and the warm tone of the varnish compliments both the red and black of the hull.

Still, I'm looking forward to an easier chapter!

IMG_1917.jpeg

IMG_1913.jpeg

IMG_1920.jpeg
 
Last edited:
I introduced so many complications to this chapter, writing down a process was non-negotiable! :p
  1. Prime the whole assembly white (Vallejo Surface Primer, airbrushed) — based on some smapling, I wanted to kill the previously sprayed gray and any chance of ghosting.
  2. Base-coat the tops white (Golden Titanium White, airbrushed). I knew I'll come back and spray the final white AFTER the edges are done, so any edge-color slop lands on not-yet-final white and gets buried.
  3. Sand the edge faces back to bare wood (150 to knock it off, then 220/320/400 to refine). Keep the top corner (the arris) as crisp as possible as it's the finished color line later. Hard sanding blocks for the straights, flexible sanding sticks for the bow/stern curves.
  4. Glaze the edges with the thinned "Varnished Oak," built in thin transparent layers to the tone I want, letting each flash off. Light 400-pad buff to knock back raised grain.
  5. Clear the edges (thinned Mr. Color GX100)
  6. Mask the crisp white/oak line (fine-line tape right at the arris) <<My next step
  7. Brush a thin clear "locking" pass along the tape edge first — helps the final white coat from bleeding under.
  8. Spray the final white top coat (plus bottom edges)
  9. Unmask, touch up, spray clear on entire assembly (optional, game time decision)
  10. Ready to install.
I've now applied 3-4 coats of my glaze and 4 coats of clear - all with microfiber swabs.

View attachment 637491 View attachment 637492

I still need to spray my final white coat - so my holding brace is still attached - but I managed to tape it in place at bow and stern to see how she looks. I suppose my color scheme is relatively unconventional for most Bluenose builds but I'm pretty happy with it and the warm tone of the varnish compliments both the red and black of the hull.

Still, I'm looking forward to an easier chapter!

View attachment 637489

View attachment 637488

View attachment 637490
That is a very nice railing with a special personal touch, Bill. As what I quote sometime: ‘It’s all in the details!’ It will accentuate her lines even more.
Regards, Peter

 
That is a very nice railing with a special personal touch, Bill. As what I quote sometime: ‘It’s all in the details!’ It will accentuate her lines even more.
Regards, Peter

Peter, much appreciated as always, I’m enjoying the look and have since found examples of natural edges, including the POF BN. What I’ve also found and cannot believe I overlooked: the space between the main and monkey rails is typically (always?) black as seen in multiple photos. The good news is that’s an easy paint fix and I have a nice defined boundary along the quarter deck.
 
Back
Top