

Yes it is, I was born 1961, I remember well I was about 15-16 years old when the box was issued.Originally posted on modelshipworld.com March 5, 2025
Browsing through some other Superbe threads, I found a comment that confirms my guess the original kit was launched in 1977. I also stumbled across a YouTube channel with some pretty neat CGI recreations of historical battles, Epic History - YouTube, including a half hour episode of the Battle of the Nile which appears well researched and filled in a few gaps in my understanding both of the battle itself, and the lead up. I especially appreciated how it gives a sense of the scale and distance to shore.

-

SUBSCRIBE TO SHIPS IN SCALE TODAY!
The beloved Ships in Scale Magazine is back and charting a new course for 2026!
Discover new skills, new techniques, and new inspirations in every issue.
NOTE THAT OUR NEXT ISSUE WILL BE July/August 2026 -

Win a Free Custom Engraved Brass Coin!!!
As a way to introduce our brass coins to the community, we will raffle off a free coin during the month of August. Follow link ABOVE for instructions for entering.
You are using an out of date browser. It may not display this or other websites correctly.
You should upgrade or use an alternative browser.
You should upgrade or use an alternative browser.
HMS Vanguard 1:150, converted from Heller's Le Superbe


Handsome ship, congrats.


Welcome PQ to the forums and greetings from Texas! Magic Mike


No build activity over the weekend, as I've been traveling over Labor Day weekend, however an exciting update that Igorcap finished crafting wooden yard arms, which should be here in a few weeks. Very excited to get on with this last stage of the build!
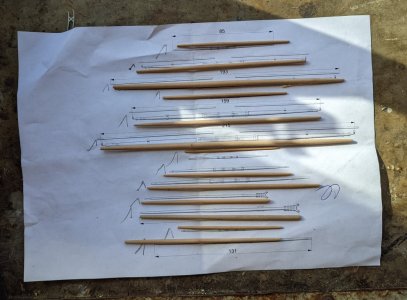
Looking a little closer it seems they may need a bit of sanding down before adding all the fittings, hopefully not too big a deal.
Readers, does anyone know where I can get hold of pearwood round stock here in the US?
Looking a little closer it seems they may need a bit of sanding down before adding all the fittings, hopefully not too big a deal.
Readers, does anyone know where I can get hold of pearwood round stock here in the US?
Last edited:
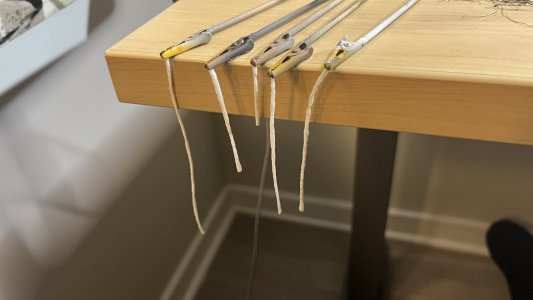
While waiting for the yards to arrive from Ukraine, I've been, I was about to say, tying up a few loose ends...  (SORRY!) Meaning, I spent nearly ten hours on the shifting stays, which were an absolute pain to install. I have a lot of understanding for the concept of simplified rigging at this scale, but too late to go down that track now. Also attached the kevels/cleats that go on the bottom of the shroud stays, for the bow lines and yard lifts. I decided to use the kevels included in the kit, and had to break up my Glorieux kit also to get all 26 needed.
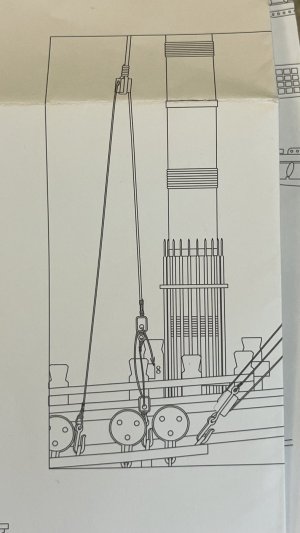
Detail from the Victory Models Vanguard kit plans, showing the fore mast shifting stay blocks. At 1:150 scale, the four shifting stays took me about ten hours to rig, incl. filing the blocks down to size. Getting the hooks (photo etched, from HiSModel) in place to the eye bolts in the channels is no joke when the shroud tackles are already in place.
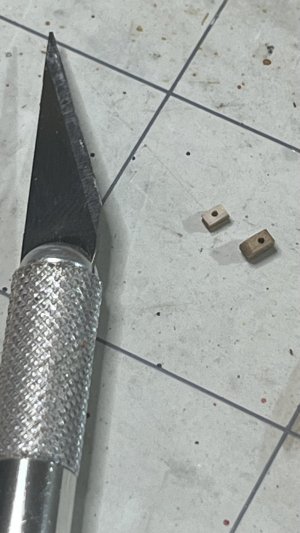
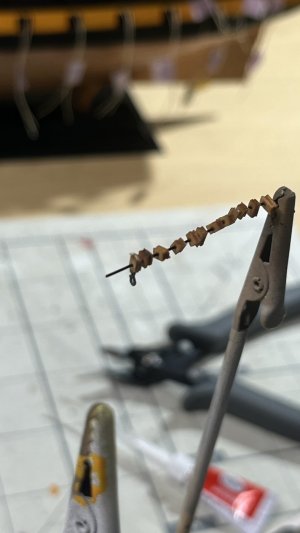
Filed down some of the Amati walnut blocks to use for the shifting stays
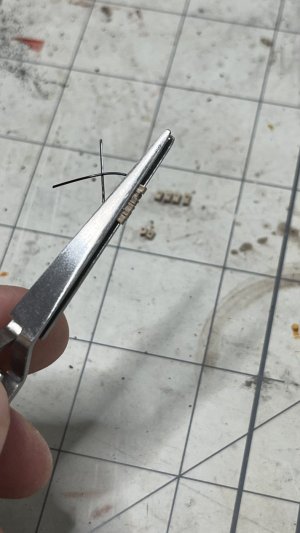
Helped to thread them on to a metal wire and file a few of them down to the same size at the same time.
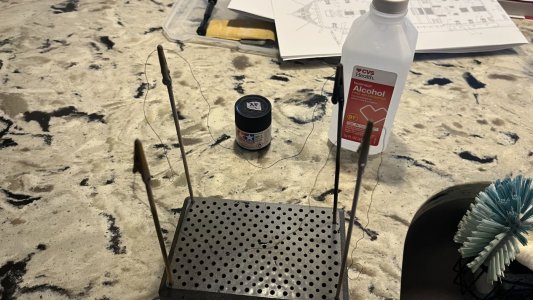
Light stain w/Tamiya XF-10, diluted 1:1 w/alcohol.
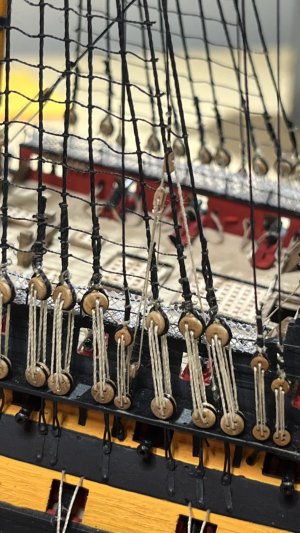
The Victory model plans for the main mast shifting stay shows the block much lower, around the second ratline instead of the fifth, but that wouldn't work since it's attached to a kevel on the inside railing of the half deck; and the hammock netting is in the way.
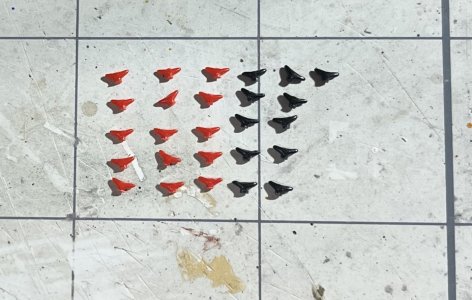
Kevels from original Heller Superbe in red, and Glorieux in black. Don't ask me why -- the kits are identical otherwise except for some ornamental details (see above). Filed clean and cut to size.
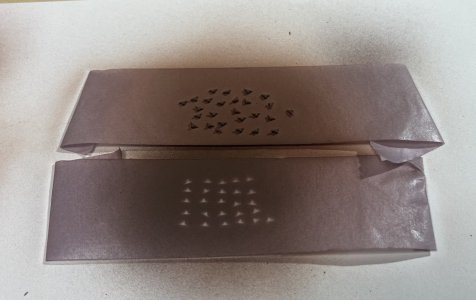
When painting small parts I usually place them on a strip of painter's tape and airbrush.
Dyeing some 10/25 Amati natural thread black. Tamiya XF-1 diluted 4:1 alcohol.
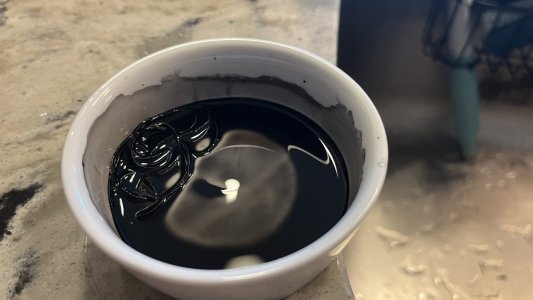
When diluted so much, only takes a couple minutes to dry.
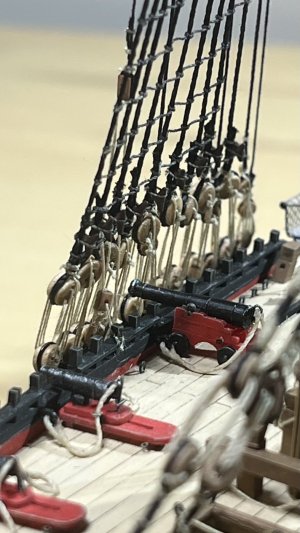
Inside of starboard fore mast shrouds. Attached the cleats to the inside of the shroud stay with a small drop of CA, then tied a single thread around it (plans show two ties). Note fore mast shifting stay block much lower down/closer to the deck than in the main mast image ^^. This is much closer to what the plans show, without the hammock netting and tied to the railing instead of a cleat.
Port fore mast shroud stay tackles with bowline & yard lift cleats attached.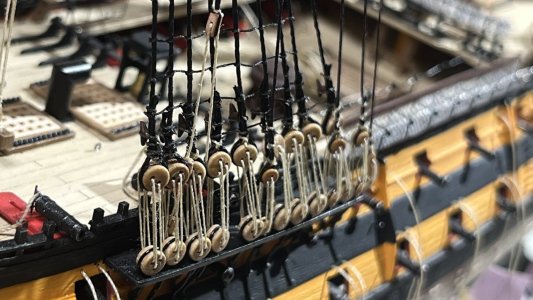
(SORRY!) Meaning, I spent nearly ten hours on the shifting stays, which were an absolute pain to install. I have a lot of understanding for the concept of simplified rigging at this scale, but too late to go down that track now. Also attached the kevels/cleats that go on the bottom of the shroud stays, for the bow lines and yard lifts. I decided to use the kevels included in the kit, and had to break up my Glorieux kit also to get all 26 needed.Detail from the Victory Models Vanguard kit plans, showing the fore mast shifting stay blocks. At 1:150 scale, the four shifting stays took me about ten hours to rig, incl. filing the blocks down to size. Getting the hooks (photo etched, from HiSModel) in place to the eye bolts in the channels is no joke when the shroud tackles are already in place.
Filed down some of the Amati walnut blocks to use for the shifting stays
Helped to thread them on to a metal wire and file a few of them down to the same size at the same time.
Light stain w/Tamiya XF-10, diluted 1:1 w/alcohol.
The Victory model plans for the main mast shifting stay shows the block much lower, around the second ratline instead of the fifth, but that wouldn't work since it's attached to a kevel on the inside railing of the half deck; and the hammock netting is in the way.
Kevels from original Heller Superbe in red, and Glorieux in black. Don't ask me why -- the kits are identical otherwise except for some ornamental details (see above). Filed clean and cut to size.
When painting small parts I usually place them on a strip of painter's tape and airbrush.
Dyeing some 10/25 Amati natural thread black. Tamiya XF-1 diluted 4:1 alcohol.
When diluted so much, only takes a couple minutes to dry.
Inside of starboard fore mast shrouds. Attached the cleats to the inside of the shroud stay with a small drop of CA, then tied a single thread around it (plans show two ties). Note fore mast shifting stay block much lower down/closer to the deck than in the main mast image ^^. This is much closer to what the plans show, without the hammock netting and tied to the railing instead of a cleat.
Port fore mast shroud stay tackles with bowline & yard lift cleats attached.
I felt quite happy to have finished all the 26 shroud cleats -- fiddly, boring, repetitive -- when I realized I missed that 8 more are needed on the mizzen mast shrouds.. 
Cut straight from the sprue
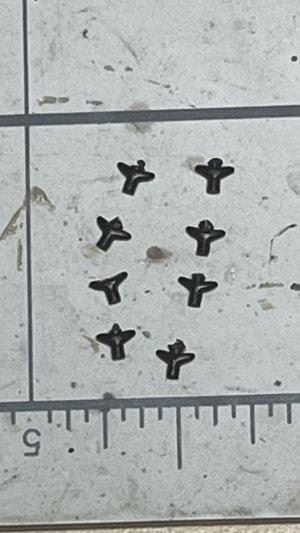
All done filed down, painted, glued in place, and tied up. DONE!
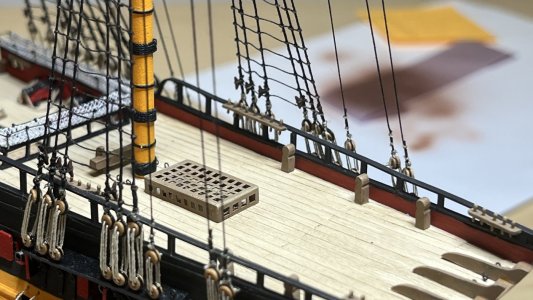
While still waiting for yards from Ukraine, I think I'll have time to finish one more little detail that's been bugging me for quite some time... stay tuned!
Cut straight from the sprue
All done filed down, painted, glued in place, and tied up. DONE!
While still waiting for yards from Ukraine, I think I'll have time to finish one more little detail that's been bugging me for quite some time... stay tuned!


 , pretty excited about this past week -- I finally had an idea how to create something I've been thinking about for a year now, that's stuck out like a missing tooth in the build... thought I'd give it a try. Let me know what you think!
Cut a 4" x 1/2" strip of 2-ply, extra durable paper towel, and separated the two layers.
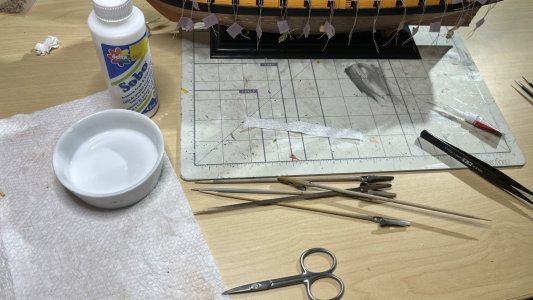
Mixed craft glue 1:1 with water, soaked up with the strip, rolled into a roll...
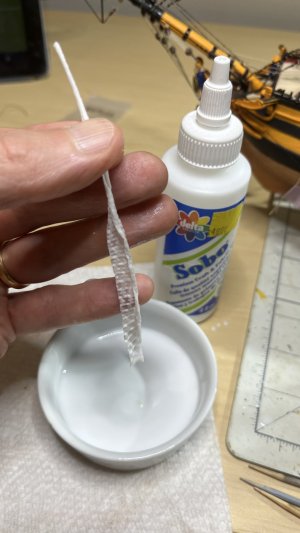
Leave to dry for about an hour. Made sure to really squeeze out as much of the liquid glue as possible, and re-roll the strand between my fingers every 20 minutes or so to give the drying "glue stick" a smooth, solid, finish.
Cut into 1/2" pieces and folded in half...
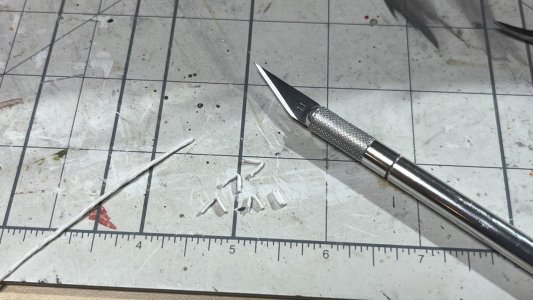
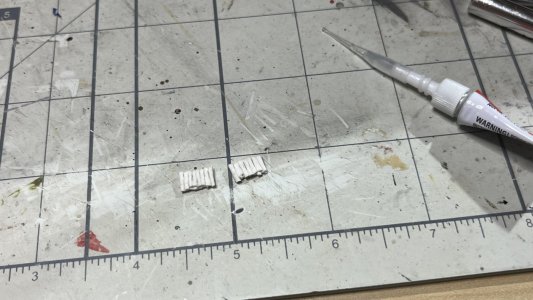
Glued a few of them together...
And gently pressed them into the hammock net...
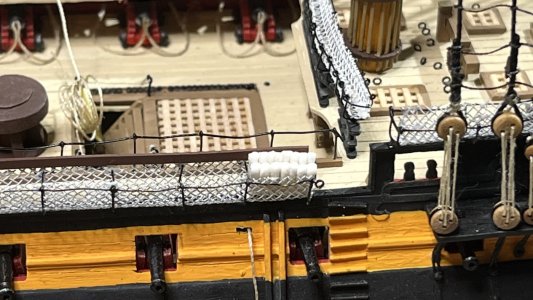
At this scale, I think I'll be able to fit ~700 hammocks into the nets... seems about right?
Bonus feature -- superglued together, they're solid enough to stop a musket ball.
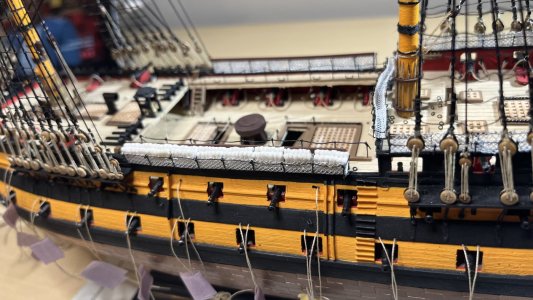
I've seen a few different references for how hammocks are stored in the nets -- in single rows, in double rows, or covered so that you don't actually see the hammocks. Can anyone shed some more light into different practices here? (I'll probably keep going with the current approach since I think it looks pretty nice
 This post by @HMSFly suggest rolled up and then tied up -- was this a consistent practice in RN?? I also came across this excellent thread from a build of Vanguard's big sister Victory -- thank you @Chestcutter -- I didn't realize the nets should be black...? I think I'll keep mine white though, looks really striking. Curious though if there's a true right/wrong here.

The main idea, as I've heard. was to make them dry in the fresh air and wind after the night. And to avoid a temptation to use one in the daytime to sleep!I've seen a few different references for how hammocks are stored in the nets -- in single rows, in double rows, or covered so that you don't actually see the hammocks. Can anyone shed some more light into different practices here? (I'll probably keep going with the current approach since I think it looks pretty nice
 So IMO - vertically, in one or two lines (depending on crew size), like on this late 19th century model (the plate reads: "Suspended sailor's hammocks, stowed in the hammock nettings during the day for airing."):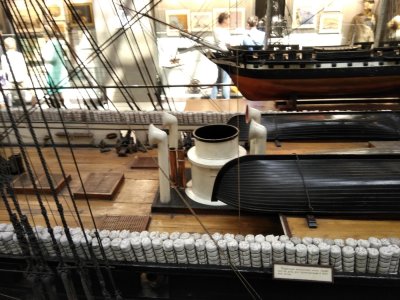
I like this look, great reference - thanks! (I may try it out evenThe main idea, as I've heard. was to make them dry in the fresh air and wind after the night. And to avoid a temptation to use one in the daytime to sleep!
View attachment 638337
Lavery’s The Ship of the Line (Vol II, p133-134) describes hammocks as 6x3 feet, “hanging a minimum of 14 inches apart”, but doesn’t elaborate on how they were rolled up for daytime storage in the hammock nets.
Longridge’s The Anatomy of Nelson’s Ships (pp135-138, 149-150) spends 5 (!) pages elaborating how to model stanchions and nets; but hardly mentions the actual hammocks… “lashed up into a sausage-shaped roll … stacked in orderly fashion in the hammock nettings”. (He does mention Nelson didn’t like the taller stanchions on the quarter deck; which might have saved his life at Trafalgar.)
Boudriot finally doesn’t mention hammocks at all — did the French navy not do this?
Two of @dafi’s projects using the “folded” hammock, beautifully weathered.
PQ, the hammock's look great! Nicely done, Magic Mike
Btw, I just found these topics, they might give some additional info (and actually there are more on the forum):I like this look, great reference - thanks! (I may try it out even
Lavery’s The Ship of the Line (Vol II, p133-134) describes hammocks as 6x3 feet, “hanging a minimum of 14 inches apart”, but doesn’t elaborate on how they were rolled up for daytime storage in the hammock nets.
Longridge’s The Anatomy of Nelson’s Ships (pp135-138, 149-150) spends 5 (!) pages elaborating how to model stanchions and nets; but hardly mentions the actual hammocks… “lashed up into a sausage-shaped roll … stacked in orderly fashion in the hammock nettings”. (He does mention Nelson didn’t like the taller stanchions on the quarter deck; which might have saved his life at Trafalgar.)
Boudriot finally doesn’t mention hammocks at all — did the French navy not do this?
https://shipsofscale.com/sosforums/threads/hammocks-on-ships.3401/
https://shipsofscale.com/sosforums/threads/hammock-rails-for-the-frigate-hermione.4173/ - including reference to Boudriot
I don't want to criticize, your hammocks look great, indeed. Just sharing info and thinking how would I do them myself!
