• Ships of Scale has incorportated an extra level of security when you log In. Please follow on-screen prompts to acknowledge that you are not a robot via a "Check Box" or a "Pictorial Check Box Puzzle". This is needed due to higher level of AI Activity Security.
  • SUBSCRIBE TO SHIPS IN SCALE TODAY!

    The beloved Ships in Scale Magazine is back and charting a new course for 2026!
    Discover new skills, new techniques, and new inspirations in every issue.

    NOTE THAT OUR NEXT ISSUE WILL BE July/August 2026
  • Win a Free Custom Engraved Brass Coin!!!
    As a way to introduce our brass coins to the community, we will raffle off a free coin during the month of August. Follow link ABOVE for instructions for entering.

HMS Victory [1805] 1:79 by serikoff. Started with Mantua -> Upgraded with John McKay's Anatomy.

I’m really interested in how you achieved such detail. Can you tell a little more about the process? You mentioned scanning? But that requires a model to scan.

 
Good afternoon Sergey. I have played with blender and some 3D printing. As much as some of us think it is easy ( better than carving tho ROTF) it is a skill in itself. Just wonderful design and detail. Cheers Grant
 
Hello,
You're doing a great job on your VICTORY.
I've just sent you a private message.
See you soon.
Merci pour vos gentilles paroles.

Good afternoon Sergey. I have played with blender and some 3D printing. As much as some of us think it is easy ( better than carving tho ROTF) it is a skill in itself. Just wonderful design and detail. Cheers Grant
I'm really glad I could motivate you to take on this challenging task))) Hahaha. ROTF
Thanks!

I’m really interested in how you achieved such detail. Can you tell a little more about the process? You mentioned scanning? But that requires a model to scan.

Thanks. Scanning was required only for the last two photos; I created everything else—up to the ship's wheel—myself. I described the process in detail in a previous review, so you can look that up if you want the specifics. In short, though, I used specialized 3D software to model every part from scratch based on blueprints. There is a link in my signature to a thread about my 3D modeling work, where I show exactly how I do it for all my models. For the current *Alert* project, I’m even coating the plastic parts in copper and applying a blackening finish; the result is a completely metallic-looking part—without any paint—that has a distinctive sheen. It’s a huge topic that’s hard to cover in a single post, but you’ll find everything you need at the link in my signature.
 
Last edited:
Merci pour vos gentilles paroles.


I'm really glad I could motivate you to take on this challenging task))) Hahaha. ROTF
Thanks!


Thanks. The scanning part applies only to the third and fourth photos from the end; I created everything else—up to the ship's wheel—myself. I described the process in detail in a previous review, so you can look that up if you want the specifics. In short, though, I used specialized 3D software to model every part from scratch based on blueprints. There is a link in my signature to a thread about my 3D modeling work, where I show exactly how I do it for all my models. For the current *Alert* project, I’m even coating the plastic parts in copper and applying a blackening finish; the result is a completely metallic-looking part—without any paint—that has a distinctive sheen. It’s a huge topic that’s hard to cover in a single post, but you’ll find everything you need at the link in my signature.
Understood. I’m working with Autodesk Fusion and see that that, magnificent as it is for straightforward design, it’s lacking in the way Blender can achieve detail.
 
3/3

So, I switched to Plan B.
I used the Gemini AI to generate 2D images of the required elements from various angles. This task wasn't as simple as it might seem; sometimes the AI produced perfect results, while at other times it stubbornly refused to cooperate.
Next, with the help of a friend, @g8rfan99 from the forum, I generated 3D objects (in STL format) based on the reference photos. He volunteered to help out of gratitude for my contributions to the forum and my detailed explanations of the various processes—especially electroplating. He used Meshy AI, a paid program for generating 3D shapes from photographs. The results weren't always usable, so it took many attempts... but it was still hundreds of times faster than modeling everything by hand. For instance, the lantern would initially come out with seven sides instead of eight, or there would be severe distortions or the addition of unwanted details (I won't show those results, though there were quite a few); still, here is the final outcome.
Let's start with the simplest element and work our way up in complexity, culminating in the figurehead.

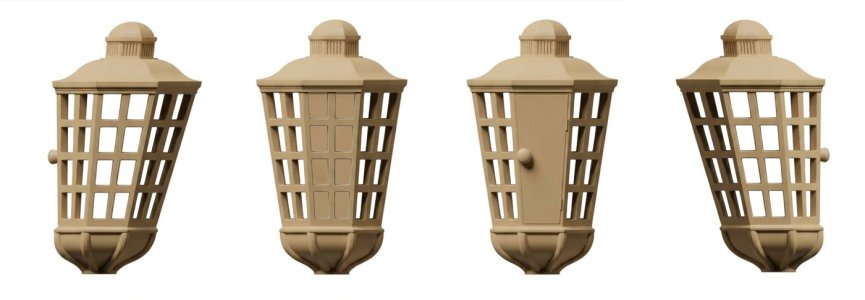
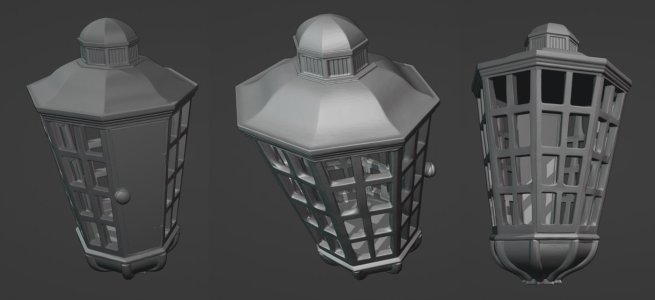
Flashlight.
Here is what I generated using Gemini based on a few photos of the original museum and images from the internet:

60.jpg

I thought Meshy AI would handle this task, but it stubbornly kept generating 7 faces instead of 8. In the end, though, we got the better of it, and the AI produced a decent result (yes, it needs a few minor tweaks—which are quick and easy—but overall, it’s a success):

61.jpg

Stern.
Initially, I thought about generating the entire stern in one go, so I could later extract all the necessary 3D details from that file. Here is what Gemini and I came up with:

62.jpg

63.jpg64.jpg

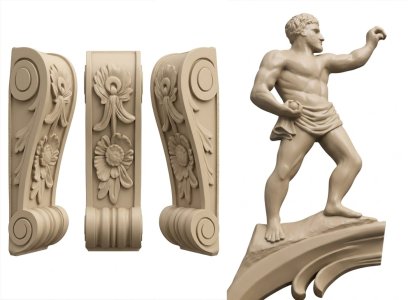
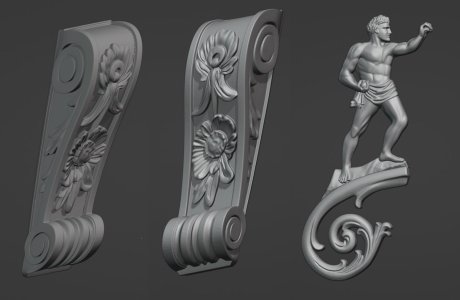
But it would be all too simple if that were actually true... and 3D modelers would lose their jobs (though, unfortunately, that is the direction things are heading). So, I had to generate all the elements separately... and here is what I came up with using Gemini:

65.jpg

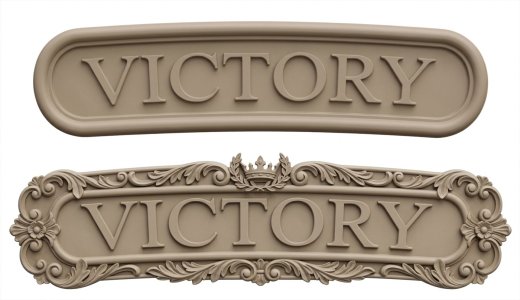
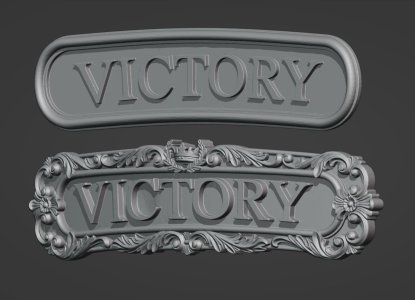
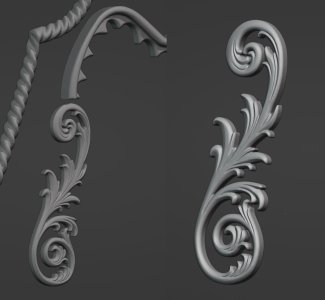
The swirls turned out without any issues—I’m not showing them here—but the shapes above required a bit more work. I also made two signs at once (see the photo below): one standard version, and another that Gemini created based on its own interpretation. I liked the latter so much that I decided to make that one too.

66.jpg

And the surprisingly complex figure in the bottom photo turned out perfectly on the first try. I simply added a few good photos to Gemini, and it produced this:

67.jpg

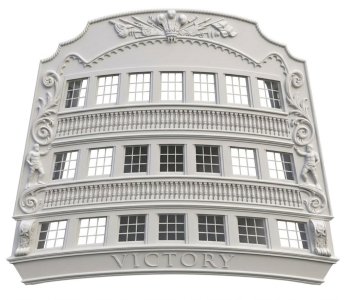
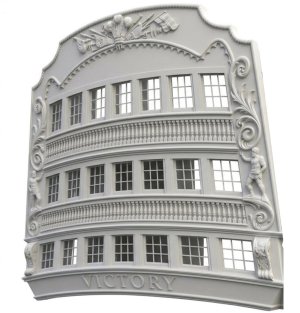
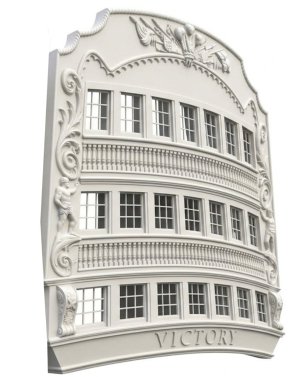
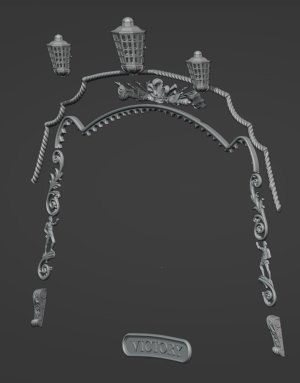
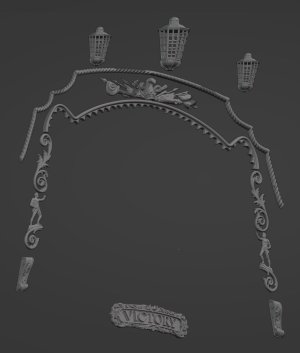
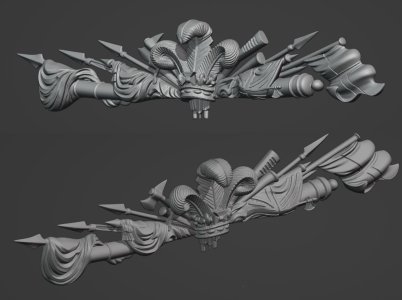
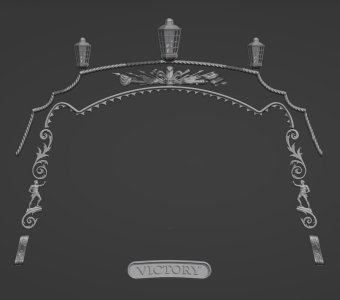
Next, there was still a lot of work to be done on the "garlands," braided ropes, and the arch spanning the entire gallery... and in the end, here is what the paid version of Meshy AI managed to generate:

70.JPG

As I mentioned, each element was generated separately; I then scaled them within the software and assembled them into a single composition, creating two versions of the signs.

71.JPG

Here are the 3D shapes up close:

72.JPG

73.jpg

74.jpg

75.jpg

76.JPG

With that, all the stern elements are ready, and after some minor tweaks to a few small areas, the whole thing is ready for 3D printing...

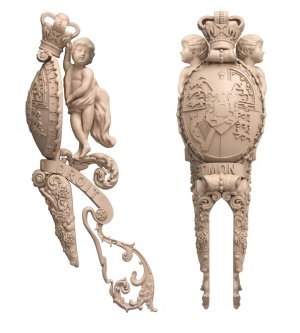
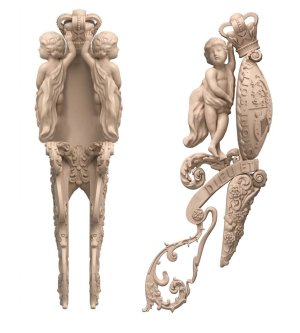
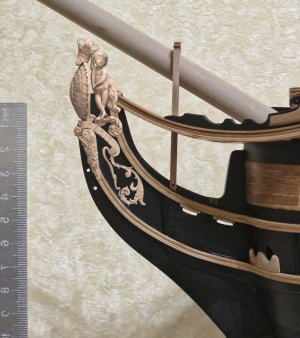
And now, for the most interesting part... the Figurehead.
I gathered the best photos and renders I could find online and used Gemini to generate this:

81.jpg

82.jpg

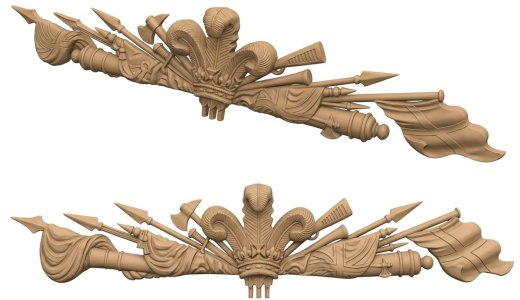
To me, it turned out really well! Yes, there are some illogical decorative elements inside, but overall, I consider it a success. The sizing was based on my model's dimensions. Not every scroll matches the original exactly, but everything is logical and works well together.

83.jpg

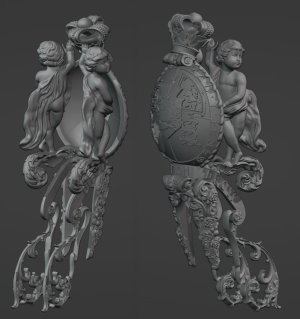
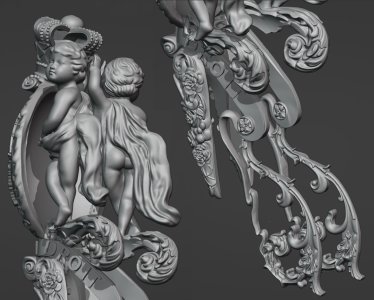
We spent a long time working on the 3D file in Meshy AI... the cherubs would end up with three arms or seven fingers, or the back view would look odd... but eventually, by breaking the model down into three sections, we got this:

84.jpg

There is still some tweaking to be done here—adjusting the scrolls on the inner surface, removing extra limbs, filling in the inside of the shield, correcting the incorrect lettering on it, and a few other details... but! These are all minor tasks taking just a few minutes, compared to the hours (or even days or months) spent creating this figure from scratch.

85.jpg

I want to express my huge thanks to Frank, who helped me generate all of this using the paid version of Meshy AI! Although I generated all the source material myself in Gemini, I wouldn't have succeeded without Frank's help!

With that, I’m declaring the work on the 3D objects complete! I’ll make any further adjustments directly when I work on the project prior to printing; for now, I’m getting back to my current project, Alert.
 
I am impressed.
Digitization and 3D printing offer wonderful possibilities.
This represents an undeniable evolution in modeling, both now and for the future.

 
Could you say a little about your workflow in Gemini? What do your prompts look like?
To create a 3D object, I need several 2D views. The more complex the object, the more views are required—ideally four.

I start with original photos of the museum ship to use as a reference. Then, I look for vector images or renders of the specific part I need (if available online).

Next, I upload all these photos to Gemini and craft a prompt asking it to generate images of the component from various angles based on the original photos, while stripping away everything extraneous to isolate the part itself. Then, I ask it to generate the part in beige against a white background, using the online renders as stylistic references. The result is an image of the component—with the background removed—that is based on the original ship photo but matches the style of the online renders. These online renders really help the AI understand what to remove and how the part should look without the background found in the original ship photos. I hope this explanation makes sense; English isn't my first language.

I am impressed.
Digitization and 3D printing offer wonderful possibilities.
This represents an undeniable evolution in modeling, both now and for the future.

I agree 100%.
 
Back
Top