• Ships of Scale has incorportated an extra level of security when you log In. Please follow on-screen prompts to acknowledge that you are not a robot via a "Check Box" or a "Pictorial Check Box Puzzle". This is needed due to higher level of AI Activity Security.
  • SUBSCRIBE TO SHIPS IN SCALE TODAY!

    The beloved Ships in Scale Magazine is back and charting a new course for 2026!
    Discover new skills, new techniques, and new inspirations in every issue.

    NOTE THAT OUR NEXT ISSUE WILL BE July/August 2026
  • Win a Free Custom Engraved Brass Coin!!!
    As a way to introduce our brass coins to the community, we will raffle off a free coin during the month of August. Follow link ABOVE for instructions for entering.

USCG Harriet Lane - Model Shipways 1:96 by DocTom

Post 32 - Out of Africa

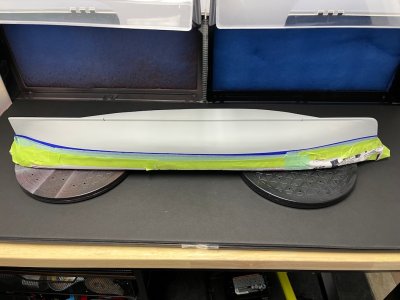
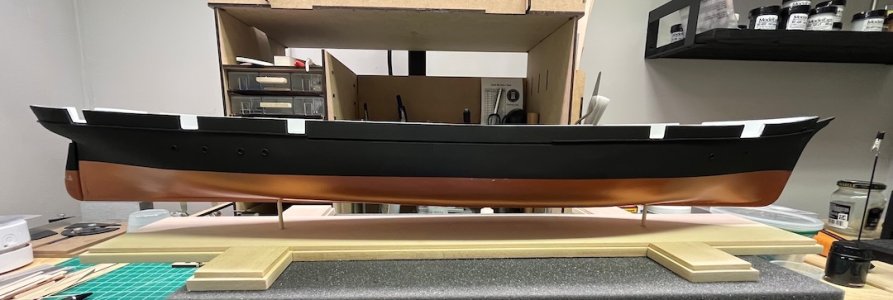
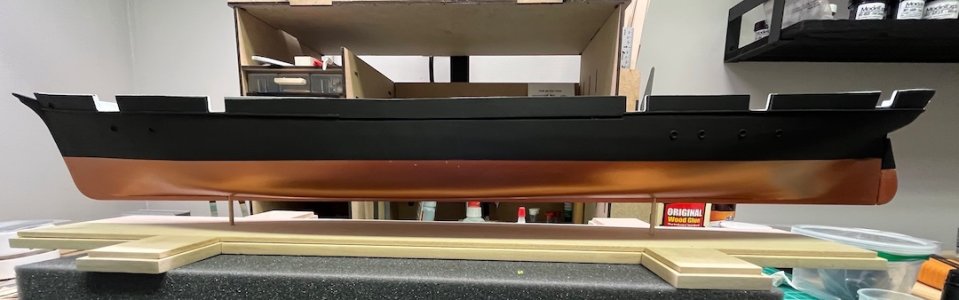
We are back from an absolutely amazing trip to Zambia and Botswana (no ships but plenty of animals!) and so it's time to get back to the shipyard. The long flight home gave me time to re-read the instruction manual, and think about how to approach painting the hull and planking the deck. I decided to paint below the waterline copper, both to help cover any gaps in the copper plating, and also to let me bush up on my rusty air brushing skills with something that won't be seen. After clearing some space in my cozy shipyard and merging two spray booths into one, I masked off the topsides of the hull
Masked for painting.jpeg

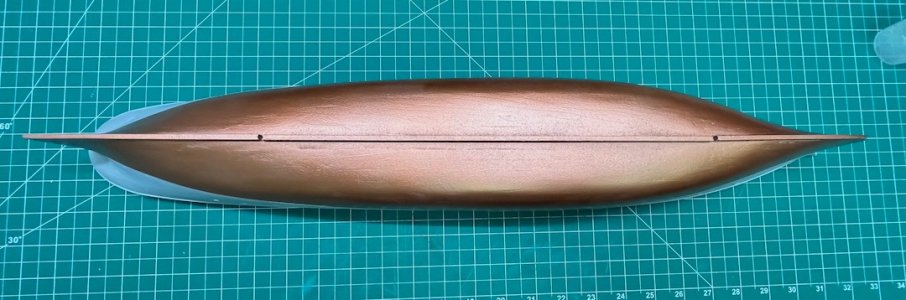
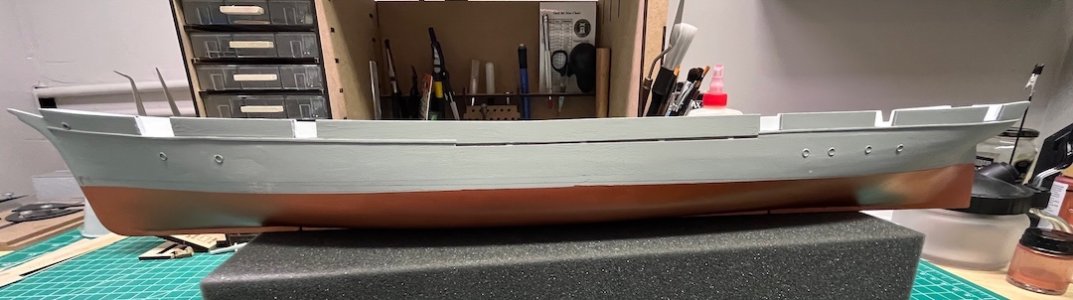
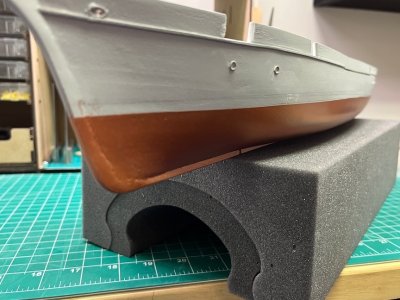
After several botched attempts that clogged my air brush I finally got the paint thin enough to do the job.
Copper Bottom.jpeg

Copper from the side.jpeg

3-4 view.jpeg

Now I need to figure out how to mask off the sides of the gun ports and inner bulwarks while I give the copper paint time to cure before re-taping the water line and painting the topsides.
 
Last edited:
Post 33 - Topsides Painted

A quick update. I used DecoArts "Lamp Black" to paint the topsides. It has a little gray in it, compared to the Model Expo "Hull Black."
Painted topsides starboard.jpeg
painted topsides port.jpeg

You may notice I put the tape on the wrong side of the waterline on the rudder! I need to do a little touch up around the gun ports, but I'm overall very pleased with how she looks. After I put away the spray booths to make some room, I'll start on the copper plating.
 
Good morning Tom. There is nothing quite like having a Botswana trip. I have done a few bike rallys and social 4x4 trips up there.....loved everyone. My Buddy has a game farm (he is a part owner) up in Northern Zambia and the game up there is plenty. Im glad you guys had a cool Southern African adventure.
I'm overall very pleased with how she looks.
That you is a true story.
Cheers Grant
 
Yes your work is impeccable, You set a target that the rest of us try to achieve (but Don't)
Thanks for the kind words. I'm mainly fussy and somewhat compulsive (like a a lot of doctors) which helps with model building. However, I'd never have the guts to kit bash like you have with your Harriet Lane!
 
Last edited:
Post 34 - Copper Plating - Not!

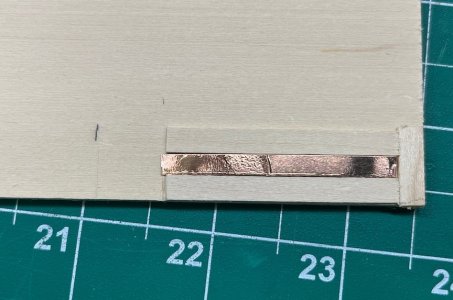
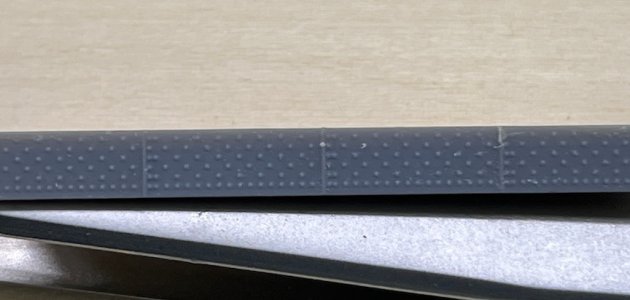
In the instruction manual for this kit David Antscherl recommends painting the lower hull copper, as copper plating "would look out of scale at 1:96." I know others have done it; I was impressed with @The Gavel's results, and so I had at it. A standard 14-15" x 48" copper plate is more-or-less 4mm x 1/2" at 1:96 scale. I bought 4mm wide copper tape from Mr. Amazon. I scaled down and had printed a 3D printed stamp that @g8rfan99 had sent to me, which stamps 4 plates at a time.

Copper plate stamp.jpeg

I made a simple jig,
Copper plate jig.jpeg
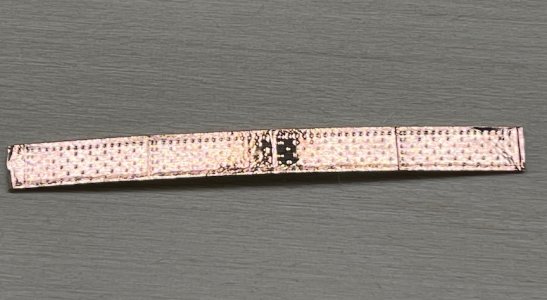
glued a handle to the stamp, cut a bunch of strips and stammped away.
The result.jpeg

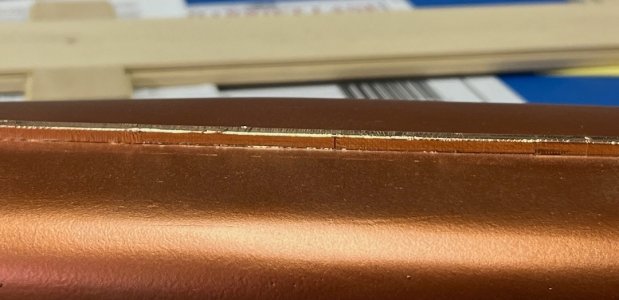
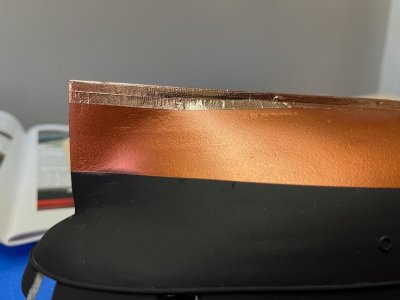
I plated the keel, and had started a second row at the stern, when I finally admitted to myself that it looked like crap. The tape is very thin and kept curling and wrinkling, and you couldn't really see the individual plates. It was like I had covered the keel in copper-colored Reynolds Wrap! I blame it on a combination of poor material and subpar skills.
plated keel.jpeg
Coppertape.jpeg

The copper paint looks much better.

I defer to David Antscherl's wisdom (you should always listen to people who know more than you do!), and will leave the hull painted. My first copper plating will have to wait for a larger scale model and higher quality copper.

I spent today peeling/scraping off the tape and repairing the damage to the paint. I'll now backtrack and finish and attach the rudder before moving on to the sponsons.

Lesson learned.
 
If you’re skilled with an airbrush (and I’m certainly not) you might mist the copper paint with a related but darker color like brown to break up the solid copper.

Roger
 
I am on the final stages of rigging my Harriet Lane and was kind of questioning whether I should have copper plated mine instead of copper paint. I guess I am glad I took the easy way out. I appreciate you at least giving it a try, i was looking forward to seeing it, sorry it didn't work out. Copper paint does look really nice, I added a fine line of red at the demarcation line between the black and the copper to make a little contrast.
 
That's a bummer, I used an acrylic from our local craft store for the copper and it went on really well with brush, mistakes in the planking were filled quite nicely. I see you airbrushed, hopefully with some fine sanding you can repair the damage. I did a lot of airbrushing on my plastic models but I have been reluctant to try it on my wooden ships, also I am lazy and find setting up the booth, brush, and cleaning was a pain so I went for fine coats of acrylic and 2000 grit sanding and multiple coats.
 
Sorry the copper plating did not work out and that you were able to repair the damage. I certainly do not have the skill set to have attempted it and I also agree with others that the copper paint looks nice.
 
I bought some tape with he intention of copper plating the bottom, used some on the rudder (for the hinges) and with the fiddley trouble I had with that ( I had to discard half the attempts) I abandoned that idea. I have seen one ship where this was applied and it looked brilliant but they did not tell us how long or how much tape was necessary to do it. I decided it was beyond me
 
That's a bummer, I used an acrylic from our local craft store for the copper and it went on really well with brush, mistakes in the planking were filled quite nicely. I see you airbrushed, hopefully with some fine sanding you can repair the damage. I did a lot of airbrushing on my plastic models but I have been reluctant to try it on my wooden ships, also I am lazy and find setting up the booth, brush, and cleaning was a pain so I went for fine coats of acrylic and 2000 grit sanding and multiple coats.
This is only the second model I've used an airbrush on, but I really like the results, despite, as you say, the hassle of setting up and dismantling the spray booths. My work space is really small, so I have to clear out after painting. For some odd reason I really enjoy cleaning the airbrush! I ended up brush painting the damaged spots on the keel, however. I also use acrylic from the local craft store (DecoArt from Michael's). I dilute it and apply 4-6 coats. I haven't sanded between, but maybe I should.

I would have liked to copper plate the hull, but the guy who designed the model said don't do it, and he clearly was right.
 
I bought some tape with he intention of copper plating the bottom, used some on the rudder (for the hinges) and with the fiddley trouble I had with that ( I had to discard half the attempts) I abandoned that idea. I have seen one ship where this was applied and it looked brilliant but they did not tell us how long or how much tape was necessary to do it. I decided it was beyond me

David Antscherl was right - at the scale of this Harriet Lane model, copper plating is not a good idea, despite the beautiful job @The Gavel did plating his! The exception that proves the rule.
 
That's a coincidence, I use the acrylics from Michael's also, they are the Folk Art brand which has been very satisfactory especially when I was looking for a particular shade of color. I buy a couple of colors that look close as the price is very good for the size of container needed. Once dry the stuff is really durable and if you wash the applicator (brush) with water soon as I am finished, it cleans up nicely, as said I haven't used this type of paint on my Iwata airbrushes as I am very careful with what paint type I use in them. I read where cleaning airbrushes with water is not good and I always use what the paint type recommends for clean up.
 
I've used both Folk Art and DecoArt paint in my Iwata Eclipse without any issues. I use water and a few drops of flow improver to thin it. I have decided the drip test rather than the run down the side of the mixing cup test is my preferred method for determining when the paint is thin enough. I start my airbrush cleaning with water, but then use Master Airbrush Cleaner to finish. end by spraying a small amount of Iwata thinner through it. Love my Eclipse!
 
On one hand, unfortunately that the copper plating didn't go as hoped, but ultimately you made the right decision to opt for the painted lower hull, Tom. Although it was in the right scale, the most important thing is how it looks to the naked eye.
Perhaps another option is to imitate the lines between the plates with a slightly blunter knife of a pointed pencil. But then you would have to align them very well, possibly using masking tape to align them. However, that involves a lot of 'high-risk' work on your nice paint.
Regards, Peter.
 
Hi Tom
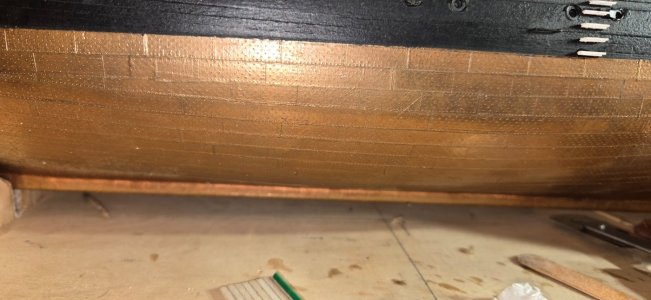
Sorry the plating didn't work out. I guess I should have warned you about the foil tape and how difficult it is to handle. I quickly found out about the wrinkling problem myself. I found that it was necessary to pull the backing away from the foil, not the other way around. That way the foil remained flat and straight. You also have to be very careful handling the foil once removed. As you found out, it is very thin and folds easily. Here's the plating on my Conny20261001_093415.jpg

Since you've already gone to the trouble of removing the tape and repainting, it's a mute point, but she looks fine with just the paint. Good luck with the rest of the build.
 
Back
Top