HI spider,,, have you started the copper taping?
-

Win a Free Custom Engraved Brass Coin!!!
As a way to introduce our brass coins to the community, we will raffle off a free coin during the month of August. Follow link ABOVE for instructions for entering.
-

PRE-ORDER SHIPS IN SCALE TODAY!
The beloved Ships in Scale Magazine is back and charting a new course for 2026!
Discover new skills, new techniques, and new inspirations in every issue.
NOTE THAT OUR FIRST ISSUE WILL BE JAN/FEB 2026
You are using an out of date browser. It may not display this or other websites correctly.
You should upgrade or use an alternative browser.
You should upgrade or use an alternative browser.
HMS Victory, Mamoli 1:90 scale by Spider999
Did you only receive 1 bag of green plates? Sure doesn't look like enough to me.
thanks, Ken
thanks, Ken
- Joined
- Feb 2, 2020
- Messages
- 66
- Points
- 88

My shift has changed at work now the airport is only open for 18 hrs a day for cargo and air ambulance flights, so we are now working 1x 18 hr shift, then 2 days off. for 3 weeks then we are on furlough for 3 weeks, rinse and repeat....... so we have plenty of free time between flights to rest.. have been doing a bit of my boat , with the boss's permission. here is the latest:
- Joined
- Feb 2, 2020
- Messages
- 66
- Points
- 88

not yet mate, gonna stick all the little green tiles (1 bag) on first to give me the vertical joints (scale) then tape over the top,HI spider,,, have you started the copper taping?
I finished the tiling about two days ago. They give you plenty. Only used about 2/3 of them. Maybe a little more.not yet mate, gonna stick all the little green tiles (1 bag) on first to give me the vertical joints (scale) then tape over the top,
- Joined
- Feb 2, 2020
- Messages
- 66
- Points
- 88

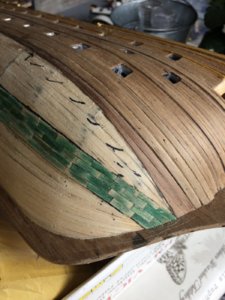
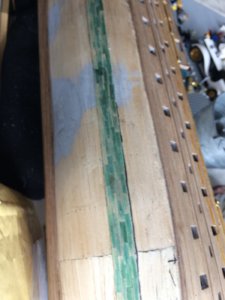
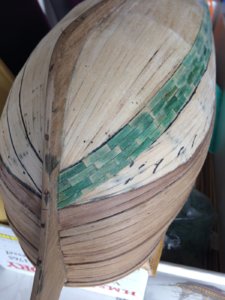
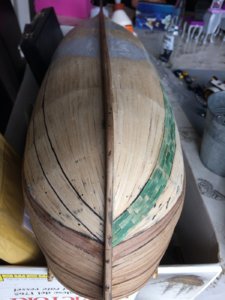
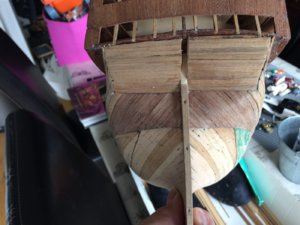
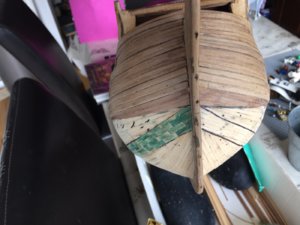
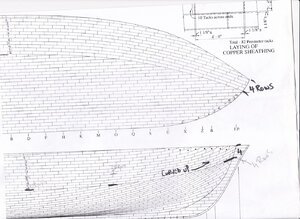
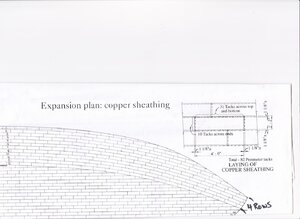
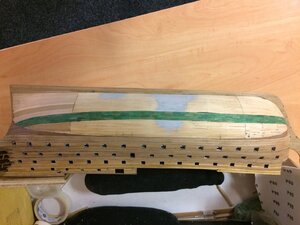
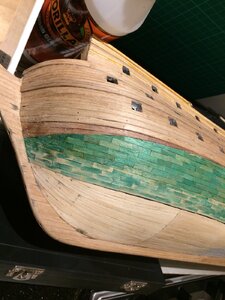
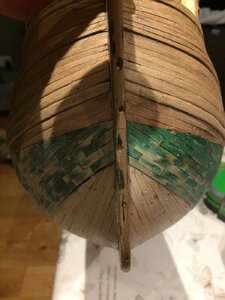
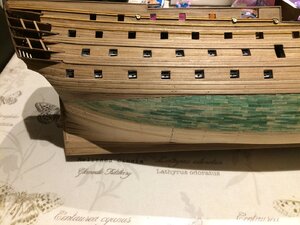
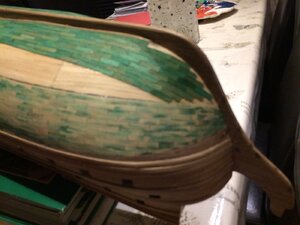
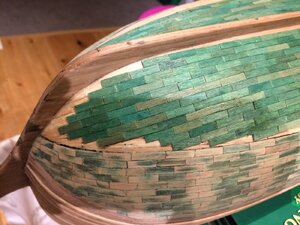
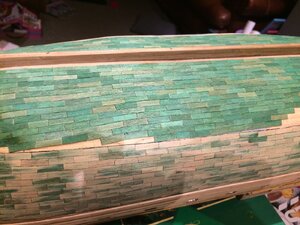
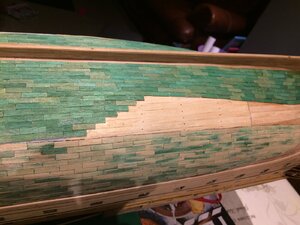
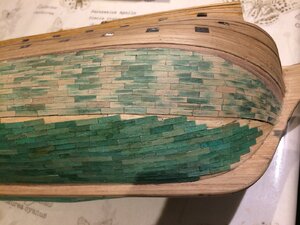
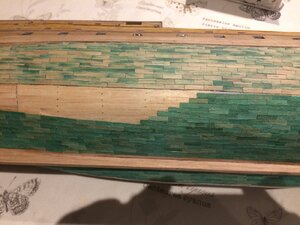
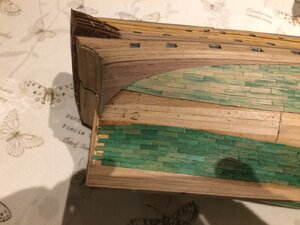
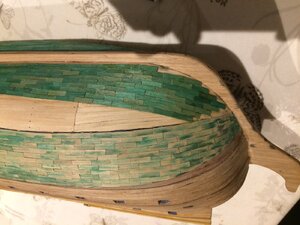
Done a bit more, got one side done down to the break in the pattern, it shows 4 rows coming to a point at the waterline at the bow, so I just drew that line, it shows a further 8 rows amidships, approx, then tapering back towards the stern. see pics, don't worry too much about the brick pattern, I am covering it all with the copper tape, so will get the vertical joins right then.
- Joined
- Feb 2, 2020
- Messages
- 66
- Points
- 88

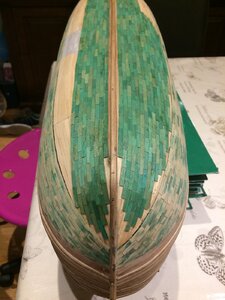
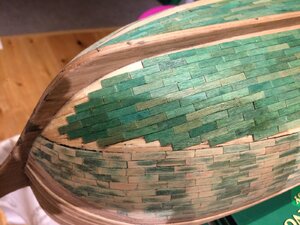
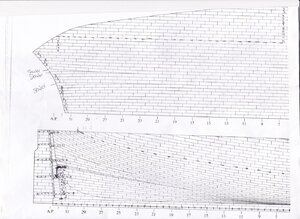
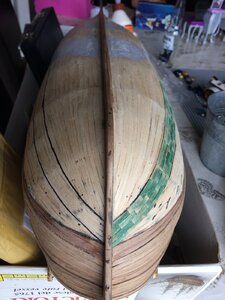
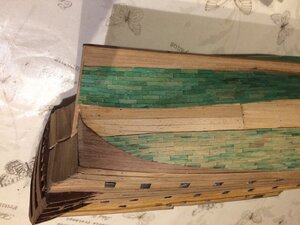
Hi Guys, update for you. I bought loads of books on the Victory, one has a brilliant layout plan for all the tiles. I followed it as best I could, there are 4 rows that start at the waterline at the bow, which become 12 rows amidships, carrying on to the stern. That is the break in the pattern.. The second set of planks run parallel with the keel, 10 rows up at the stern there is a stealer, then another 3 rows, and another 2 stealers, finally 6 rows brings you up to the first set. I am a good way into it, and have sanded the upper set to remove any imperfections, ready for the copper tape. I only did the tiles to approximate the vertical joins as a guide for when I imprint the rivet lines on the tape. (keep following, all will become clear..ish)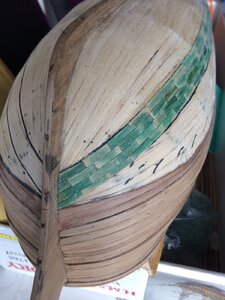

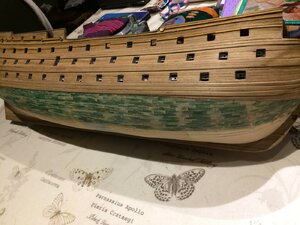
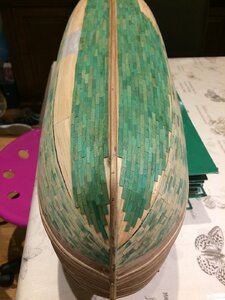
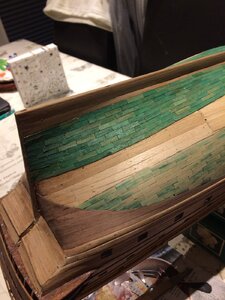
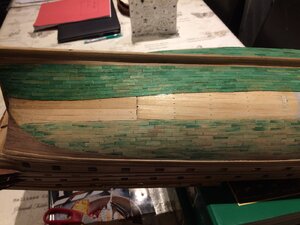



- Joined
- Feb 2, 2020
- Messages
- 66
- Points
- 88

If anyone is following my build and are wondering how the hell to start the tiles, here are the pages from the book I have showing the layout of the tiles. As you can see from the photos on my build, I started with the 4 rows at the waterline at the bow, , then went to amidships and put 12 rows (held on with masking tape) in place, drew a mark on the planks, then same at the stern. joined the dots so to speak and glued on the first 4 rows. After that I just filled in above them up to the waterline. did both sides, then started down at the keel working up parallel to it until I got up to the first set., just got to cut and fit the shaped ones now.
I've been following your build all along. I just finished my tiles a couple of months ago. (now working on stern) What the mamoli plans show is basically correct. I also saw those plans on MSW a few moments ago, (on rob's site) I also stressed on the tile lay out. (just a little). From the looks of it, you're doing fine. Wait until you get to the stern, that's a whole other mess.
Hello:
Which book did you use to plan out your tile layout?
regards
J
Which book did you use to plan out your tile layout?
regards
J
- Joined
- Feb 2, 2020
- Messages
- 66
- Points
- 88

It's HMS "Victory": Her Construction, Career and Restoration by Alan McGowan but I have loads of books about her,Hello:
Which book did you use to plan out your tile layout?
regards
J
The Anatomy of Nelson's Ships by C. Nepean Longridge
Haynes owners manual by Peter Goodwin
Rigging Period Ships Models: A Step-by-step Guide to the Intricacies of Square-rig by Lennarth Petersson
THE MASTING & RIGGING ENGLISH SHIPS OF WAR (Conway's History of Sail) by James Lees
The Art of Rigging by George Biddlecombe
I was just flicking through the first one and came across the layout plans for the copper plates and thought it would be very helpful as that was the stage I was approaching. To be honest, I haven't really looked through the others yet as I only got the books to help with the correct layout of the rigging.. I can tie knots, I am a former Able Seaman in the British Merchant Navy, I just want to know which line goes where!!
I forgot to say, I also just got hold of a mint copy of
The 100-Gun Ship Victory, Revised Edition (Anatomy of the Ship) by John McKay.
Last edited:
- Joined
- Feb 2, 2020
- Messages
- 66
- Points
- 88

Thanks for that Ken... I am following YT's build closely on here and formerly on MSW, he shows some really neat tricks to get around the stern gallery issues. However, what I am NOT looking forward to doing are the beakhead timbers, these bad boys:I've been following your build all along. I just finished my tiles a couple of months ago. (now working on stern) What the mamoli plans show is basically correct. I also saw those plans on MSW a few moments ago, (on rob's site) I also stressed on the tile lay out. (just a little). From the looks of it, you're doing fine. Wait until you get to the stern, that's a whole other mess.
Kurt Konrath
Kurt Konrath
This is first time I have seen someone do cooper tiles in wood, but they look good.
Yeah...... that has been on my mind also, as I will be finishing the stern in a couple days. It's those three curved 1x's is the question? Port and starboard. Correct?Thanks for that Ken... I am following YT's build closely on here and formerly on MSW, he shows some really neat tricks to get around the stern gallery issues. However, what I am NOT looking forward to doing are the beakhead timbers, these bad boys:
Spider:
Thanks for your book references.
J
Thanks for your book references.
J
- Joined
- Feb 2, 2020
- Messages
- 66
- Points
- 88

yes mate, in fact all the bow timbers if I'm honest. YT put some lovely photos on his build showing how he bent the laminated planks to get the correct profile. I will do it, and to be honest it doesn't really matter if i get them slightly wrong, I'm only building it for myself, it isn't the real ship, just a model of her. it's just my impression of her!1 (if I tell myself that often enough I will convince myself I am right!!)Yeah...... that has been on my mind also, as I will be finishing the stern in a couple days. It's those three curved 1x's is the question? Port and starboard. Correct?
- Joined
- Feb 2, 2020
- Messages
- 66
- Points
- 88

Mate, you're more than welcome. I only got them because other people recommended them to me on here and MSW forum.Spider:
Thanks for your book references.
J
I am still considering buying replacement lines and blocks from a site in the USA (Syren models). Someone told me about them about a year or so ago, and I worked out how many of each size i needed, added a few, then drew up a shopping list. It came to about £140, which is ok, quality is never cheap but having been stung for customs and import duties on 2 posters I bought online and which came from San Francisco, I am a little reluctant to make the purchase. The posters were 2ft by 3 ft, just a single sheet of A3 paper, with a valentines message for the admiral. She loved them but I daren't tell her how much they cost... Customs fees were eventually refunded but the only way I can see around the problem is if the retailer puts "GIFT" on the shipping label, otherwise i could be looking at a charge of somewhere around £40 or so.
I'll cross that bridge as and when I get to it..
Spider
- Joined
- Feb 2, 2020
- Messages
- 66
- Points
- 88

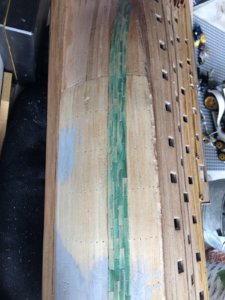
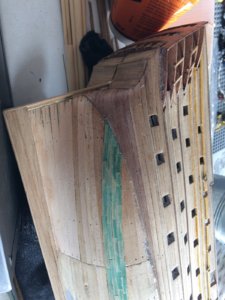
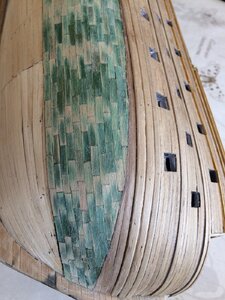
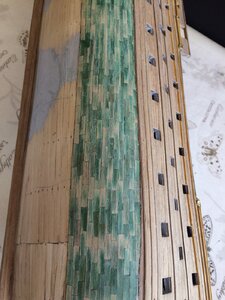
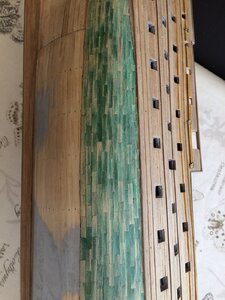
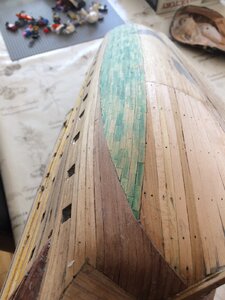
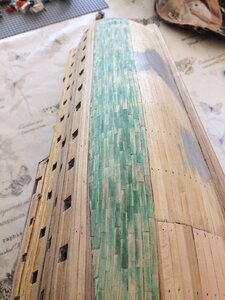
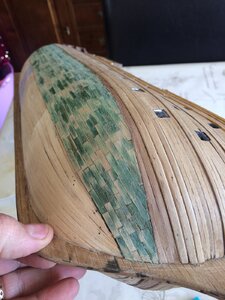
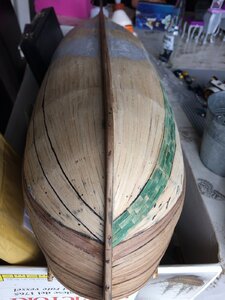
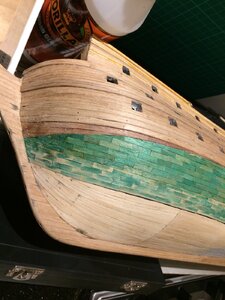
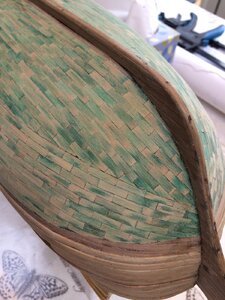
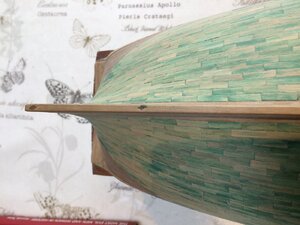
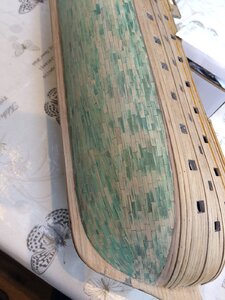
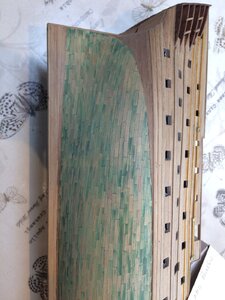
Gentlemen/Ladies, I am pleased to announce that I have finished..... The bloody green tiles. They went a lot easier than I thought they were going to. That set of plans certainly helped. I have a question , having seen a few of you go through this stage, and not wanting to mess it all up now I have gotten this far:
Do I A: just stick the copper tape straight onto the sanded down green tiles
or B: as I saw on YT's build, he sealed the tiles with acrylic matt varnish.
What is the benefit of actually sealing them first?
Advice please..
here are a few new pics showing my milestone achievement!!! (big smiley face emoji..)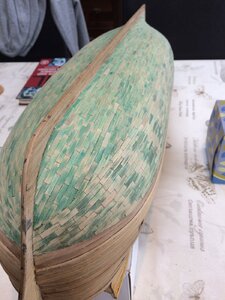
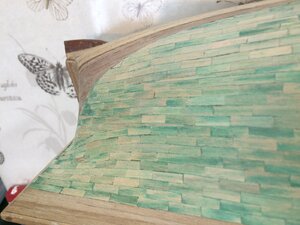
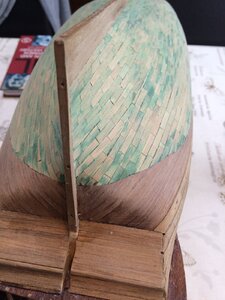
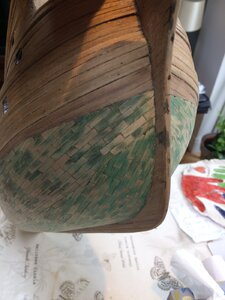
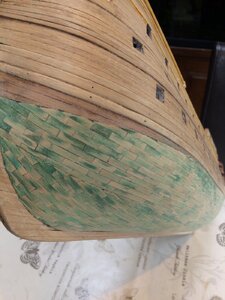


Last edited:
- Joined
- Feb 2, 2020
- Messages
- 66
- Points
- 88

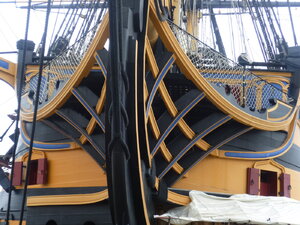
Just been having a look at YT's build log to get my inspiration for starting the stern galleries and comparing them to the real thing. Think I am definitely gonna bin some of the mamoli stuff and follow YT. Interesting shot I took back in 2011 down at the ship herself, proven to be a very useful photo.. I missed the window top right!!, both sides, schoolboy error,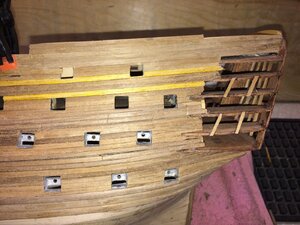 oh well, can rectify that error..
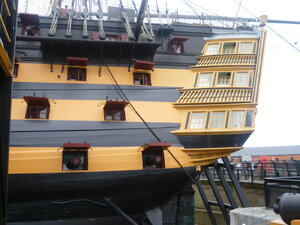
 oh well, can rectify that error..


