Cutter Cheerful 1806 Build Log [COMPLETED BUILD]

Status
Not open for further replies.
So how did you cut the margin planks? I have the model to build in yellow cedar
Glenn,
The first order of business was to find the outer shape of the margin plank. I simply used some painters tape and placed it on the false deck overlapping already planked bulwarks. Trace the curve where bulwark meets false deck with pencil, peal the tape and that's the outer shape of your margin plank. Instead of placing that tape directly on wood, I placed it on some card stock, cut it out and checked the shape on the model. Once satisfied, I transferred the shape on wood sheet of appropriate thickness and cut it out. It still required some sanding, but the end result was not too bad. Thanks for your interest, you are doing wonderful job on Lady Nelson. Can't wait to see your Cheerful.
 
Its the cutting part I’m trying to sort out, jigsaw?

thanks for checking out my Nelson, I’m scratch building where I can as practice for Cheerful. I’m looking forward to it, the Alaskan Yellow Cedar is like butter.
 
Its the cutting part I’m trying to sort out, jigsaw?

thanks for checking out my Nelson, I’m scratch building where I can as practice for Cheerful. I’m looking forward to it, the Alaskan Yellow Cedar is like butter.
For all the irregular (non straight) cutting jobs I use Proxxon bandsaw, works like charm. I like it much better than scroll saw. Thanks again for your interest.
 
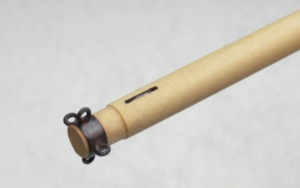
Where did you find the brass for the deadeye strops, and or how did you make them (for my future Cheerful build. They look excellent.
 
Where did you find the brass for the deadeye strops, and or how did you make them (for my future Cheerful build. They look excellent.
Glenn, I cut them off the brass tube of appropriate diameter with Micromark's tooth hollow ground saw blade - old Harold Hahn's trick. Advantage is that they are all of exactly the same diameter and no need to silver solder. Disadvantage is that they do not look as realistic as those made of copper wire silver soldered. Thanks for your interest.
 
Well done and clever. I can’t seem to find brass strip for the dead eyes that’s both the right thickness and width, do you have recommendations for a source?
 
Well done and clever. I can’t seem to find brass strip for the dead eyes that’s both the right thickness and width, do you have recommendations for a source?
Brass tube I used for strops is K&S 5/16" x 0.014" and chain plates are made of K&S brass strip 3/32"x1/64". Strips I bought on ebay and tubes, can't recall - it was years ago.
 
You can use the dr
Well done and clever. I can’t seem to find brass strip for the dead eyes that’s both the right thickness and width, do you have recommendations for a source?
You can use the drill bit with sufficient diameter, wind a spring wire and cut individual rings, use silver solder close the ends. That's all!!!
 
K&S brass strip 3/32"x1/64
That's the common answer, but I've learned K&S is not longer producing brass strip in this size - so its either finding a store with left-over stock or finding a new source. Thanks though.
 
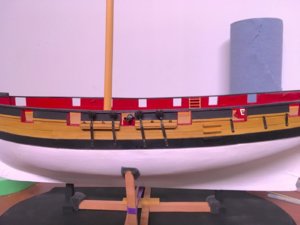
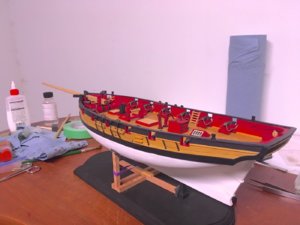
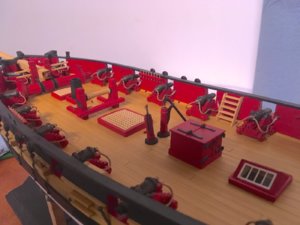
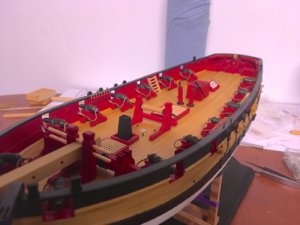
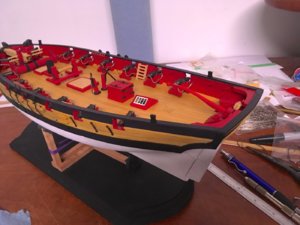
Hello fellow modellers! I hope you are all healthy and sound in mind. Thanks for all the likes, loves, disappointments and interest. Small progress. Finished the outer hull except for rudder, permanently installed carronades and skylight. Rigging tiny carronades was exercise in frustration. The language I unleashed hasn't be known to me so far. Thanks again.

IMG_0127.JPG
IMG_0128.JPG
IMG_0129.JPG
 
Hi Gennaro. Certainly no dislikes, disappointments or disapproval here. She is looking beautiful and very "cheery" indeed. I really admire the cleanliness of your build. Hey, the language you "unleashed" can sometimes be a great building tool! :D
 
Hi Gennaro. Certainly no dislikes, disappointments or disapproval here. She is looking beautiful and very "cheery" indeed. I really admire the cleanliness of your build. Hey, the language you "unleashed" can sometimes be a great building tool! :D
Thank you for your kind words Heinrich. Much appreciated and encouraging. Thanks for all the likes. I guess it's better to curse and swear than to finish the model with an axe. I tried to install inhaul tackles inspired by Ted (@tedboat) and Gary (@garyshipwright), but that turned into impossible task. Hook on bulwark eyebolt, than carriage, it unhooks at bulwark, try the other way around - it unhooks at carriage. These little ropes have their own will and defy gravity.
 
Thank you for your kind words Heinrich. Much appreciated and encouraging. Thanks for all the likes. I guess it's better to curse and swear than to finish the model with an axe. I tried to install inhaul tackles inspired by Ted (@tedboat) and Gary (@garyshipwright), but that turned into impossible task. Hook on bulwark eyebolt, than carriage, it unhooks at bulwark, try the other way around - it unhooks at carriage. These little ropes have their own will and defy gravity.
Hi Gennnaro,
Yes, they are little b*****s to fit. Keep at it - three of King's Fisher's guns were under the forecastle deck and the quarterdeck, so even worse. Looking at the quality of your build, I reckon you could do it. Try a tiny drop of cyano when you hook on.

Ted
 
Hi Gennnaro,
Yes, they are little b*****s to fit. Keep at it - three of King's Fisher's guns were under the forecastle deck and the quarterdeck, so even worse. Looking at the quality of your build, I reckon you could do it. Try a tiny drop of cyano when you hook on.

Ted
Many thanks for your advice, compliment and interest. What you've done with King's Fisher is magic, but that's way beyond my ability. I'll give it a try and see how it goes.
 
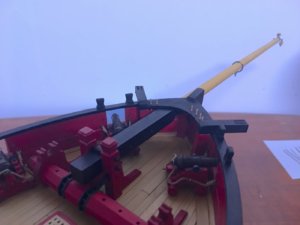
Small update - rudder and tiller have been installed. I'm actually quite pleased how tiller turned out.

IMG_0131.JPG

IMG_0132.JPG

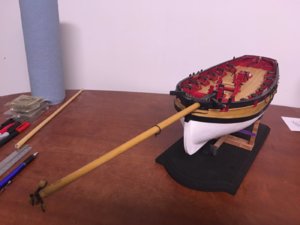
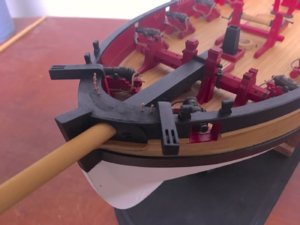
She's now ready for rigging. The first thing that bothers me a little bit is bowsprit blocks. I'm trying to do as least rigging on the model itself as possible. Since bowsprit protrudes the bulwark, that's not possible. This is how it's supposed to look like:

Screen Shot 2020-04-09 at 1.26.10 PM.png

I've seen some contemporary models that instead of blocks attached to eyebolts, have blocks hooked to the eyebolts. Any thoughts? That would make life easier. If hooks are used, shouldn't eyebolts be rotated by 90 degrees? Or have hooks with eyes perpendicular to the body? Any advice is more than appreciated. Thanks all.
 
Status
Not open for further replies.
Back
Top