Thank you Dave as well for your valued input !!!
You are using an out of date browser. It may not display this or other websites correctly.
You should upgrade or use an alternative browser.
You should upgrade or use an alternative browser.
Planking question and examples
- Thread starter rickyboy66
- Start date
- Watchers 20
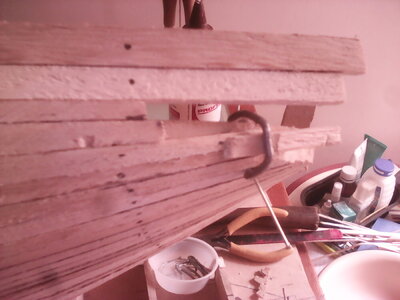
I buy Basswood too. But differently than most model builders. I buy it from a local hardwood supplier and then mill it as needed. The board in this picture is Basswood just stored up there for now.....I found the basswood from Midway to be inexpensive, and you can buy a whole bunch cheaply and not worry about running out of wood, because kits give you the bare minimum. Watch how Olha cuts wood in the link I posted previously. Narrow planks follow the hull well, wide planks make a segmented shape that no amount of sanding will create smooth curves from. Make 4mm planks and then start planking, but look at other models and copy the shape and directions of their planks. It takes practice. Planks should not have any gaps, so sand the edges at angles such that they meet the edges of adjacent planks perfectly. Make each plank FIT. apply glue to the plank edges as well as the frames. Wipe off excess glue with a moist towel and don't smear the glue, ROLL it off using the rag. You can get away with gaps on the first layer, but NOT the finish layer, so you need to practice, and prepare each plank using careful fitting, so by the time comes to add the final planking, you'll have the skill you need.
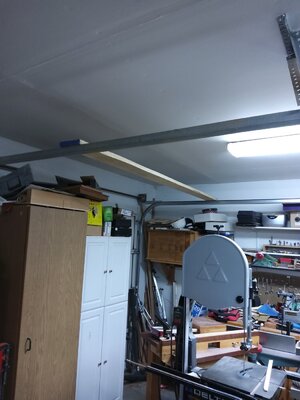
My Delta bandsaw is about 20 years old. And like you, I prefer it for resawing. I do have a scrollsaw and tablesaw. I upgraded the bandsaw with roller bearing guides, urethane tires, blade tension release and after market fence, and carbide tooth blade. Its a workhorse. When I need wood for my models, I mill it to order. And right now, I am considering buying a Spanish Cedar board because I like to color. Might work out nicely. We'll see......
- Joined
- Feb 15, 2019
- Messages
- 279
- Points
- 168

There are 2 methods of planking. The kit method, planking upper and lower hull and leaving a gap to fill with ever reducing planks. Or the simplified dockyard method, where each plank is shaped and tapered/spiled to fit. The second is the preferred method. This can be simplified by calculating the degree of taper required so that all planks will fit at the stem and all will be an equal shape and size, the principle rule here is that no plank should ever finish with a pointed end and no plank should taper to more that .6 of it's width. Stealers will not be necessary at the stem. To use this method lay your garboard ensuring that it doesn't curve too far up the stem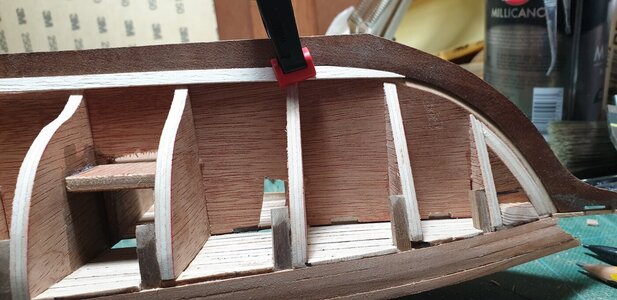 . And, lay a wale following the sheer of the deck. You now have an upper and lower index to allow you to measure the bulkhead depth and calculate the taper (total no. of planks required at the deepest part of the hull divided by depth of hull at a given bulkhead) You will find that the taper will only be necessary at about the 1st 3 bulkheads, the rest will be a full width plank. All the planks will be the same shape (not so on a real ship) So, all planks below the wale will be tapered, planks above the wale will be laid straight.
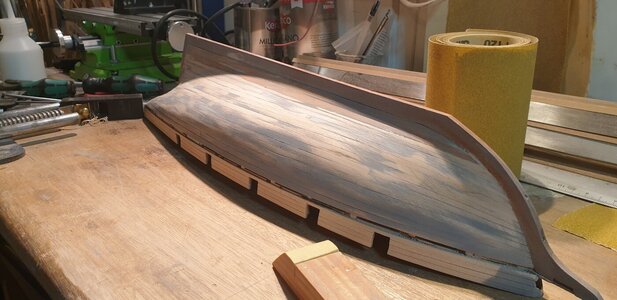
 . And, lay a wale following the sheer of the deck. You now have an upper and lower index to allow you to measure the bulkhead depth and calculate the taper (total no. of planks required at the deepest part of the hull divided by depth of hull at a given bulkhead) You will find that the taper will only be necessary at about the 1st 3 bulkheads, the rest will be a full width plank. All the planks will be the same shape (not so on a real ship) So, all planks below the wale will be tapered, planks above the wale will be laid straight.
Las tracas deben ser adelgazadas hacia los finos del casco, no en una medida prefijada, si no de acuerdo como van evolucionando las curvas del casco. Cada diseño tiene los diferentes anchos en lugares de acuerdo con su estilo. Es señal de buen trabajo que las tracas sean el mismo número en proa, en popa y hacia la cuaderna maestra. Para ello es que se van adelgazando a medida que pasan por las distintas cuadernas. Dejar morir una traca sin llegar a la roda o al codaste es que no se comprendió la geometría del casco.
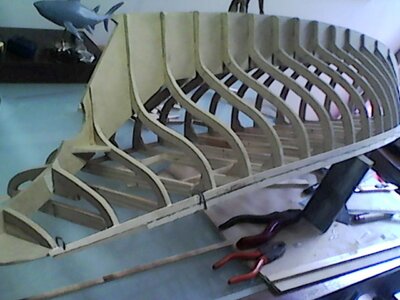
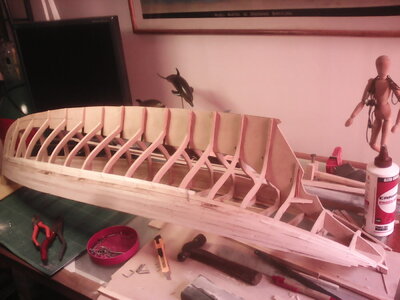
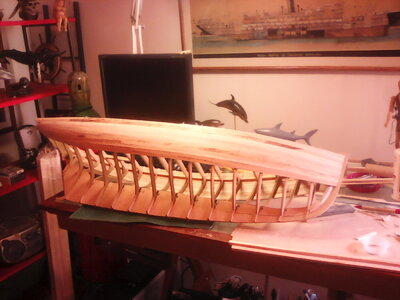
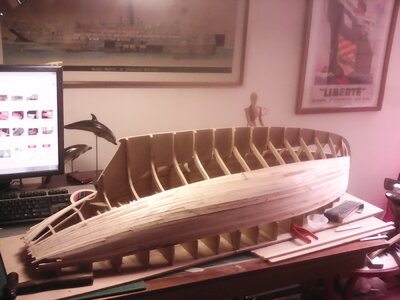
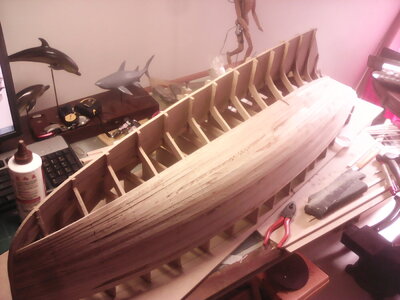
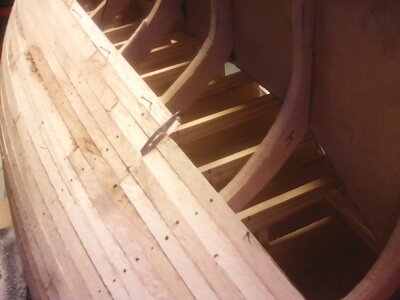
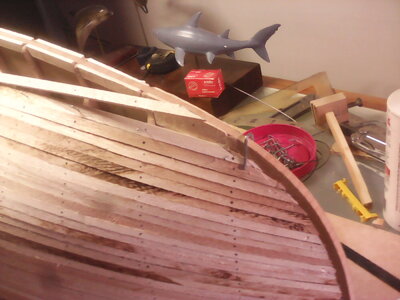
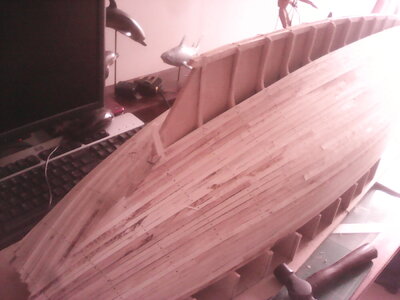
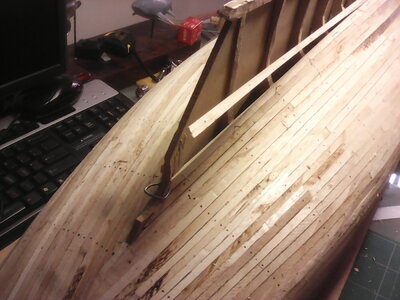
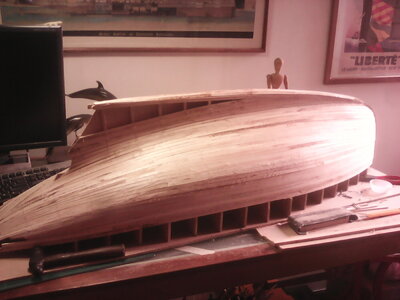
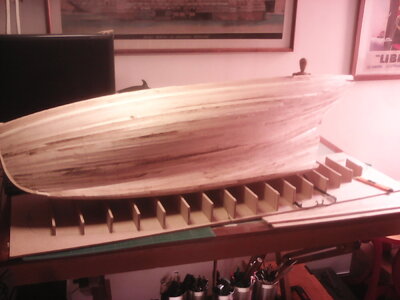
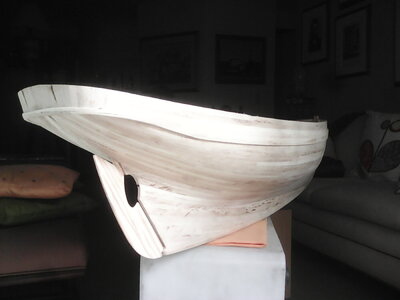
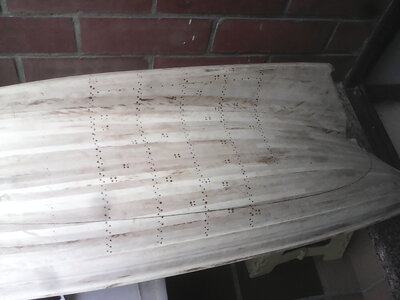
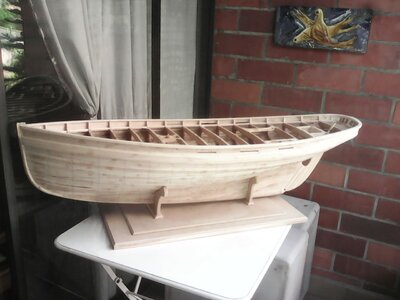


Hallo @rickyboy66look at these pictures i was practicing having problems with the tapering thing I'm pretty sure I was supposed to taper a couple of planks I'm having a problem understanding which ones to taper and how I've been watching how to videos but I'm just getting frustrated nether pictures are that great but I have to start somewhere.
we wish you all the BEST and a HAPPY BIRTHDAY

- Joined
- Dec 26, 2021
- Messages
- 88
- Points
- 68

Thank you very much , you guys are s great group.
Nice job in the hull planking!
Kurt Konrath
Kurt Konrath
This is a very good thread on the issues of planking and information give by Kurt and Donnie and others, I will have to take more time to go back and review some of the posts with the how to's to improve my basic planking skills.
It's been a long time since I first learned to plank a decade ago, and I need a refresher course.
Admins, thanks for moving this out to more public area for others to find.
It's been a long time since I first learned to plank a decade ago, and I need a refresher course.
Admins, thanks for moving this out to more public area for others to find.
OP, this thread is gold dust for me. I'm set to start on hull planks next. I recall years ago making the 'Billing Boats' Bluenose and the planks terrified me, too! The one I'm making now, after returning to modelling is not even painted... Oh, no! I can't use filler to mask my mistakes!
Donnie, your advice has helped me, too. It's just as well your username is 'Donnie' rather than 'Dunny'. Now I know you're not talking... err... rubbish. Thanks, mate. Btw, do you realize how the Aussie expression 'No worries' is spreading around the globe? I'm English and I started using it years ago... probably after watching interviews with Aussie cricketers who'd played their part in my team's downfall! (Then again, what cricket fan doesn't like Jason Gillespie, or the Waugh brothers, to name a few?). Anyway, I've noticed that it's getting very common, even here in the north of England.
If you don't like cricket, just ignore my cricket references!
Go Aussie! (Just don't mention the latest ashes series, please)
- Joined
- Jan 21, 2022
- Messages
- 397
- Points
- 238

thanks, I need the help the article is great!!you can go here starting on page 3 about planking and tapering planks
Royal James sloop
Final step in making the keel is adding a strip on the top right down the center. When the keel is set on the hull the strip set the rabbitshipsofscale.com
Hey there. You are definitely not the only one!Thanks Donnie, looks like I have the best tutor because I thought I was the only one terrorized by this planking thing.
i fully agree with you. -el capiThere are 2 methods of planking. The kit method, planking upper and lower hull and leaving a gap to fill with ever reducing planks. Or the simplified dockyard method, where each plank is shaped and tapered/spiled to fit. The second is the preferred method. This can be simplified by calculating the degree of taper required so that all planks will fit at the stem and all will be an equal shape and size, the principle rule here is that no plank should ever finish with a pointed end and no plank should taper to more that .6 of it's width. Stealers will not be necessary at the stem. To use this method lay your garboard ensuring that it doesn't curve too far up the stemView attachment 285000. And, lay a wale following the sheer of the deck. You now have an upper and lower index to allow you to measure the bulkhead depth and calculate the taper (total no. of planks required at the deepest part of the hull divided by depth of hull at a given bulkhead) You will find that the taper will only be necessary at about the 1st 3 bulkheads, the rest will be a full width plank. All the planks will be the same shape (not so on a real ship) So, all planks below the wale will be tapered, planks above the wale will be laid straight.View attachment 284993
Finally I found it. Now I just have to practice it and practice it.First off, for this scale, your planks may be too wide, making it difficult to follow the twist and curve of the bow. Here are the lines your are looking to follow.
View attachment 283702
A plank should never be tapered smaller that 50% of it's original width. When things appear to get tight at the bow, make a drop plank like this. The plank that is cut short is 50% of the full width. The plank that absorbs the short end of the taper plank is about 75%-80% of its full width. Before you just start tapering planks, get familiar with judging plank width by taking a pencil and DRAW THE PLANK LINES on the planks, then cut. Cutting planks for me is tricky. I often run off the line and ruin a plank, ESPECIALLY if the knife is dull. So always use a sharp knife blade, preferably a new one. I often SAND the edge of the plank by placing it in a desktop vice and sanding the edge to meet the pencil line. This has saved me much wood and many mistakes cutting.
View attachment 283703
Always make TWO planks at a time, and plank the port and starboard sides at the same time. This allows you to look and check to make sure both sides are symmetrical. You can adjust by making a couple planks a bit thicker on the side that is losing the race toward closing the gap in the hull. Look at the hull of La Couronne below. Note how planks are started at the gunwale at the top, and also at the garboard strake, at the keel, and planking progresses toward a midpoint at the hardest turn of the curvature of the hull. The strip left unplanked is the line where the gun ports will go.
View attachment 283705
The gap narrows. It is obvious at this point hat drop planks will be needed, mostly at the bow, and a couple at the stern.
View attachment 283706
View attachment 283764
The lines of the planks are harder to see here, because the hull has been sanded, filled, and sanded again several times. Filler fills in flat spots, so the hull curves are never sudden bends, but rather slow and subtle curves. The drop planks at the stern terminate farther from the stern than the drop planks terminate from the bow.
View attachment 283707
View attachment 283708
Really hope this helps! Planking is a skill that terrorized me at first, but with the right instruction, it can be done even by a beginner. Attached below are three tutorials for planking. They use a calculated approach to planking. More than anything, you need PATIENCE to plank a hull. Once you do one, it gets much easier. The nice thing is that the first layer of planks allows you to practice and correct mistakes, which will never show. The final layer is where you have to get it right. By then, you will have the skill to plan and lay each plank, watching how the gap is closed, planning when and where to us drop planks and stealer planks, and keep the planking on both sides of the hull 100% symmetrical. You have to give yourself time to learn.
Watch my favorite tutor and professional modeler, Olha Batchvarov, show you how plank a hull. Note how she makes her drop planks.
Step By Step Model Ship Build : #02 - First layer of planking
Best of luck! Show us pictures as you go so we can comment on the work as you go. The first planking job on a model is the the most frightening. It gets better.Finally I found it. Now I just have to practice it and practice it.
NOT FOR ME KURT, AS I AM A GLUTTON FOR PUNISHMENT I WILL TRY IT AGAIN THE DEFINITION OF INSANITY, I HAVE A CURE IT IS CALLED POF. GOD BLESS STAY SAFE ALL DON
Lovely planking, what do you use to hold the planks,Las tracas deben ser adelgazadas hacia los finos del casco, no en una medida prefijada, si no de acuerdo como van evolucionando las curvas del casco. Cada diseño tiene los diferentes anchos en lugares de acuerdo con su estilo. Es señal de buen trabajo que las tracas sean el mismo número en proa, en popa y hacia la cuaderna maestra. Para ello es que se van adelgazando a medida que pasan por las distintas cuadernas. Dejar morir una traca sin llegar a la roda o al codaste es que no se comprendió la geometría del casco.
View attachment 285087View attachment 285088View attachment 285089View attachment 285090View attachment 285091View attachment 285092View attachment 285093View attachment 285094View attachment 285095View attachment 285096View attachment 285097View attachment 285098View attachment 285099View attachment 285100View attachment 285101


