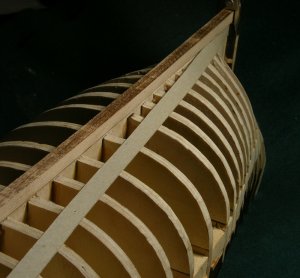
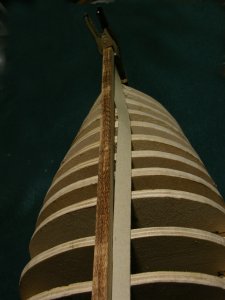
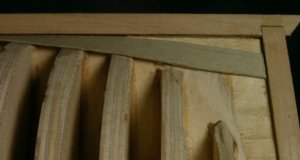
Royal James sloop

G'day Dave
Just brilliant workmanship and your step by step instructions has given me some insight in the reason where I can improve my own technique.
I have always sanded the joints and the definition was not as good as your razor blade scraping. That's the method I'll be using in the future.
So Dave, you can teach an old dog some new tricks!:p

Regarding the planking: I like the natural pearwood, but show some aging and wear. Pirate Flag
Happymodeling
Greg
 
note and ad-vice on a vice

I do all my joinery with a knife and vice but the accuracy, squareness and flat surfaces depend on the quality of the vice.

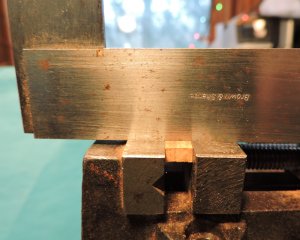
here you see both jaws on the vice are machined surfaces and they line up with each other, if one jaw was slightly lower or higher the cut will be at an angle.

vice0.jpg

you get want yo pay for

vice1.jpg

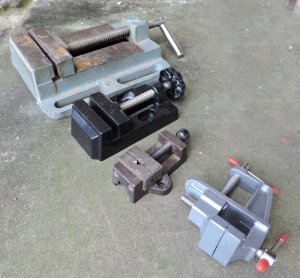
the vice at the top bolts to a X Y table on a mill or drill press and works fine for that. It also has replaceable jaw plates or soft plated for delicate clamping

vice2.jpg

this jaw is 3 inch and does have a little wiggle not a big deal for a 3 inch jaw you just have to clamp in the center

vice3.jpg


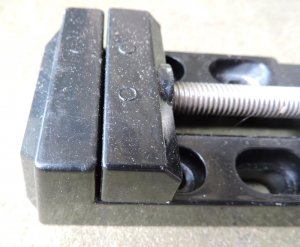
this vice is a closeup of the black one, you can get these for around 6 to 10 bucks and are good for holding stuff but worthless for cutting accurate joinery because the tops of the jaws have to much play and don't line up with each other.

vice4.jpg

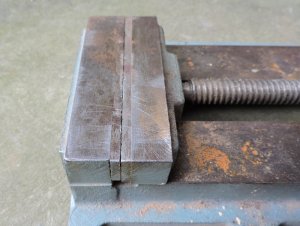
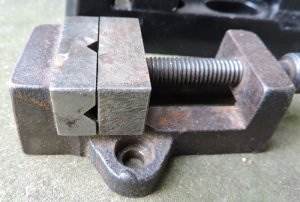
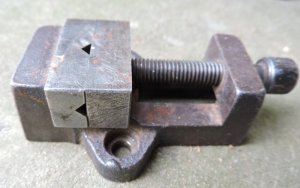
this is the vice used for accurate joinery cutting because the jaws are machined flat and square and almost zero wiggle in the moveable jaw

vice6.jpg

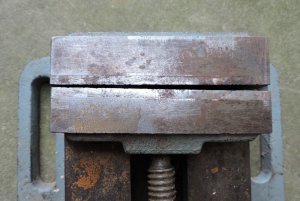
when you close the jaws you can see the top surfaces match and the jaws close tight

vice7.jpg

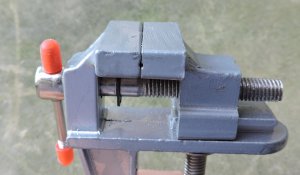
this is a good little vice nice and accurate its only problem is the jaws are not machines smooth.

vice5.jpg

so there you have it if you want nice fitting joinery get a nice fitting vice
 
Hello Dave,
I just stumbled on your log and I will be following along with interest. When I saw that you also got your muse/inspiration from Jeff's drawings I realized that we are kindred spirits due to the fact that I have also built the Mediator. While it was a scale of 1:147, I feel like I was able to incorporate a lot of details. At the scale you are constructing her you'll be able to add a lot more. In the event you'd like to see what the Mediator looks like at 1:147 scale, I will attache a link for easier reference.
http://www.modelshipbuilder.com/e107_plugins/forum/forum_viewtopic.php?19703

I look forward to viewing more posts from you.

Ray
 
the problem with most screw vices is the screw end will lift as the vice tightened. I have been through this looking for a Machinist vice the best I have found to combat the problem is a Screwless Vice. They aren't cheap but they are a must have for any serious Machinist and in this case Possibly a good choice for Hobbyist. Screwless vices don't lift your work up and the Jaws always remain Square no matter what.
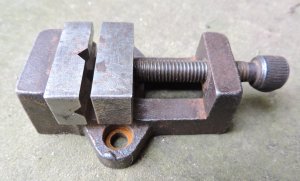
 
the problem with most screw vices is the screw end will lift as the vice tightened. I have been through this looking for a Machinist vice the best I have found to combat the problem is a Screwless Vice. They aren't cheap but they are a must have for any serious Machinist and in this case Possibly a good choice for Hobbyist. Screwless vices don't lift your work up and the Jaws always remain Square no matter what.

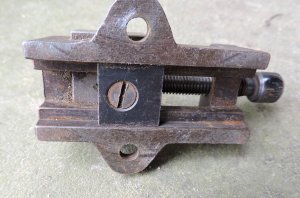
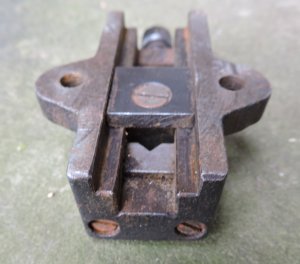
this is very true most vice jaws move up because the movable jaw just rides on the jaw base but this little gem stays put.

v1.jpg

when you flip it over there is a plate screwed to the bottom of the jaw that rides on a channel which prevents the jaw from moving up

v2.jpgv3.jpg
 
this is very true most vice jaws move up because the movable jaw just rides on the jaw base but this little gem stays put.

View attachment 58722

when you flip it over there is a plate screwed to the bottom of the jaw that rides on a channel which prevents the jaw from moving up

View attachment 58723View attachment 58724
this one should work well for sure unfortunately many aren't built as nice as this one appears to be.

The Screwless vice is so nice and IMO worth every penny you spend for them The one I have on my Milling Machine was close to $400 but its fairly large as my Mill is a large turret head Mill. I also have this one for my micro mill and its fantastic https://www.micromark.com/PRECISION-VISE-W-HLD-DOWN. I've been a Machinist for some 20 years and just found out about screwless vices myself 3 years ago. All the swearing I did over the years trying to set up parallels in a screw vice and keep everything square was a pain in the back side.
 
it seems such build logs get started then poof! nothing

I have not abandoned the build it is just life issues come up and have to be dealt with my mom has dementia and requires daily care like a reminder to eat. We have someone coming in twice a day but it is expensive and mom may very well out live her savings so my brother and I fill in and thank god for the kindness of the neighbors who look in on mom.

I am prepping the next part on planking the hull it will be soon.
 
Hey Brother Family is always First. I know well the issues with dementia as I helped my wife with her Mother and Aunt, it was almost a full time job. unfortunately my wife will suffer the same fate and this is why I helped her so much. She has a condition that is passed down through the generations all the women in her family have it and now so does my daughter passed to her from my wife. all the women in my wife's family have passed away around the 65 years of age mark. my wife will be 51 this year so I have another ten years of good time with her before she forgets who I even am. Its terrible I wish you the Best Brother and my prayers are with you and your family. Take your time this will always be here Spend the time with your Mon.
 
This a terrific build I liked how you down-loaded the plan and then came up with a lot of new ideas.
Can I just run over your method for the plans, do you just down-load and then have your plans printed
to the scale you want. As regards bulkheads that are far apart when I am planking I use a tool which puts a slight
crease in the wood I then go all along the strip to impart a very slight bend in the strip, then I can glue the strip in place
and leave a nice gentle curve between the bulkheads.
Regards JANET
 
looking good Dave I'm drawing this Swedish yacht/privateer now showing my step by step but hope to be drawn up enough to start playing beaver by next weekend I should have 4 days off so that's my goal. Ill be watching some of your techniques to incorporate for my tough areas
 
Can I just run over your method for the plans, do you just down-load and then have your plans printed
to the scale you want.


basically that is correct I down loaded the Mediator plans from model Ship Builder site then took those plans and imported them into CAD, traced the parts I needed and scaled them. If you have a high resolution JPEG file you can scale the file in any drawing program and print them out. You do not have to import them into CAD. The plans are a PDF file and most all office supply stores can print them out to any scale direct from the PDF file

As regards bulkheads that are far apart when I am planking I use a tool which puts a slight crease in the wood I then go all along the strip to impart a very slight bend in the strip, then I can glue the strip in place and leave a nice gentle curve between the bulkheads.

great idea that is a common problem with bulkheads spaced far apart the plank tends to flatten out in the space between bulkheads.
 
planking the hull

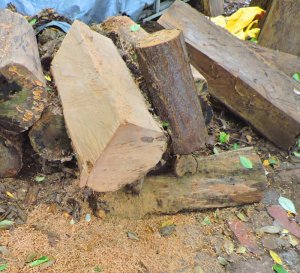
An advantage to scratch building is you get to pick the materials so for this hull I chose natural pearwood. In the true sense of scratch building I started with a log of pearwood and trimmed it out with a chainsaw.


log.jpg


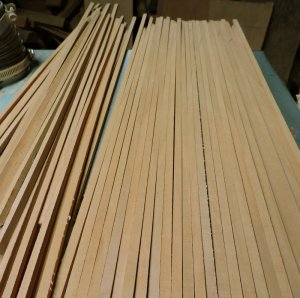
Next i resaw the billets into planking strips and run those through the thickness sander, there are 3 different width planks 3/8 wide for the garboard planks, 1/4 wide for the bottom planks and 5/32 for the hull planking. the hull is singled planked so the thickness is 1/16 + giving me enough thickness to sand the hull.


planking1.jpg

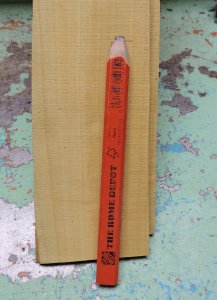
another reason for choosing natural pear is the color it is a creamy gold that will age to a deeper rich gold color. Right now it is a pale cream color when fresh cut.

wood color.jpg
 
a basic understanding of planking a ships hull makes the process a bit easier. A beginner would naturally think all you have to do is bend the planks to the shape of the hull. That is only part of the process the other part is cutting and shaping a plank to fit.

Builders ask do i start the planking from the keel and work up to the caprail or do i start from the top and work down to the keel? The answer is both because you want to end up with the shutter plank which is the plank directly under the wale.

I will start the hull planking with the garboard plank that runs along the keel, the shape of this plank sets the run for the bottom planks and it is cut to fit the hull.

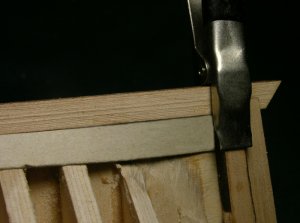
a trick to a successful planking job is to get the planks to run without forcing them to fit. Starting with a strip of cardboard i clamp it against the keel and sternpost,


gar1.jpg

by letting the plank take a natural bend along the hull it tends to move away from the keel.

gar2.jpg

if I were to force the cardboard strip against the keel and hold the end the strip will kink. This is what we want to avoid.

gar3.jpg

if I run the strip along the keel and allow the end to take a natural flow back to the stern post as you can see a gap between the strip and keel occurs because the strip wants to follow the curve of the hull and it will naturally sweep up. We don't want that either. so how do we fit it?

gar6.jpg
 
Back
Top