Royal James sloop

The problem is fixed by "cutting" the garboard plank to fit the hull.

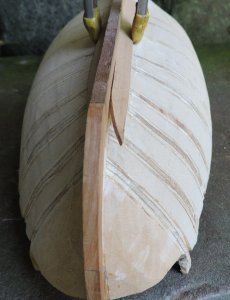
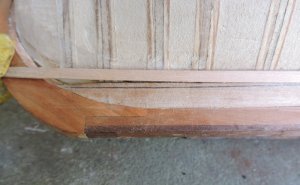
lets take a look at how the shipwright solved the problem a look at a hull you can see at the stern the garboard and bottom planks flare out the bottom yellow arrow is the lower edge of the garboard against the keel and the next yellow arrow up it the top edge of the garboard. The next two bottom planks the flare gets less the higher up the stern post. The gap that occurs is filled in by the shape of the plank and the run of the plank will follow the hull.
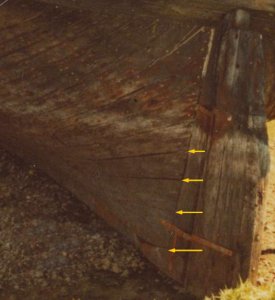
closeup stern_edited-1.jpg

this picture gives you a better example of the flare of the bottom planks. It is this flare at the ends that allow the bottom planks to take a natural curve.

tecu1B.jpg

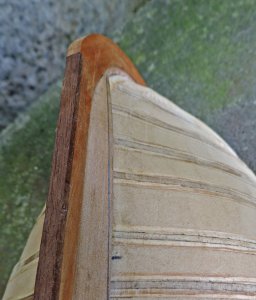
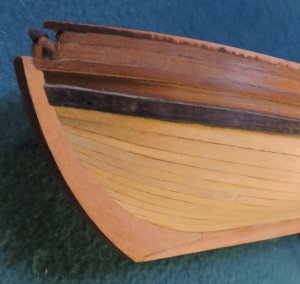
looking at the bow of the garboard the end is called the "hood" and it fills the lower space created by the natural upper sweep of the garboard plank.
The next plank up is the bottom plank and it also has a flare. The planks in the blue arrow part notice are much narrower this is because the next belt of planking has to conserve space along the stem or you will end up with a gap at midship and no room for the ends of the planks at the stem.
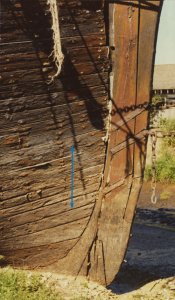
ALVIN stem_edited-1.jpg
 
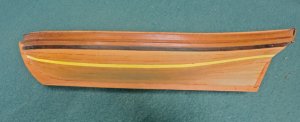
The final shape of the garboard looks like this and it will lay nice and flat all along the bottom of the hull. you can see why a wider plank is needed to shape the garboard.

garboard plank.jpg

keeping with scale lengths of planking the cardboard pattern was used and the garboard is made in two pieces.

garboard1.jpg

The garboard plank on one edge fits nice and snug into the keel rabbit and the upper edge takes a gentle curve of the hull. To accomplish this the garboard was cut to fit and not bent to fit the hull.

gar7.jpg
 
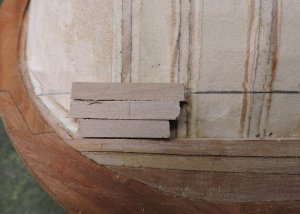
Bending and clamping planks to the hull is always a concern just looking at the front section of the garboard the end has to bend and twist to fit the stem. That seems to be pushing the limits of what a plank will do without breaking or splitting. The end has to take almost a 90 degree twist.
garboard2.jpg

you can see here if the end is held against the stem the plank has to twist and bend to lay flat to the bottom of the hull and slip into the rabbit.

plank flex4.jpg
 
You might find this hard to believe but the garboard was bent and twisted dry and without the use of one of those plank benders you heat up.
soaking the plank and steam heat does help in bending planks. One draw back is this method softens the plank and being soft clamps tend to leave a mark.

What I did was to use a wood that actually bends as you can see here.

plank flex2.jpg

and you can also twist it 90 degrees

plank flex1.jpg

no magic was used in the demonstration of bending the wood all it took was a wood suitable for bending AND using aged wood not kiln dried wood. Kiln dried wood makes it brittle aged wood maintains it natural elasticity.
 
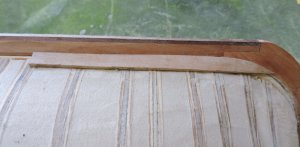
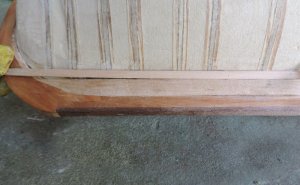
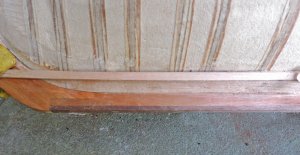
the next plank to fit is the first bottom plank laying the plank on the top edge of the garboard it follows the edge and leaves a gap. i do not want to force the plank down because it will want to spring edgewise.

bottom 1.jpg

if i bend the plank with the curve of the hull there is a slight overlap of the garboard.

bottom 2.jpg

i drew a line along the bottom of the bottom plank

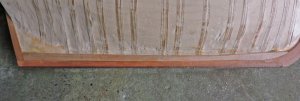
to get the bottom plank to lay natural and flat to the hull i will sand off the extra material on the garboard.

bottom 3.jpg

Here you can see what has to be removed from the top edge of the garboard

bottom 4.jpg

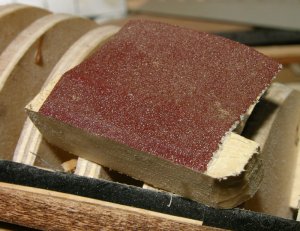
sanding the edge of the plank i use a sanding sled which is nothing more than a small block of wood with a pieces of sanding belt glued to the side. I also nipped off the front edge so the block does not get caught on anything. the sanding goes very quick and easy.

sand block.jpg
 
a strake is a run of planks that run longitudinally along the hull from on end to the other.

strake_edited-1.jpg


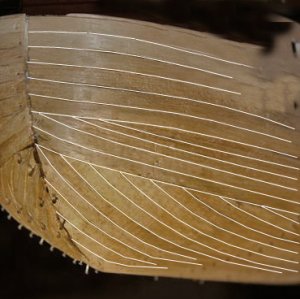
a proper planking job has all the stakes of planking running the full length of the hull from stem to sternpost which in order for all the strakes to fit, the ends at the bow have to be tapered.

1540829361024.jpg


looking close at the first bottom plank it has a flare to it. This plank was spiled to fit the hull. This is done by taking measurements from a batten running along the hull and measurements are taken from the batten to the top of the garboard and the bottom edge of the plank is cut to fit thus filling that gap we saw when the plank was run to the hull curve.

L005.jpg


What i did with the bottom plank you could call reverse spiling because i cut the top of the garboard to fit the bottom of the next plank.
 
fitting the bottom plank requires extreme bending and very often clamping is a problem and at times the plank will move and you don't notice it until you remove the clamps. My solution to the problem is the glue the end of the plank in place and allow the glue to dry. This requires little force and all you need to do is snug the plank into position.

bottom 5.jpg

bottom 6a.jpg


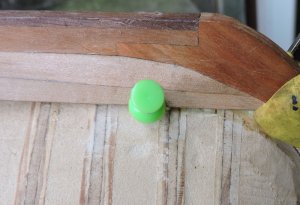
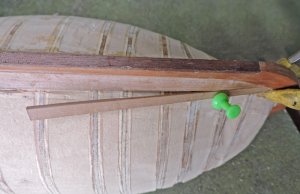
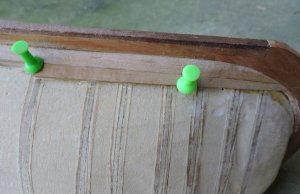
when the glue is setup the end of the plank it secure in place so i can bend the plank and hold it with push pins. An advantage to using the sign board as filler between bulkheads is it is dense enough it will hold the pins so they do not pop out from the pressure of the bent plank.

bottom 7.jpg
 
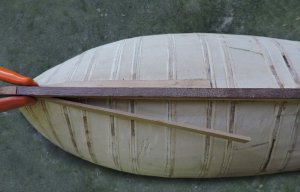
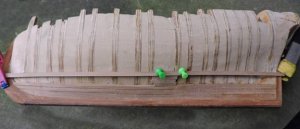
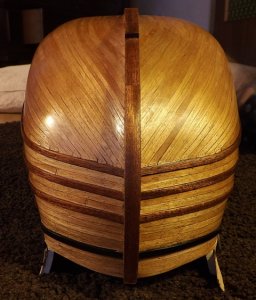
depending on the shape and size of the hull determines the amount of bottom planks used. Two or three works for this size hull so from here i establish the first belt of planking by using 4 pieces of planking at the mid section and bending a batten to the curve of the hull

1540829796051.jpg


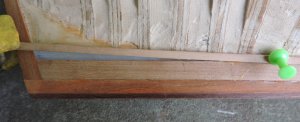
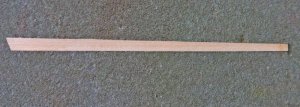
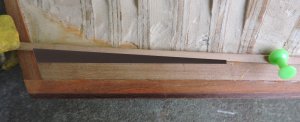
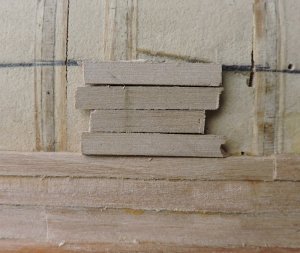
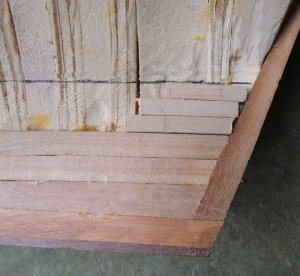
By doing this i know where the upper line of the belt of planking is and the taper of the planks. midship it takes 4 plank widths, at the stern 3 and at the bow 2 1/2

belt 2.jpg

belt 5.jpg

belt 3.jpg

belt 4.jpg
 
now I have to catch up with the build log and plank up the other side then we can continue with the first belt of planking.

so while I am planking the other side take a break and look at the planking on some of these high end models

https://www.shipsofscale.com/sosfor...chefort-france-18-th-21-st-october-2018.2050/

planking a hull the correct way is an art unto itself and the pride of a master shipwright. I understand for many this is a hobby and having fun with it is the prime concern. However, there is nothing wrong with pointing out the wrong way to plank a hull just in case your planning on entering a model is a show like the one above OR you just want to challenge yourself.

what not to do

planking is cut and shaped to fit the curves and shape of a hull or you end up with gaps and the plank run does not flow with a sweet curve.

gaps.jpg
the strakes as a whole tapper or you will run out of room at the stem

76-0-8.jpg

hum the builder got into trouble early in laying out the belts of planking

27415.jpg

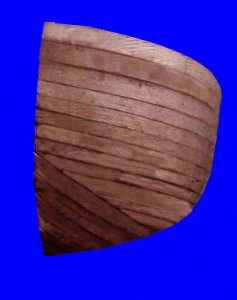
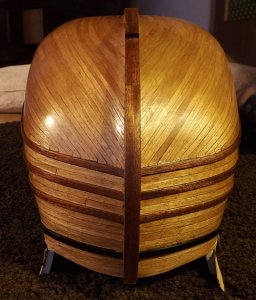
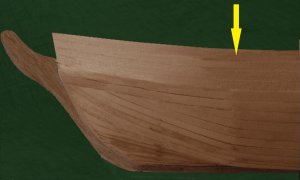
nice looking planking BUT remember all strakes run to the stem and not under the wale

hull16c.jpg

a "hard" bend which has nothing to do with the planking and this is because of no bevel to the bulkhead and the hollow space between the bulkheads give no form to the hull so the planks will lay flat

hard bend1_edited-1.jpg

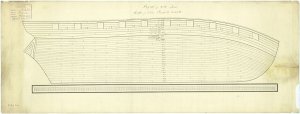
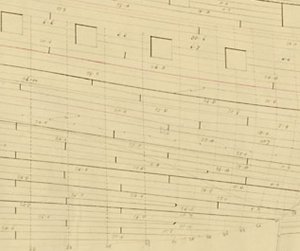
master shipwrights took a lot of time to plan out the run and shape of planking in what is called an expansion drawing

drawing planks.jpg

planking by the spiling numbers

closeup1_edited-1.jpg

and if you are really good you can do this

plank 2_edited-1.jpg
 
Last edited:
I don't know how well I would hold up if my better half were to suffer from dementia. My wife had a ruptured frontal lobe aneurysm about 3 years back resulting in mental stresses and symptoms that will plague her for life. When she was in a induced coma following the surgery, they told me that we wouldn't know how bad things would be until she comes to. I was on my knees praying to the Almighty for my Jenny and it breaks my heart seeing her struggle every day since then. My hope would be to follow through and stay strong for her as you have done for yours. I will say a few prayers tonight for everyone here.

Back onto this excellent mini planking tutorial...I can't wait to see the rest! I have now attempted Granado's hull 3 different times and have ripped it off in frustration. I'll be here watching :)
 
Fantastic planking info the picture below that planking is known as Dutch style planking.


I do not know for sure but I have found no references to "dutch style planking" where the planks end under the wale. for one thing that would make a very weak hull planking. In the plank expansion posted above the shipwrights went to extreme methods to lock the strakes of planking together, they did this to help prevent the hull from hogging. If all the upper strakes ended under the wales you would have a long seam running along the hull, when the hull hogged that seam would open up.

I read someplace ship carpenters and master shipwrights from England worked in Dutch shipyards because there were only so many jobs available so ship builders sought work where they could find it. Ship builders were banned from coming to North America so they went to other countries. The big Dutch shipyards were run my English master shipwrights and I do not think they would build a hull with such a glaring flaw.

it is possible this Dutch style is mistaken for the use of drop planks where a strake stopped short of the stem and drop planks were used but this entailed complex and often elaborate joinery, it was much easier to plan out the run of planking.

I could be totally wrong on this and I am wide open for any historical reference to the Dutch style of planking
 
Dutch style of planking was not the best way to plank depending on who you asked. who ever planked this ship did it correctly as there are to be no pointed ends in planking anywhere. I read about this style of planking a few years ago it. The 2 styles are said to be English and Dutch style with English method tapering the planks aka spilling. I dont remember where I read about the Dutch style but it is a real thing and real ships were planked that way. It was said that the hull wouldn't be a strong as with the English method. I have no info on if that were true or not and it was the english who made the claim supposedly. I'll try and find the article I read about it when I get home from work.
 
the first belt of planking does not require any shaping of the planks, all they need is to be tapered. The trick to a good taper is keeping it straight and that can be a problem if your trying to cut the taper along a straight edge. Depending on the wood used and the thickness of the material you may need more than one pass to get through the wood which requires you cutting in the exact same cut. Another problem is sometimes the knife wants to follow the grain of the wood and not along the straight edge.

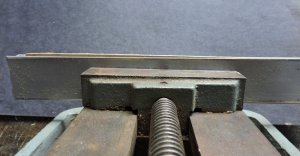
Here is what I do when it comes to cutting tappers in planks I learned this from hanging around with machinists, they spend a lot of time with jigs and setting up a job.
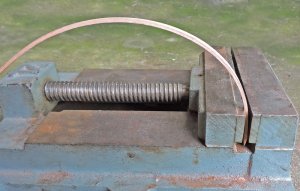
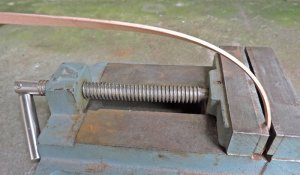
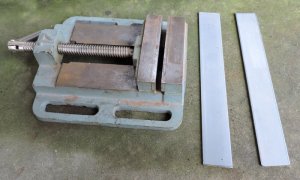
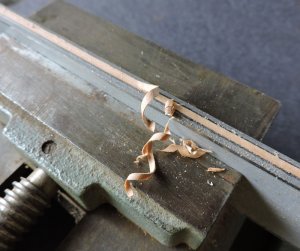
I use a vice and two strips of steel flat stock, you can get this in most any hardware store.

tp1.jpg

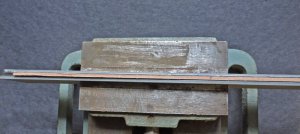
make sure the vice has a bed so the steel strips don't just fall through the jaws and the bed sets both strips level with each other.

tp2.jpg

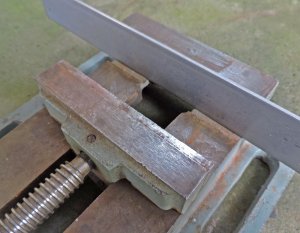
set your plank between the steel strips, if your really about exactness you can measure the taper personally I just do it by eye and call it close enough.
Clamp down on the vice and the steel strips hold the plank really tight, it is not going to move.

tp3.jpgtp4.jpg

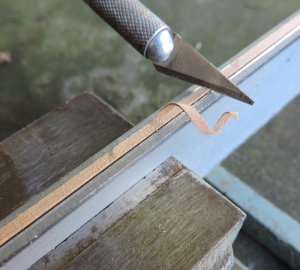
I use the steel strips because for one thing the vice jaws are not long enough and second all I need is that 3/32 flat edge as a guide.

tp5.jpg

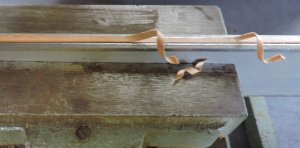
when you shave the plank you have to get that curl if not your going the wrong way. Wood grain has a nape to it
like fur on your pet. One way your cut will be short chips the other way it shaves off in nice clean shavings

tp6.jpg

I like to use new sharp blades mostly scalpel blades because they are very sharp. You know you got it when the blade glides along the edge of the steel. You can not gouge the plank or make an uneven cut so keep going until the blade no longer cuts then you will have a perfect taper.

tp7.jpg
 
Outstanding Dave I have that plank tapering vice from mantau it works ok, but I like your method. the two steel strips act like parallels used for holding things squarely above the vice jaws. I have a set of parallels but they are to short for planks that need taper so I'll stop at the metal shop and grab a couple lengths of precision ground steel bar.
 
Outstanding Dave I have that plank tapering vice from mantau it works ok, but I like your method. the two steel strips act like parallels used for holding things squarely above the vice jaws. I have a set of parallels but they are to short for planks that need taper so I'll stop at the metal shop and grab a couple lengths of precision ground steel bar.

those steel strips are a soft steel I got from a hardware store. What happens the edge will nick because the blades will cut into the steel, you can not use sandpaper or a file as a final smooth finish to the taper because that cuts into the steel strips.
At one time I had strips of tool steel or 1096 high carbon steel, now that was sweet a knife would slide along the edge without cutting into the strips and I could use a file and give that taper a final smooth even edge.
but I lost those strips
 
I ordered some precision ground high carbon tool steel from my metal dealer when I get them I'll check them out if they are good I'd be happy to grab a set to send to you Brother. I forge steel into Knife blades, Atlatl points and Arrow points for hunting. So I buy a good bit of steel from my dealer. Its getting time to start the old forge up for the season I work out of the Garage so I only forge and do Foundry work during the winter its to hot through the summer to be in my garage anymore. old age and heat don't mix well least not for me anyhow. I throw the garage door open in the winter and forge for hours keeps warm enough I don't need a coat, I wear leathers for protection and that's perfect with the heat rolling from the forge or Foundry furnace.
 
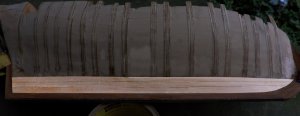
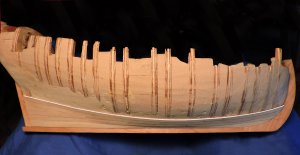
planking the hull 2.0

garboard bottom planks.jpg

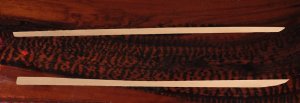
I ended up ripping off the planking and starting again, the problem started with the garboard and first bottom plank. They were not the correct shape, here are the new plank shapes. The bottom one is the garboard at the bow is the hood then the plank gets narrow as it approaches the center then flares out as it reaches the stern post. The plank at the top is the first bottom plank and it shape is the opposite of the garboard plank.
 
Back
Top