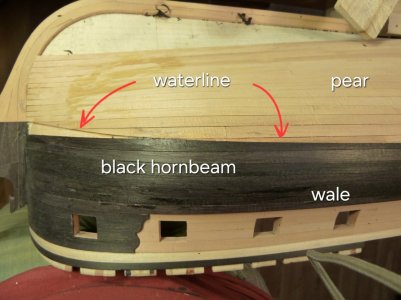
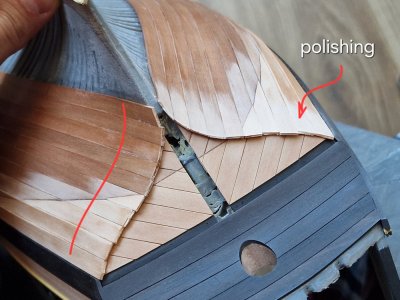
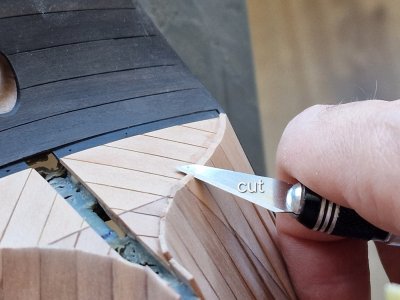
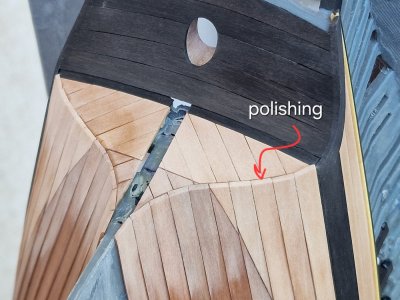
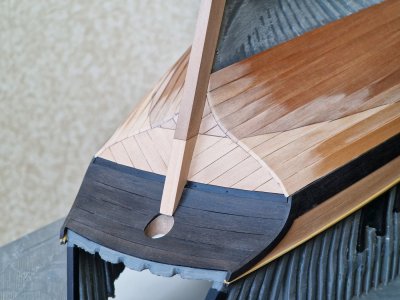
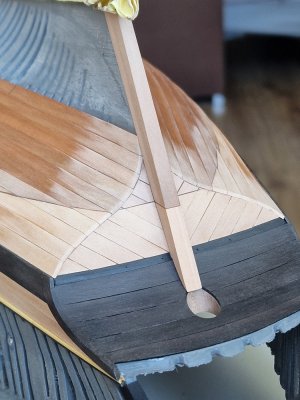
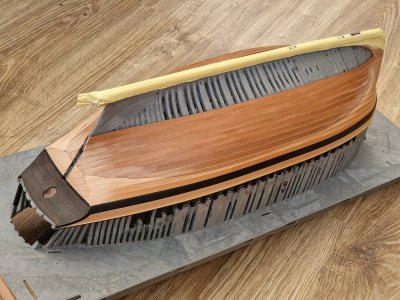
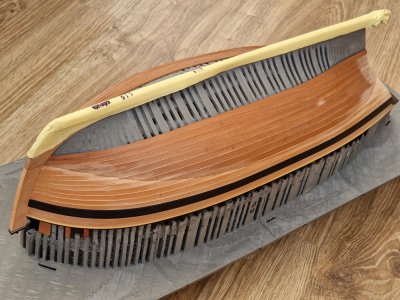
Due to time constraints, did not do much, but! I have completed exactly half of the body skin, that is, 8.5 belts out of 17... And you can exhale, because I completely finished the whole part over the waterline. And now it remains to make 8.5 belts of only one color from a dark pear, which will be more significant faster!
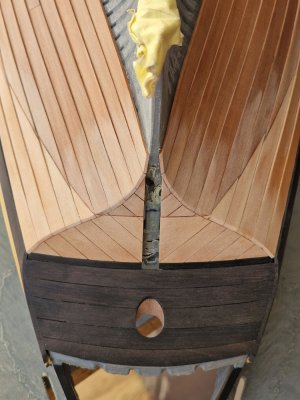
This is what my favorite symmetry looks like)))
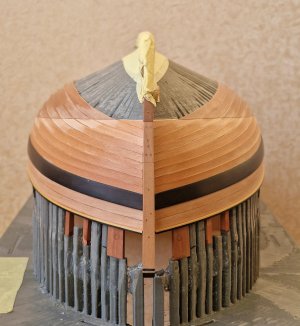
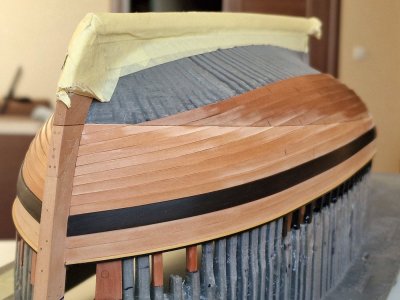
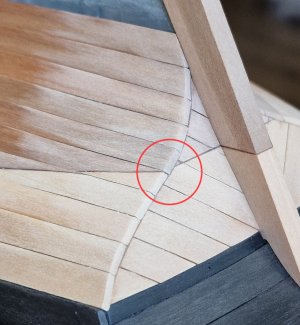
Due to the fact that the skin boards overlap, the waterline runs smoothly at one angle, and at a different angle...
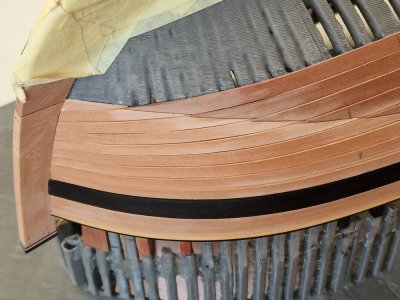
.. due to the position of the boards, the waterline goes with displacements (like on a ladder), which is structurally logical.
Another point that I wanted to describe was the connections of the boards.
Anatomy shows that the maximum length of the skin boards and deck boards does not exceed 18 cm, which is slightly more than usual, but within the permissible norms. I repelled from this indicator. And he made a layout of connections with an offset step of 2-3 belts (basically 3, which gives a more correct and rigid frame due to the maximally spaced connections from each other).
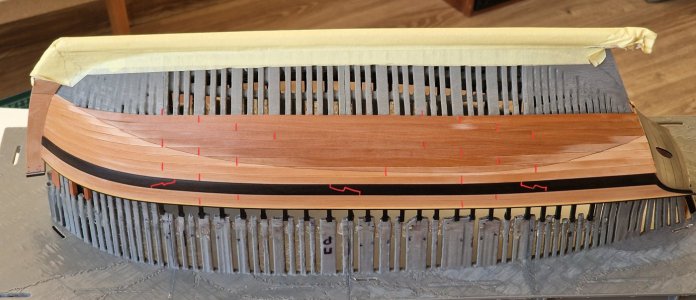
I will make a reservation: I connected the first and second belts under the wale in specific places due to the shortage of long boards, therefore these connections are adapted to the general scheme. The rest of the belts (in photo 6 from above) were already clearly connected according to the scheme with a shift from steps to 3 boards (that is, 3 boards without connection (solid) are placed above each connection in the zone of double frames) and only the 4th board again goes with the connection. The photo below is visible on the top 6 belts.
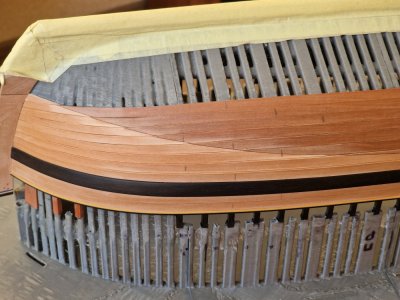
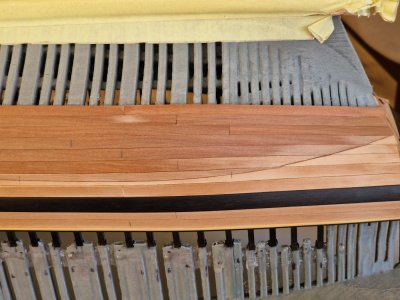
Here is a visual diagram.

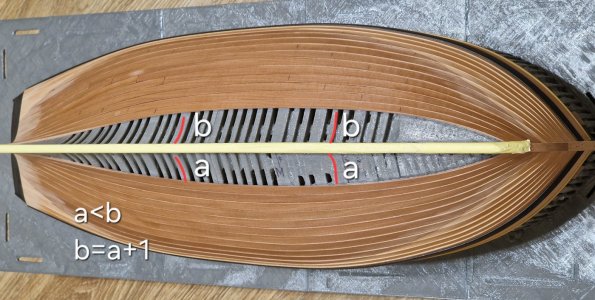
I decided to check and at the same time redo the template. The remaining space for boards is 54 mm. If you divide it by 6mm (the width of the board) it will be 9, and this is the number of belts left to set. From the middle to the stern, the values + are the same.
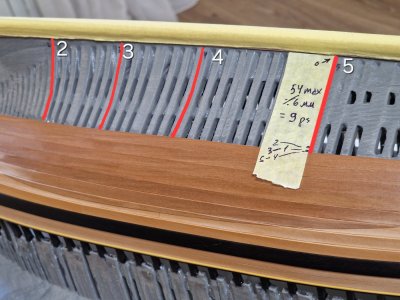
In the nasal section, the racks from 6 mm narrow to 4 mm.
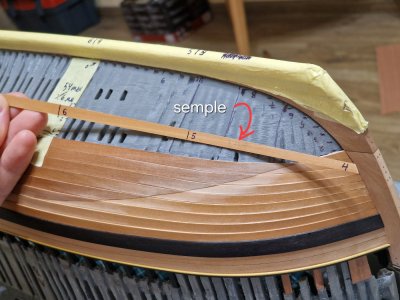
According to the new template, I will manufacture the remaining 9 belts.
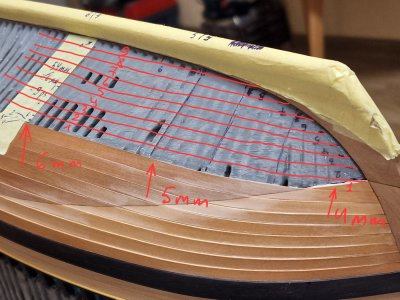
As you can see in the photo above, the belts will go + - according to this scheme, which corresponds to the real position of the boards with this method of fixing them.
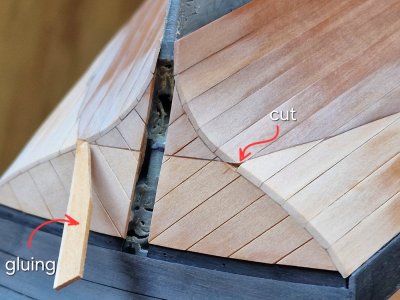
Now, it remains to glue them in place... let's go!
This is what my favorite symmetry looks like)))


Due to the fact that the skin boards overlap, the waterline runs smoothly at one angle, and at a different angle...

.. due to the position of the boards, the waterline goes with displacements (like on a ladder), which is structurally logical.
Another point that I wanted to describe was the connections of the boards.
Anatomy shows that the maximum length of the skin boards and deck boards does not exceed 18 cm, which is slightly more than usual, but within the permissible norms. I repelled from this indicator. And he made a layout of connections with an offset step of 2-3 belts (basically 3, which gives a more correct and rigid frame due to the maximally spaced connections from each other).

I will make a reservation: I connected the first and second belts under the wale in specific places due to the shortage of long boards, therefore these connections are adapted to the general scheme. The rest of the belts (in photo 6 from above) were already clearly connected according to the scheme with a shift from steps to 3 boards (that is, 3 boards without connection (solid) are placed above each connection in the zone of double frames) and only the 4th board again goes with the connection. The photo below is visible on the top 6 belts.


Here is a visual diagram.

I decided to check and at the same time redo the template. The remaining space for boards is 54 mm. If you divide it by 6mm (the width of the board) it will be 9, and this is the number of belts left to set. From the middle to the stern, the values + are the same.

In the nasal section, the racks from 6 mm narrow to 4 mm.

According to the new template, I will manufacture the remaining 9 belts.

As you can see in the photo above, the belts will go + - according to this scheme, which corresponds to the real position of the boards with this method of fixing them.
Now, it remains to glue them in place... let's go!


