Well, let's continue with our
experiments and tests...
Today I'll show you some options for
imitation bolts and nails on clinker.
View attachment 552423
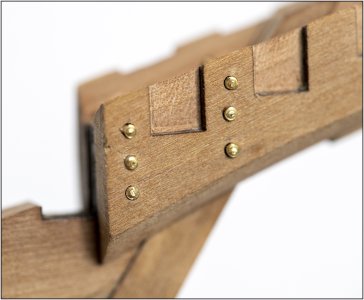
The photo shows that the size suggested by the anatomy is clearly too large. The bolt head physically couldn't be 1.2-1.3 mm. That's simply enormous, considering the 0.5 mm head height. Therefore, studs with a 0.7 mm shank and a 1.2-1.3 mm head will definitely not work. This will look especially bad on the sheathing, where there's a taper of 4 mm.
Now a few words about mistakes. I specifically wanted to show them clearly, and how these errors will be visible, especially if you use bitumen.
View attachment 552425
1. Any cracks and crevices will be very visible after applying oil, and especially bitumen. Always keep this in mind.
2. The hole should be no larger than the dowel or wire. Otherwise, there will be a dark halo around it.
3. The bolt heads should be to scale (otherwise, you'll get a cucumber effect with its bumps). And ideally, all the nails and bolts should be as similar and identical in shape as possible (this will at least look prettier and neater).
A quick option is to glue the nail or wire into the board and then cut it off and sand it flush with the boards... but I don't like this visually, although it's good and simple.
I like it when the dowel or wire protrudes slightly above the surface, creating some texture, but only very slightly. So, I initially did it like this:
View attachment 552426
I drilled a 1 mm hole, inserted a 1 mm wire into it, and snipped it off with wire cutters, leaving 0.5 mm. Then I sanded it down. This way, the wire protruded slightly above the surface, but was rounded.
View attachment 552427
I liked the 0.8mm wire option better than the 1mm wire; it looked more natural, but...
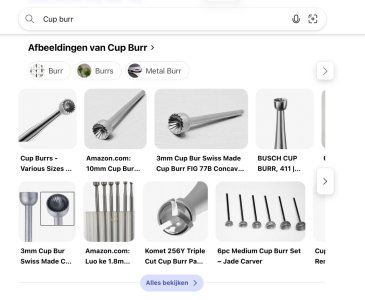
... I bought special cup-shaped burs:
View attachment 552428
These burs come in various sizes, from 0.8 mm upwards. I noticed that the 0.8 mm burr worked very well on nails with a diameter of 0.5 mm, but when used on 0.8 mm wire, the results weren't very visible.
View attachment 552429
That is, even under magnification, any geometry of the head is barely visible. It just looks like the wire has been scratched, but on 1 mm wire, this burr works wonders, in my opinion!
View attachment 552430
In the photo above, you can see that the polished 1mm wire looks ordinary and unnatural (although this result is very easy to achieve).
But after burring, a clear bolt head profile appears!
Yes, you need to control the center when positioning—otherwise, the bolt head may be off-center, but this is mainly due to haste and the uneven surface of the wire before burring. But I really liked the result. And most importantly, it's very quick and repeatable!
View attachment 552431
So, to summarize, the current plan is to make a test piece and perform the following manipulations on it: use a 1 mm diameter burr to process the 1 mm wire, and use a 0.8 mm burr to process the nails (0.5 mm birch toothpicks) (since that's the smallest).
And here's the planned result, very enlarged:
View attachment 552432
I love how fast, repeatable, and easy this method is. It only takes a few steps: mark the hole with a needle, drill, insert the wire, cut it, and lightly sand it with fine sandpaper to remove the sharp edges. Then, use the burr to create the cap, which takes about a second... hmm...


