1:100 Halcon 1840 Schooner

I just got reference on other models.
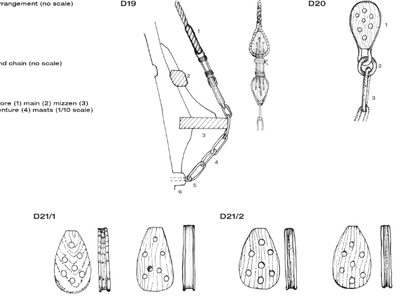
Some SOS member explained to me that by this time, theres no chain for anchors, but big rope instead, but, i found the image below.
My chain is too thick i think to go arround.

View attachment 234425
View attachment 234426
Nice one. They're the best details I've seen yet. That will really help with the rigging. Thanks for posting them.
 
I just got reference on other models.
Some SOS member explained to me that by this time, theres no chain for anchors, but big rope instead, but, i found the image below.
My chain is too thick i think to go arround.

View attachment 234425
View attachment 234426
I'd love to know the history of these plans. People dismiss the Halcon as a Chinese knock-off of Mantua's Albatros, but all these kits are clearly based on the above. Is there a signature and a date in the bottom right corner? 1944?
 
Just had a look at the Mantua site. Some good details on there. Thanks for posting
 
Hello,

This will be a build log of the $15 1:100 Halcon 1840 kit from aliexpress.

This will be my first wooden static sailing ship. I have built some RC boats before, but they were built for speed, and now it is time to build something for the looks.

So, after waiting for about 2 weeks for the kit to arrive, it fell trough the mailbox. After opening the enveloppe the kit appeared:

View attachment 222231

View attachment 222232

View attachment 222233

View attachment 222234

View attachment 222235

View attachment 222236

So far so good, the laser cut parts look great!
The sheets of wood are a little warped, but that should not be a problem, they will straighten out once the build progresses and parts will be glued in place.

The build plans are short, maybe even too short.
The small parts are clear, but when it comes to finishing a lot is not listed here.

View attachment 222237

View attachment 222238

View attachment 222239

As you can see, its not much and i guess im gonna have a lot of questions about the masts and rigging.

So far the "unboxing" part. Can you call it a unboxing when it did not come in a box?

Time to start the build.
The first thing i just had to do is build some cannons:

View attachment 222240

View attachment 222241

These are nice little things. The brass looks great, too bad it needs some paint later on.

Time to start building the hull. The laser cut parts fit really tight together, maybe even a little too tight, so some sanding is needed:

View attachment 222242

Couldnt help myself and built some more cannons

View attachment 222243

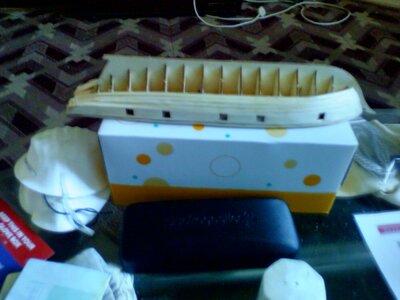
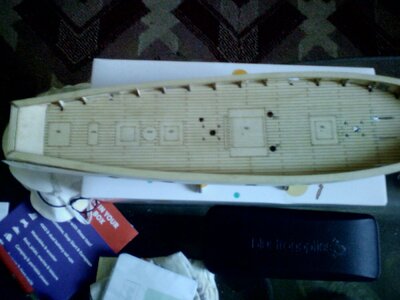
After some creative ways of applying pressure while the glue was drying, there was a deck and railings:

View attachment 222244

View attachment 222245

I also started on some of the smaller parts, like the hatches and other stuff

View attachment 222246

View attachment 222247

View attachment 222248

Then it was time for the difficult part, the boardings. I used hot water and some pressure to bend the wood so it would take the shape of the hull before i glued them in place.

View attachment 222249

View attachment 222250

View attachment 222251

View attachment 222252

While the glue was drying, i started painting some of the smaller parts. I used 2 shades of brown to get some contrast between the parts.
Can you spot the different colored parts? No? Me neither... I guess the two colors look too much alike and i need to buy a different brown to get the effect i was looking for. Or maybe i will leave it this way, because it looks nice anyway.

View attachment 222253

And some black paint to get a feeling for the final color scheme

View attachment 222254

View attachment 222255
Hallo @Freakert
we wish you all the BEST and a HAPPY BIRTHDAY
Birthday-Cake
How is your work on the Halcon going? Are you still working on her?
 
Thank you very much :)

The build is still standing right next to me on my desk/workbench, but unfortunatey i have not found time to do anything.
But the good weather is coming to an end, so it probaby wont take long before i have some time for her again.

But dont worry im still boating:cool:
I am working on a new RC speedboat called the "Wiesel" and i have bought myself a Aquaholic v2 for my birthday.

20211001_103239.jpg
 
Hi guy's, Murf from Australia, I also bought the Chinese Halcon model kit next to no instructions parts missing and it is the first model kit I have tried to build. I have the deck on the gunwales on ( used the soak the boards and peg them in place but I used a hairdryer rather than wait over night it works quit well. It seems you have the cutout sheet for the sails I would be very greateful if you could flatten the sheet and post it so I can download and print it. Thank you I will keep looking at your progress.
 
Hi, I have 2 poor pics of my progress on my halcon model I have used my phone as my camera is still on loan. hope they are not too poor for this site. I have found models are a quite a bit more fiddly than the real thing, I did at one stage build sail boats and motor cruisers the largest being 65 foot. Please let me know what you think of my progress I would like to know if you can give me some direction as this is the first model I have tried. Thanks .004.jpg005.jpg
 
Hi, unfortunately my camera is not back ( perhaps it is not coming back )001.jpg
 
Hello,

This will be a build log of the $15 1:100 Halcon 1840 kit from aliexpress.

This will be my first wooden static sailing ship. I have built some RC boats before, but they were built for speed, and now it is time to build something for the looks.

So, after waiting for about 2 weeks for the kit to arrive, it fell trough the mailbox. After opening the enveloppe the kit appeared:

View attachment 222231

View attachment 222232

View attachment 222233

View attachment 222234

View attachment 222235

View attachment 222236

So far so good, the laser cut parts look great!
The sheets of wood are a little warped, but that should not be a problem, they will straighten out once the build progresses and parts will be glued in place.

The build plans are short, maybe even too short.
The small parts are clear, but when it comes to finishing a lot is not listed here.

View attachment 222237

View attachment 222238

View attachment 222239

As you can see, its not much and i guess im gonna have a lot of questions about the masts and rigging.

So far the "unboxing" part. Can you call it a unboxing when it did not come in a box?

Time to start the build.
The first thing i just had to do is build some cannons:

View attachment 222240

View attachment 222241

These are nice little things. The brass looks great, too bad it needs some paint later on.

Time to start building the hull. The laser cut parts fit really tight together, maybe even a little too tight, so some sanding is needed:

View attachment 222242

Couldnt help myself and built some more cannons

View attachment 222243

After some creative ways of applying pressure while the glue was drying, there was a deck and railings:

View attachment 222244

View attachment 222245

I also started on some of the smaller parts, like the hatches and other stuff

View attachment 222246

View attachment 222247

View attachment 222248

Then it was time for the difficult part, the boardings. I used hot water and some pressure to bend the wood so it would take the shape of the hull before i glued them in place.

View attachment 222249

View attachment 222250

View attachment 222251

View attachment 222252

While the glue was drying, i started painting some of the smaller parts. I used 2 shades of brown to get some contrast between the parts.
Can you spot the different colored parts? No? Me neither... I guess the two colors look too much alike and i need to buy a different brown to get the effect i was looking for. Or maybe i will leave it this way, because it looks nice anyway.

View attachment 222253

And some black paint to get a feeling for the final color scheme

View attachment 222254

View attachment 222255
Hallo @Freakert
we wish you all the BEST and a HAPPY BIRTHDAY
Birthday-Cake
 
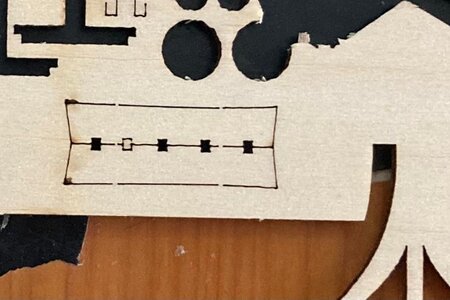
This forum is Gold for beginners like me. I was wondering what is this part. I couldnt figure out where this would go?

WhatsApp Image 2022-10-17 at 11.32.40 AM.jpeg
 
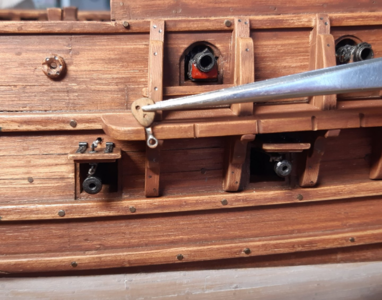
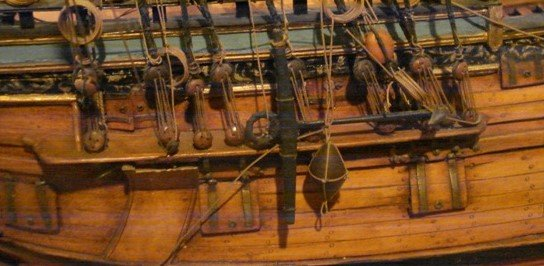
@suzkin Those parts look to me as Channels (Board and Starboard), the square notches are to position the chainplates stropped with deadeyes.

1666034224789.png

1666034278051.png

1666034321162.png
 
three years ago I started building, two weeks a year on my vacation at the beach apartment in Caioba, Brazil. I've already done 30%, another six years I'll finish.
 
Wow Very nice build and nice Pictures. I have just received the same kit yesterday and this morning I was cleaning off my build area and found the instructions are blurry to the point most cant be built, so I have to wait for dealer to get back to me. i just hope mine will turn out that nice. this will be my first wood ship build , looking forward to starting "Again very nice build"
 
great build!!!!I'm also trying to start mine.....Do you you have plans with measurments of the musts and sails?
 
With some of the parts in place, it starts to look like a ship

View attachment 222256

View attachment 222257

At this point, the accesory pack fell in the mailbox. This pack consists of 6 nicely detailed "small" cannons, one "big" cannon, 5 barrels, 2 metal anchors, anchor chain with some link rings, and a bag of small ball bearing balls wich should go for cannonballs. Unfortunately these balls are to big even for the big cannon, so i put them on the side for now. So lets build and paint the new parts

View attachment 222258

View attachment 222259

At this point i discovered my revell enamel paint dried out so the metal straps on the barrels have to wait on their color until the shops open again.

The big cannon appeared to be nozzle heavy and kept falling forward...

View attachment 222261

I had to use a small 3mm drill to drill out the nozzle to lose some weight at the front.

At this point the questions are starting.
I want to paint the anchorchain in a nice scale color, but how do i do this without making a mess of it and what color(s) should i use?

Next was to apply some paint to the deck and inside of the boardings:

View attachment 222260

Next step will be to add the planks on the bottom of the hull. To keep the strips of wood in place while drying, i tried needles and wasknijpers(whats the correct english word for this?) But both didnt work the way i was hoping them to work, so i did what every hobbyist would do; i made my own tools to fit the job!

I made some simple clamps who would fit on the ribs, with a little extension to keep the strips of wood in place.

View attachment 222271

View attachment 222272

Now this problem is solved, i can continue glueing the strips of wood in place.
This is a slow process, max 2 strips a day because i want to let the wood dry for at least one day.

View attachment 223378

I also glued little blocks of balsa wood on the spots the masts will be glued as reinforcements.

View attachment 223374

View attachment 223379

Painted the anchors and the hoops of the barrels

View attachment 223875

I made an attempt to make my own 4mm deadeyes. They dont look too bad, but im curious how they look to the seasoned scale builders here.

I am also making some 3x4mm single blocks. Not sure how many i gonna need so i start with about 20 or so.

View attachment 223879

I also made some room for the bowsprit by filing the rail down to stem level.
I know it is not like it should be, but looks good:

View attachment 223916

View attachment 223917

After some inspiration from @Dr Havotnicus i built a new pump:

View attachment 226472

View attachment 226473

My only concern is the size. I think it might be too big for 1:100 scale. I will try to find some sizes and if it really is too big, i will make another. I know i can make something nice now, so that shouldnt be a big problem :)

Next thing i made was a tool to help me thread my deadeyes. I found something on aliexpress that looked like this and made my own:

View attachment 226486

Time for a little update.
Unfortunately it is a really small update, did not have much time to work on this ship.

I have made a new smaller version of the pump:

View attachment 234107

I hope i can make a bigger update soon.
Where did the cannons come from? My kit came with the laser cut cannons. Are those them or did you add them? If so, where did you get them? Thanks.
 
You have to buy separate gun barrels and add them yourself. I used several that were the right size from my spare parts box. The Chinese sell a set of nice brass barrels for this model for around $12.00. LINK
 
Back
Top