-

Win a Free Custom Engraved Brass Coin!!!
As a way to introduce our brass coins to the community, we will raffle off a free coin during the month of August. Follow link ABOVE for instructions for entering.
-

PRE-ORDER SHIPS IN SCALE TODAY!
The beloved Ships in Scale Magazine is back and charting a new course for 2026!
Discover new skills, new techniques, and new inspirations in every issue.
NOTE THAT OUR FIRST ISSUE WILL BE JAN/FEB 2026
You are using an out of date browser. It may not display this or other websites correctly.
You should upgrade or use an alternative browser.
You should upgrade or use an alternative browser.
1/24th scale POF 36' French Longboat, Cherry wood version from Unicorn
Sure - but I've never used a google drive folder before - let's see now, google is usually easy ...That's awesome, Tim! Thanks so much for doing it. I'll send a PM when I get home, but maybe put them in a google drive folder and share that?
Here's a link to my google drive with the zip file called "French Logboat.zip" on it ... https://drive.google.com/file/d/1KiUKogD9aJ8QvOTTGX02X5fstlU1dAvc/view?usp=drive_link
I still had to request access to downloadI just granted access to my google drive (didn't know I'd have to do that). The pics are in alphabetical order except for the 1st two called "page 1 top En.png" and "translated_image_en.png".
I think I have it set now, to allow anyone with the link to download. Maybe.I still had to request access to download
I would love to see how I could get a copy of these before I start my journey with the kit.I have translated the instructions - I had to create 3 sections for each page, in order to get good translations. Each translated section is about 1.5mb and includes the pics. There are 23 files total. If anybody wants a copy - I'll send em to you ... tell me how you'd like to get em. They are currently in png format. And as I said, each one is about 1.5mb. And the zip file is 32mb. I included one of the section files so you know what I'm offering.View attachment 545546
I just downloaded. Thanks for doing this!Here's a link to my google drive with the zip file called "French Logboat.zip" on it ... https://drive.google.com/file/d/1KiUKogD9aJ8QvOTTGX02X5fstlU1dAvc/view?usp=drive_link
- Joined
- Jan 23, 2021
- Messages
- 624
- Points
- 353

Unicorn Model is working on an english version of the manual too
Rob's photos and work are so good - but I still might start my own blog for this same boat - dunno.
Just got my frames all beveled up, and the char removed. And I am ready to attach frame 28 to the keel and fix the keel to the frames in the jig.
Lucky for me that I saw the link to the build videos in this blog. The vids had some useful bits that I didn't find in the instructions.
Just got my frames all beveled up, and the char removed. And I am ready to attach frame 28 to the keel and fix the keel to the frames in the jig.
Lucky for me that I saw the link to the build videos in this blog. The vids had some useful bits that I didn't find in the instructions.
- Joined
- Jan 25, 2023
- Messages
- 542
- Points
- 308

Allright, not a ton of progress, I didn't enjoy this part as much because it was a lot harder. These four clamps just did not want to go in. I got the bottom two bent at the front by soaking and using a bending iron on them, but even then one broke before I could cut it to length. The upper two both broke while sanding the char from the edges. So I didn't even bother trying to bend them at the front. I think it would have been better to leave them full width and etch the notches on so you could use a grinding tip to remove that later. So not my proudest work, I hope the decking at the front and rear will cover for these mistakes.
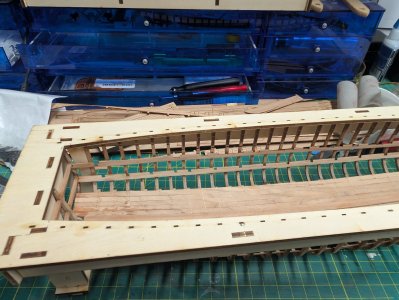
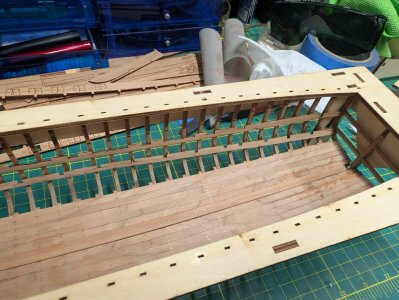
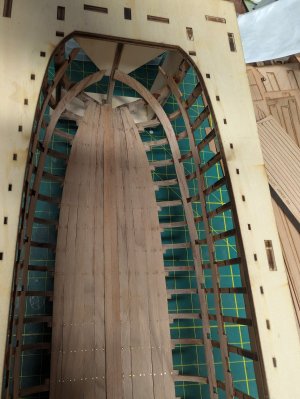


Some days are more frustrating than others, Rob. I feel you.
- Joined
- Jan 25, 2023
- Messages
- 542
- Points
- 308

Made a little more progress. The last 4 are the supports for the aft floor decking. In front of them are the curved footrests. Despite my best efforts, one of the clamps was just ever so slightly ahead of the other one so if you look from the top down, the footrests are not perfectly perpendicular to the keelson.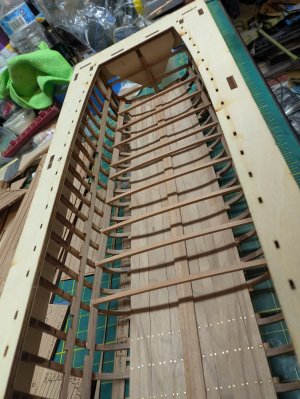
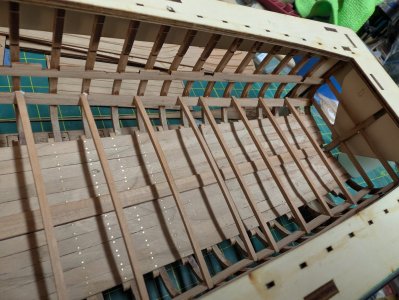
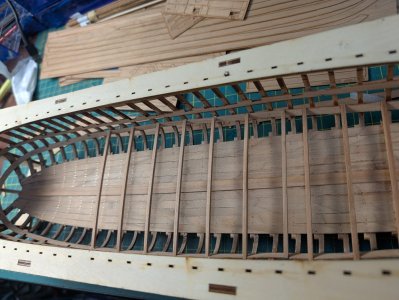
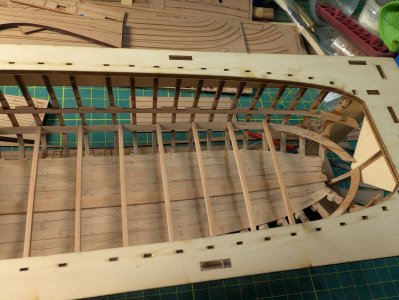
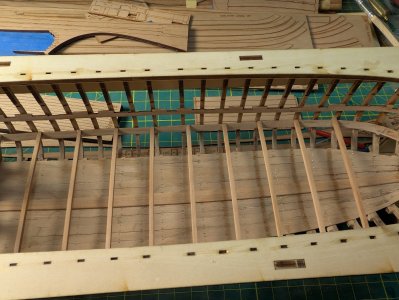
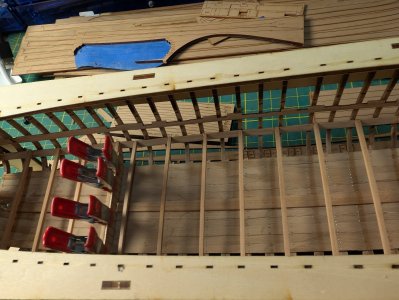
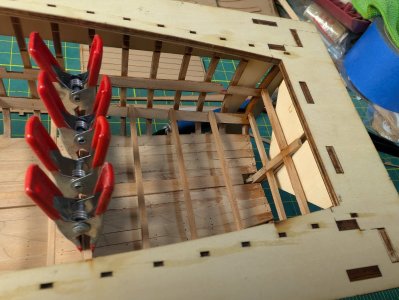
I added a couple of supports on the floor decking for this planking panel that goes on the front of the aft floor section. That way, when I glue it in it won't push through.
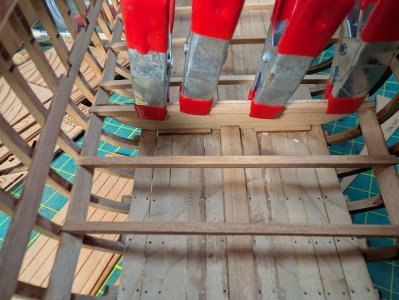
And the rest of these are just reference images for other's to look at and try and figure out the geometry.
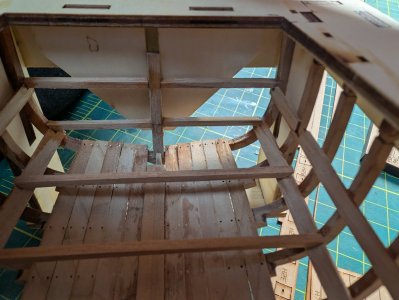

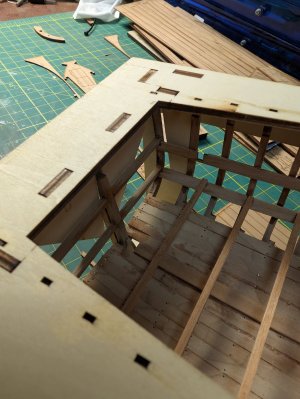
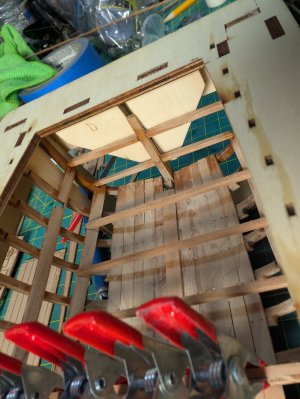
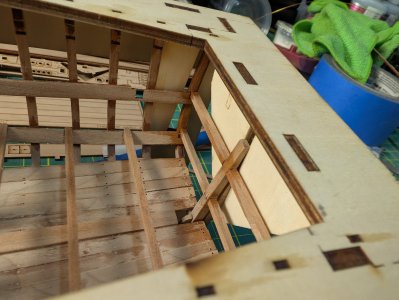


I added a couple of supports on the floor decking for this planking panel that goes on the front of the aft floor section. That way, when I glue it in it won't push through.

And the rest of these are just reference images for other's to look at and try and figure out the geometry.


