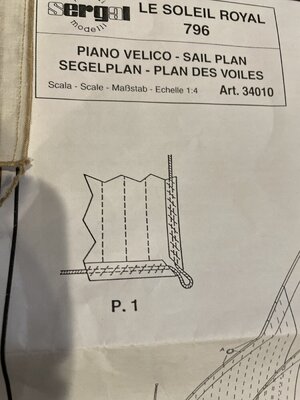
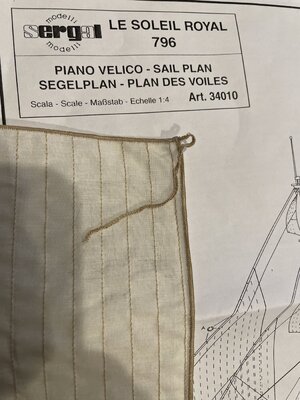
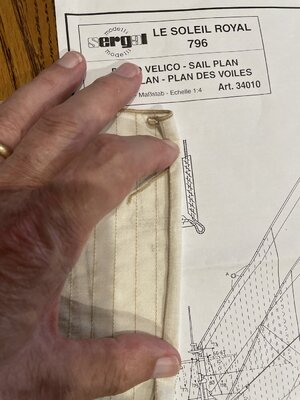
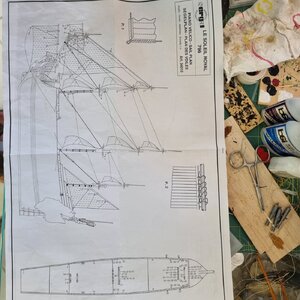
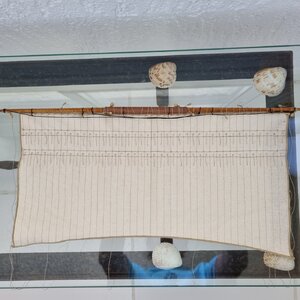
¡Grácias, Capitan! I noticed that in some pictures the bolt rope is covered with cloth. In others, it is stitched onto the canvas.MORNING FROM SPAIN. Do you have a good picture of your Standing Riggen from the Bowsprit to the Foremast, so I can get a better understanding of your build.
Anyhow -for the last time I will add some pic or drawings. Below the Topmast Stay, you should have the Fore Topmast Preventer Stay -it is here you should add a staysail-. as well you should have the Fore stay and just below the preventer stay-for staysail and finally the main stat.
the staysail is general fasten with a metal ring- with an opening -to go through the edge of the sail and over the preventer stay, and then closed. in the 1st pic, there is a small mistake. the preventer is always belowView attachment 317496View attachment 317497View attachment 317496View attachment 317497 the stay-not opposite
View attachment 317498
View attachment 317499
View attachment 317500
View attachment 317501
-

Win a Free Custom Engraved Brass Coin!!!
As a way to introduce our brass coins to the community, we will raffle off a free coin during the month of August. Follow link ABOVE for instructions for entering.
-

PRE-ORDER SHIPS IN SCALE TODAY!
The beloved Ships in Scale Magazine is back and charting a new course for 2026!
Discover new skills, new techniques, and new inspirations in every issue.
NOTE THAT OUR FIRST ISSUE WILL BE JAN/FEB 2026
You are using an out of date browser. It may not display this or other websites correctly.
You should upgrade or use an alternative browser.
You should upgrade or use an alternative browser.
Sorry, Gilbert, I meant to post this on my thread.
- Joined
- Nov 25, 2018
- Messages
- 635
- Points
- 403

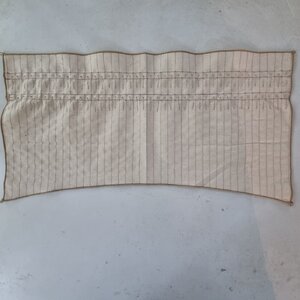
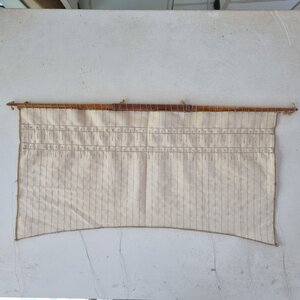
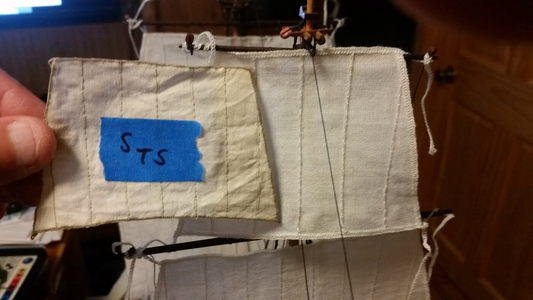
Most likely, the final size is already on these "sails".It is not necessary to turn them up.Check the size by attaching it to the ray.If there is no desire to do it again, take a normal thin fabric, such as cambric.I am confused by the crooked seams on the canvas.Then at least to give these sails a look, it is worth sheathing them around the edges with a lyctrose.And they are already forming loops at the corners of the sail.I hope I explained it clearly...And don't forget to at least stitch additional seams, where there will be reef point,I have a question about bolt ropes. The directions show stitching cloth over them.
View attachment 317840
They look like this:
View attachment 317841
Do I roll the bolt ropes under and stitch them?
View attachment 317842
Or just leave them exposed?
The loops aren’t fastened yet. I do plan on adding reefs. I’ve never seen reefs formed in an x shape before. Maybe I’m just not very observant.
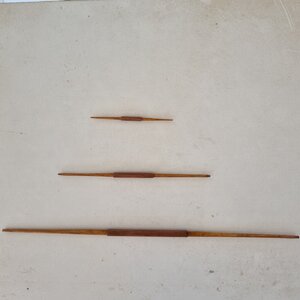
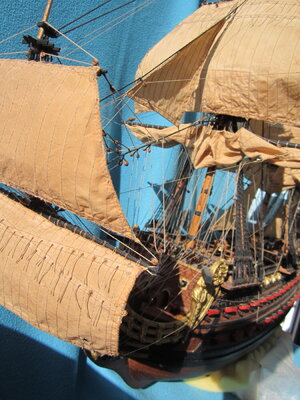
Vic, you already know that sails are not sewn in the manner which Sergal has shown in the instructions. If I were you, I would take the time to check the sizes of the sails, and trim them to size if they are too large. If they are too small, you need make a new sail. Let's say that you find the size of the sails to be satisfactory, and that the clews are not wider than the lengths of the yards. Now is where you take crappy kit sails and make them better. You have two choices. You can cut off the edges, replace them with your own bolt ropes made from line, or live with the edges as they are, and take the loose ends at the corners, and use a needle to weave the end back into the corner or edge of the sail to form a loop. Cringles will have to be added at the sides of the sail by hand. The edges make for ugly simulations of bolt rope, but at viewing distance of 5', they work. Use PVA glue to secure the ends of the loops and cringles, and you will find this to be strong enough.The loops aren’t fastened yet. I do plan on adding reefs. I’ve never seen reefs formed in an x shape before. Maybe I’m just not very observant.
Personally, I bought a set of premade sails for La Couronne, and they had the same zig-zag stitch on the edges that yours have. I still have the sail set if anyone wants then, but they were not good enough in my opinion. There are no kit sails that are even close to realistic, which was disappointing, but it forced me to make my own sails, and I was very pleased with the results. If you look at my build log, you will see that for my small scale model, sewing the bolt ropes would have been too large, so actually PVA gluing the bolt ropes to the cloth edges was the technique that was chosen. You have to apply a tiny line of glue with a toothpick, but it holds. I saw that technique in a YouTube video from Russia somewhere. Those Russians always seem to have incredibly high talent for scratch build ship modelling!
Whatever you change will be an improvement. Sail making takes lots of patience, but remember that crappy sails destroy the appearance of a model more readily than a crappy hull.
Model with crappy kit sails.
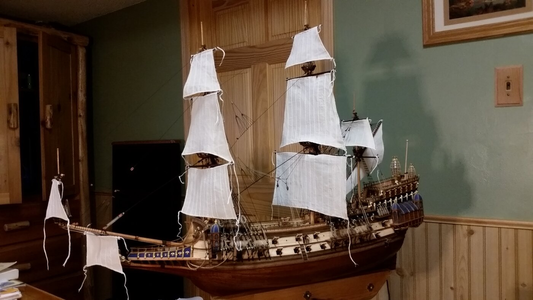
Scratch made sail with sewn, and CA glue hardened edges, before bolt rope is attached.
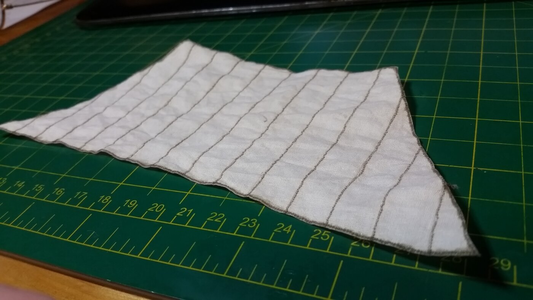
Kit sail versus scratch made sail with glued on bolt rope.
Last edited:
I think I’m sorry I asked. I only have a couple more weeks and haven’t started ratlines and running rigging yet. My back can only take about an hour at a time.Vic, you already know that sails are not sewn in the manner which Sergal has shown in the instructions. If I were you, I would take the time to check the sizes of the sails, and trim them to size if they are too large. If they are too small, you need make a new sail. Let's say that you find the size of the sails to be satisfactory, and that the clews are not wider than the lengths of the yards. Now is where you take crappy kit sails and make them better. You have two choices. You can cut off the edges, replace them with your own bolt ropes made from line, or live with the edges as they are, and take the loose ends at the corners, and use a needle to weave the end back into the corner or edge of the sail to form a loop. Cringles will have to be added at the sides of the sail by hand. The edges make for ugly simulations of bolt rope, but at viewing distance of 5', they work. Use PVA glue to secure the ends of the loops and cringles, and you will find this to be strong enough.
Personally, I bought a set of premade sails for La Couronne, and they had the same zig-zag stitch on the edges that yours have. I still have the sail set if anyone wants then, but they were not good enough in my opinion. There are no kit sails that are even close to realistic, which was disappointing, but it forced me to make my own sails, and I was very pleased with the results. If you look at my build log, you will see that for my small scale model, sewing the bolt ropes would have been too large, so actually PVA gluing the bolt ropes to the cloth edges was the technique that was chosen. You have to apply a tiny line of glue with a toothpick, but it holds. I saw that technique in a YouTube video from Russia somewhere. Those Russians always seem to have incredibly high talent for scratch build ship modelling!
Whatever you change will be an improvement. Sail making takes lots of patience, but remember that crappy sails destroy the appearance of a model more readily than a crappy hull.
Model with crappy kit sails.
View attachment 317918
Scratch made sail with sewn, and CA glue hardened edges, before bolt rope is attached.
View attachment 317919
Kit sail versus scratch made sail with glued on bolt rope.
View attachment 317920
Sorry to hear that, Vic. Ratlines are tough on the back. Are you saying you only have a couple more weeks to finish the entire model? Am I missing something?I think I’m sorry I asked. I only have a couple more weeks and haven’t started ratlines and running rigging yet. My back can only take about an hour at a time.
I’ve brought it to my daughter’s house in Nebraska. She’s recovering from surgery and I wanted to leave it with her. It’s also her birthday today. We don’t get up here too often. It’s a two day trip. And I’ve been at it a year now. My yards are made already. If I have to, I’ll leave it here unfinished and continue working on it when I come back next year. I think I’ll answer any other posts on my own thread. Je suis désolé, Gilbert.
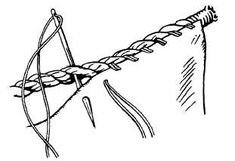
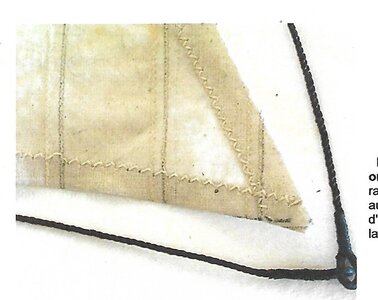
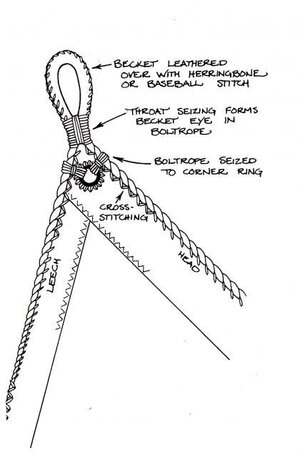
Hi, I finally found the images of how to attach the bold rope to the edge of the sail. They will be the VERY last images I send out to builders if they are not deleted by the management-it is not the first timeThe loops aren’t fastened yet. I do plan on adding reefs. I’ve never seen reefs formed in an x shape before. Maybe I’m just not very observant.
if someone wants to contact me please use the E-MAIL_ PEANDERSEN@TELEFONICA.NET, SO TAKE NOTE AND INFORME OTHERS SORRY AND GOODBYE.
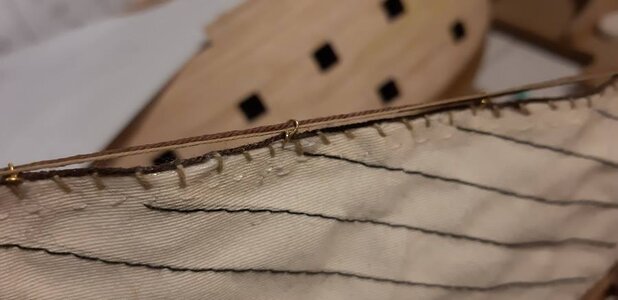
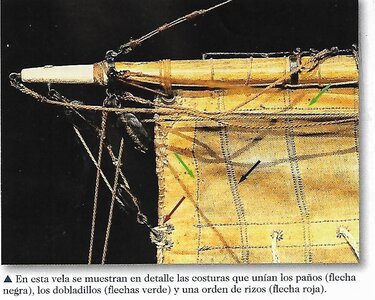
Last edited by a moderator:
Hi, I finally found the images of how to attach the bold rope to the edge of the sail. They will be the VERY last images I send out to builders if they are not deleted by the management-it is not the first time
if someone wants to contact me please use the E-MAIL_ PEANDERSEN@TELEFONICA.NET, SO TAKE NOTE AND INFORME OTHERS. SORRY AND GOODBYE.
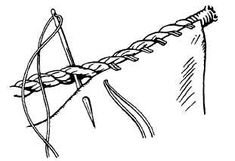
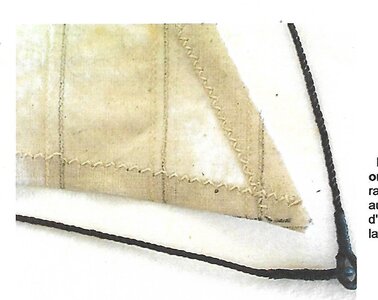
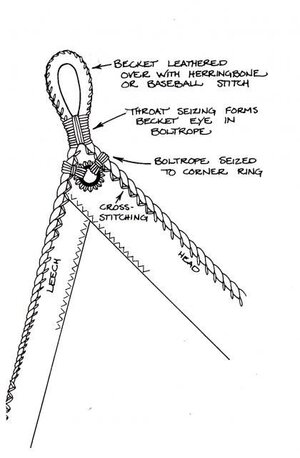
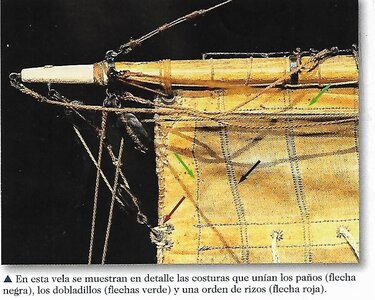
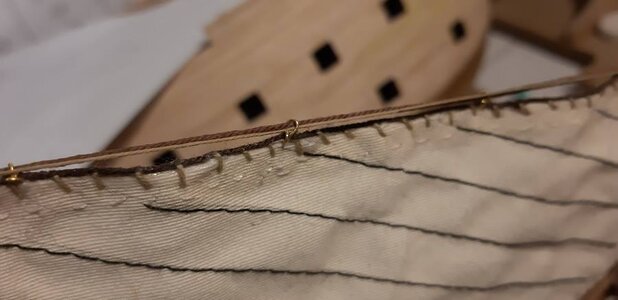
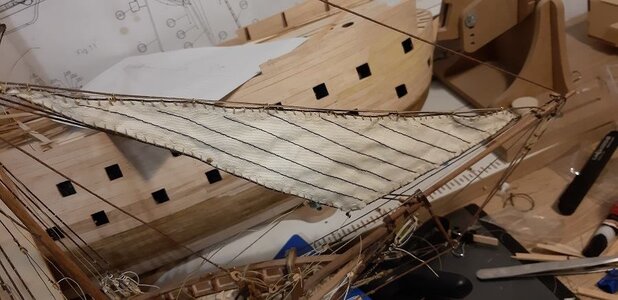
if someone wants to contact me please use the E-MAIL_ PEANDERSEN@TELEFONICA.NET, SO TAKE NOTE AND INFORME OTHERS. SORRY AND GOODBYE.


Last edited by a moderator:
¡Grácias, y adiós amigo!
Looks like you followed the sail rigging plans well, Gilbert! The rigging for the braces on the sprit mast sail wasn’t according to the SR instructions, but that would be impossible because of the intervening sail. I think there’s enough space on the black line below the jib sail to place the brace blocks, so I think I’ll try that. You’re a sold builder, Gilbert.
Hi VicLooks like you followed the sail rigging plans well, Gilbert! The rigging for the braces on the sprit mast sail wasn’t according to the SR instructions, but that would be impossible because of the intervening sail. I think there’s enough space on the black line below the jib sail to place the brace blocks, so I think I’ll try that. You’re a sold builder, Gilbert.
Thanks for your compliment, but I am far from being a solid builder
I just have fun and enjoy
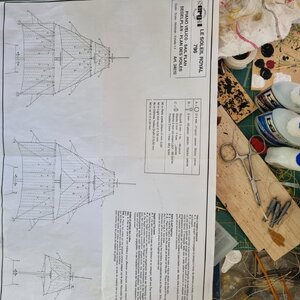
And I enjoy your work. I have a question,though. Somehow I have misplaced my sail plans. Would you mind sending me a copy of yours, front and back? I don’t need the red ones. A photo would be sufficient.
The Admiral says, “What a sweet man!” The Ensign (my daughter) concurs.Hi Vic
See below
Let me know if you want me to scan these pages and send them over email
View attachment 321281
View attachment 321282

WELL DONE MATE, THE BOLD ROPE ON THE EDGE ARE VERY WELL DONE. I STILL HAVE THE BOOK OF THE ARQUITECTURA NAVAL RESERVED FOR YOU. TH REST HA ONE ASWELL THE TOOLS. YOU WILL NOR SEE ME VERT MUCH IN FUTURE HERE ON S.O.SBUR YOU CAB CONTACT MY IN MY MAIL....PEANDERSEN@TELEFONICA.NETWorking on the main yard/sail took more time than expected !!!
Living in the South of France when your grandchildren are visiting for the summer does not leave a lot of time for the shipyard
The main sail is now installed, and rigging will be the next step.
Below some pictures
View attachment 321288
View attachment 321289
View attachment 321290
View attachment 321291
View attachment 321292
View attachment 321293
IN FACT, THE PICTURE ARE MINE-SAEND TO GILBERT- ELCAPILooks like you followed the sail rigging plans well, Gilbert! The rigging for the braces on the sprit mast sail wasn’t according to the SR instructions, but that would be impossible because of the intervening sail. I think there’s enough space on the black line below the jib sail to place the brace blocks, so I think I’ll try that. You’re a sold builder, Gilbert.
YOU CAN ALWAYS CONTACT ME AT ON----PEANDERSEN@TELEFONICA.NET


