Great job so far. What, pray tell, was the issue with the rear of the ship?Hello
Good progress since my last post on Sunday.
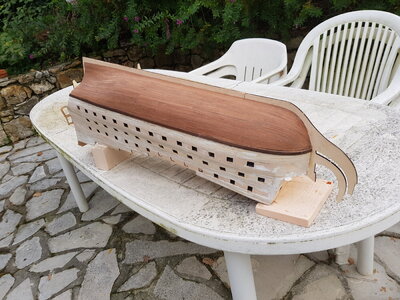
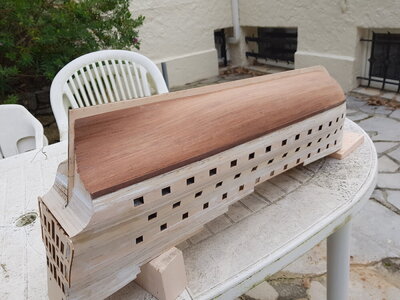
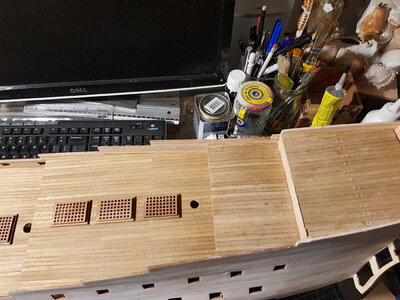
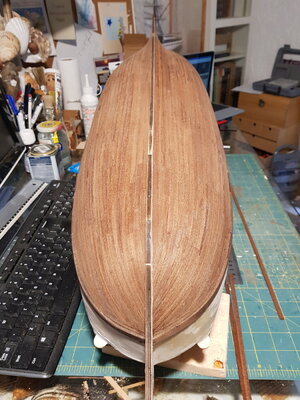
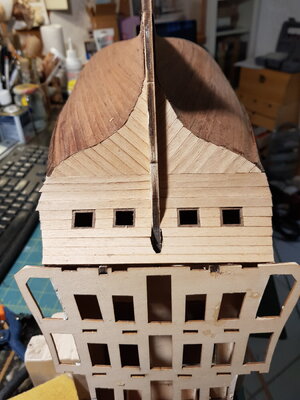
The issue I had aligning the stern has been solved and both stern and bow have been installed
View attachment 195253
View attachment 195254
View attachment 195255
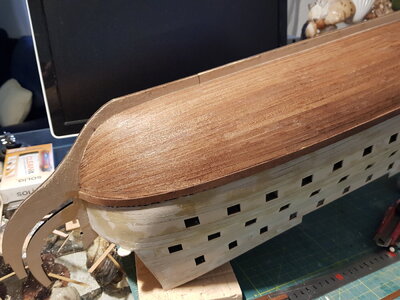
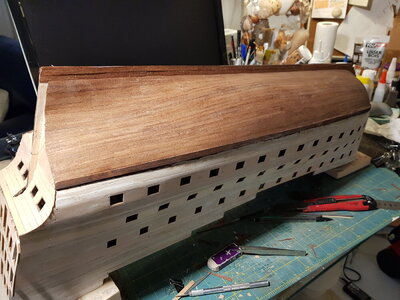
Installed all the canon boxes and mounted the 3 layers of portholes on one side(not sure about the name in English- it's called "sabord" in French and Google translate gives me porthole as translation).
I glued the canon boxes vertically rather than horizontally (documented in the instructions). They do not fit with the bulkheads otherwise.
Started the same on the other side, but still some work to do here.
This will be for tomorrow.
View attachment 195256
View attachment 195257
View attachment 195258
View attachment 195259
View attachment 195260
View attachment 195261
-

Win a Free Custom Engraved Brass Coin!!!
As a way to introduce our brass coins to the community, we will raffle off a free coin during the month of August. Follow link ABOVE for instructions for entering.
-

PRE-ORDER SHIPS IN SCALE TODAY!
The beloved Ships in Scale Magazine is back and charting a new course for 2026!
Discover new skills, new techniques, and new inspirations in every issue.
NOTE THAT OUR FIRST ISSUE WILL BE JAN/FEB 2026
You are using an out of date browser. It may not display this or other websites correctly.
You should upgrade or use an alternative browser.
You should upgrade or use an alternative browser.
Me too.I have never made a porthole that looks that good.
Well done.
Hello VfordyceGreat job so far. What, pray tell, was the issue with the rear of the ship?
The issue was related to the angle of the last bulkhead.
Furthermore I have just realisez, installing the planks at the stern, that the poop deck was leaning forward way too much and I have made some corrections.
I'll explain this in my next post.
Hello
I have completed the planking around the bow and stern decks.
When doing so, I realized that the slope of the poop deck (the one before the last deck on the stern) was quite sharp. I also realized that the space between the quarter deck and the poop deck was too narrow to insert the windows and various elements provided in the kit.
See below this view when following the model:
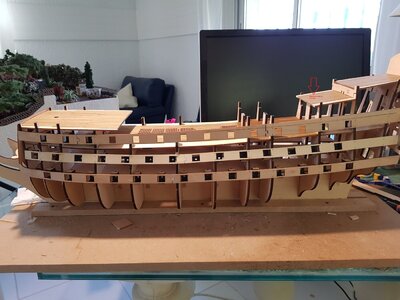
I have therefore adjusted with a 5mm balsa on bulkhead #10. I feel that it does look nicer. See below
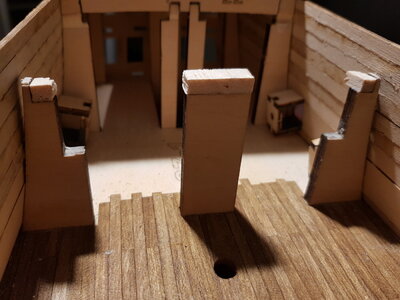
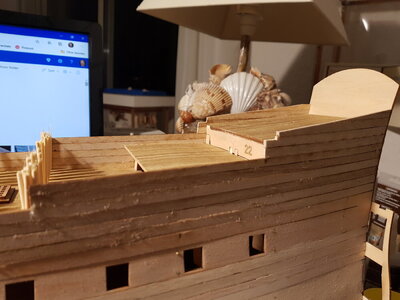
I also realized that gluing the 2 upper decks prior to doing the planking was not a good idea and I had to take them out for some adjustments.
In the meantime, I did the treenails on the various decks (still the lower deck to be completed)
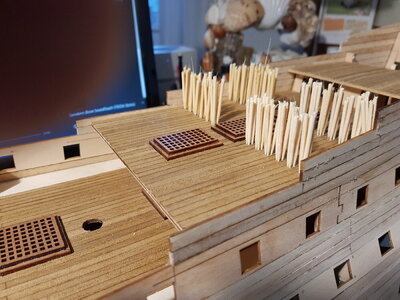
I'll get going with sanding the hull starting tomorrow. This will definitely require some time to complete.
I have completed the planking around the bow and stern decks.
When doing so, I realized that the slope of the poop deck (the one before the last deck on the stern) was quite sharp. I also realized that the space between the quarter deck and the poop deck was too narrow to insert the windows and various elements provided in the kit.
See below this view when following the model:

I have therefore adjusted with a 5mm balsa on bulkhead #10. I feel that it does look nicer. See below


I also realized that gluing the 2 upper decks prior to doing the planking was not a good idea and I had to take them out for some adjustments.
In the meantime, I did the treenails on the various decks (still the lower deck to be completed)

I'll get going with sanding the hull starting tomorrow. This will definitely require some time to complete.
Hello
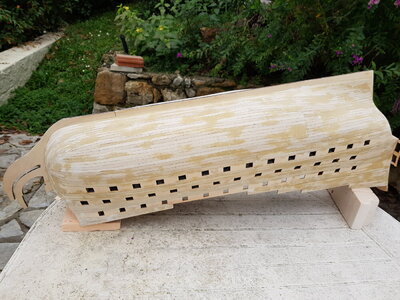
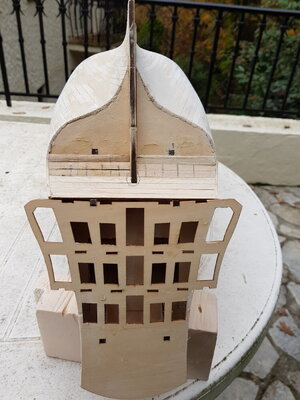
I spent quite a bit of time this week on the hull: sanding and gap filling.
I feel that I am getting there and believe that I am close to be ready for the second layer of planking.
I would appreciate the feedback of the community on the hull as it stands today.
Your input is welcome on things to work on or adjust.
See pictures below
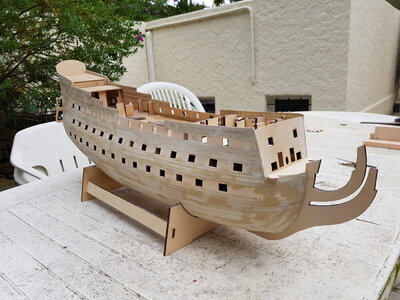
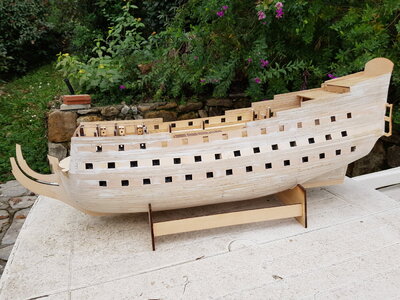
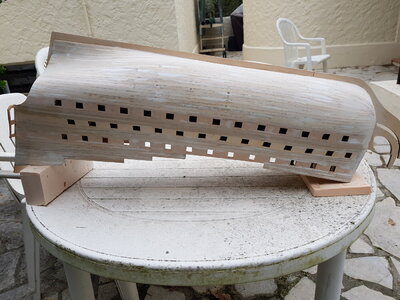
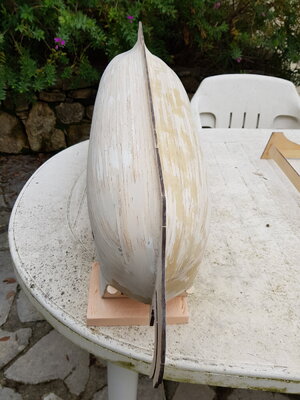


You are making a good foundation for the final planning. I know, it takes time, and a burden job to feel\sand all of the imperfections, but...you will be rewarded for sure with a nice, smooth planking layer. Keep up a good job! 

Bravo - it is looking very good and we can see at the putty, that you did also a very good job with fairing the bulkheads before - your planks are "flowing" and have no buckles !!!!
Really good work and a very good basis for the further work
One question: did you use two different types of filler? One side is more or less white, the other side of the hull more sand color.....
Really good work and a very good basis for the further work
One question: did you use two different types of filler? One side is more or less white, the other side of the hull more sand color.....
Hi UweBravo - it is looking very good and we can see at the putty, that you did also a very good job with fairing the bulkheads before - your planks are "flowing" and have no buckles !!!!
Really good work and a very good basis for the further work
One question: did you use two different types of filler? One side is more or less white, the other side of the hull more sand color.....
THanks for your feedback.
You are correct, I used 2 different kind of filler. The first one I used (the brown one) was kind of dry and hard to sand. I decided to get a new one for the other side of the hull and it turned out that it was white.
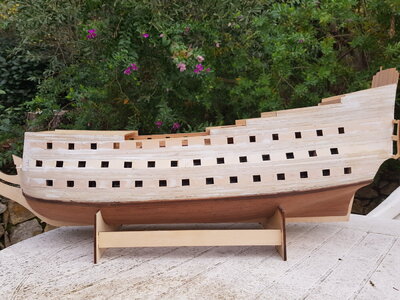
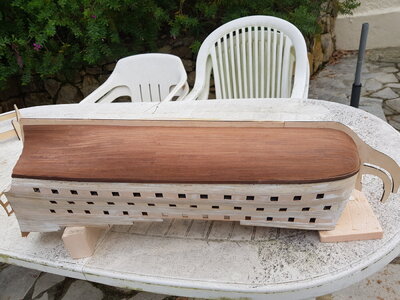
Work during the last few days has been focusing on several aspects:
Steps for next week will include:
- Gunports at the stern and planking of the stern
- Lower wale and bottom second layer of planking on the starboard side.
Question to the community: are you using varnish or oil on top of the second layer planking (it's sapeli)? Input welcome
Merry Christmas and Happy New Year to all
- Finalizing the hull to be ready for second layer of planking
- Some work on the decks on making tree nails for all decks and planking of the side of the decks (did one side so far)
- Second layer of planking for the bottom of the hull, under the lower wale, on the port side


Steps for next week will include:
- Gunports at the stern and planking of the stern
- Lower wale and bottom second layer of planking on the starboard side.
Question to the community: are you using varnish or oil on top of the second layer planking (it's sapeli)? Input welcome
Merry Christmas and Happy New Year to all
I used tung oil on the Black Pearl. It really brought out the beauty of the wood. Unfortunately, glue doesn't stick to it very well. I used satin polyurethane on the deck of my Constitution and liked the results. I used satin varnish on painted parts with great satisfaction. Just my limited personal experience. Wow, I'm not looking forward to all those guns.Work during the last few days has been focusing on several aspects:
See the updated pictures below
- Finalizing the hull to be ready for second layer of planking
- Some work on the decks on making tree nails for all decks and planking of the side of the decks (did one side so far)
- Second layer of planking for the bottom of the hull, under the lower wale, on the port side
View attachment 201556
View attachment 201557
View attachment 201558
View attachment 201559View attachment 201560
Steps for next week will include:
- Gunports at the stern and planking of the stern
- Lower wale and bottom second layer of planking on the starboard side.
Question to the community: are you using varnish or oil on top of the second layer planking (it's sapeli)? Input welcome
Merry Christmas and Happy New Year to all
That's a lot of toothpicks. It make me wonder if drilling hols and swiping on some putty might be easier.Work during the last few days has been focusing on several aspects:
See the updated pictures below
- Finalizing the hull to be ready for second layer of planking
- Some work on the decks on making tree nails for all decks and planking of the side of the decks (did one side so far)
- Second layer of planking for the bottom of the hull, under the lower wale, on the port side
View attachment 201556
View attachment 201557
View attachment 201558
View attachment 201559View attachment 201560
Steps for next week will include:
- Gunports at the stern and planking of the stern
- Lower wale and bottom second layer of planking on the starboard side.
Question to the community: are you using varnish or oil on top of the second layer planking (it's sapeli)? Input welcome
Merry Christmas and Happy New Year to all
- Joined
- Dec 27, 2019
- Messages
- 551
- Points
- 308

Looking good Gilbert. You are setting high standards for me.Work during the last few days has been focusing on several aspects:
See the updated pictures below
- Finalizing the hull to be ready for second layer of planking
- Some work on the decks on making tree nails for all decks and planking of the side of the decks (did one side so far)
- Second layer of planking for the bottom of the hull, under the lower wale, on the port side
View attachment 201556
View attachment 201557
View attachment 201558
View attachment 201559View attachment 201560
Steps for next week will include:
- Gunports at the stern and planking of the stern
- Lower wale and bottom second layer of planking on the starboard side.
Question to the community: are you using varnish or oil on top of the second layer planking (it's sapeli)? Input welcome
Merry Christmas and Happy New Year to all
Hi VicThat's a lot of toothpicks. It make me wonder if drilling hols and swiping on some putty might be easier.
Yes, indeed a lot of bamboo sticks.
I drilled 0.8mm holes using Dremel and then inserted the sticks.
The longest is definitely drilling the holes.
Hello all
Below the update for this week:
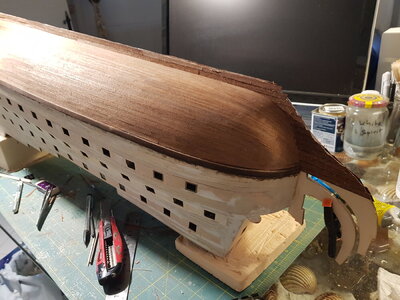
- Lower wale on the port side is installed as well as the second layer planking below the wale. The bottom of the hull second layer planking is now complete; need some sanding and oil.
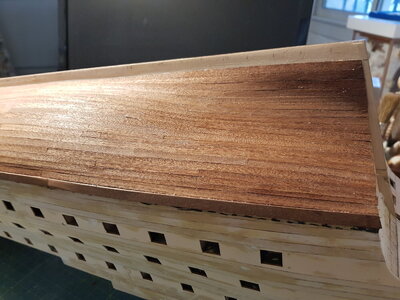
- I have opened the gun ports at the stern, inserted the gun port frames and planked the stern
- I also started to plank the keel (work in progress)
Planned for next week:
- Sanding of the lower par of the hull + oil
- Sanding of the stern + continue planking
- Continue planking of the keel and the bow
- Upper wale + second layer planking above the wales
Happy New Year to all
Below the update for this week:
- Lower wale on the port side is installed as well as the second layer planking below the wale. The bottom of the hull second layer planking is now complete; need some sanding and oil.


- I have opened the gun ports at the stern, inserted the gun port frames and planked the stern

- I also started to plank the keel (work in progress)


Planned for next week:
- Sanding of the lower par of the hull + oil
- Sanding of the stern + continue planking
- Continue planking of the keel and the bow
- Upper wale + second layer planking above the wales
Happy New Year to all
be careful of oils, some will inhibit the adhesion of adhesives....gluesHello all
Below the update for this week:
- Lower wale on the port side is installed as well as the second layer planking below the wale. The bottom of the hull second layer planking is now complete; need some sanding and oil.
View attachment 203191
View attachment 203192
View attachment 203193
- I have opened the gun ports at the stern, inserted the gun port frames and planked the stern
View attachment 203194
- I also started to plank the keel (work in progress)
View attachment 203195View attachment 203196
Planned for next week:
- Sanding of the lower par of the hull + oil
- Sanding of the stern + continue planking
- Continue planking of the keel and the bow
- Upper wale + second layer planking above the wales
Happy New Year to all
Hi Ken
Thanks for your input
In fact I am planning to use something called "fondur" in French (no idea in English)
See https://www.freresnordin.fr/fondur-sev-p-261.html#
Thanks for your input
In fact I am planning to use something called "fondur" in French (no idea in English)
See https://www.freresnordin.fr/fondur-sev-p-261.html#
Looks like it is a kind off Wood Sanding Sealer or Wood Conditioner. To be used before staining.
Translated from the French company using Google Translator
Ultra-fast-drying cellulosic filler, giving the wood a pleasant softness to the touch, making it possible to fix the Nordin Brothers Water Tints and to prepare the wood for the waxed or varnished finish (1l = approximately 10-12m²).
On prepared wood (exposed, stained, limed, etc.)
DIRECTIONS FOR USE
1. Spread Fondur SEV with an Extra Fine Wick in the grain, repeat 2 or 3 times
2. Equalize with Extra Fine Steel Wool between each coat
3. Then carry out your finishing:
- traditional patina: (Mattine Gomme Lacquer and Cire à patiner)
- transparent waxed patina: (Encaustic Paste)
Cheers
Daniel
PS: In Spanish I used to call these products "Tapa Poros".
Hi DanielLooks like it is a kind off Wood Sanding Sealer or Wood Conditioner. To be used before staining.
Translated from the French company using Google Translator
Ultra-fast-drying cellulosic filler, giving the wood a pleasant softness to the touch, making it possible to fix the Nordin Brothers Water Tints and to prepare the wood for the waxed or varnished finish (1l = approximately 10-12m²).
On prepared wood (exposed, stained, limed, etc.)
DIRECTIONS FOR USE
1. Spread Fondur SEV with an Extra Fine Wick in the grain, repeat 2 or 3 times
2. Equalize with Extra Fine Steel Wool between each coat
3. Then carry out your finishing:
- traditional patina: (Mattine Gomme Lacquer and Cire à patiner)
- transparent waxed patina: (Encaustic Paste)
Cheers
Daniel
PS: In Spanish I used to call these products "Tapa Poros".
Thanks for the translation
Hello all
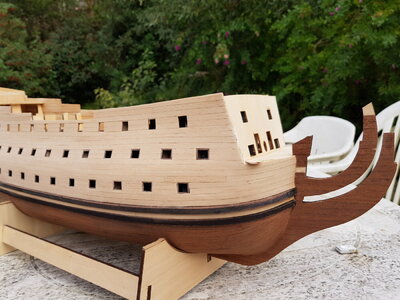
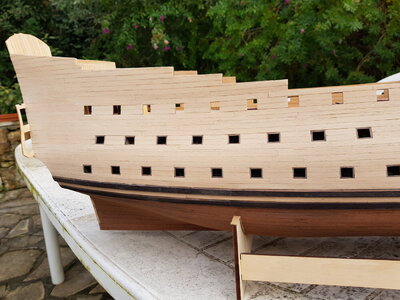
I first installed all the canon frames in the portholes on the starboard side. Quite laborious since most of the frames are slightly too large for the portholes. Filing the frames without breaking them is definitely the risk (I broke only 2 or 3, not too bad).
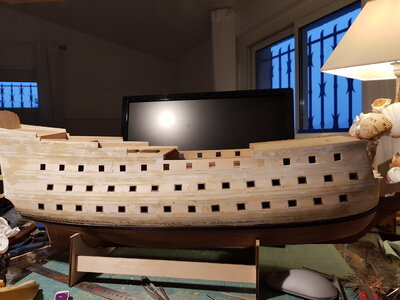
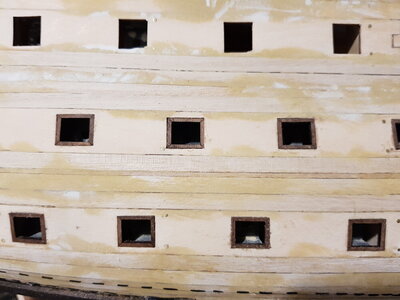
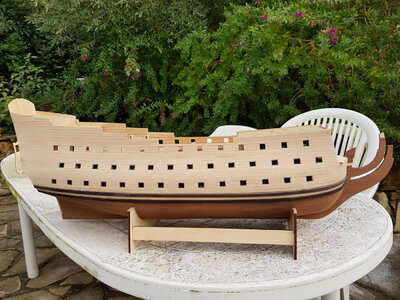
I then installed the upper wale and planked the upper part of the hull on the starboard side using beech planks provided in the kit.
After sanding, the hull is looking quite nice.
Planned for next week:
- Canon frames on the port side
- Second wale on port side and planking above the wale
I first installed all the canon frames in the portholes on the starboard side. Quite laborious since most of the frames are slightly too large for the portholes. Filing the frames without breaking them is definitely the risk (I broke only 2 or 3, not too bad).


I then installed the upper wale and planked the upper part of the hull on the starboard side using beech planks provided in the kit.
After sanding, the hull is looking quite nice.


Planned for next week:
- Canon frames on the port side
- Second wale on port side and planking above the wale
hi gilbert. got the instructions and thank you. were the instructions hard to follow? thanks again and will follow your build with great interest. hope to start my build very soon.


