17th Century Battle Station

Hello All!!

Well while Dave and Mike have been working so hard on this project I have been slackening off a little. So I thought it was maybe time to show some progress on my part, before any keel hauling or loss of grog rations begins.
I have just finished making the columns for each of the models. We had the choice of a few different styles to choose from and as it ended up everyone choose a different one. It is now official all models will not be exactly the same, and therefore impossible to ever offer as a kit;)(not that it ever was going to be).
Columns are made from 1/4" square cherry stock, turned on a Sherline lathe and in the case of the tapered ones shaped using sanding sticks.
IMG_3277.JPG
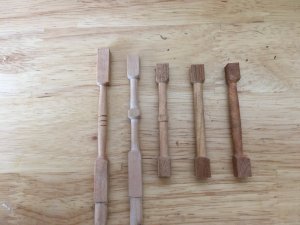
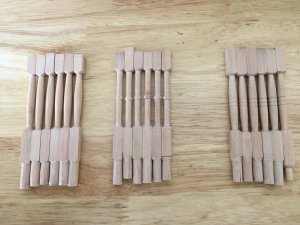
This what we had to choose from, the three on the end have been treated with poly. If you notice the end one on the right is a little off centre, this due to using a four jaw chuck that is not self centring. Independent jaws are typically much more accurate, but I found that with wood and each jaw applying a different pressure it was very hard to centre using my four jaw chuck. The two on the right show that by carving and filing the end round I was able to use my self centring three jaw chuck with better and more consistent results.
IMG_3275.JPG

Here are the final results from left to right are Dave's, Mike's and then mine. These are not cut to length, each modeller will be responsible for that. Included is one extra for each of us, just in case something goes wrong.
Hope you enjoyed.
 
Hello All!!

Well while Dave and Mike have been working so hard on this project I have been slackening off a little. So I thought it was maybe time to show some progress on my part, before any keel hauling or loss of grog rations begins.
I have just finished making the columns for each of the models. We had the choice of a few different styles to choose from and as it ended up everyone choose a different one. It is now official all models will not be exactly the same, and therefore impossible to ever offer as a kit;)(not that it ever was going to be).
Columns are made from 1/4" square cherry stock, turned on a Sherline lathe and in the case of the tapered ones shaped using sanding sticks.

View attachment 41032
This what we had to choose from, the three on the end have been treated with poly. If you notice the end one on the right is a little off centre, this due to using a four jaw chuck that is not self centring. Independent jaws are typically much more accurate, but I found that with wood and each jaw applying a different pressure it was very hard to centre using my four jaw chuck. The two on the right show that by carving and filing the end round I was able to use my self centring three jaw chuck with better and more consistent results.

View attachment 41033

Here are the final results from left to right are Dave's, Mike's and then mine. These are not cut to length, each modeller will be responsible for that. Included is one extra for each of us, just in case something goes wrong.
Hope you enjoyed.
They are all looking very good.....good work!
 
Looks excellent Don!! I should have an update on the next batch of laser cut parts soon!
 
A few more update photos as the fabrication of parts nears the end.

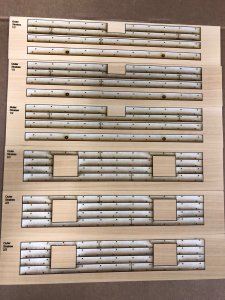
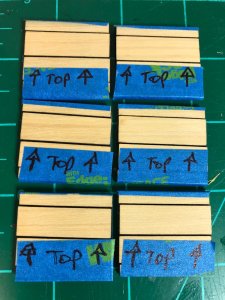
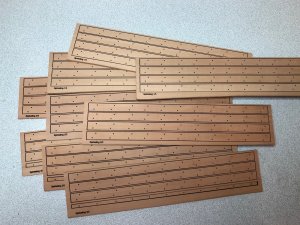
Each outer cannon port lid includes 4 boxwood planks. These were laser cut and randomized for later assembly.
IMG_0877.JPG

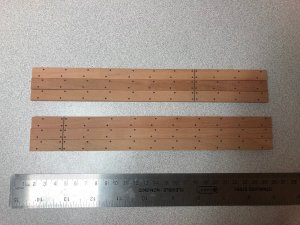
3 sets of the pair of Channel Wales in Swiss Pear. I may not have mentioned, the treenails are "deep etched" and will hold up to surface/finish sanding.
IMG_0891.JPG

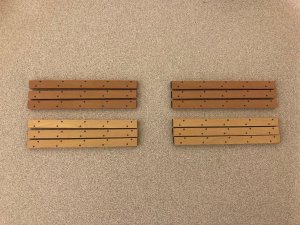
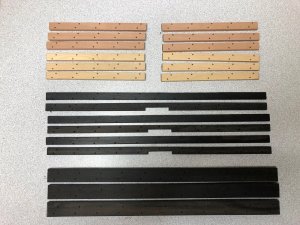
The Great Wale spans the upper gunport so is cut into two parts. We did 3 sets in both Swiss Pear and Boxwood. Builder's choice upon assembly.
IMG_0892.JPG

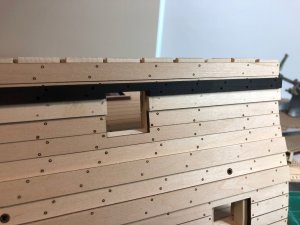
Here is the test fit of one of the black sheer strakes, laser cut in Ebony placed on the prototype. The 1/16" height reduction was due to an earlier design change.
IMG_0893.JPG

Parts: Great Wale, Sheer Strakes, Lower Wale
IMG_0901.JPG
 
Looking great, Mike! Are the treenails simulated in the ebony pieces, or are they through and through holes to place our own treenails? If they are through holes, what color treenail would we use? Bamboo has an open end grain and would be darker than birch toothpick and might work well. I'll run some tests.
 
Looking great, Mike! Are the treenails simulated in the ebony pieces, or are they through and through holes to place our own treenails? If they are through holes, what color treenail would we use? Bamboo has an open end grain and would be darker than birch toothpick and might work well. I'll run some tests.

The treenails are simulated deep etched in the ebony like all the rest. You might see through a couple of them on one of the sheer strakes. That was an error on my part. The nice thing is, you can either keep the etched treenails or easily manually drill thru them and refill them with another material. Uncharted ground...
 
We got this email from Don (I hope you don't mind my posting this, Don). He's been busy!

"Good morning guys.
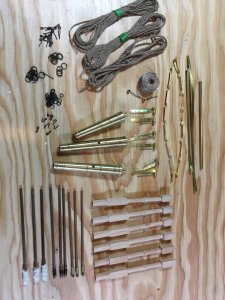
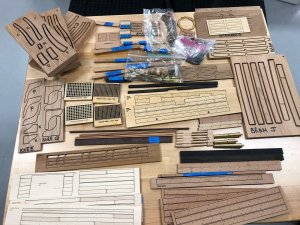
I have attached a picture of the parts coming from the great North, I'm hoping I have remembered everything. The parts are as follows:
Three cannons - two sizes
Brass rod for trunnions
Two pre bent brass strips for cap squares or trunnion straps
Two spare brass strips
Rope for running rigging(made from 3 wraps of 4 strand)
Breaching rope(made from 3 wraps of the running rigging rope)
Seizing rope
Two spare parts for hinges
Three sets of hinges
Six columns
Eyebolts, rings and hooks
Cannon tools

Note:

The package will also include copper cap squares, these are 2 mm wide versus the 3 mm wide brass ones...builders choice
While making up the packages I noticed the hooks and eyebolts maybe a little too small for the rope so I will make some slightly larger ones this morning to include in the packages
The screws and powder scoops are not glued to the wooden dowel, I was not sure if the walnut handles would be the choice for everyone but that was all I had. If you decide to change the diameter required is 2 mm. If you do decide to change let me know, I can send some of the material for the sponge then.

Have a good look and let me know if something else is required.

Thanks

Don"

There will be three sets of these parts, one for each kit. Don and Mike are working on blocks needed for rigging. We are getting close!!!!!Don's parts.JPG
 
Gents what a beatiful project and fantastic cooperation. I am amazed to see the capabilities of the current cnc machines. I think in a few years it must be affordable to have these for hobby at home. For our hobby this will be the way forward instead of 3d printing which is using plastics instead of the real deal. Ship building without wood dust makes it far less fun.
 
Back
Top