-

Win a Free Custom Engraved Brass Coin!!!
As a way to introduce our brass coins to the community, we will raffle off a free coin during the month of August. Follow link ABOVE for instructions for entering.
-

PRE-ORDER SHIPS IN SCALE TODAY!
The beloved Ships in Scale Magazine is back and charting a new course for 2026!
Discover new skills, new techniques, and new inspirations in every issue.
NOTE THAT OUR FIRST ISSUE WILL BE JAN/FEB 2026
You are using an out of date browser. It may not display this or other websites correctly.
You should upgrade or use an alternative browser.
You should upgrade or use an alternative browser.
A beautifull set of Parts......Great work....-and most of the work is done....
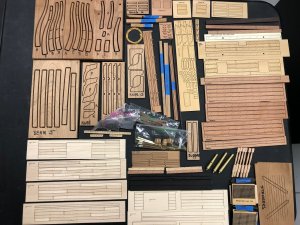
Mike and I have our kits...Don will have his shortly. That means we'll begin our build logs soon. This is going to be fun!
Does this mean, that we can expect three logs? Would be great......Mike and I have our kits...Don will have his shortly. That means we'll begin our build logs soon. This is going to be fun!
Absolutely Uwe, 3 separate logs. I expect each will be a little different from the others.
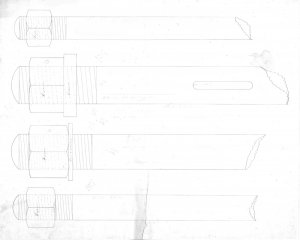
Mike milled the frames before I could let him know of an option we could include. Looking at Goodwin's book "The Construction and Fitting of the English Man of War ,1650-1850" the frames would have been bolted together, with a prominent scarf joint just below the level of the weather deck . The first photo from Goodwin's book shows the layout. The second is what I plan to do with the exposed frames: a simulated scarf joint and bolts. The question is, how big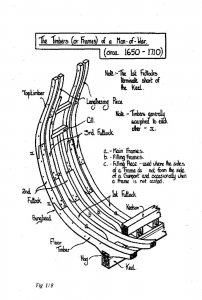
 would those bolt heads have been? Goodwin gives no clue, and I couldn't find the answer in Steel's book either. Anyone hazard an educated guess?

 would those bolt heads have been? Goodwin gives no clue, and I couldn't find the answer in Steel's book either. Anyone hazard an educated guess?
In the end, I'll probably just go with whatever pleases the eye. It's pretty much what I did for the scarf location
In scale 1:48 I try usually to make the nail head between 0,5mm to max 0,8mm, sometimes for deck planking 0,35mm. The rule by Boudriot is, that the head should be max 1/4 of the thickness of the timber fixed......I would suggest to try 0,5 and 0,8 and decide what is looking best....
- Joined
- Dec 1, 2016
- Messages
- 6,379
- Points
- 728

- Joined
- Dec 1, 2016
- Messages
- 6,379
- Points
- 728

just a quick peek I found several references to bolts. Now I see why a scale or dimensions are not on the drawing it is because the specs are in the text.
if you read through all of the text you may find references to bolts and their sizes once you know the dia. then you can figure out the head and nut sizes off the drawings.
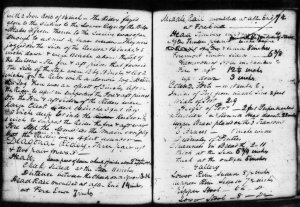
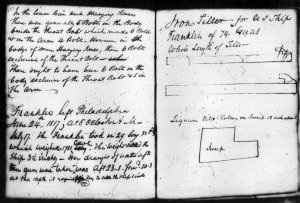
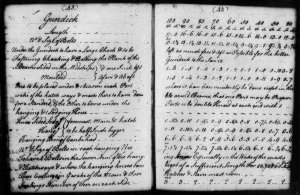
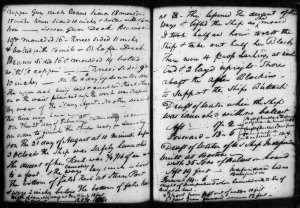
if you read through all of the text you may find references to bolts and their sizes once you know the dia. then you can figure out the head and nut sizes off the drawings.


- Joined
- Dec 1, 2016
- Messages
- 6,379
- Points
- 728

well it is better than just a random guess at least this is a historical reference to using bolts in wooden ship building.
if you want to go through this page by page Model Ship Builder has a transcribed version
if you want to go through this page by page Model Ship Builder has a transcribed version
Thanks Dave! I checked out Humphrey's notebook. For a vessel of 50 guns, 1-1/4" bolt diameter was specified. Base on modern bolt head to shaft ratios, the bolt head would have been about 2" in diameter. Answers my question!
- Joined
- Dec 1, 2016
- Messages
- 6,379
- Points
- 728

happy to have been a help
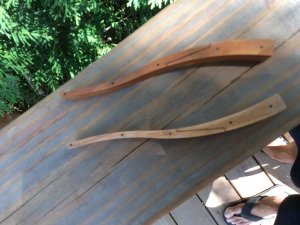
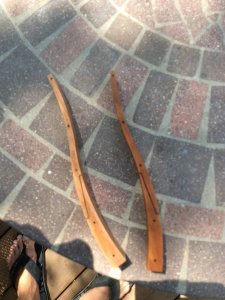
In looking at the frames above you notice the difference in the color of the cherry between the two. This is fairly typical of cherry. Since these two frames are a focal point, I want to make sure that they look similar. I use a special stain mix of standard and gel cherry stain on full sized furniture. It works great even on lighter cherry sapwood. I think I’ll give the frame on the left a swipe!
In view of our commitment to no paint or stain, I coated the pieces with boiled linseed oil which will darken cherry, including sapwood. Picture when dry.
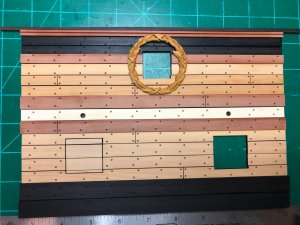
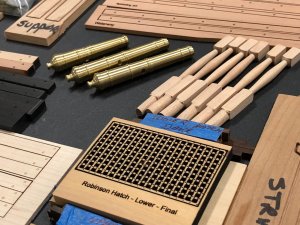
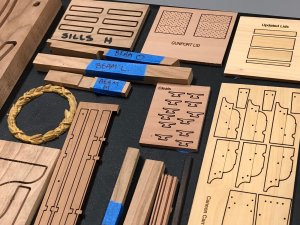
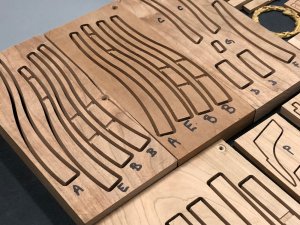
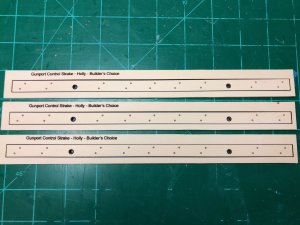
This project takes a bit of a different approach and uses some techniques not generally seen in the hobby. The Admiral and I own a home business making wedding and anniversary gifts. Our investment into this business allowed us to purchase both a CNC machine and a 60 watt laser. I have recently begun to take advantage of these tools within the modeling hobby. I have partnered with two of my long-time modeling friends Dave "Doc" Blake and Don Robinson to scratch build not just 1 but 3 examples of a 17th century battle station based upon Jeff Staudt's plans. The models will be in 1:32 scale and exhibit the following features:
- Use of both CNC and laser for the fabrication of parts. In some cases parts may be fabricated using a combination of both tools.
- Over 200 parts - all architecturally dimensioned for perfect fit including the planking. Very little manual cutting, sanding, or shaping.
- Experimental laser etched details to include properly scaled treenails and the use of laser char to simulate plank caulking.
- Paint-with-wood. Entire model built from various custom milled hardwoods. No paint or stains will be used (we hope). Thanks Dave!
- Hand turned brass cannon and custom fabricated metal work. Thanks Don!
- The use of Google Sheets for real-time collaboration of technical details such as part numbers, dimensions, machine specs, etc.
- Much more ...
Prior to starting this log, we did a bunch of work up-front to include:
- Imported all of Jeff's drawings into CAD software, cleaned them up, made corrections where needed
- Rendered each of the parts for either CNC cutting or laser cutting... or in some cases both
- Test cut prototypes of all 200 parts in poplar and basswood
- Assembled the prototype taking extensive notes and making updates to the design where needed
- Created a spreadsheet of all 200 parts to enable selection of hardwood types, machine method, and grouping
Our next step is for Dave to work on hardwood selection and milling while Don turns the 9 brass cannon required for the project.
Attached are a few pictures of the prototype. We are very excited to share this with you and hope you enjoy the ride.
Mike Shanks
Dave Blake
Don Robinson
View attachment 35361View attachment 35362View attachment 35363View attachment 35364View attachment 35365View attachment 35366
Very nice , Mike! Reading the lot now
Ted
Very nice , Mike! Reading the lot now
Ted
Thanks Ted. My build log is out there... I had some health issues and havent yet finished my final build. Doc finished his and it is stunning. Don's is on the shelf as he is over his head with MarisStella. I am just getting back on my feet and working on some future plans... If you listen to Doc, they might be BIG plans... LOL... so to speak... HAHA... Although I have been away from modeling, I have continued to gain knowledge and skill in CAD and machine fabrication as applied to model building. We have some new techniques to try and share on the horizon. Stay tuned.
Very nice , Mike! Reading the lot now
Ted
Ted - here is the build log of my actual model.. not just the prototype... hope I didn't confuse anyone... There are actually 4 examples of this model:
1. My prototype based on Staudt drawings heavily modified
2. My final build not yet finished
3. Doc Blake's build - finished and beautiful
4. Don Robinson's - on the shelf
Here is mine
Mike's 17th Century Battle Station
After 6 months of collaboration, development, prototyping, fabrication and mailing parts... I took the pile of what was left over and hopefully will be able to assemble my battle station from it. Notice I said "assemble". Although this is a scratch built wooden model, the way we fabricated...
shipsofscale.com


