1805 Virginia Swift by AL

Joined
Oct 1, 2023
Messages
427
Points
168

Here is the start of my build log. This is my third project following the Model Shipways Dory and Pram.
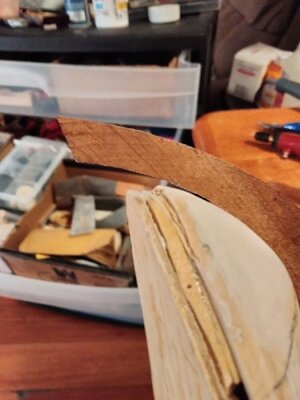
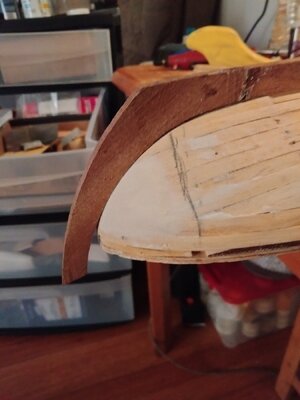
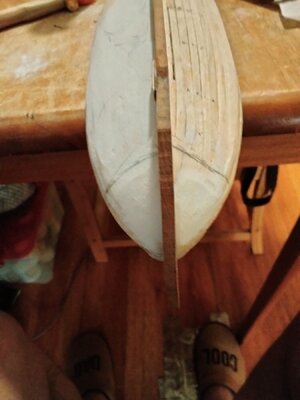
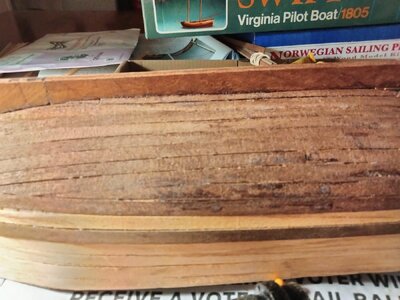
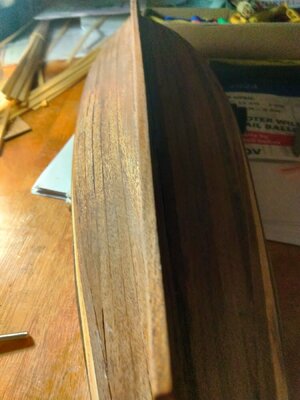
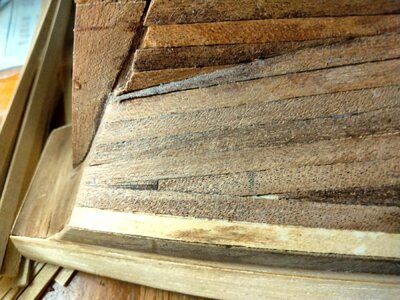
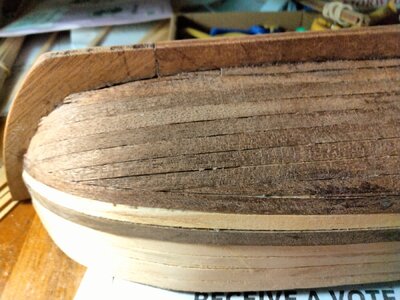
From the attached photos you will find the problem of the day.
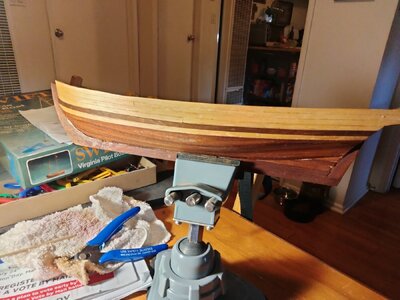
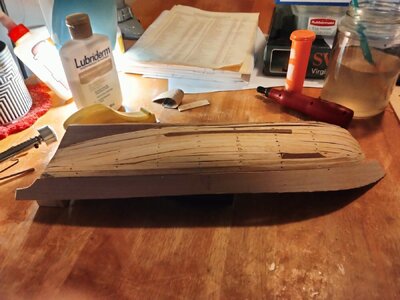
I completed the second planking and started sanding. Let me state, I have never sanded with so much care. The walnut planking varies between .3 and .5mm thick.
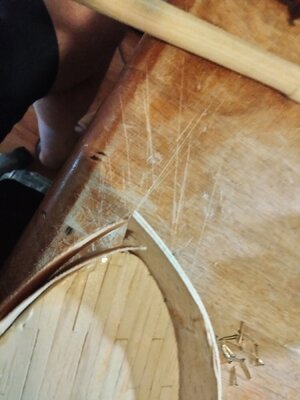
As previously posted, this is a 42 year old kit. The plywood keel was warped and twisted after installing the frames. When I applied heat and moisture to straighten the plywood delaminated. I glued it back together but didn't really get much improvement. I dealt with the twisted frame by installing the deck one frame at a time and shiming the low spots. Same goes for the lower hull. I used model lite filler and varnished after sanding. I used TiteBond original to install the second plank layer. The glue would bleed through the thinner planks. I had a problem with adhesion, in general, due to the filler I used. When I started sanding the plank edges and ends tore out, frequently. I used CA to get the tearouts back in place.
Now I'm fighting the hard spots from CA saturation along with the discoloration.
I realize that any staining and finish will telegraph this glossiness. I have considered not staining and a high gloss finish or saturated the planks with CA and then use a satin finish.
Are either of these ideas workable. I'm certainly open to suggestions.
In closing, I'm having a lot of fun and learning a lot.
Ted Robinson IMG20240125123935.jpgIMG20240128121441.jpg
IMG20240127085535.jpgIMG20240127085433.jpgIMG20240127085419.jpgIMG20240128121441.jpg
 
Looking good so far for working with old wood.

Keep up the posting and photos, remember if you a specific problem or question, just ask and someone should answer sooner or later.
 
Thank you.
I'm wondering how to deal with Pva glue bleed through And Ca splotches on the finish.
 
Hi Ted. If you are serious about achieving a good finish on this model, I would opt for another layer of planking, 0.5-1.0mm thick (but with uniform thickness), and only using water soluble PVA glue to affix the planking to the hull. Have a damp cloth ready so that you can immediately wipe away excess glue.
 
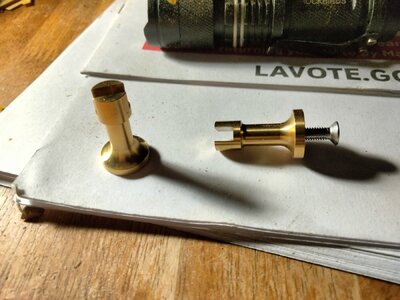
I purchased a set of brass pedestals for use with a display stand . Provisions to display the model were not included with the kit. It appears that trying to mount the hull via the clips will just be looking for a problem. I can just see it snapping the keel in half the first time it gets bumped. If I got longer screws and drilled up into the hull. Mounted with epoxy. What do you think, will it work or should I just design some kind of cradle
IMG20240208090212.jpgIMG20240208090449.jpg

IMG20240208090236.jpg
 
You may notice (in the picture above)that this model has four lime wood planks at the top of the hull instead of the two called for in the plans. Before starting the second planking layer I counted Walnut strips and found I was two strips short. Since this was my first attempt at a second planking layer I decided to keep two extra planks in reserve in case I made an error. I now have two full strips remaining. This begs the question; should I attempt to install them and then where.
 
Hi Ted. If you post a pic of the ship as a whole in profile, we can have a look at where the wales should go. Maybe, you can utilize those planks there.
 
You definitely have a workable hull. Good luck with the rest of the construction process.
 
I purchased a set of brass pedestals for use with a display stand . Provisions to display the model were not included with the kit. It appears that trying to mount the hull via the clips will just be looking for a problem. I can just see it snapping the keel in half the first time it gets bumped. If I got longer screws and drilled up into the hull. Mounted with epoxy. What do you think, will it work or should I just design some kind of cradle
I've used brass pedestals like that for every kit I've built to date... including my two main mast cross section kits. If the slots for the brass pedestals were narrower than the keel I was mounting them too, I marked on the keel where the edges of the brass pedestal would fit, and then carefully removed wood material such that the pedestals would then fit correctly and snugly. As for affixing them to the model and wooden display base, I countersink the bottom of the display base such that the screw head goes inside the base so it can sit flush on whatever shelf I'm placing the model on. I also pre-drill into the keel for the screw.... the same as I would for any product where I'm inserting long screws into hard wood. Forgive me if you already know this, but the drill bit diameter you would use would be smaller than the size of the actual screw... you still want the threads to bite into the wood to secure it. I've never used glue in this process, as the screw should provide more than adequate grip for mounting purposes. However, since you've experienced some delamination issues with your kit, if you do use glue, I'd first test fit everything to make sure it goes together snugly, and then repeat the process using a small amount of white wood glue (not CA).

FWIW, I build this kit as my very first wooden ship model back in the 1980's. I gave that one to a relative who destroyed it when they were moving home locations (lesson learned with that.... I have never given a completed kit away since then). But I liked the kit and had purchased a second one several years later, which is still sitting awaiting a slot on my build schedule. Given that my kit is also nearly thirty years old, I'm hoping I don't suffer similar issues. If the frame is warped, I'll try to address that through clamping and application of first layer planking to bring things back in line. Once that's done, by the time the deck is nailed and glued down, that should hold everything straight and even for the remainder of the dual planking process.

Best wishes for successful completion of your kit, and I look forward to seeing the progress of your build.
Thank you for the information. I couldn't decide if I had to narrow the keel or grind out the brass fitting.
My Swift kit came with two cannons that are no longer provided. You are welcome to the if you want them.
 
The cured CA glue residue will need to be scraped. ALWAYS keep a damp cloth handy when using PVA.
I built this kit as my first also, hull turned out well. I liked that it had a rigging plan, reasonably easy to follow too except didn't know what size line to use and, didn't know at the time but, the color of the large thread was an inappropriate color of green....
For me the build was frustrating. Poor, poor, poor and lacking instructions..
Good luck!
That's where I'm running into a problem. Some of the second layer planking was only .3mm thick. I sanded where I could and coated the hull with Watco.
 
Back
Top