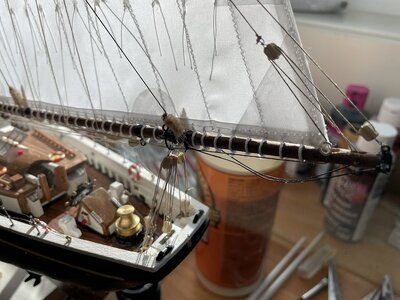
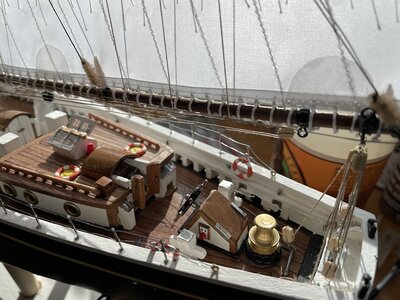
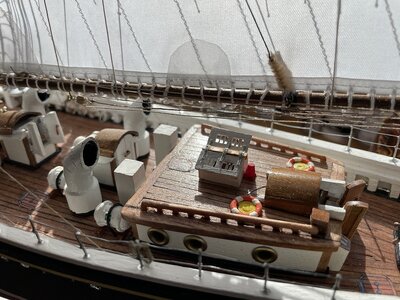
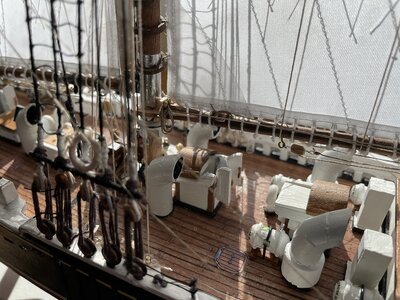
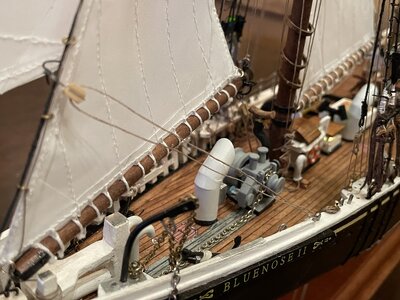
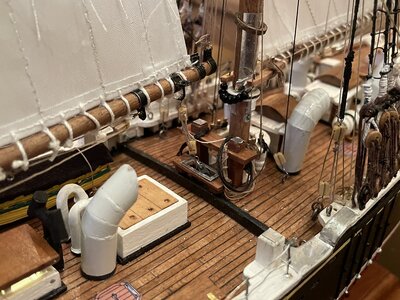
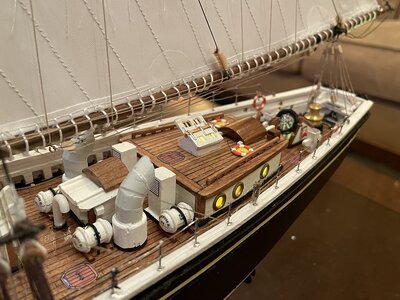
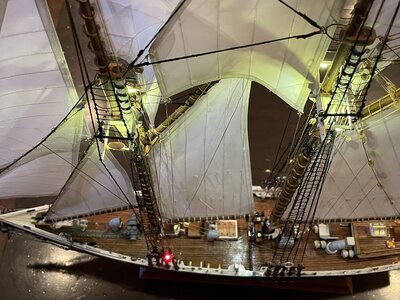
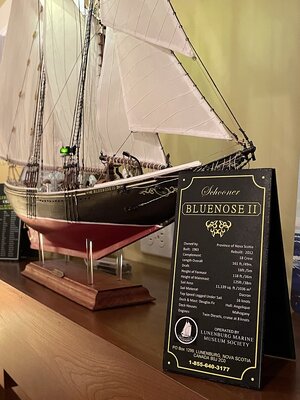
2023 Schooner Bluenose 1:75 Artesania Latina 20500 [COMPLETED BUILD]

Joined
Aug 20, 2023
Messages
6
Points
43

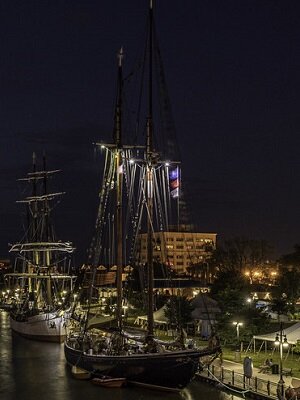
My new hobby started summer of 2023 with an RV vacation that included a visit to historic Lunenburg, NS. While there we got to walk the decks of the Bluenose II and meet the captain. I saw many pricey prebuilt models of the Bluenose while there and once home was inspired to build my own.

I found a vintage unopened Artesania Latina 20500 kit on ebay for $59 and eagerly awaited its arrival. We had a busy summer but finally the kit arrived, it was then I was notified by my spouse I couldn’t start my new project until the kids were back in school. The beginning of September couldn’t come fast enough.

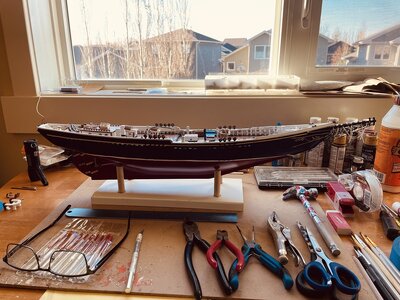
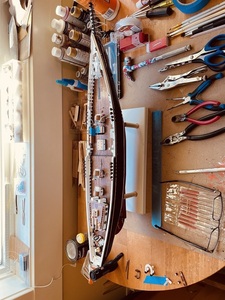
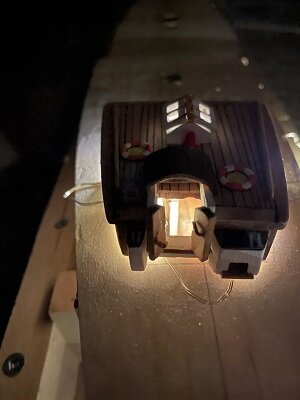
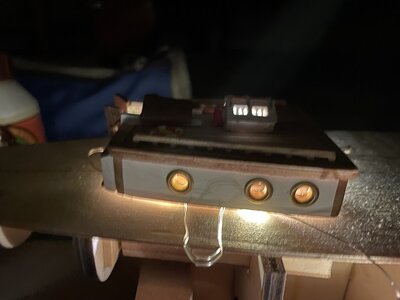
I spent some time opening the kit and planning out my new build. I’ve done many polystyrene models in the past and always enjoyed adding lights and accessories to my kits and decided that I wanted to add the running lights to my Bluenose II. It was about this time while I was collecting reference photos I discovered the Bluenose II virtual tour with above deck and below deck views. I resolved that, even though they are not all that visible through the port holes and access hatches, that I would to do scratch build the interior rooms and areas and light them as well. I also decided that I since there is such good reference for the 2009 rebuild that I would attempt to replicate the Bluenose I had toured in 2023.

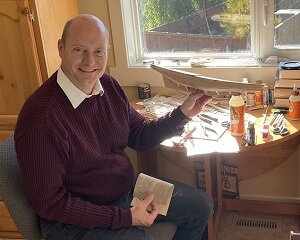
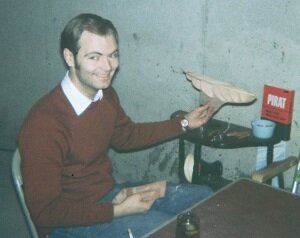
Got started with the build and while I was working on the hull I found an old photo of my father from the 70’s and had a little fun recreating it. Dad was obviously regulated to working in his cold, dark unfinished basement whereas I had a nice south facing window for lots of natural light to work in. Don't know if Dad ever finished his ship or what became of it but it looks like he's having fun.

I’ll post more build photos later, but I just wanted to say hi and thanks for all the information, tips and tricks and general knowledge I’ve been able to glean from all the build logs on the site.
Cliff
0.JPG1.JPG2.JPG3.JPG
 
Great looking work, keep at it and you be done in no time.

The fun part of masts, yards, sails and rigging it all is coming up.
 
  • Like
Reactions: BMT
It's always nice to see the progress of a Bluenose build.
You mentioned running lights; how do you plan on implementing them into your mm model?
 
It's always nice to see the progress of a Bluenose build.
You mentioned running lights; how do you plan on implementing them into your mm model?
Thanks for asking. It all took a little bit of planning but there isn't near as much lighting as some of the star trek models I've completed in the past.
When the hull was still open at the bottom, (as in the photo in my first post) I did all the interior wiring from room to room and cut the deck for the cabin and hatch accesses. I have a headphone jack on the hull (looks a lot like a thru hull fitting) for the battery pack. I used a string of fairy lights that ran through the hull and will continue up the rat lines for the mast lights as seen in reference photo. Wiring continues to stern for the stern light and for the port and starboard red and green lights. (you can see the wires in my first couple of photos poking up on the port and starboard sides). I've included a couple of early lighting test photos I had taken. At this early stage you can still see some bleed through on the cabin top so I had to paint the ceiling black.

49718313031_dc8c66cca6_b.jpgIMG_1235.JPGIMG_1236.JPG
 
Love how it turned out, so much detail. Very stunning, what a show piece. I couldn't hope to get to that level. (Maybe someday)
I didn't do an open hull so only had to build the interior where it was visible through port holes and hatches.
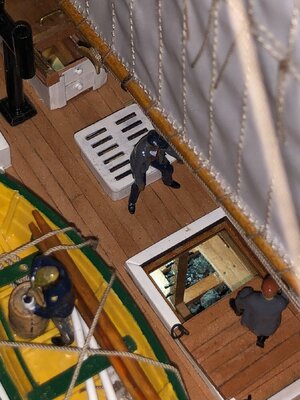
My kids have been asking if I am going to add crew. What did you use for yours and where did you get them? What scale is your Bluenose?
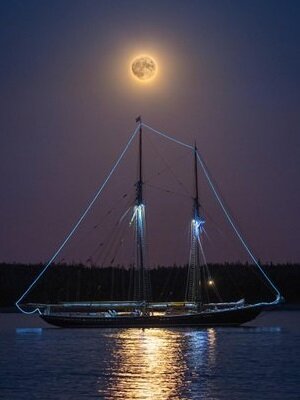
Your lighting reminds me of one of the reference photos I found.
lights1.jpg
 
Love how it turned out, so much detail. Very stunning, what a show piece. I couldn't hope to get to that level. (Maybe someday)
I didn't do an open hull so only had to build the interior where it was visible through port holes and hatches.
My kids have been asking if I am going to add crew. What did you use for yours and where did you get them? What scale is your Bluenose?
Your lighting reminds me of one of the reference photos I found.
View attachment 431988
This was my first full build after a 35-year hiatus and a more recent reastauration of a BB Bluenose. I think that even with limited tools and/or experience one could build a beautiful model.
The scale is 1:72 and the crew are modified figurines from Germania-Figuren:
https://www.super-hobby.nl/products/Shipyard-1914-Workers-01.html
Adding the lights, especially the lights from bowsprit, fore top-, fore main mast to the main boom, turned out to be beyond expectations.
Admittedly, I did quite a number of customizations, which made the build last longer, but is was definitely worth it.
In time, I hope to see some more from your "labor of love".
 
As a person that has never sewn before, the sails seemed like a daunting, looming task. I knew while working on the masts and making mast hoops I would have to eventually need to get some lessons from my wife on how to use her classic Kenmore sewing machine.

After a few sit downs with her and a few different approaches I eventually came up with a procedure that produced adequate results. I had decided to not use the included sepia colored fabric for the sails opting for a whiter modern sail option to mimic the Dacron sails of the Bluenose I had visited in Lunenburg.

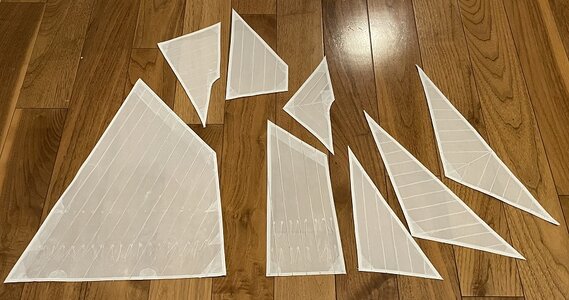
I tried a number of different materials, including cutting up an actual old sail we have in the garage from our Catalina 22. While I was online someone had a suggestion to use an old shower curtain. Surprisingly, it was a pretty close approximation of Dacron and so I tried sewing up a couple of test sails. Nothing seamed to be working right though. Stitching wasn’t straight and holding the edge folds seemed (seamed haha) near impossible. Back to research and I found another tip that worked beautifully. Diluted white glue made the fabric stiff enough to fold and iron so I could get the accurate straight lines that I was looking for.

I thought the stiffness would also allow me to make the sails appear like they are billowing as if filled with wind. I’ve seen many models with perfectly flat sails but I wanted to make a more active looking ship. I didn’t want to have the boat healing with booms way out for the display but wanted to have the sails looking full and as if at the point of needing to spill off a little of the wind with the booms slightly off center.

The true test would be once they were mounted and rigged whether I could pull that look off though.

I added the reinforcement fabric to the corners and along the top of the larger sails that I could see in my reference photos and decided to sew the stitching lines. I tried to pencil them in but wasn't happy with the look. There were a number of different orientations for the stitching on the fore sails. (The Bluenose must have had a number of different sails throughout the years) I added the row reefing lines on the main sail and two rows for the mid sail. It looked like the second row of reef lines on the main sail were never installed even though the sail reinforcement had been included. So I tried to match it all as much as I could.

IMG_1783.JPG.
 
As a person that has never sewn before, the sails seemed like a daunting, looming task. I knew while working on the masts and making mast hoops I would have to eventually need to get some lessons from my wife on how to use her classic Kenmore sewing machine.

After a few sit downs with her and a few different approaches I eventually came up with a procedure that produced adequate results. I had decided to not use the included sepia colored fabric for the sails opting for a whiter modern sail option to mimic the Dacron sails of the Bluenose I had visited in Lunenburg.

I tried a number of different materials, including cutting up an actual old sail we have in the garage from our Catalina 22. While I was online someone had a suggestion to use an old shower curtain. Surprisingly, it was a pretty close approximation of Dacron and so I tried sewing up a couple of test sails. Nothing seamed to be working right though. Stitching wasn’t straight and holding the edge folds seemed (seamed haha) near impossible. Back to research and I found another tip that worked beautifully. Diluted white glue made the fabric stiff enough to fold and iron so I could get the accurate straight lines that I was looking for.

I thought the stiffness would also allow me to make the sails appear like they are billowing as if filled with wind. I’ve seen many models with perfectly flat sails but I wanted to make a more active looking ship. I didn’t want to have the boat healing with booms way out for the display but wanted to have the sails looking full and as if at the point of needing to spill off a little of the wind with the booms slightly off center.

The true test would be once they were mounted and rigged whether I could pull that look off though.

I added the reinforcement fabric to the corners and along the top of the larger sails that I could see in my reference photos and decided to sew the stitching lines. I tried to pencil them in but wasn't happy with the look. There were a number of different orientations for the stitching on the fore sails. (The Bluenose must have had a number of different sails throughout the years) I added the row reefing lines on the main sail and two rows for the mid sail. It looked like the second row of reef lines on the main sail were never installed even though the sail reinforcement had been included. So I tried to match it all as much as I could.

View attachment 434554.
Hi Cliff. An interesting choice for making the sails. I like experimenting ‘out of the box’.
And for shure, ‘bulged sails’ give a ship a nice impression.
Regards, Peter
 
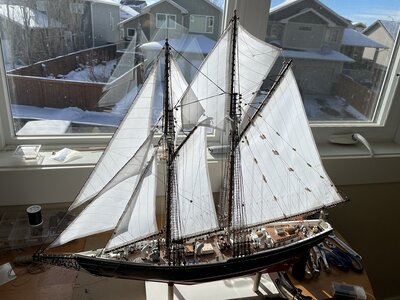
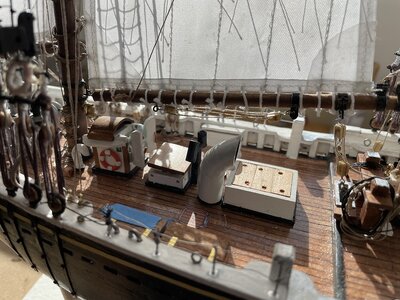
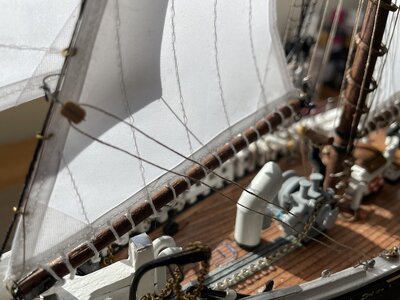
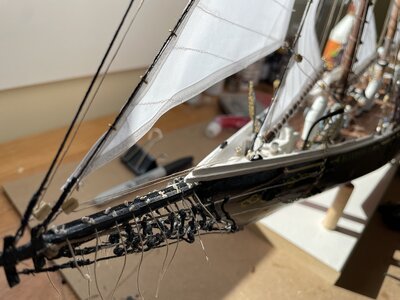
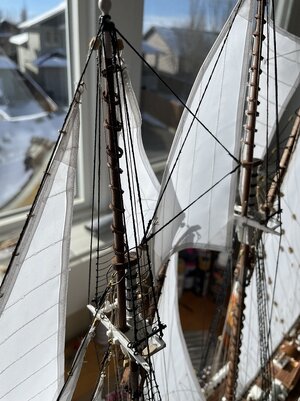
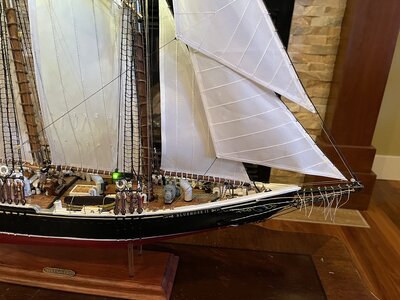
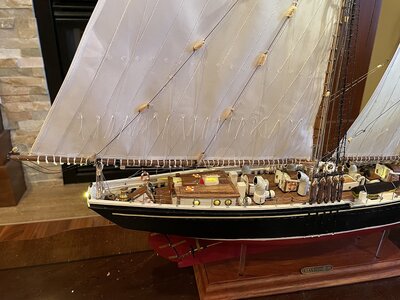
All complete! Well almost, still have a few things to address. Like the flags and the halyards for those and of course a quick cleaning. There are also a few scratches on the hull paint that need touching up from moving it around on my temporary stand.

(Looking at these photos I realized I still have to remove the blue painter’s tape off the life jacket chest that is on the port side deck. I didn’t want the all the life jackets to fall out while I was moving it around).

I’m quite happy with the results and can’t wait to have it up in its permanent display location in the living room.

I learned so much about the process of model ship building, and it gives me a greater appreciation for all the hard work it takes while I’m looking at all the fantastic, competed projects on shipsofscale.

I still have a few items to finish up before it goes on the mantel though. I have to of course build my stand/mount and I want to do up the information sandwich boards that we saw set up when we boarded the Bluenose in Lunenburg for my display.

In the meantime, I thought I’d share a few pics of my Bluenose while its still on the work table in the sunlight.
IMG_1807.JPGIMG_1808.JPGIMG_1809.JPGIMG_1810.JPGIMG_1811.JPGIMG_1812.JPGIMG_1813.JPGIMG_1814.JPGIMG_1815.JPG
 
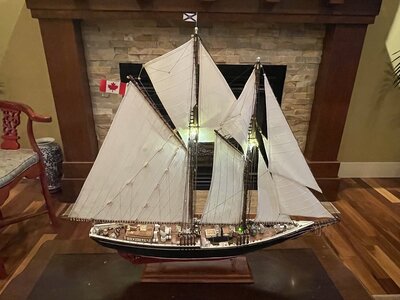
I’ve added the lifeboats, flags and the clean up and touch ups are complete.
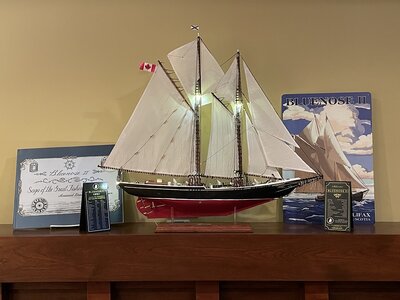
I've added the sandwich boards one for the 2023 sailing schedule and the other for the Bluenose specs as per the ones we saw during our visit to Lunenburg.
It’s now in its place of honour on the living room mantel.
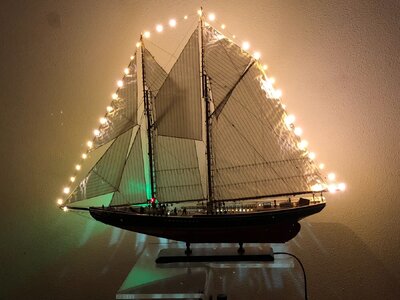
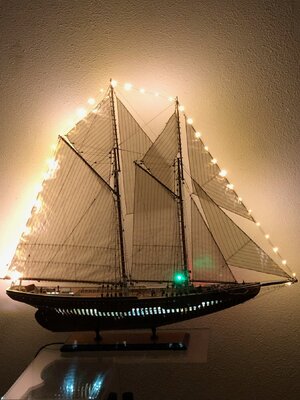
A couple of final pics with the lights on... enjoy!
IMG_1864.JPGIMG_1865.JPGIMG_1866.JPGIMG_1849.JPGIMG_1839.JPGIMG_1838.JPGIMG_1872.JPGIMG_1873.JPGIMG_1875.JPG
 
I’ve added the lifeboats, flags and the clean up and touch ups are complete.
I've added the sandwich boards one for the 2023 sailing schedule and the other for the Bluenose specs as per the ones we saw during our visit to Lunenburg.
It’s now in its place of honour on the living room mantel.
A couple of final pics with the lights on... enjoy!
View attachment 439459View attachment 439460View attachment 439461View attachment 439462View attachment 439463View attachment 439464View attachment 439465View attachment 439466View attachment 439467
Congratulations with this beautiful Bluenose. She is standing very nice in your lining. The sandwich board is also a nice addition.
Regards, Peter
 
I’ve added the lifeboats, flags and the clean up and touch ups are complete.
I've added the sandwich boards one for the 2023 sailing schedule and the other for the Bluenose specs as per the ones we saw during our visit to Lunenburg.
It’s now in its place of honour on the living room mantel.
A couple of final pics with the lights on... enjoy!
View attachment 439459View attachment 439460View attachment 439461View attachment 439462View attachment 439463View attachment 439464View attachment 439465View attachment 439466View attachment 439467
Good evening. A beautiful schooner. I really like the specifications board- lovely touch. Cheers Grant
 
Back
Top