3d printing

so all you 3D print enthusiasts join in and as a team create the cannon used at fort Malden. look close at the image at the top of the web site and you can see the cannon.

 
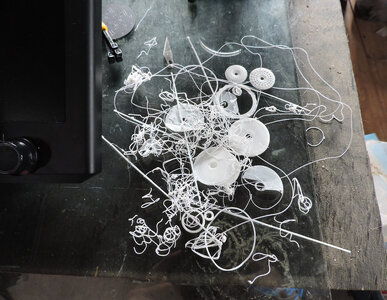
i am good at making spaghetti noodles

DSCN6926.jpg

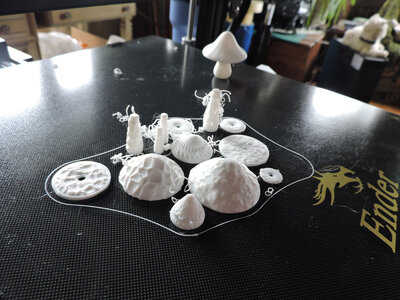
and a few mushrooms

DSCN6927.jpg

a few more tries setting up the print files and tweaking in the printer i will be ready to print the Hancock and Alfred sterns
 
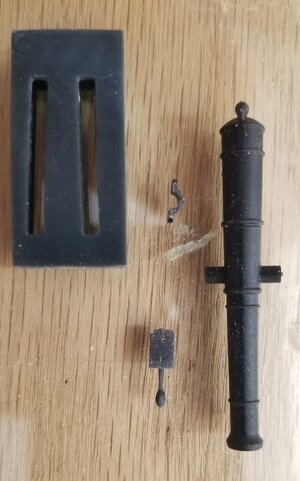
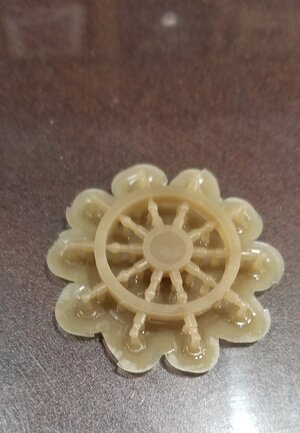
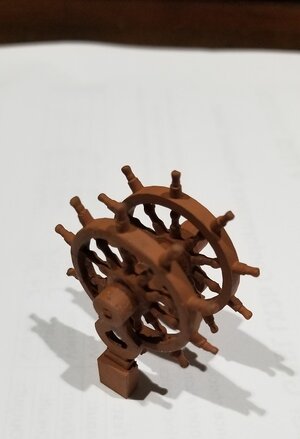
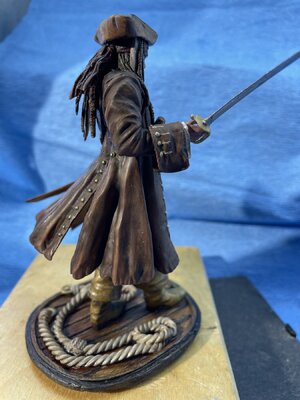
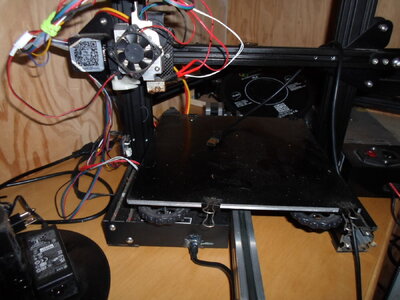
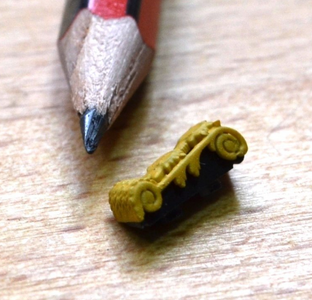
Well, I believe in 3d printing. It achieves detail at a small scale I cannot reproduce by hand. I use a cad program to either craft the part from scratch or import a pdf drawing. I create a 3d image, export the file to ".stl". The slicing program that my "Elegoo Mars 2" 3D printer uses "CURA". Pictures are examples of what you can create. examples are parts for a cannon assy. The barrel, quoin, The trunion clamp and a jig to make the carriage. The cannon is about 1 3/4" long. Two other photos are a 3d printed ships wheel and it's assembly. All parts were individually created and then glued.
3D Cannon Parts.jpg3D Ship's Wheel.jpgShip's Wheel Assy..jpg
 
Ready to learn……. New dedicated Forum page needed.

That depends on how many members here actually do 3d printing and the amount of interest and posts on the subject.

making Spaghetti is caused by the nozzle offset that is how far from the surface you are if you are to high then the extruded plastic does not stick to the base or to the layer.
 
Last edited:
I cover the bed of my XYZ printer with blue painters tape. The three object sticks to the tape and is easy to remove.

that is a great idea
i read people use hair spray on their bed but i found that to be a little messy. some will make a "raft" with a bigger foot print to hold tight to the bed then print the part on the raft

getting you piece to stick to the bed is a big deal
 
I have been printing for years and have found using G10 (carbon circuit board material) and a light coat of hair spray is the best for getting prints to stick. Let bed cool after printing and print pops off flexible G10 board. You can hold G10 to heated bed with small binder clips
SAM_0421.JPG
 
I started 3D design and printing about 4 years ago and my experience may save you a little frustration and time.

For design, I began with TinkerCad but outgrew that within a few months. I tried every bit of free CAD out there and settled on Fusion 360 as I found that matched the way my brain works. The point I’d make is that for most of us, the CAD learning curve is long and involved, and once you’ve got the hang of this or that package, you probably won’t want to change to another.

Printing (filament): I used to get so fed up trying to find settings that would work. Cutting to the chase, I solved all my problems by getting a glass bed, always using 3DLAC, fitting auto-levelling and, most important of all, using a filament dryer. Wherever possible I plan ahead and turn on the dryer a few hours in advance, but always have it turned on during a print. I hardly ever have fails these days. I use default Cura settings, and only print using PETG. I also upgraded the motherboard and power supply of my Creality Ender 3 to silent versions and they certainly do make it very quiet. I keep this machine in my office as filament doesn’t like the cold, and often have it running quietly in the background.

Having written all that, I still find filament printing to be a sub-optimal solution for modelmaking. It’s fine for larger items that you can sand but not great for fine detail.

Printing (resin): much better than filament for detail but at fine scale there is a constant tension between size and strength. I don’t and wouldn’t have resin printers running in my ‘office’. I did for a while but changed all that when I got pneumonia. I don’t know if there was a direct connection but I’m a ‘look at the obvious’ kind of guy and the only thing that had changed in my life was introducing resin printers into the office, because it’s a warm room. I now have them (I have 2) in a heated cabinet in my garage. Set up for resin printing is generally very simple and I mostly use the free version of Chitubox, but if the object is symmetric and needs loads of supports I use Lychee as this allows mirroring. But on the whole I find Chitubox is quicker and more than adequate.

I know everyone has their favourite resins, mine are Elegoo standard and ABS-like, which I blend 50:50 for most jobs. I find standard on its own is too brittle, and ABS-like too bendy. For especially delicate parts I use Syraya tech, either on its own or blended with about 20% elegoo standard. This seems to give a slightly stronger print. The downside is the support side is more lumpy. I’ve tried a few other resins, e.g. the Amazon own-brand Eono, AnyCubic, Sunlu, elegoo water-based: all have been okay-ish but not as good as normal elegoo, which also tends to be the cheapest. I haven’t tried any of the very expensive exotics. Maybe I will when I finally get to the point where my first print is right first time, whereas I still throw hundreds of pounds worth of prints in the bin right now. Tip one is to buy one or two spare resin vats and use the resin colours to denote the type of resin rather than as an end colour in itself. For me, grey will always be straight elegoo ABS-like, yellow is the 50:50 mix, pink is syraya etc. This makes it easier to know what’s in a vat on the shelf. Tip two is that when you have a fail, use the tank clean function to cure a few layers across the whole vat, and peel this out rather than try to pop the failed object. The reason for this method is that popping small parts concentrates the pressure in a small area of the FEP and a tiny hole here will see you wrecking a £100 screen rather than wasting 20p’s worth of resin.

As resin printing is a ‘wet’ process it’s inherently ‘dirtier’ than filament. For me it was especially dirty when I cleaned parts manually. The best thing I ever did was buy the large anycubic wash’n’cure and an extra tank. I have a ‘dirty’ tank which contains fairly used IPA and a ‘clean’ tank of, no surprises, clean IPA. I wash in dirty first, then rinse in clean.
 
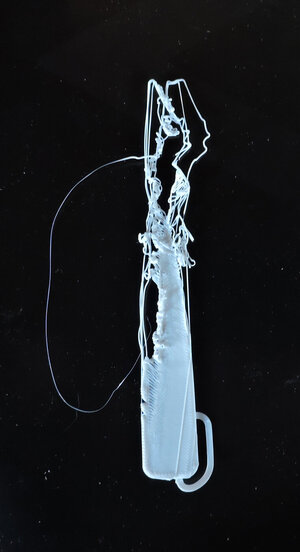
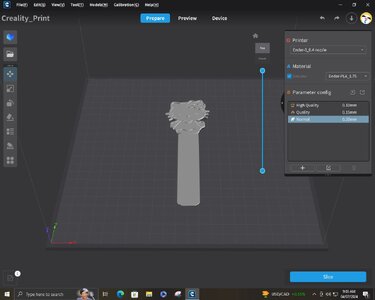
this is a failed print of a book marker a very simple object that would not stick to the bed. I kept playing with the nozzle offset bring it closer to the bed and then backing it off, changing the temp of the nozzle and the bed but still nothing.

DSCN7053.jpg
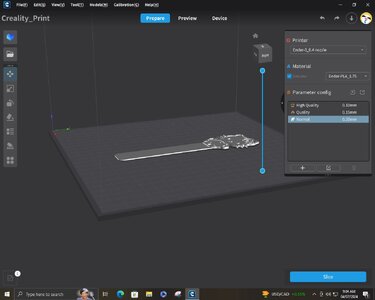
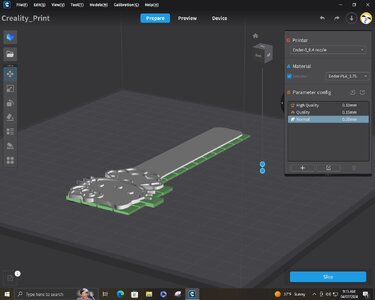
so i went back to the program and found the problem, so far it looks good a simple flat item that should print.

c10.JPGc11.JPG

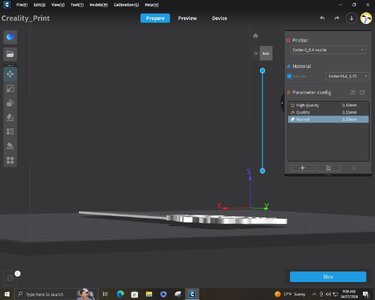
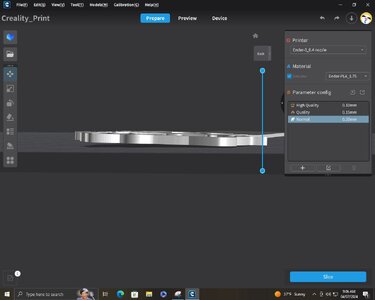
it looked like it was sitting on the bed but zoom way in there is a gap between the bottom of the book marker and the bed, it is very small but still a gap.

c13.JPG

c12.JPG

lowering the nozzle offset did not make a difference because the machine will not print if there is nothing there. It starts to extrude plastic in mid air.
The solution is to fill the gap by creating a raft. The program will fill in the space from the bottom of the piece to the table then print the piece on the raft. I made the raft almost paper thin just enough to fill the gap and for the nozzle to extrude a flat surface on the table

C14.JPG

next try was a perfect print so if you have trouble with your object sticking to the table you may not have a big enough foot print to hold the piece in place or it is not sitting perfectly level on the table.
 
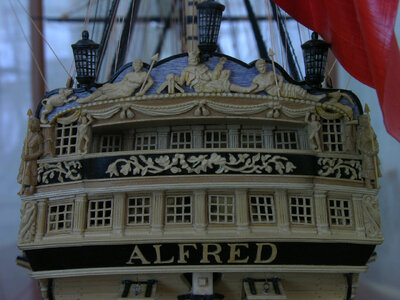
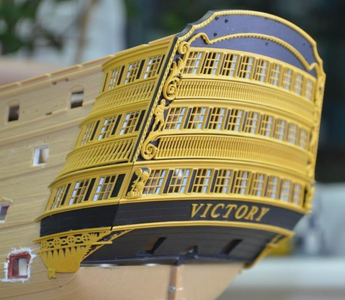
MASTER PHOTO.jpg

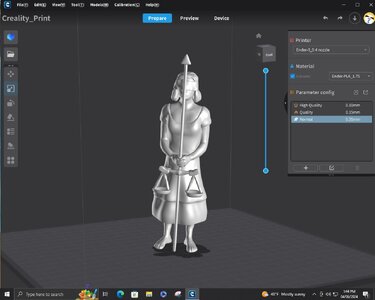
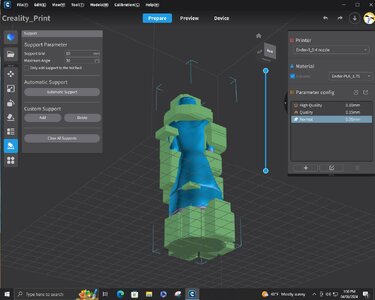
the figures on the corners of the stern in the print program

c1.JPG

first off just her feet touching the bed will not be enough to hold the piece in place and the bottom of her dress is not supported so the print no doubt will fail.

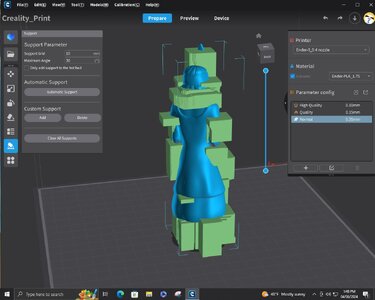
before you print you have to add supports in sections that overhang

C4.JPG

looking from under the bed there is now a much larger area to stick to the base.

C5.JPG


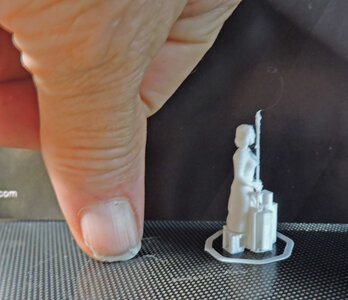
Hahn's model was done at 1/8 scale and that is way to small to add details like the scales but with 3D printing such a small detail can and was added
 
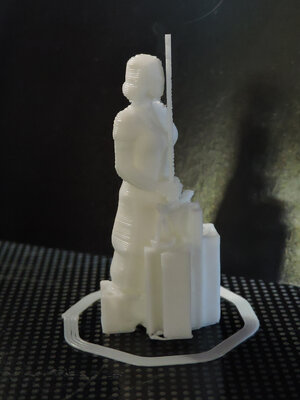
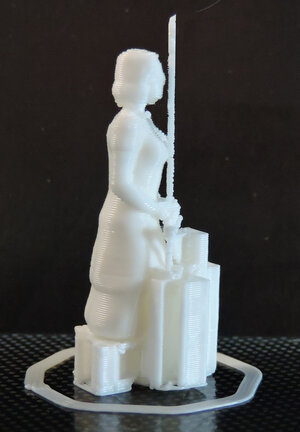
the print she is really small at 3/16 scale so something this small would require the setting to be high resolution this was printed on the normal setting just to see if will print

DSCN7056.jpg

the detail is there but because of the light and reflection you can not see it in the picture

DSCN7054.jpgDSCN7055.jpg


now i have to see if i can removes the supports without destroying the print. Creality print software is limited when i comes to creating supports

there is a lot more i can do by setting the thickness and amount of slicing layers, quality of the print

i attached the STL file for anyone wanting to play around with it.

i did laser cut the stern frames and deadwood which i will soon start a build on a stern section of the Alfred and post the STL files for anyone wanting to build a model of the stern.
 

Attachments

Last edited:
It probably won't surprise you to hear me say that figure would present no challenges in resin, and even if you go down to a 0.1mm nozzle you'll still have very noticeable layers lines in filament. That's why I use both systems. Below, just how small and tidy you can go with resin.

I'm not familiar with the Creality slicer but regarding the gap, if that was me I'd check whether I have an 'add supports' set as a default and if so, turn it off. In cura there is a facility to put the object flat on the plate. There shouldn't be any need for a raft for that bookmark, it's plenty big enough.

1712922247026.png1712922289769.png
 
It probably won't surprise you to hear me say that figure would present no challenges in resin, and even if you go down to a 0.1mm nozzle you'll still have very noticeable layers lines in filament. That's why I use both systems. Below, just how small and tidy you can go with resin.

I'm not familiar with the Creality slicer but regarding the gap, if that was me I'd check whether I have an 'add supports' set as a default and if so, turn it off. In cura there is a facility to put the object flat on the plate. There shouldn't be any need for a raft for that bookmark, it's plenty big enough.

View attachment 441229View attachment 441230
Kevin, Just so you know the Creality slicing software is identical to Cura. I think I read somewhere that Creality just repackages the Cura software.
 
identical
I’m not so sure about that, Olivier, the screenshots are nothing like the Cura interface. But I expect all of the slicers cover much the same territory as we all need certain basic functions. For sure there is very little difference between Lychee and Chitubox once you disregard the cosmetics.
 
I’m not sure which versions you’re referencing but the Creality Slicer 4.8.2 and the Ultimaker Cura 4.5 that I have look pretty identical. The only real difference I found was that the Creality software came loaded with the various Creality printer default setups

From Creality’s website…
Creality Slicer(FDM Slicer)
Creality Slicer is a slicing software developed by Shenzhen Creality 3D Technology Co., Ltd. Based on Cura, an open source slicing application for 3D printers, Creality Slicer is featured with 3D model editing and importing, supports for slicing and parameter profile editing, previewing and saving. With these advanced features and settings, it helps you improve the quality of your 3D prints by optimizing the configuration parameters of the existing Creality 3D printers.
 

Kevin, Just so you know the Creality slicing software is identical to Cura. I think I read somewhere that Creality just repackages the Cura software.


i heard the same thing in a you tube tutorials

There shouldn't be any need for a raft for that bookmark, it's plenty big enough.

that is true the only reason i added a raft under it was because i was having trouble with it sticking to the table, then discovered i was not flat on the table. so if i rotated the piece so it sat flat then your right there would be no need for the raft.

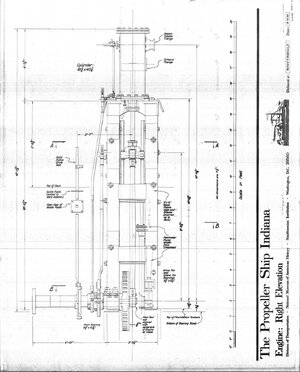
after downloading a bunch of free STL files and printing them i got the printing part under control now moving on to the 1848 steam engine

right elevation.jpg

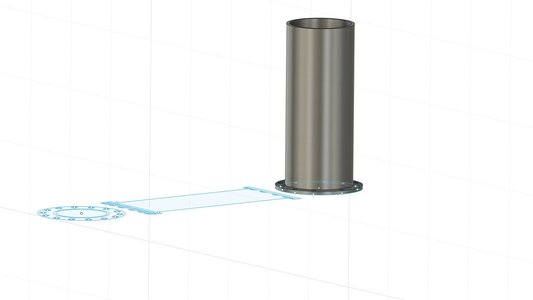
working in Fusion360 so far i got the cylinder and the bottom flange in the works. I am new working with Fusion360 and it is taking a lot to grasp in one bite.


engine3 v1.jpg


Here is a tutorial on what Fusion can do. you can actually build a working model of the engine, if your good with fusion360.

www.youtube.com/watch?v=mK60ROb2RKI
 
Back
Top