3d printing

here is the Indiana

INDIANA (1848)_f0001_i00001.jpg

here is the salvage of the engine

INDIANA (1848)_f0002_i00004.jpg

and here is the engine and boiler for maybe a cross section of the hull at the engine room. Lots and lots of parts to make. But one heck of a model of the hull section.

DSCN0915.JPG
 
at the rate i am going it might take a long long time to 3d model this engine in fusion360 a bit over my skill level at this point but muddling through it
each and every part is modeled separately then joined together and then printed as parts. I must say one heck of a kit to build it.

it is one thing to sit and watch you tube tutorials late at night then in the morning trying to actually do what you watched.
 
Dave, I feel your pain. I worked with AutoCAD professionally since Version 12 (not 2012… just 12) and when I started trying 3D modeling with AutoCAD and then Fusion 360 it seemed like a didn’t just spend 30+ years engineering and drafting. :oops:
 
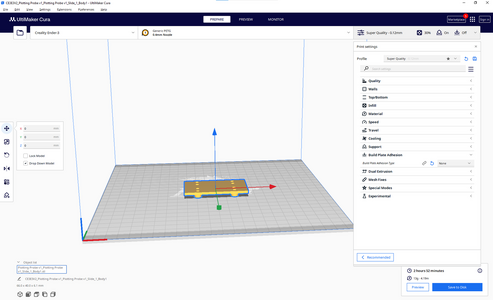
I was using Cura V4.13.0 but the discussion led me to update to 5.7.0 this morning, in case there have been radical changes that have me talking nonsense. But I still see the same interface, which looks quite different to the screenshot of Creality. Not that any of this matters, if the Creality version just rebadges Curaa then the principles are the same.

In the 5th screenshot of the failed print, it looked like the bottom of the bookmark is not a single flat surface, and the first photo certainly suggests the same. Could that be it? Is it your stl or downloaded off the web? Another thin possibility is near invisible artefacts from cutting in the design software. As your engine build log suggests you are very familiar with CAD you'll probably know what I mean.

1712993655772.png
 
In the 5th screenshot of the failed print, it looked like the bottom of the bookmark is not a single flat surface, and the first photo certainly suggests the same. Could that be it? Is it your stl or downloaded off the web? Another thin possibility is near invisible artefacts from cutting in the design software. As your engine build log suggests you are very familiar with CAD you'll probably know what I mean.


the book mark was a free download after looking close at the book mark fie your right the bottom is not flat so the section that did not stick was ever so slightly off the bed. So in this case either fix the file or put in on a raft.
 
Dave, I feel your pain. I worked with AutoCAD professionally since Version 12 (not 2012… just 12) and when I started trying 3D modeling with AutoCAD and then Fusion 360 it seemed like a didn’t just spend 30+ years engineering and drafting. :oops:

i have been working with AutoCad for years and stick with AutoCad14 on an old computer running windows 7. if it ain't broke don't try to fix it.
i know autocad very well so doing the 2D drawing in autocad14 then save as a DXF which i bring into Fusion360.

having worked with other 3D modeling programs like Tinkercad and Sketchup i know the basic functions and all 3D modeling programs are the same in a basic way.

right now i need to set up the engine in F360 from sketch mode i need to bring each part into solid mode make a 3D model and save it as a separate piece.
sounds easy enough until you try it.
 
3D design and printing is the next level in model ship building, in Fusion360 you can design the engine to actually work by using a small air pump. Now this is model engineering. I can imagine an engine room model of the Indiana with a small air pump in the display base. Flip the switch and watch the piston move in a clear printed cylinder, the shaft turn and the prop rotate.
dream on and that makes you sit in front of a computer for hours on end learning a new program. OR do all the 2D cad work and hire someone to design the 3D parts then send you STL file for printing.
Good luck with this project. I wish you great success. However, now that I’m retired I have no interest in sitting behind a desk drafting. I would much rather be in the shipyard/woodshop tinkering on models or general woodworking. Or maybe skiing… In fact I think I’ll ski today. We still have a week or so left in the season.
 
i figured i would try printing cannons i started with the smallest and if i could print it with an Ender filament printer larger sizes would be no problem
here is the result.


cannon.jpg

when you zoom in really close the finer details are distorted and it looks a bit rough

cannon1.jpg

looking at a screen shot of the original cad drawing you can see the sharp detailing

cannon.JPG

i uploaded the object file for anyone wanting to test a print and see if they get better results
 

Attachments

i figured i would try printing cannons i started with the smallest and if i could print it with an Ender filament printer larger sizes would be no problem
here is the result.


View attachment 458344

when you zoom in really close the finer details are distorted and it looks a bit rough

View attachment 458345

looking at a screen shot of the original cad drawing you can see the sharp detailing

View attachment 458346

i uploaded the object file for anyone wanting to test a print and see if they get better results
Dave , thanks for the generousty
 
Dave, I think you'll always be chasing your tail with cannons this small on a filament printer. Printing vertically, after reaching a certain height, the printhead tends to 'drag' and want the cannon swivel around the tip, creating distortion. You can mitigate that a bit by over-heating the filament (which it looks like you're doing) but you then lose definition and get that 'oozy' outcome. Personally, I think filament is rarely useful for model-making very small parts, but can be great for bigger parts or items that are hidden or can be sanded. So, if the 6lbs-ers are really at 1/4 scale you should be fine :) .

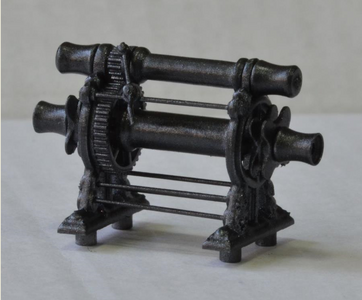
Cannons in resin, on the other hand, come out extremely well, as do machine parts (winch at 1:100, about 20 pieces if I remember rightly).

1720682894924.png1720683651566.png

Plug away at F360. In my experience, there's a tipping point where it starts to become quite easy and quick. But I'm also with Olivier on this, and personally make a point of keeping the 3D in check.
 
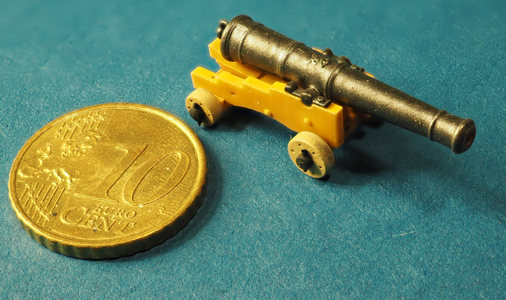
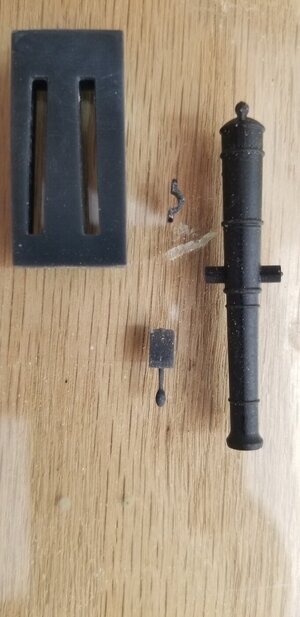
I agree with Kevin. If you want detail, resin is the way to go. Getting started on e-bay with an elegoo Mars2 about $100.00 + $25 for a bottle of resin. Attached is a cannon barrel about 2" long, a quoin and a trunnion clamp. The 4th item is a small jig I made to guide the carriage sides. I was able to make 12 cannons in one printing. I use a .05mm layer setting. The .stl files I make myself on autocad.
20240130_123026.jpg
 
Last edited:
i would like to see a resin print from the same file i posted to see the difference.
i checked Ebay and resin printers are indeed around 100$$

is there a resolution factor to consider when buying a resin printer?
 
While I haven’t seen the output from the latest generation of printers, the objective reviewers are saying the difference between these and mine (a couple of years old) are minuscule. If you bought something like a one or two year old elegoo Mars I promise you you’d be blown away by the quality. But, a health warning of sorts; like all such things, the printer is just the tip of the iceberg and you can easily end up spending the same again (and again) on associated kit, like a wash and cure machine, extra plates and tanks and so on. There’s very little learning curve though, unlike filament there are only a few settings and factory defaults work fine. The main learning curve is around designing for printing and positioning, and supporting the item when printing.

A print of your STL would produce a cannon just like mine, above. Same subject, both done in F360, similar designs, so same result. Mine is printed on an elegoo Saturn but there’s no material quality difference between any of the big names in the hobbyist market.
 
i would like to see a resin print from the same file i posted to see the difference.
i checked Ebay and resin printers are indeed around 100$$

is there a resolution factor to consider when buying a resin printer?
Dave, I have a Mars 2. If you send me your .stl file. I'll print it. Send me a message in conversations with the file or I'll give you me e-mail. Bill20240711_181702[1].jpg
 
Last edited:
Dave, I have a Mars 2. If you send me your .stl file. I'll print it. Send me a message in conversations with the file or I'll give you me e-mail. Bill

i posted the object file in post #50

i assume all printers will take OBJ and STL files
 
Dave, I have a Mars 2. If you send me your .stl file. I'll print it. Send me a message in conversations with the file or I'll give you me e-mail. Bill

i posted the object file in post #50

i assume all printers will take OBJ and STL files
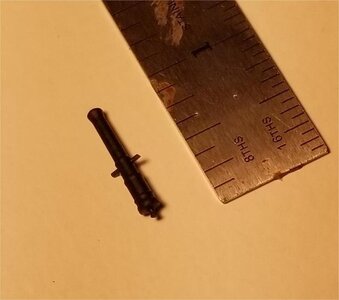
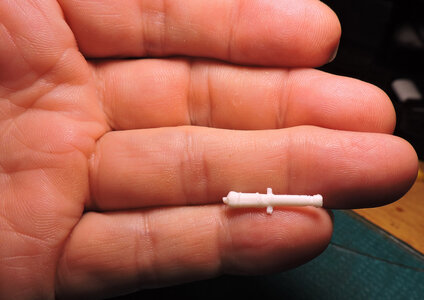
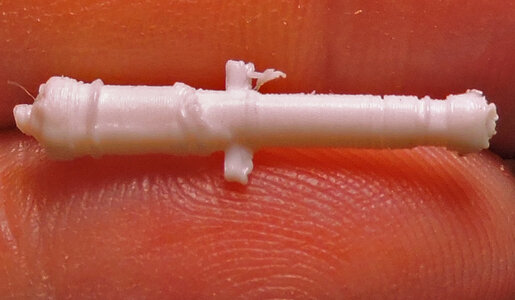
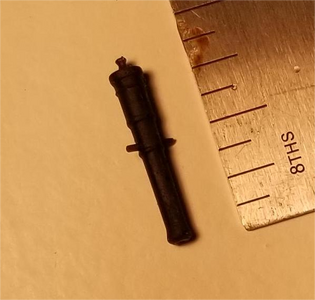
Dave - Ok, here it is. Your .stl file was downloaded to my "CHITUBOX" slicer program. The program is the stock Eligoo Mars2 slicer/driver. I added program supports. So, 21mm long. Run time was 1.24 hrs. The long run time was supports and .015mm layers. The slicer layers, drives the resolution. The best camera I have is my phone. Couldn't get rid of the shadow. There are some sprew witness marks that can be cleaned up. The two pics are the same cannon. Bill
21mm Cannon2.png21mm cannon.jpg
 
the prints look good so i need a resin printer to get a clean nice print

thanks Bill for the print test.

now i am going to see how a 4 and 6 pound cannon will print at 1/4 scale

here are the files
 

Attachments

Back
Top