A New Black Pearl in the Shipyard... All Scenarios Version

Good morning David. Off to a brilliant start. Your detail work is awesome- The deck caulking, buckets and gratings with lovely weathering. I will pull up a chair and watch the development of this BP no doubt. Cheers Grant
Thank you Grant. I'm having fun (and losing a bit of hair) trying these new to me techniques and build methods that people share unselfishly in this forum.
So fortunate to have found this place. I'm not sure I would have ever had the confidence to start such and endeavor.
Beautiful piece of work your Victory... Clearly you have a detail obsession also ! ! Your chair will always be welcome in this shipyard, and comments and guidance appreciated :).
Thank you again,
David
 
Good Evening All !

Quick update on The Pearl progress... I'm realizing quickly (especially as a newbie) why time can be of no consideration when ship building. I swear I spend more time researching and learning how to do things and how I want my build result to be then actually building ! !

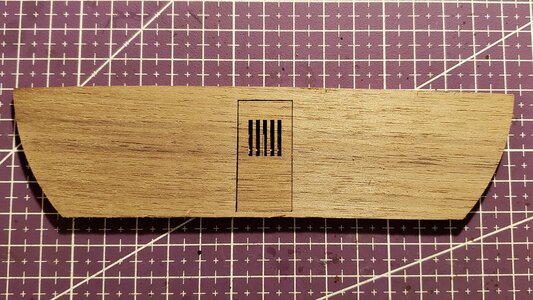
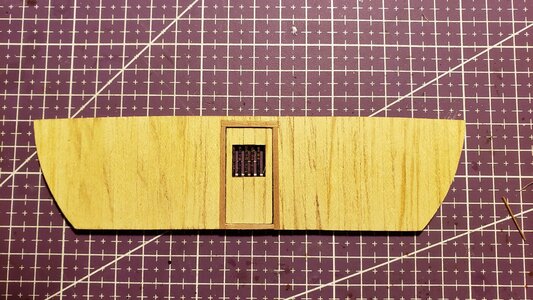
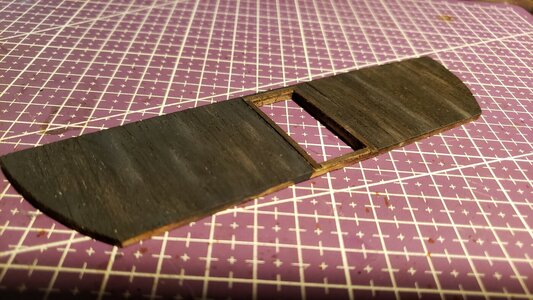
I'll start with the bulkheads. As provided for the lower decks (there are 4 in total, 2 with double doors) the bulkheads are painfully plain. I decided to plank it and frame the door.

20220922_222603.jpg20220922_230749.jpg

I started following a build on youtube months ago by someone who happens to be member here... Shelk. Truly an accomplished ship builder and as artist in weathering and distressing.

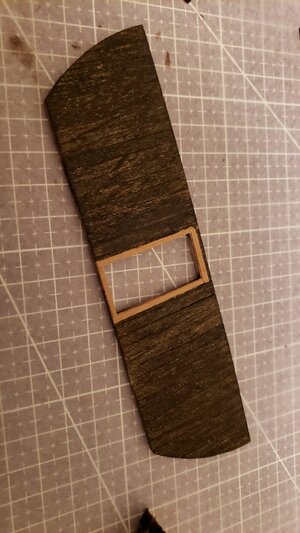
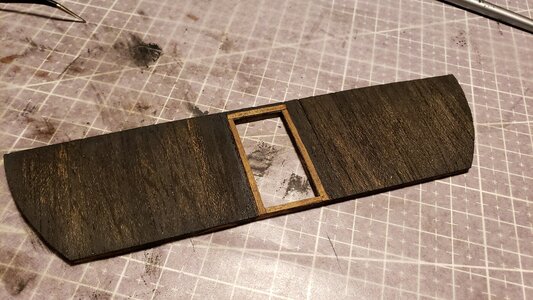
I decided to try to duplicate his technique with stain, indian ink, acrylic paints and dry pigments. The pics below show my attempt. This all is brand new to me and while pleased with my first outcome, I feel I will improve with each additional bulkhead.

I also made a realization after doing the bulkhead and placing it on the ship... the plank imprinted dark wood decks (you can see them in the previous post) are just not going to make muster ! ! So I'm ordering wood and will be planking/weathering those also. So glad I hadn't glued in the cell walls and deck yet !

20220924_192400.jpg20220924_194016.jpg20220924_223908.jpg

The door is not in the pic as I am in the process of replacing the wooden laser etched bars with copper wire bars and making the hinges and door handle.
The kit came with the means to make operational hinges but I don't think I want the doors to open or swing... A decision for another day.

For those not familiar with Shelk's work, here is a link of his video weathering the bulkhead on his Pearl. I have learned much from his videos on his Pearl and his Santisima Trinidad.

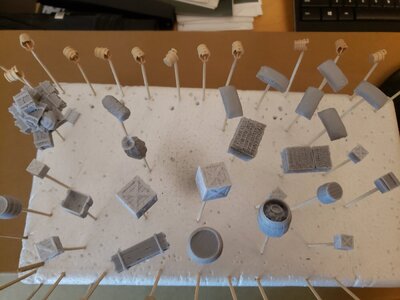
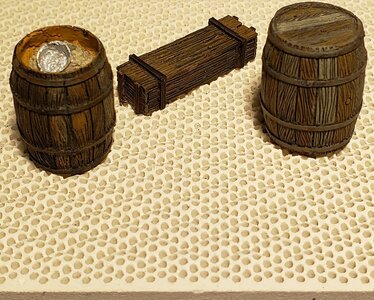
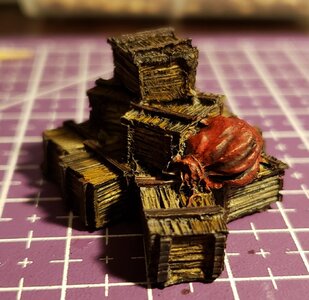
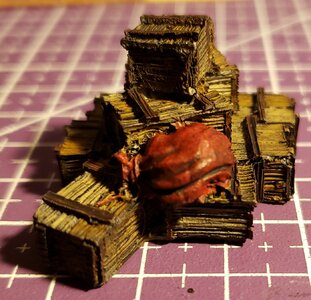
I've been working quite a bit on the deck items. All elements of the lowest deck will be dusted and cob webbed after they are installed.
This has really been a fun learning experience for me as I've never been any sort of an artist or painter. This is also a newly learned Shelk technique ! !

20220722_213507.jpg20220929_202421.jpg
20220928_071144.jpg20220928_071345.jpg

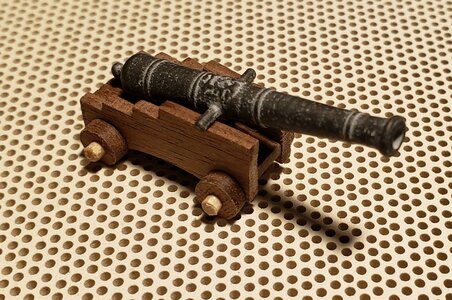
And finally there were these little guys. 33 Perfectly squared cannon carriages... THAT I BUILT BACKWARDS ! ! ! :mad:

20220929_200028.jpg

This pic is of a corrected carriage.
It was a bit of a challenge getting them unglued without damage but we got there and glued them back together the RIGHT way. They still need to be weathered and outfitted but for now they live in a box till I can actually look at them again.

I'm not sure what was worse. The frustration of having made an error and the time spent correcting it or the fact that the song "second time around" by Shalamar was in my head the entire time I was working on them. I didn't care for the song in 1979 and like it even less now ! !

The upcoming weeks will be deck planking, the overhead beams, lantern assembly and electrical to get lowest deck wrapped up.

As always, I welcome your comments and feedback.

Be happy and be well.

David
 
Good Evening All !

Quick update on The Pearl progress... I'm realizing quickly (especially as a newbie) why time can be of no consideration when ship building. I swear I spend more time researching and learning how to do things and how I want my build result to be then actually building ! !

I'll start with the bulkheads. As provided for the lower decks (there are 4 in total, 2 with double doors) the bulkheads are painfully plain. I decided to plank it and frame the door.

View attachment 331302View attachment 331304

I started following a build on youtube months ago by someone who happens to be member here... Shelk. Truly an accomplished ship builder and as artist in weathering and distressing.

I decided to try to duplicate his technique with stain, indian ink, acrylic paints and dry pigments. The pics below show my attempt. This all is brand new to me and while pleased with my first outcome, I feel I will improve with each additional bulkhead.

I also made a realization after doing the bulkhead and placing it on the ship... the plank imprinted dark wood decks (you can see them in the previous post) are just not going to make muster ! ! So I'm ordering wood and will be planking/weathering those also. So glad I hadn't glued in the cell walls and deck yet !

View attachment 331306View attachment 331307View attachment 331308

The door is not in the pic as I am in the process of replacing the wooden laser etched bars with copper wire bars and making the hinges and door handle.
The kit came with the means to make operational hinges but I don't think I want the doors to open or swing... A decision for another day.

For those not familiar with Shelk's work, here is a link of his video weathering the bulkhead on his Pearl. I have learned much from his videos on his Pearl and his Santisima Trinidad.

I've been working quite a bit on the deck items. All elements of the lowest deck will be dusted and cob webbed after they are installed.
This has really been a fun learning experience for me as I've never been any sort of an artist or painter. This is also a newly learned Shelk technique ! !

View attachment 331310View attachment 331311
View attachment 331312View attachment 331313

And finally there were these little guys. 33 Perfectly squared cannon carriages... THAT I BUILT BACKWARDS ! ! ! :mad:

View attachment 331314

This pic is of a corrected carriage.
It was a bit of a challenge getting them unglued without damage but we got there and glued them back together the RIGHT way. They still need to be weathered and outfitted but for now they live in a box till I can actually look at them again.

I'm not sure what was worse. The frustration of having made an error and the time spent correcting it or the fact that the song "second time around" by Shalamar was in my head the entire time I was working on them. I didn't care for the song in 1979 and like it even less now ! !

The upcoming weeks will be deck planking, the overhead beams, lantern assembly and electrical to get lowest deck wrapped up.

As always, I welcome your comments and feedback.

Be happy and be well.

David
I suspect we have all built a few cannon carriages backwards, possibly at least once per build!
 
Good Evening All !

Quick update on The Pearl progress... I'm realizing quickly (especially as a newbie) why time can be of no consideration when ship building. I swear I spend more time researching and learning how to do things and how I want my build result to be then actually building ! !

I'll start with the bulkheads. As provided for the lower decks (there are 4 in total, 2 with double doors) the bulkheads are painfully plain. I decided to plank it and frame the door.

View attachment 331302View attachment 331304

I started following a build on youtube months ago by someone who happens to be member here... Shelk. Truly an accomplished ship builder and as artist in weathering and distressing.

I decided to try to duplicate his technique with stain, indian ink, acrylic paints and dry pigments. The pics below show my attempt. This all is brand new to me and while pleased with my first outcome, I feel I will improve with each additional bulkhead.

I also made a realization after doing the bulkhead and placing it on the ship... the plank imprinted dark wood decks (you can see them in the previous post) are just not going to make muster ! ! So I'm ordering wood and will be planking/weathering those also. So glad I hadn't glued in the cell walls and deck yet !

View attachment 331306View attachment 331307View attachment 331308

The door is not in the pic as I am in the process of replacing the wooden laser etched bars with copper wire bars and making the hinges and door handle.
The kit came with the means to make operational hinges but I don't think I want the doors to open or swing... A decision for another day.

For those not familiar with Shelk's work, here is a link of his video weathering the bulkhead on his Pearl. I have learned much from his videos on his Pearl and his Santisima Trinidad.

I've been working quite a bit on the deck items. All elements of the lowest deck will be dusted and cob webbed after they are installed.
This has really been a fun learning experience for me as I've never been any sort of an artist or painter. This is also a newly learned Shelk technique ! !

View attachment 331310View attachment 331311
View attachment 331312View attachment 331313

And finally there were these little guys. 33 Perfectly squared cannon carriages... THAT I BUILT BACKWARDS ! ! ! :mad:

View attachment 331314

This pic is of a corrected carriage.
It was a bit of a challenge getting them unglued without damage but we got there and glued them back together the RIGHT way. They still need to be weathered and outfitted but for now they live in a box till I can actually look at them again.

I'm not sure what was worse. The frustration of having made an error and the time spent correcting it or the fact that the song "second time around" by Shalamar was in my head the entire time I was working on them. I didn't care for the song in 1979 and like it even less now ! !

The upcoming weeks will be deck planking, the overhead beams, lantern assembly and electrical to get lowest deck wrapped up.

As always, I welcome your comments and feedback.

Be happy and be well.

David
If you had followed my thread, you might have noticed that I did the same thing and you could have missed out on my frustration!
 
Anything new on your BP?
Hi Vic... no Sir, not this week. Waiting on wood to plank those lower decks. Did a little painting of deck details and built a few of those tiny little lanterns but not much else. The Admiral decided we needed to take some time off and go to Nashville for a bit. I'll be back in the shipyard in a week or so and should have an update shortly after. Thanks for checking .
How're things in your corner?
 
Ahoy All, I'm happy to announce that a new Black Pearl is in the shipyard. Well, actually, her keel was laid a few months ago.

First, my heartfelt condolences to King Charles and the Royal Family on this day, the 8th of September. The passing of the worlds longest reigning Monarch is a sad day regardless of what country you pledge allegiance to. The Queen is dead, Long Live the King !

This is my first ship build and I never considered doing a build log until I got some good feedback and encouragement from some of the members here when I posted a few pics in "Introduce Yourself"
I have been studying plans, reading build logs, watching videos (god bless YouTube University and all it's contributors) and filling notebooks for months ! !
I finally started her in June and am slowly moving forward and enjoying applying the methods and techniques that I have observed and practiced.

I am hopeful that those who take interest in this log will provide feedback and mentor me as I have seen done with other builds. Your inputs will be welcome, needed and appreciated ! !

Enough jabber, Let me welcome you to my shipyard and share the Pearls progress thus far...

My Admiral of many years has allowed me to carve out a place in our backroom. This is my shipyard.
View attachment 327412View attachment 327414View attachment 327415

The keel went together with much care to ensure that things were straight and aligned...
View attachment 327418View attachment 327419View attachment 327430

I played around a lot with deck finishes... and went with a process learned online from a shipwright at Model Ships. A combination of isopropyl alcohol and Indian ink and scraped graphite.
I like the gray tone and contrast with the walnut ribs as well as the ability to create traffic patterns and darkened areas with the graphite. It seems to get lost in the pictures but looks great in person !
View attachment 327443View attachment 327444

I dry fit the cell walls, beams and posts. Some sanding and adjusting needed to get the beams to fit proper but it all worked out.
View attachment 327445View attachment 327446View attachment 327447

Took a day or four out of sequence and decided to try my hand at some painting of the deck props and weathering of the cell bars... Even made one of those tiny lantern frames !
Please know that until this date, the only things I had ever weathered had been hard times and and few North Atlantic storms on a destroyer. Thanks again to Model Ships and his excellent vids. This is his process and I'm quite pleased with the results.
I used Vallejo brown paints on the deck props with a black wash. Prior to placement they will be dusted with Desert Dust pigment.
Rust washes with light and dark rust pigments on the cell bars.
View attachment 327452View attachment 327453

Love these little buckets but didn't like the way they looked when I tried tying rope handles. Stripped some old USB cable, twisted them together and painted them black. I'm pleased with the appearance.
View attachment 327450View attachment 327451

Stained the beams, posts and cell walls. Strategically hitting them with sand paper to show age and wear. This is still a work in progress. Nothing has been glued.
View attachment 327455View attachment 327454

Went to work fitting the metal cell grates into the walls. As many have mentioned, there's a fair amount of sanding to do here. Got them all fitted. The cell walls still need to be weathered with diluted grey paint and pigments. I want this lower to deck to look dark and dank with the feeling of wet wood and stained walls. Also fabricated some rings for the handles on the cell doors but haven't fitted them yet. They'll get brass blacked and the rust treatment.
View attachment 327459View attachment 327458View attachment 327457View attachment 327460View attachment 327461View attachment 327463

So Mates, That's where we be as of this log entry. I'd like to hear your inputs, opinions, warnings ! ! I'd prefer to have warnings of potential problems than discovery !
I've gathered that ship building does not subscribe to Bob Ross' "Happy Little Accidents" theory...
and I've much to do to finish that which I've shared and get everything glued in place. All of the deck props, lighting and the front and rear bulk heads with the doors. Which reminds me.
Here's a question... or poll as it may be. The bulkheads with doors are plain and flat plywood. I'm going to plank these for a board effect and originally intended to plank them vertically as I've seen on other models. Then I saw that the Captains cabin bulkhead is etch planked horizontally. I'm leaning toward vertical but would like some opinions.

That's all I have for now. Thank you all again for having me.

Be happy and be well.

David

View attachment 327456

View attachment 327462
Hallo @ctdragrcr
we wish you all the BEST and a HAPPY BIRTHDAY
Birthday-Cake
 
Back
Top