• LUCZORAMA SHIPWRECK SCAVENGER HUNT GIVEAWAY. 4 Weeks of Fun • 1 Legendary Prize ((OcCre’s Fram Ship)) • Global Crew Welcome!
    **VIEW THREAD HERE**

Alex R H.M.S. Enterprize Build Log

I have looked everywhere for this
Are you in UK If so can you send me some!
Where did you get it Or what is it actually called
Is it on Amazon where you are
Very frustrated THANKS
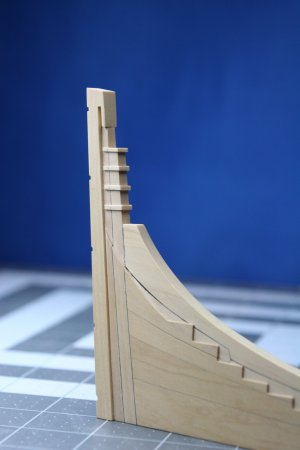
Hi Richard. I recently used black tissue paper that you can easily find on Amazon. Here is my methodology: I wiped a thin layer of wood glue on one of the joining surfaces - laid a piece of the tissue paper on that surface and gently smoothed it down with an old credit card with a smoothed off edge - let that dry. Next I wiped a thin layer of wood glue on the other joining surface and firmly clamped the parts together - and allowed that to dry. I found that the tissue paper did weaken the joint but not enough to matter. Do a trial using this approach and see if that would work for you. I’m not the only one to represent tar soaked flannel in this way. The only downside is it surely makes a mess.

1749600144619.jpeg

Sorry to hijack your excellent build report, Alex.
 
Hi Richard. I recently used black tissue paper that you can easily find on Amazon. Here is my methodology: I wiped a thin layer of wood glue on one of the joining surfaces - laid a piece of the tissue paper on that surface and gently smoothed it down with an old credit card with a smoothed off edge - let that dry. Next I wiped a thin layer of wood glue on the other joining surface and firmly clamped the parts together - and allowed that to dry. I found that the tissue paper did weaken the joint but not enough to matter. Do a trial using this approach and see if that would work for you. I’m not the only one to represent tar soaked flannel in this way. The only downside is it surely makes a mess.

View attachment 524859

Sorry to hijack your excellent build report, Alex.
Thanks So much to look at
Ive virtually given up on the Artisania Anatomy Victory The instructions are on a video but some parts need to be fitted with mm accuarcy other wise the whole Orloo Deck dosent Fit The deck is cliped together interlocking the planks between two of the beams - It just breaks and falls about The guy who does the video is either incredibly accurate or has access to loads of spares !!!
He has already made a major change to the hold where i pointed out that the ballast should be under the barrels and Flour sacks not on TOP!!
Suddenly one of the videos changed !!
But working on it while i wait for mine to arrive
 
Hey Alex,

very nice work. Quick question:
If I use paper and glue it in. Won't I have problems sanding it? I have noticed that if you use paper and use it as an intermediate buffer and then sand it, that it fuzzes. (I hope you understand what I mean) or becomes crumpled. It doesn't look so nice anymore.
Do you know this problem and what do you do about it?

Cheers
Günther Ship-1
Gunther. I take a razorblade and use it as a scraper on the joint. (After it has been pressed and dried.)You might have to do it during sanding, but not usually necessary.
AR
 
Hi everyone,
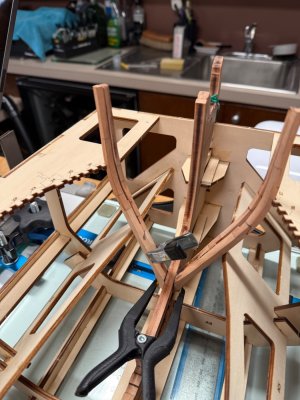
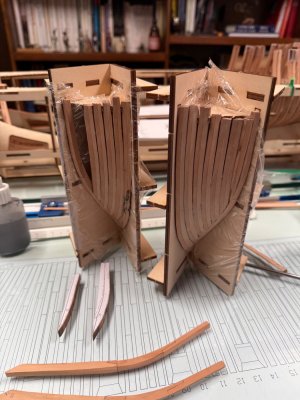
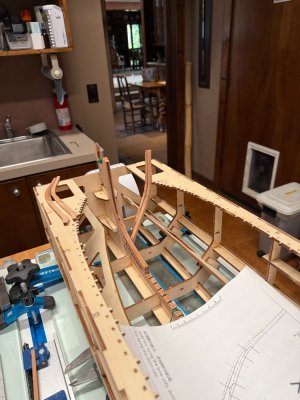
Returned to Houston three weeks ago after a three week trip cruising the Northern Irish coast, the Scotish Hebrides, Iona, Isle of Man and Isle of Lewis. Incredibly interesting, rough and beautiful. No work on the Enterprize during that time. After the cruise, I was able to work on the ship a little. Worked the hawse piece assemblies as well as bow cant frames, # 7 and #8. Plan is to continue working building frames towards the stern in September. (The Houston shipyard will not be operational until September because we started ouryearly road trip to Utah.) In the Park City, Utah shiyard, I am building CAF’s 1:48 cross-section of HMS Granado, and will post pictures on my build page for it. Meanwhile, I will be watching and learning from you guys as your builds progress.
Cheers
Alex R
RIMG_1818.jpegIMG_1817.jpeg
The hawse pieces still need to be finished, trimmed, and sanded.

IMG_1816.jpeg
 
Gunther. I take a razorblade and use it as a scraper on the joint. (After it has been pressed and dried.)You might have to do it during sanding, but not usually necessary.
AR
Hey Alex,
Thank you for your reply. So you take a razor blade and very carefully cut off the paper. Thanks for the tip.Thumbsup

Best regards
Günther Ship-1
Gunther. I take a razorblade and use it as a scraper on the joint. (After it has been pressed and dried.)You might have to do it during sanding, but not usually necessary.
AR
 
Gunther. I take a razorblade and use it as a scraper on the joint. (After it has been pressed and dried.)You might have to do it during sanding, but not usually necessary.
AR
With the stuff I've used, as it gets glue soaked, when dry it hardens and trimmed dead flush with the joint with a razor sharp chisel....zero sanding needed.
 
Hi everyone,
Returned to Houston three weeks ago after a three week trip cruising the Northern Irish coast, the Scotish Hebrides, Iona, Isle of Man and Isle of Lewis. Incredibly interesting, rough and beautiful. No work on the Enterprize during that time. After the cruise, I was able to work on the ship a little. Worked the hawse piece assemblies as well as bow cant frames, # 7 and #8. Plan is to continue working building frames towards the stern in September. (The Houston shipyard will not be operational until September because we started ouryearly road trip to Utah.) In the Park City, Utah shiyard, I am building CAF’s 1:48 cross-section of HMS Granado, and will post pictures on my build page for it. Meanwhile, I will be watching and learning from you guys as your builds progress.
Cheers
Alex R
RView attachment 525622View attachment 525623
The hawse pieces still need to be finished, trimmed, and sanded.

View attachment 525624
Looking good Alex.
 
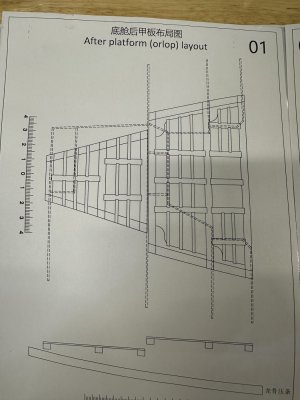
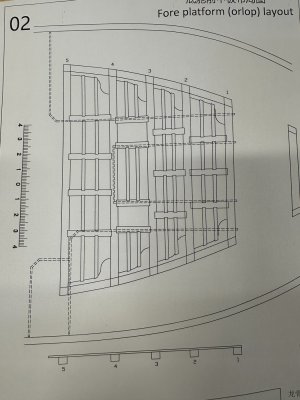
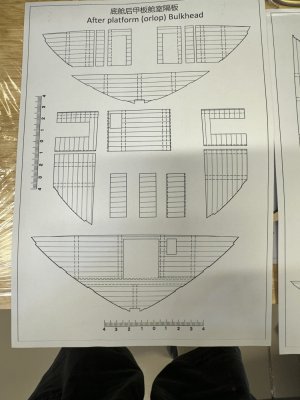
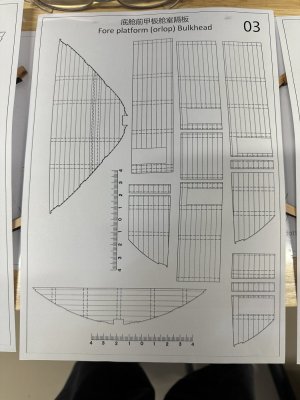
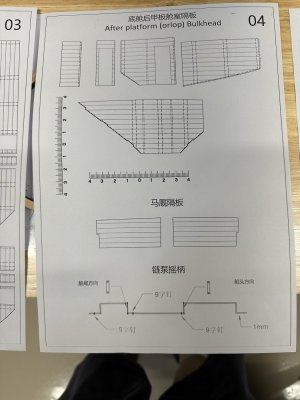
Looking super Alex! If there is an inboard profile drawing and or the top view of the orlop/platforms could you post a photo of one or both? Many thanks :)
Allan
 
Thanks Jeff. These are helpful to be sure. I was trying to see if the platforms are like when she was built or in 1787 when the guns, shot locker, magazine, etc were permanently removed. With only the fore and after platforms it appears the plans are for her as an armed sailing vessel prior to her being converted.
Either way it will be an interesting build, and the quality of the kit appears to be top shelf and their transcription of the contemporary plans look to be spot on. :)
Allan
 
Last edited:
Hi Richard. I recently used black tissue paper that you can easily find on Amazon. Here is my methodology: I wiped a thin layer of wood glue on one of the joining surfaces - laid a piece of the tissue paper on that surface and gently smoothed it down with an old credit card with a smoothed off edge - let that dry. Next I wiped a thin layer of wood glue on the other joining surface and firmly clamped the parts together - and allowed that to dry. I found that the tissue paper did weaken the joint but not enough to matter. Do a trial using this approach and see if that would work for you. I’m not the only one to represent tar soaked flannel in this way. The only downside is it surely makes a mess.

View attachment 524859

Sorry to hijack your excellent build report, Alex.
will certainly give that go - its been depatched but no tracking number yet - in uk delivery here id A1
 
Back
Top