WHOA NOW THAT IS REALLY GREAT MIKE I NEED TO STUDY THIS A LITTLE SO MY MIND DERANGED AS IT IS CAN ABSORB IT AND SEE IF I HAVE ANY QUESTIONS WITCH I AM SURE THAT I WILL HAVE. GOD BLESS STAY SAFE YOU AND YOURS DON
-

Win a Free Custom Engraved Brass Coin!!!
As a way to introduce our brass coins to the community, we will raffle off a free coin during the month of August. Follow link ABOVE for instructions for entering.
-

PRE-ORDER SHIPS IN SCALE TODAY!
The beloved Ships in Scale Magazine is back and charting a new course for 2026!
Discover new skills, new techniques, and new inspirations in every issue.
NOTE THAT OUR FIRST ISSUE WILL BE JAN/FEB 2026
- Home
- Forums
- Ships of Scale Group Builds and Projects
- Group Build Archives
- English Cutter - Half Hull Group Build
You are using an out of date browser. It may not display this or other websites correctly.
You should upgrade or use an alternative browser.
You should upgrade or use an alternative browser.
An English cutter half hull 1:32 by MikeJ [COMPLETED BUILD]
- Thread starter MikeJ
- Start date
- Watchers 7
-
- Tags
- completed build
FIRST UP WHAT IS THE NRG KIT AND TUTOTORIAL AND WHERE CAN I PURCHASE IT AS I AM A PERSON NON GRATA BIG TIME. GOD BLESS STAY SAFE YOU AND YOURS DON
Don, Aloha
Last edited:
Thanks for all the likes. It makes me feel special.
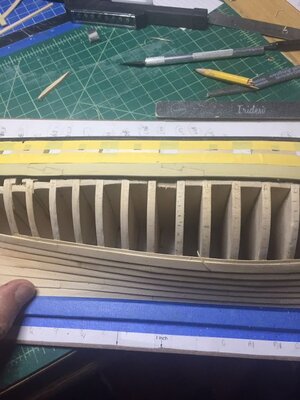
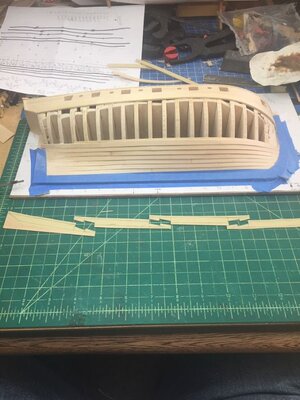
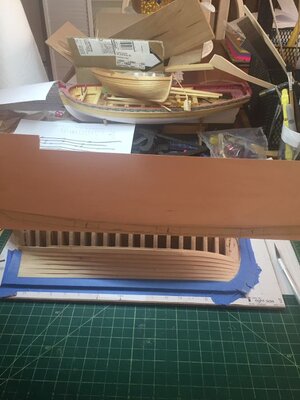
Mike, Thanks again for the drawing. I copied the shape of the wale and added the scarfs per the drawing, just a little larger than scale cause I want it to stand out when stained black and glued it on. As for the model, I'm going to finish it with wipe on urethane with black accents. I've decide to do another in pear and more
to scale. I like doing half hulls. Doesn't take up too much space Haha. Aloha, Mike


Last edited by a moderator:
HI MIKE J, YOUR EXPLANATION AND THE PICTURES WERE A SUPERB HELP TO ME, I DO HAVE SOME QUESTIONS, IF I AM NOT HOGGING UP YOUR LOG IF SO LET ME KNOW,,,,, ONE OF MY MAIN DOWNFALLS OF SPILING SHOULD BE THE SIMPLEST BUT NOT TO ME LOL LOL LOL LOL THAT IS SPILING THE PREVIOUS PLANKS SHAPE, I HAVE USED ALL SORTS OF MATERIALS ALONG WITH COMPASSES TO KNOW AVAIL, ALL TYPES OF MASKING TAPE, 90LB BOND PAPER ETC IT COMES OUT WRONG VERY, VERY WRONG, WHAT KIND OF MASKING TAPE ARE YOU USING, IF I CAN GET THIS PART CORRECT IT WOULD BE A BIGIE FOR ME I ALS HAVE A LOT OF SCRAP MATERIALS (I AM USING 14 INCH YELLOW HEART FOR PLANKING) I NEED AT LEAST 3/8 INCH + TO COPY THE THE PRVIOUS PLANK EDGE AM I CORRECT, SORRY FOR THE LENGTH OF THIS HAVE A FEW MORE QUESTIONS IF YOU DO NOT MIND BTW I AGREE TOTALLY ON HALF HULLS GO TO IT MIKE I WILL JOIN OTHERS SHOULD ALSO NOTHING WRONG WITH SOMETHING NEW AND FUN TO BOOT. GOD BLESS STAY SAFE YOU AND YOURS DON
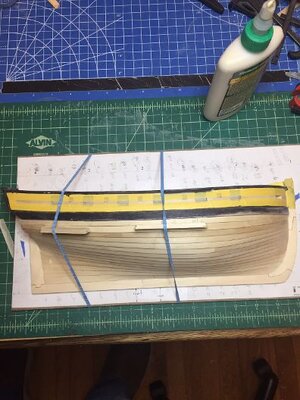
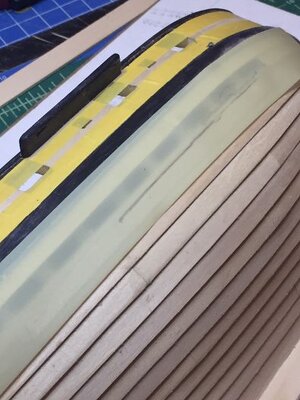
Don, no problem. Nothing except the tape, pencil, 6 inch rule, micrometer, wood and knife needed to spile. Oh don't forget the sanding stick. I'm using green painters tape. It is fairly translucent so I can see what is behind it when marking the frames. But I have used blue painters tape. You just have to feel for the frames. Haha. Anyway, I'm cutting my planks from 1/2 inch wide bass wood and since my plank width is 1/4 inch all the curves fit. it sound like you may need at least 3/4 wide stock. If they didn't I would use some sheet stock to allow for the extra curve,
The key is, your first plank, usually the garboard, should be straight along the top of the plank. Even if you make the stern end larger than the forward end, the top edge should be straight. On this model. I chose to make it all one width, !/4 inch. Once it is shaped and twisted into the rabbet The top of this plank gives you the line of the bottom of the next plank which you mark off on the tape. The planks widths comes from the measurements you take on each frame from the top of the first plank to the bottom of the whale divided by the number of planks you want. Each plank width will be different at each frame. this works well if you decide to install steelers. Since I decided not to I made the stern ends wider to the bottom of the last frame, so you have to make that extra width extend forward to make a fare run.
I did the kit and read and reread the pdf I posted this afternoon many times till I got it and I still have to review it in my mid when I start. I hope this helps. It is quite a concept and takes some getting used to and takes time. but the result is, I think, a lot nicer than just covering the hull
Don start reading about page 29 in the pdf.
WILL DO MIKE, THANK YOU GREATLY. GOD BLESS YOU AND YOURS DON
- Joined
- Aug 10, 2017
- Messages
- 1,706
- Points
- 538

Thanks for all the likes. It makes me feel special.
Mike, Thanks again for the drawing. I copied the shape of the wale and added the scarfs per the drawing, just a little larger than scale cause I want it to stand out when stained black and glued it on. As for the model, I'm going to finish it with wipe on urethane with black accents. I've decide to do another in pear and more to scale. I like doing half hulls. Doesn't take up too much space Haha. Aloha, Mike
Hi Mike, if you are concerned about space for your models you should consider a cross section. We have a group build for the Blandford cross section you might enjoy building; it is an introduction to scratch pof modeling. There are several very well documented build logs showing different procedures to accomplish the build. The internal details of a ship is the most interesting part for me to model.
Very nice work, Mike!
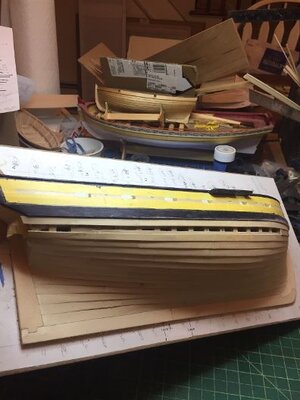
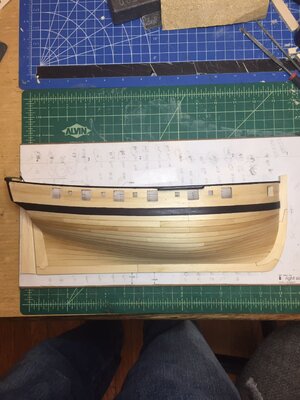
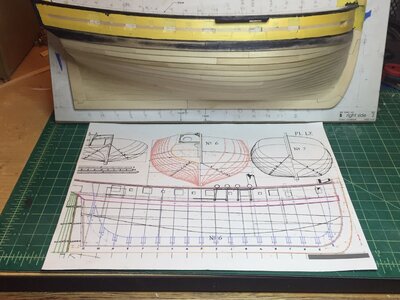
Yes Mike, I helps when you can work on your project hours a day. The slow process was the planking, about one plank a day. good thing it is a half hull Haha. This was my first plank job clinkering, so it was a learning experience. Carvel is much easier. the small mistakes are easily erased. I will plank using your method of slicing the top of plank cause doing the strip of wood to kick out the bottom of the plank showed every small imperfection in my faring of the frames. I'm looking forward to seeing how yours turns out. I'll be finishing the hull after sanding. I'll be gluing it on some oak flooring glued together with the joint representing the water line behind the model. I can't wait to do this again with different wood. Aloha, MikeJHi Mike, Great job on the planking. It looks like you are about finished and the rest of us are just getting started. Lol
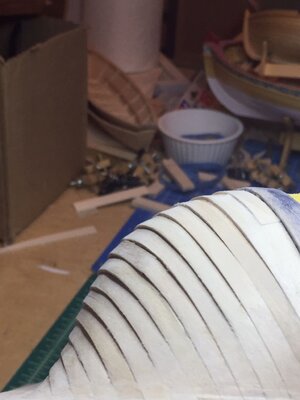
A BEAUTY MIKE, LOVE IT , READY FOR THE NEXT ONE. GOD BLESS STAY SAFE YOU AND YOURS DON
HI MIKE HAVE A QUESTION, TRYING TO FIND THE PAINTERS TAPE THAT YOU USED, SEE THRU AND THICK ENOUGH TO MAKE THE CURVE COULD YOU HELP. GOD BLESS STAY SAFE YOU AND YOURS DON
Don, The tape I use is Tamera( hope I spelled it correctly) modeling tape. It is very flexible and holds a fine line. Aloha, MikeHI MIKE HAVE A QUESTION, TRYING TO FIND THE PAINTERS TAPE THAT YOU USED, SEE THRU AND THICK ENOUGH TO MAKE THE CURVE COULD YOU HELP. GOD BLESS STAY SAFE YOU AND YOURS DON
Don, I forgot to say I get it at my hobby shop.Don, The tape I use is Tamera( hope I spelled it correctly) modeling tape. It is very flexible and holds a fine line. Aloha, Mike
HI MIKE, THANKS, HAVE YOU GOT A LINK I HAVE TRIED GOOGLE AND AMOZON CAN NOT FIND IT, THANKS. GPD BLESS STAY SAFE YOU AND YOURS DON


