Apóstol Felipe (OcCre) 1:60 [COMPLETED BUILD]

Joined
Oct 13, 2020
Messages
19
Points
58

Location
Denmark
This is my first build log and as a novice I 'am a little lost with respect to how much I shall comment on my project - but for now I 'will just go ahead and look forward for any advice.

I went through the manual and the plans a number of times an made (new) notes (and questions) every time realizing that I should definitely not start the actual build before I had at least a good idea of how, I should proceed.
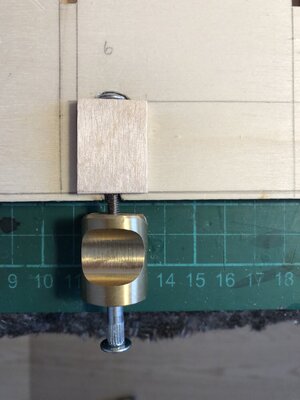
The kit does not contain a base for the model or any indication of where and how to install pedestals which was what I wanted. So I came up with this solution:
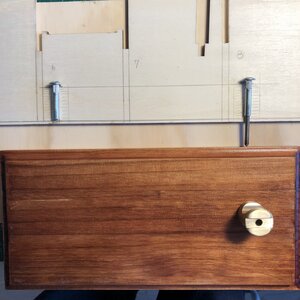
IMG_2568.JPG

I don't know what the proper name is in English (not even in Danish) for the "bolt", but it has an outer diameter of 5 mm and an inside thread of M4 (4 mm) plus some indentations below the bolt-head making a firm grip after gluing. Since the false keel is 5 mm, I just cut a channel for the bolt and and glued and reinforced the construction on both sides of the false keel. For the pedestal body I used a brass towel-knob into which I cut a groove (Dremel) for the real keel (also 5 mm). I' will have to drill a 4 mm hole when the keel is mounted for the threaded rod which connects the upper bolt with a twin mounted on the backside of the wooden base:
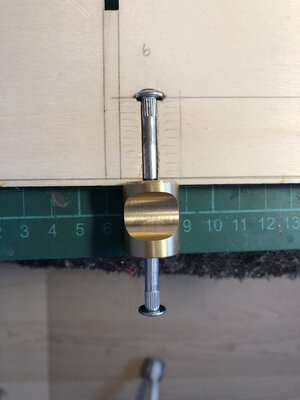
IMG_2579.JPGIMG_2582.JPG

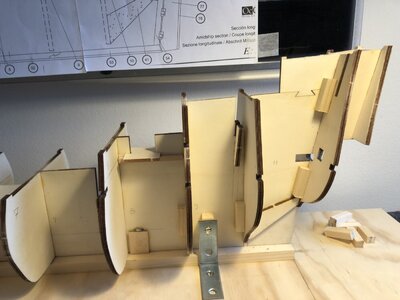
All the bulkheads where first filled and dry fitted together with the false decks utilizing the latter (still dried fitted) to ensure that the bulkheads were glued perpendicular to the false keel and reinforced with square timber on both sides of the false keel for further strength and hull symmetry:
IMG_2602.JPG

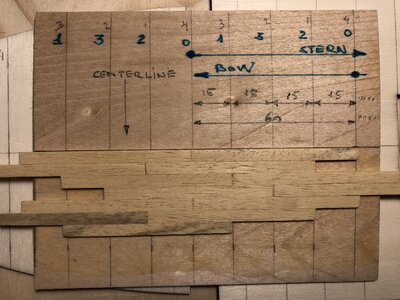
The deck planks are 1x3 mm lime wood. With my (old) eye sight that prevent me from marking the butts with simulated nails, but instead I decided to plank the deck(s) with 6 cm planks (corresponding to a quite realistic length of 3.6 m for real). I wanted a pattern of: 413241... and made a deck-copy out of scratch material as a guide:
IMG_2629_1.JPG

According to the manual the deck planks should be glued with contact glue. First of all, I can't stand the smell and worse: no room for mistakes! So I decided on my deck-copy to figure out what was a reasonable opening time for yellow glue while planking if you should take your time to fumble, and found 6 minutes as the maximum.
(Just to make things clear (?): on the deck-copy the bow is to the left -actually the starboard side- and with respect to the centerline the pattern is then: 423142... when the centerline is the origin, and thus the stern to the right - actually the portside - and with respect to the centerline the pattern is: 4132413...).
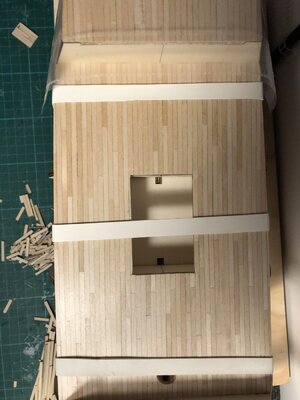
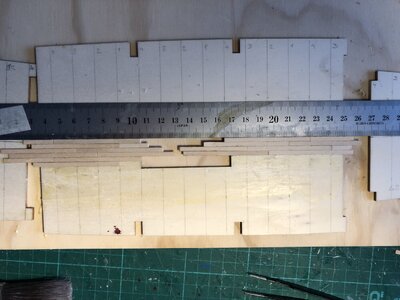
So I cut "millions" of 6 cm planks and simulated caulking with a pencil on the edges and went on with the deck-planking according to my homemade guide:
IMG_2726.JPG

The ruler serves as a guide to the first centerline-planks (not to be associated with the pencil-marking). Notice the yellow area underneath the deck-planks! Even with my own homemade planking guide, I succeeded in making errors in the planking pattern!!!! Up with the planks! - remove the glue with a wet towel - and be thankful that you didn't used contact glue....
Since this mistake I have decreased the glue-area when planking, because I am apt to make the same pattern-error ...

By the way: is contact glue the same as contact cement?

Well - more deck planking, clean cutting, sanding and matt varnish, more sanding, varnish and finally gluing all the decks in place plus lining all areas of the bulkheads above the deck with the 1x3 mm lime wood.
 
By the way: is contact glue the same as contact cement?
Yes, I believe that it is. I think you are well on your way to a great looking model. I love the way you did the pedestal mounting. I would not have thought about that. Your deck planking scheme seems very well done.
I have been using "weld bond" (white glue) which seems to stick rather quickly. I can hold the parts together for about 10 to 15 seconds and let go (depending of course) on how much other tensions are being on the joint. For your Deck Planking, after about 10 seconds of pressing down on the plank, it is pretty much stationary and will not move on its own. In case you need to remove a plank, just take like a cotton tip with a little water and let it soak for about a half a minute or so, then the plank will come up. This also depends on how much surface area the glue has been applied, (might take more than a minute), but it is not like CA glue. I stopped using CA glue completely for ships. The CA (Cyanoacrylate or superglue) just soaks into the wood and makes a mess.
 
Snowy: I hope to justify your considerations for eventually to achive Apóstol Philipe.

Donnie: Thank you for kind answer. I must say I was a little hasty with respect to the opening time of yellow glue. You are absolutely right: not minutes, but rather seconds before the planks are settled - so little glue area at the time,,,

I' will post some pictures of the planking later, but I have to say that while I did check the width of the deck planks from OcCre - especially very obvious when making the caulking with a pencil on the edges of the planks (8 together at a time) - I forgot/neglected to check the thickness of the planks! Should be 1 mm, but there were/are quite a bit of variations. As long as the planking is done on the false deck outside (i.e. not glued to/in the model) it is essentially a question of enough sanding without the risk of ruining other parts of the model, but with respect to the lining of bulkheads above the mounted deck(s) I' will sort all the planks in groups of same width for the number necessary per bulkhead in order to minimize the sanding...
 
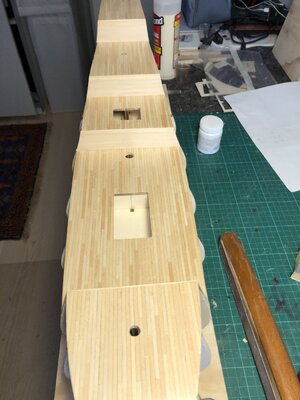
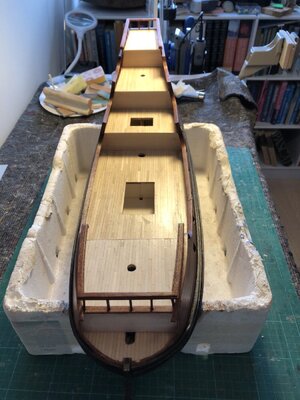
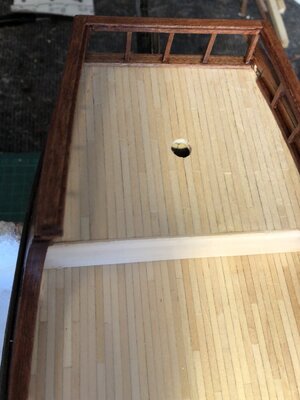
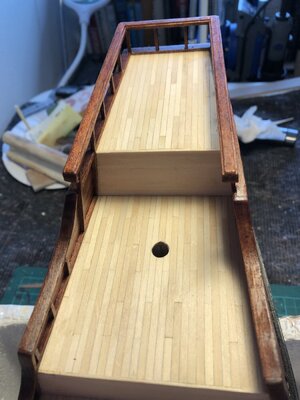
After a heavy sanding, varnish, sanding, varnish etc. all the decks where planked and glued on the hull:

IMG_2748.JPG

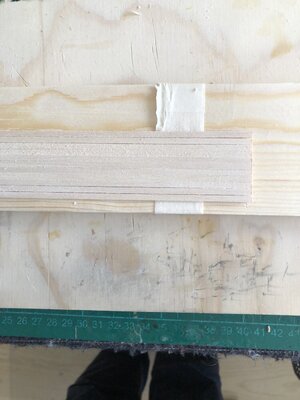
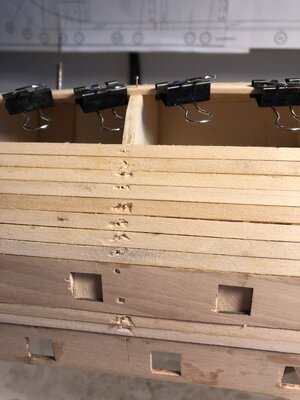
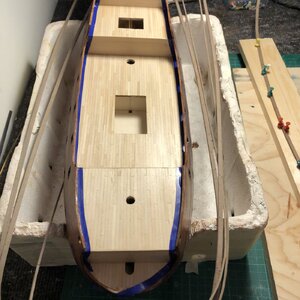
Having learned the hard, sanding way that the deck planks did not have the same thickness and they were intended for lining on all bulkheads, I dry fitted the necessary number on masking tape and medium sanded the lot before gluing them to the bulkhead:

IMG_2757.JPGIMG_2761.JPG

I only had to sand a little before varnishing...

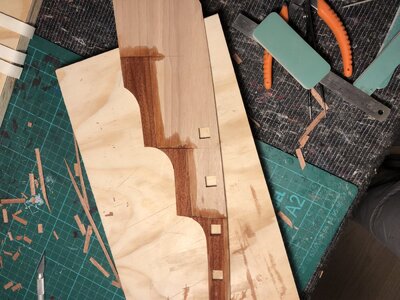
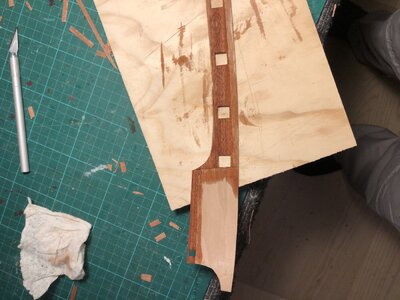
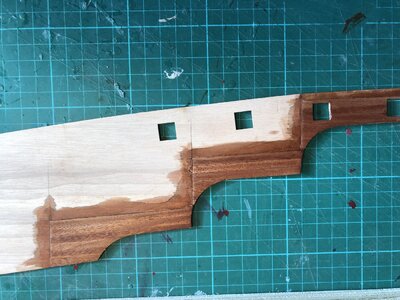
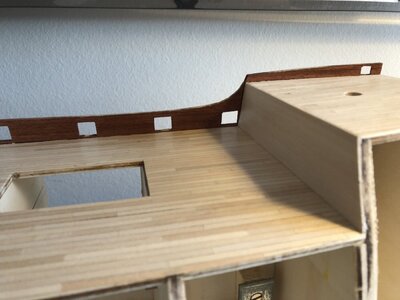
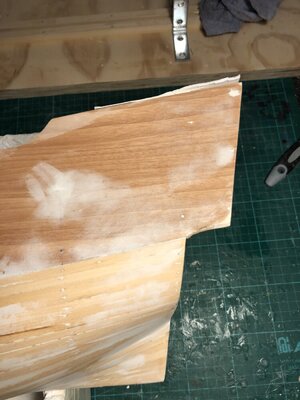
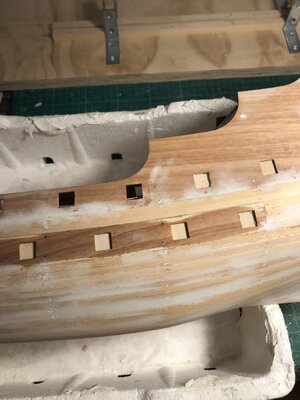
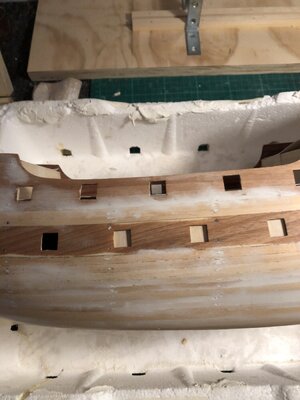
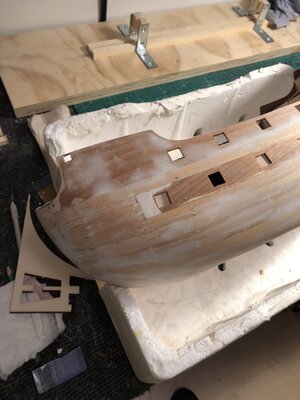
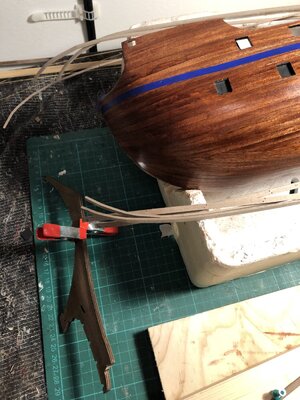
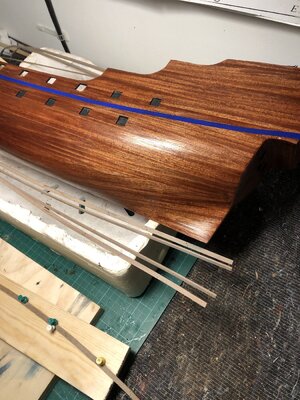
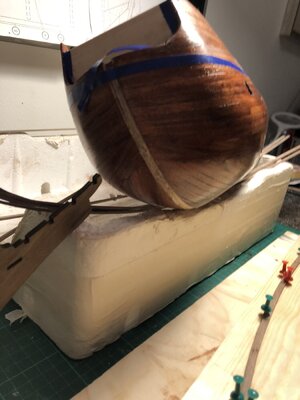
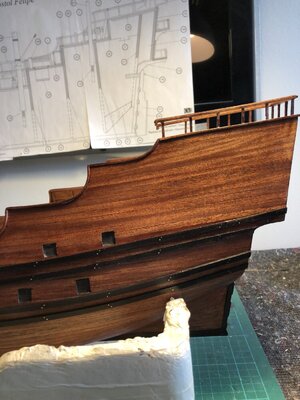
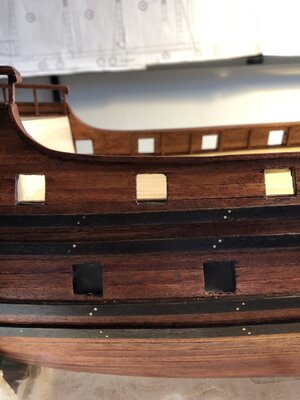
Having prepared the hull for planking, the manual said: line the center part of the bulwarks before gluing it in place (with Sapelli, 0.6 X 5 mm). Again it is difficult to sand, stain, varnish etc. when the bulwark is mounted, so I decided to soak, bend, ironing and dry fit the bulwark very precisely on the hull and then mark the edges for the inside Sapelli-lining. Then I lined, glued, cut gun port openings, sanded, stained and varnish the bulwarks before it was mounted on the hull:

IMG_2792.JPGIMG_2793.JPGIMG_2794.JPGIMG_2802.JPG

I think it is appropriate to mention that when I received the kit and did an inventory, 2 minor items where missing ( 2 brass rings out of 8 and 3 metal ornaments out of 45) - the total number on the inventory list being more than 410... I filled out a spare part request and less than a week later I received not only 2 brass rings but 8, and instead of 3 metal ornaments I got 45!. (the supposed number from the kit).. Excellent service from OcCre.
.
The next thing to do will be the planking of the hull. The sticks from OcCre are 2 x 5 mm and should be nailed to the frames according to the manual. I Have never tried that but will be back with the result in due time.
 
I have now finished the first planking of the hull using nails for the first time. I did watch some video's showing how simple it was with a nail pusher. So I began planking with nails and the nail pusher. That was not a success! With trembling hands and poor eyesight I managed to insert nails with the wrong angel with respect to the frames in almost 50% of the cases. Furthermore I thought it necessary to push the nails as deep into the strakes as possible followed up by a hammer, so the final sanding should not be an issue!...
I had seen somewhere, that no matter what it was much better to remove the nails and after some premature filling and sanding before the complete hull was planked, I realized that the nails should indeed be removed.
Therefore the rest of the planking was done by means of a simple pair-of-pliers which I could control fairly easily with respect to depth of the nail and hitting the frame in a suitable angle.
Then I removed nearly all the nails leaving craters craters all over the hull:

IMG_2845.JPG

Thanks to putty I did end up with a descent result:

IMG_2853.JPGIMG_2866.JPGIMG_2875.JPGIMG_2879.JPG

Then a minor disaster occurred: The back plane to one of the gun ports (see picture above) where the artificial canon should be mounted fell into the hull - No access after finished planking!!! I have have all the way tried to make sure that everything was properly glued, but obviously this was not the case with this gun port.
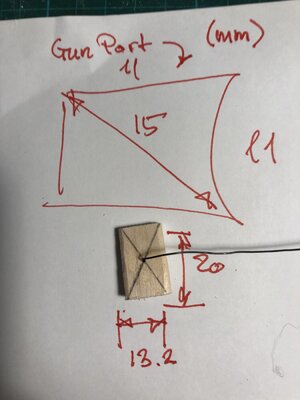
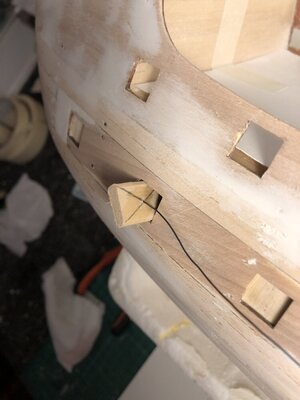
Thanks to math I came up with a solution: The gun ports are quadratic and thus the diagonal is the square root of 2 (approximately equal to 1.4) times longer than the length of the sides. So If I made a gun port backplane with a width a little smaller than 1.4 times (but a height somewhat taller) than the side length I could sneak it through the port with a metal wire placed in the center of the gun backplane:


IMG_2909.JPG
IMG_2910.JPG


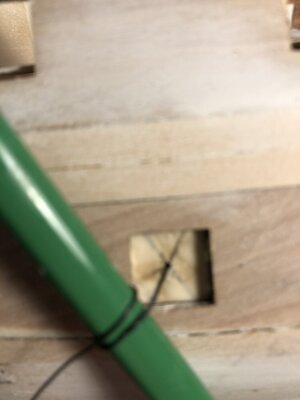
The I pulled the wire and glued (plenty!) and positioned the gun backplane and left it to dry:

IMG_2911.JPG

I' will just have to cut the wire and push it into the hull - with this solution.

Next task is the second planking - something I haven't tried either, but I have looked into some of the SOS logs so I will just try my luck...
 
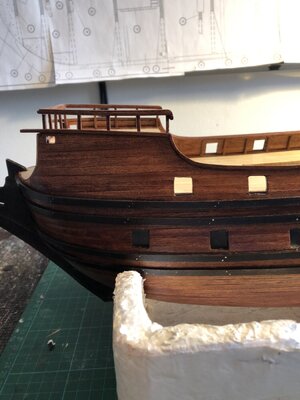
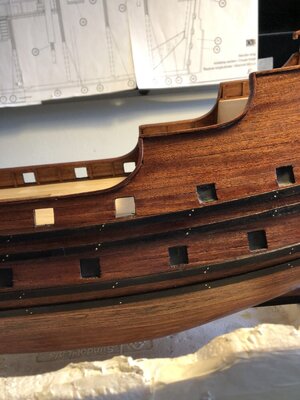
I finished the second planking - sanded and varnished the hull. Next task was the installation of 4 rail bulwarks on each side. I used a masking tape (5 mm wide) to find the most suitably position of the 2 upper rails and the 2 lower rails. The distance between the 2 pair of rails had to calculated from the dimensions of the bow timbers and anchor entry plates:

IMG_2917.JPG

IMG_2919.JPG

IMG_2934.JPG

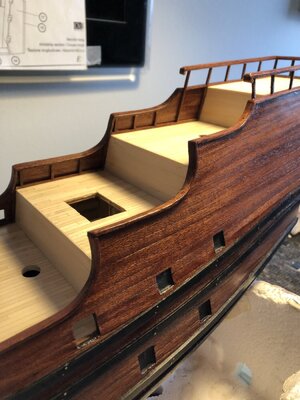
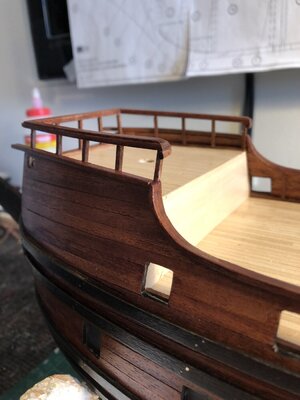
Finally the handrails were installed. This was quite difficult since the dimensions of the sticks was 2 x 6 mm (sapelli). I tried nearly everything in the book: water, amonium, steam, ironing but the curvature on part of the rail was to steep and I broke several sticks in my attempt to curve the handrails. Finally I resolved to a solder iron knowing that there would probably be burn marks even with an abundance .of water on the sticks in the bending process
The 2 mm thickness allowed me to sand (nearly) all the burn marks away and after staining and varnish (both several times), I ended up with an acceptable result:


IMG_2940.JPG

IMG_2945.JPG

IMG_2939.JPG
.
 

Attachments

  • IMG_2920.JPG
    IMG_2920.JPG
    286.4 KB · Views: 9
  • IMG_2946.JPG
    IMG_2946.JPG
    253.3 KB · Views: 8
  • IMG_2952.JPG
    IMG_2952.JPG
    182.5 KB · Views: 8
  • IMG_2956.JPG
    IMG_2956.JPG
    175.7 KB · Views: 6
  • IMG_2966.JPG
    IMG_2966.JPG
    195.3 KB · Views: 7
  • IMG_2969.JPG
    IMG_2969.JPG
    225.2 KB · Views: 10
  • IMG_2973.JPG
    IMG_2973.JPG
    164.8 KB · Views: 9
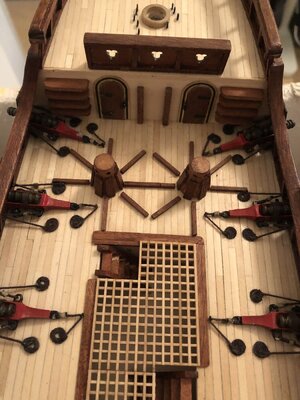
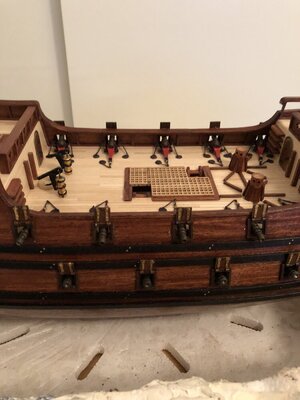
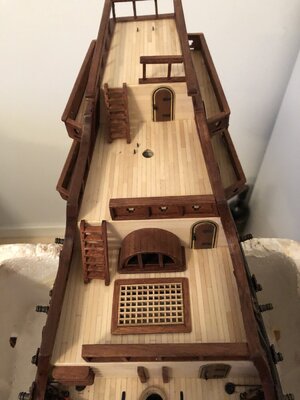
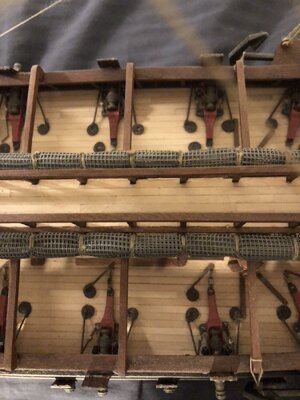
Ladders, capstans and pumps have been installed and so are the guns - both real and fake guns:

IMG_3004.JPG

IMG_3005.JPG


All the doors and their frames are in brass with engravings. Everything is supposed to be painted beige with the engravings in black. This is beyond my capabilities, so instead I painted the engravings black, left the frame in brass and lined all the doors with left-over from the second hull planking:

IMG_3003.JPG

Next in line are the galleries and then channels with deadeyes...
 
Thank You to all the persons who liked my Apostol Filipe build log.
Work is progressing and I shall in due time post some more pictures.
 
I haven't had success with my camera lately so a lot of building steps have not been (picture) documented...
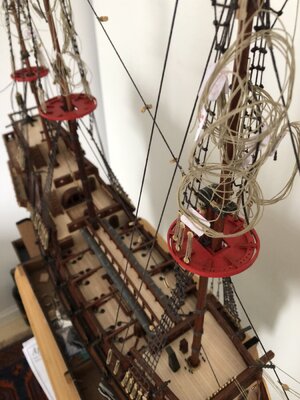
Since last post the galleries, channels, deadeyes etc. plus all mast and bowsprit have been installed including ratlines and backstays, some yards and a number of different rigging lines curled up and numbered waiting to be attached later:

IMG_3040.JPG

IMG_3049.JPG

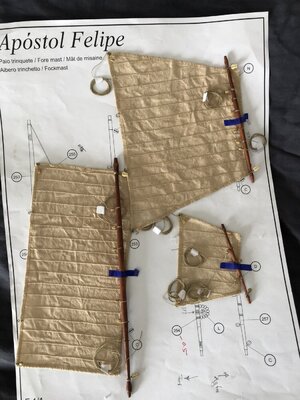
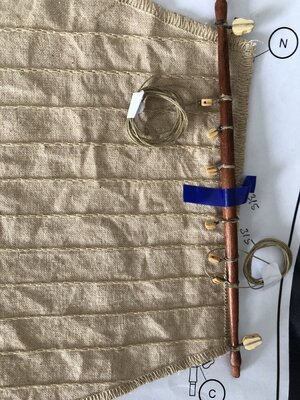
All the yards have been tapered with their ends carved according to the plans and fitted with blocks and other accessories needed. The sails are prepared with blocks, rigging line and ready to be mounted on the yards when the latter have been put on the masts:

IMG_3062.JPG

IMG_3059.JPG

So the Apostol Felipe is going to be finished in the not so far future and I have enjoyed building her including a lot of visits to quite a number of other building logs on SOS...
 
Last edited:
I haven't had success with my camera lately so a lot of building steps have not been (picture) documented...
Since last post the galleries, channels, deadeyes etc. plus all mast and bowsprit have been installed including ratlines and backstays, some yards and a number of different rigging lines curled up and numbered waiting to be attached later:

View attachment 221170

View attachment 221172

All the yards have been tapered with their ends carved according to the plans and fitted with blocks and other accessories needed. The sails are prepared with blocks, rigging line and ready to be mounted on the yards when the latter have been put on the masts:

View attachment 221175

View attachment 221174

So the Apostol Felipe is going to be finished in the not so far future and I have enjoyed building her including a lot of visits to quite a number of other building logs on SOS...
Hallo @Major6
we wish you all the BEST and a HAPPY BIRTHDAY
Birthday-Cake
Did you finish your project in the meantime? Maybe you show us the final result?
 
Finished Apostol Felipe

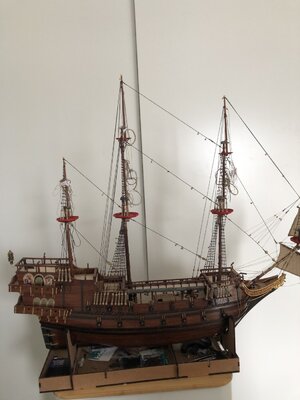
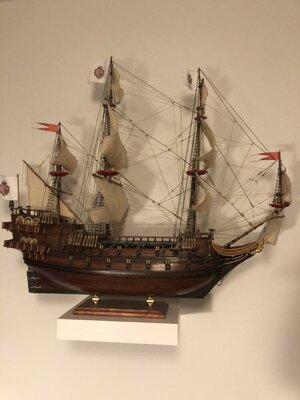
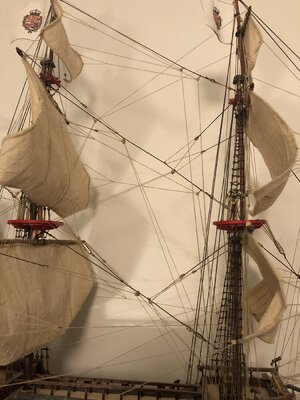
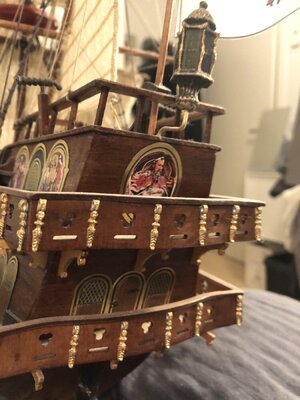
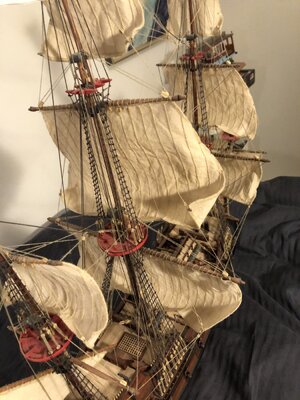
After a period of sickness I 'am grateful to be back, and have now finished Apostol Filipe:

IMG_3207.JPGIMG_3210.JPGIMG_3211.JPGIMG_3215.JPG

I have learned a lot making this model AND by looking into a number of different logs and comments...

Actually I 'am tempted to engage in a new model within the next 5 month, if my health permit it!
I 'am considering the "New King of Mississippi" from Artesania.

There are a number of build logs on this site - both of the old and new design from Artesania of "king of Mississippi" - so I wonder if it is any idea at all to start (my) log on the same model? - probably have anything I can contribute with already been commented in this excellent forum

IMG_3219.JPG
 
My congratulations for finishing this model - very well done
and now`what comes next? - you know "after the model is before the model"
 
This is my first build log and as a novice I 'am a little lost with respect to how much I shall comment on my project - but for now I 'will just go ahead and look forward for any advice.

I went through the manual and the plans a number of times an made (new) notes (and questions) every time realizing that I should definitely not start the actual build before I had at least a good idea of how, I should proceed.
The kit does not contain a base for the model or any indication of where and how to install pedestals which was what I wanted. So I came up with this solution:

View attachment 188484

I don't know what the proper name is in English (not even in Danish) for the "bolt", but it has an outer diameter of 5 mm and an inside thread of M4 (4 mm) plus some indentations below the bolt-head making a firm grip after gluing. Since the false keel is 5 mm, I just cut a channel for the bolt and and glued and reinforced the construction on both sides of the false keel. For the pedestal body I used a brass towel-knob into which I cut a groove (Dremel) for the real keel (also 5 mm). I' will have to drill a 4 mm hole when the keel is mounted for the threaded rod which connects the upper bolt with a twin mounted on the backside of the wooden base:

View attachment 188474View attachment 188475

All the bulkheads where first filled and dry fitted together with the false decks utilizing the latter (still dried fitted) to ensure that the bulkheads were glued perpendicular to the false keel and reinforced with square timber on both sides of the false keel for further strength and hull symmetry:

View attachment 188523

The deck planks are 1x3 mm lime wood. With my (old) eye sight that prevent me from marking the butts with simulated nails, but instead I decided to plank the deck(s) with 6 cm planks (corresponding to a quite realistic length of 3.6 m for real). I wanted a pattern of: 413241... and made a deck-copy out of scratch material as a guide:

View attachment 188524

According to the manual the deck planks should be glued with contact glue. First of all, I can't stand the smell and worse: no room for mistakes! So I decided on my deck-copy to figure out what was a reasonable opening time for yellow glue while planking if you should take your time to fumble, and found 6 minutes as the maximum.
(Just to make things clear (?): on the deck-copy the bow is to the left -actually the starboard side- and with respect to the centerline the pattern is then: 423142... when the centerline is the origin, and thus the stern to the right - actually the portside - and with respect to the centerline the pattern is: 4132413...).
So I cut "millions" of 6 cm planks and simulated caulking with a pencil on the edges and went on with the deck-planking according to my homemade guide:

View attachment 188532

The ruler serves as a guide to the first centerline-planks (not to be associated with the pencil-marking). Notice the yellow area underneath the deck-planks! Even with my own homemade planking guide, I succeeded in making errors in the planking pattern!!!! Up with the planks! - remove the glue with a wet towel - and be thankful that you didn't used contact glue....
Since this mistake I have decreased the glue-area when planking, because I am apt to make the same pattern-error ...

By the way: is contact glue the same as contact cement?

Well - more deck planking, clean cutting, sanding and matt varnish, more sanding, varnish and finally gluing all the decks in place plus lining all areas of the bulkheads above the deck with the 1x3 mm lime wood.
Hallo @Hannibal
we wish you all the Best and a HAPPY BIRTHDAY
Birthday-Cake
 
This is my first build log and as a novice I 'am a little lost with respect to how much I shall comment on my project - but for now I 'will just go ahead and look forward for any advice.

I went through the manual and the plans a number of times an made (new) notes (and questions) every time realizing that I should definitely not start the actual build before I had at least a good idea of how, I should proceed.
The kit does not contain a base for the model or any indication of where and how to install pedestals which was what I wanted. So I came up with this solution:
Hallo @Hannibal
we wish you all the BEST and a HAPPY BIRTHDAY
Birthday-Cake
 
Back
Top