...A tiny detail, perhaps makes the model looks live....Very good, Doc!! You are master adding small details, and you make them perfect! Now I know, where this expression come from: This is what the Doc prescribes!Thanks, guys!
Having a little fun with details. I decided that the stove needed a source of fuel, so I built a little coal scuttle. I sawed one of my powder kegs in half, found the center point of the cut surface, and holding the barrel in the jaws of a pair of pliers to steady it, I used a Forstner bit to hollow out a shallow hole in the barrel's top. I spread some WeldBond glue in there and sprinkled in some coarse black model railroad ballast. The handles are 28 gauge annealed black steel wire. A couple of coats of poly and the coal scuttle was done. Elapsed time: about an hour.
-

Win a Free Custom Engraved Brass Coin!!!
As a way to introduce our brass coins to the community, we will raffle off a free coin during the month of August. Follow link ABOVE for instructions for entering.
-

PRE-ORDER SHIPS IN SCALE TODAY!
The beloved Ships in Scale Magazine is back and charting a new course for 2026!
Discover new skills, new techniques, and new inspirations in every issue.
NOTE THAT OUR FIRST ISSUE WILL BE JAN/FEB 2026
You are using an out of date browser. It may not display this or other websites correctly.
You should upgrade or use an alternative browser.
You should upgrade or use an alternative browser.
Armed Virginia Sloop - Lauck Street Shipyards, POF 1:32 Scale, Admiralty Style by DocBlake [COMPLETED BUILD]
- Joined
- Apr 20, 2020
- Messages
- 6,241
- Points
- 738

You act as in the well-known phrase:Thanks, guys!
Having a little fun with details. I decided that the stove needed a source of fuel, so I built a little coal scuttle. I sawed one of my powder kegs in half, found the center point of the cut surface, and holding the barrel in the jaws of a pair of pliers to steady it, I used a Forstner bit to hollow out a shallow hole in the barrel's top. I spread some WeldBond glue in there and sprinkled in some coarse black model railroad ballast. The handles are 28 gauge annealed black steel wire. A couple of coats of poly and the coal scuttle was done. Elapsed time: about an hour.
View attachment 172736
"God is present in the details."

It is indeed important in our field to implement the important value of maintaining the small details in the construction process, and it is not a simple challenge at all.
Well done, your attention to detail is reflected in the beautiful photos
By the way, some attribute the phrase to the writer Gustav Flaubert, a 19th century, but there is no definite evidence for this. Others attribute the phrase to architect Ludwig van de Rohe Who lived in the 20th century, and used it frequently.
It's the little details that add so much to a modelThanks, guys!
Having a little fun with details. I decided that the stove needed a source of fuel, so I built a little coal scuttle. I sawed one of my powder kegs in half, found the center point of the cut surface, and holding the barrel in the jaws of a pair of pliers to steady it, I used a Forstner bit to hollow out a shallow hole in the barrel's top. I spread some WeldBond glue in there and sprinkled in some coarse black model railroad ballast. The handles are 28 gauge annealed black steel wire. A couple of coats of poly and the coal scuttle was done. Elapsed time: about an hour.
View attachment 172736
Ted
Thanks!
The shot locker/well took longer than I thought. Here is the completed structure and the final appearance of the magazine. You can see the work table and the powder kegs. I was going to leave one of the lids on the shot locker open to show the shot inside but took the easy way out! The well/shot locker design is from the Swan class of British sloops based on David Antscherl's drawings in his book.
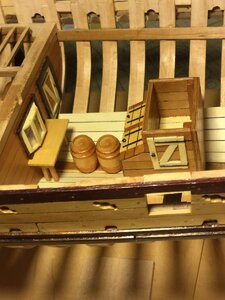
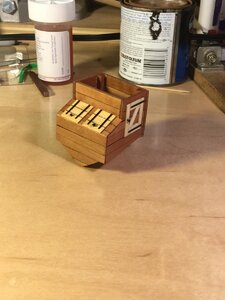 (Photo 86-87)
The shot locker/well took longer than I thought. Here is the completed structure and the final appearance of the magazine. You can see the work table and the powder kegs. I was going to leave one of the lids on the shot locker open to show the shot inside but took the easy way out! The well/shot locker design is from the Swan class of British sloops based on David Antscherl's drawings in his book.

 (Photo 86-87)
- Joined
- Apr 20, 2020
- Messages
- 6,241
- Points
- 738

It's really beautiful,Thanks!
The shot locker/well took longer than I thought. Here is the completed structure and the final appearance of the magazine. You can see the work table and the powder kegs. I was going to leave one of the lids on the shot locker open to show the shot inside but took the easy way out! The well/shot locker design is from the Swan class of British sloops based on David Antscherl's drawings in his book.
View attachment 173201View attachment 173202(Photo 86-87)
I even showed it to my wife, and she agreed with me that is high quality of work
Thanks Shota. And thank you everyone for the "likes".
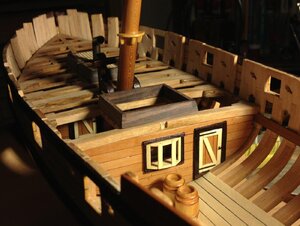
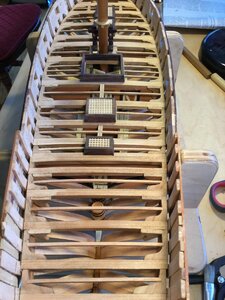
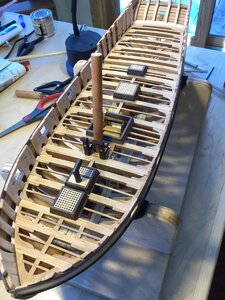
I completed the last bulkhead below deck and finished framing the main deck...a milestone! Next is framing the quarterdeck. The deck furniture is just set in place for the photos. I'm also considering a companionway with open doors for the main hatch so the ladder leading below remains visible.
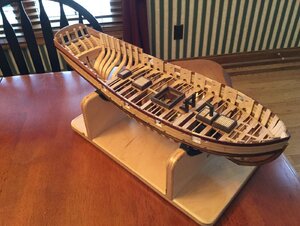
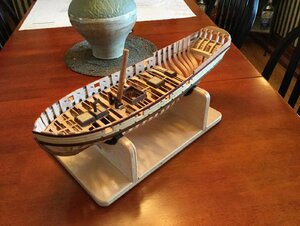
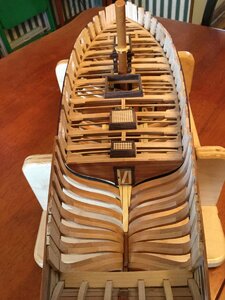
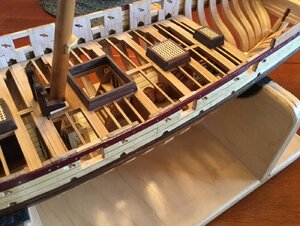
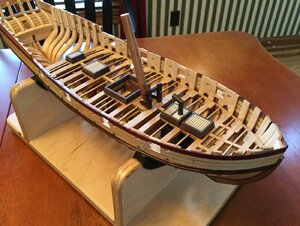
I completed the last bulkhead below deck and finished framing the main deck...a milestone! Next is framing the quarterdeck. The deck furniture is just set in place for the photos. I'm also considering a companionway with open doors for the main hatch so the ladder leading below remains visible.


Kurt Konrath
Kurt Konrath
Master craftsmen ship for sure!
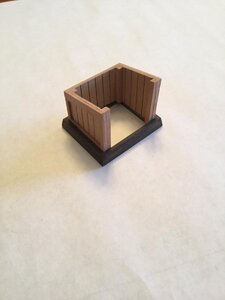
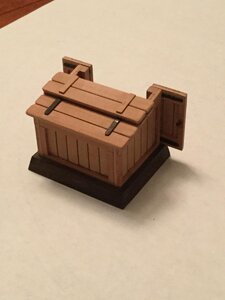
I'm trying to decide what to do about the main hatch. The plans call for a plain coaming and there are stairs leading below. Lots of water in the bilge if it rains with the hatch open and very inconvenient to access below deck if the hatch is battened down. I made up a second coaming for the hatch and started construction of a companionway. The top will be planked with a hinged portion shown folded back as is typical for this style of deck furniture. It is a close fit, though because the hatch is right behind the main mast and I have to ensure clearance so that the hinged top can fold back without hitting the mast or the boom support. Photos show stages of construction
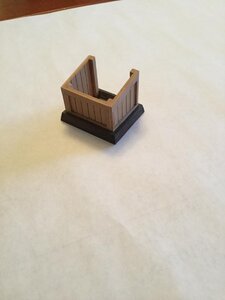
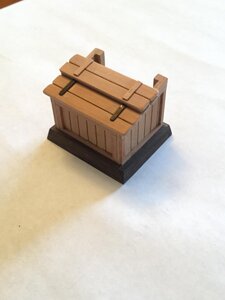
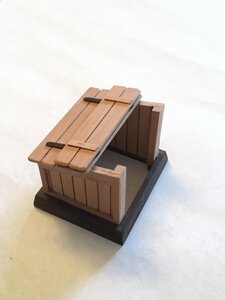
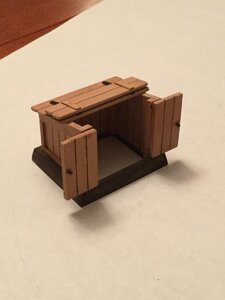


Kurt Konrath
Kurt Konrath
Is this a drawing or actual build, looks good either way!
That's the actual build, Kurt!
Kurt Konrath
Kurt Konrath
Reminds me about the access hatch on back of small sailboat to go down into cabin, with opening top and back doors.
Very functional design for deck hatch opening.
Very functional design for deck hatch opening.
I finished the treenails on the inboard bulwark planking. There were about 350 of them. I used bamboo toothpicks and I think they turned out OK - visible but not overpowering. Next comes the deck planking, I was able to find some acrylic paint that exactly matches the color of the red heart bulwark planking once it's finished with poly. Once the scuppers are cut on the inboard side, I'll paint the scuppers, sweep ports and inside of the gun ports and then seal them with some poly.
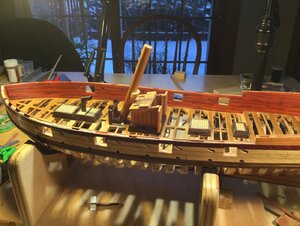
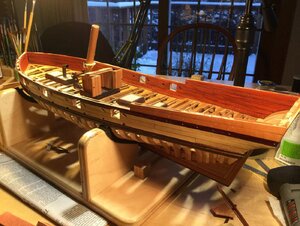


I completed the quarterdeck and cabin planking. I've yet to place the treenails, though. I completed bulkhead 5 and the picture shows me in the process of fitting it in place. Lots of contour sanding to get the side edges of the bulkhead flush against the bulwark planking as well as in the right place on the deck. No poly on the bulkhead yet, and the doorknobs have to be added. Next I'll install the margin plank on the main deck and begin main deck planking.
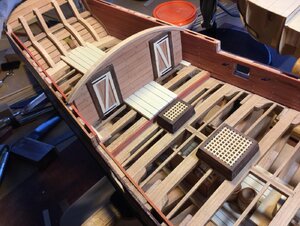

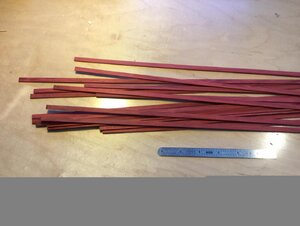
The kit provides a .pdf template of the nibbing strake. the four pieces are cut out, rubber cemented to some holly stock and then cut out with a scroll saw. I then glued them in place.
I finished the decking and treenailing. I also fitted the bowsprit bit and the sprit itself. No poly on the sprit, inboard bulwarks or deck. The sprit needs some stop chocks for the forestay and the footrope stirrups. I still need to frame the great cabin roof, install the rails and build the binnacle, great cabin lights, elmtree pumps, and windlass. Still a lot to do!
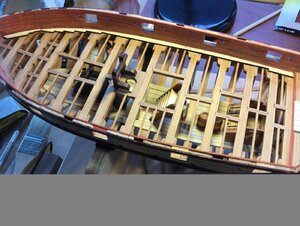
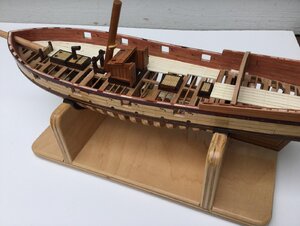
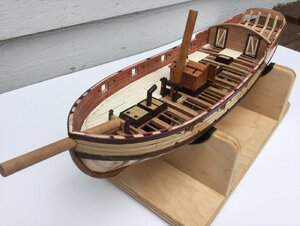
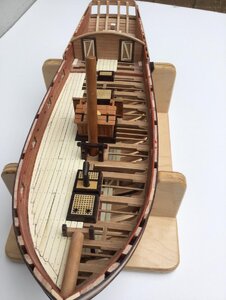
I finished the decking and treenailing. I also fitted the bowsprit bit and the sprit itself. No poly on the sprit, inboard bulwarks or deck. The sprit needs some stop chocks for the forestay and the footrope stirrups. I still need to frame the great cabin roof, install the rails and build the binnacle, great cabin lights, elmtree pumps, and windlass. Still a lot to do!


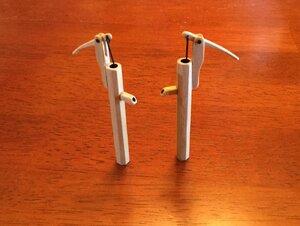
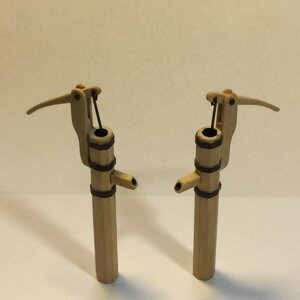
I decided to build the elm tree pumps out of boxwood. A milled the wood to an octagon shape and cut the pumps to length. The supports and spouts were glued on and the handles were installed. Last came the metal work. I drilled out the tops of the pump body and painted the insides black to simulate hollowed out logs. Same with the spigots. I added reinforcing bands.


- Joined
- Apr 20, 2020
- Messages
- 6,241
- Points
- 738

Dear DocI decided to build the elm tree pumps out of boxwood. A milled the wood to an octagon shape and cut the pumps to length. The supports and spouts were glued on and the handles were installed. Last came the metal work. I drilled out the tops of the pump body and painted the insides black to simulate hollowed out logs. Same with the spigots. I added reinforcing bands.
View attachment 174668View attachment 174669
First of all the result looks great

 Thanks for the detailed explanation, do you also have pictures we can view and thus incorporate them into your detailed explanation.
Thanks


