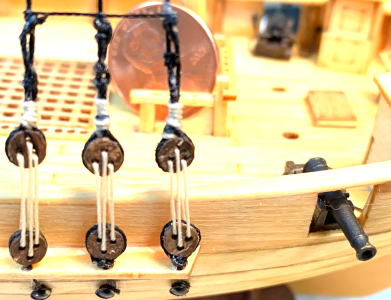
With a double action air brush, one trigger controls two actions, the air flow and the paint flow. It gives you better control. With more are and less paint, you can coat your object with a thin mist of paint, addiing color that is translucent over wood and not filling in and covering up the texture of the wood. With more paint flow, you get more coverage of the objects color with the paint's color. Being able to control both air and paint flow with one finger lets you choose how the paint appears on the surface. Using a regular paint brush, you can't get the subtle color effect and retain the wood texture nearly as well. I am still a rank beginner using an air brush, but doing some basic painting of 3D printed cannon barrels showed me how and air brush can preserve intricate details, and spraying wood that has an open grain like walnut or mahogany retains the texture and doesn't make the wood look like plastic. It's a great tool!K. I've never become proficient with an airbrush since the last time I had the equipment to try it was probably 30 years ago or though. I'm not sure what a "double-action" airbrush means! Please give advice as much as you have time for!
M.
-
LUCZORAMA SHIPWRECK SCAVENGER HUNT GIVEAWAY. 4 Weeks of Fun • 1 Legendary Prize ((OcCre’s Fram Ship)) • Global Crew Welcome!
**VIEW THREAD HERE**
You are using an out of date browser. It may not display this or other websites correctly.
You should upgrade or use an alternative browser.
You should upgrade or use an alternative browser.
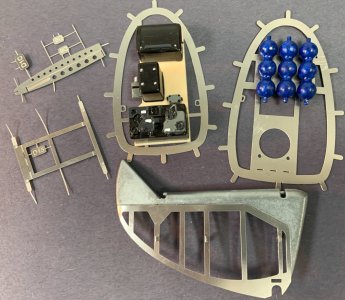
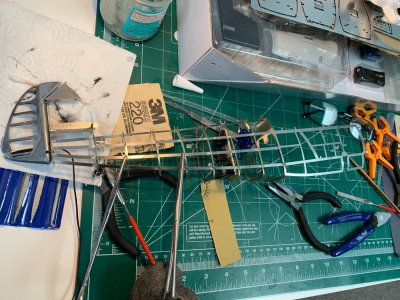
HA! Finger punctures... I did one of these several years ago and bled myself a half a dozen times or more. The "kits" are only only two postcard sized sheets of steel. Fun, but frustrating!I am also currently building this model. My impressions: customer support is excellent (quick response, excellent assistance), manual is fantastic with detail I have never seen before, parts are well made with very little touch up required on cast parts. Going to try the electric side cutting pliers to improve the filing of nubs on the steel parts. Many finger punctures. My biggest problem was with parts with tabs that need to be bent on many parts. They are delicate and more than 2 bends and they break off. I had a lot of work around securing parts with broken tabs. To the company’s credit, they quickly replaced parts with multiple broken tabs for the three layer bulkhead. I just couldn’t keep going back to them for subsequent broken parts. I used primer and model paint on the cast parts but found that it rubbed off if I handled the part to any extent. I also used Super Glue to bond parts and had good success unless I put too much pressure on the parts. All in all I am extremely satisfied with this model and will happily go back for additional models in the future.
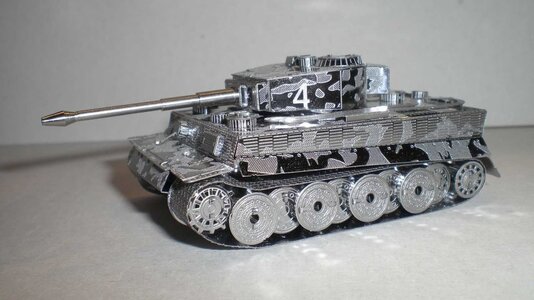
Fun side projects M!HA! Finger punctures... I did one of these several years ago and bled myself a half a dozen times or more. The "kits" are only only two postcard sized sheets of steel. Fun, but frustrating!
View attachment 464362
The single action airbrush was pretty simple to figure out. The biggest variable appears to be how thick/thin your paint mixture is? After that I am not sure what you would need to know to just do solid colors. Which is all I am doing atm. But my daughter is an artist who has locked eyes on the airbrush since I opened up the box. This evening, she commented on my cardboard test sheet where I had tested fades in black but also did a darker smiley face in one corner. She appeared excited to try it out (later, because she is doing math homework right now) but I can never be 100% sure. She is 16 after all...
Heh.. You had better buy a second airbrush !The single action airbrush was pretty simple to figure out. The biggest variable appears to be how thick/thin your paint mixture is? After that I am not sure what you would need to know to just do solid colors. Which is all I am doing atm. But my daughter is an artist who has locked eyes on the airbrush since I opened up the box. This evening, she commented on my cardboard test sheet where I had tested fades in black but also did a darker smiley face in one corner. She appeared excited to try it out (later, because she is doing math homework right now) but I can never be 100% sure. She is 16 after all...
Sorry about this post but my 'puter seems to have issues with YouTube playing RUSH and also on SOS.50 tubes to mix and thin paint to air brush availability https://www.amazon.com/dp/B07FFSYVW4?psc=1&ref=ppx_yo2ov_dt_b_product_details
Oh thankSorry about this post but my 'puter seems to have issues with YouTube playing RUSH and also on SOS.
GOD! It is playing SRV with Jeff Healey now!
btw, NOTHING wrong with RUSH!!! I Love that band! Then again, SRV?!?! 'nuff said?!Oh thank
GOD! It is playing SRV with Jeff Healey now!
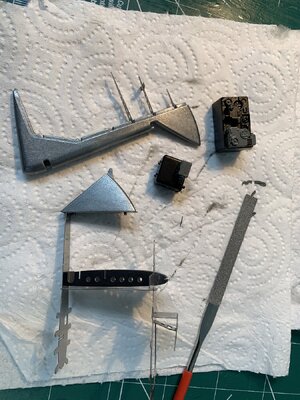
Acetone (aka nail polish remover). It dissolves CA (for those of us who do not already know this). I learned this from a YouTube of a guy machining a micro aircraft engine. Super cool video. But, either way, I am doing a LOT of cleanup with swabs and acetone atm. The stainless of this model deserves no less (at this price!) in my opinion.
I've only found two issues with the kit so far. The rudder has an LED in it that is not thin enough to be sandwiched between the two rudder side plates. Maybe if you bulged out the area around the light to make it kinda like a tube for the LED it might work? I don't know.
There is no way to bend the tabs on the sides to 90 degrees with the spring-back of the steel. So it requires gluing (CA) of each tab on those type of joints (the entire fuselage). Which is OK now that I know. It requires roughing the shiny tabs on the bulkheads and then cleanup with acetone. But the results are amazing!
Oh, and the top of my rudder did not exactly reach the same height as the rest of the vertical stabilizer. Minor visual issue that only I may notice in a finished model.
M.
Absolutely!


