-

Win a Free Custom Engraved Brass Coin!!!
As a way to introduce our brass coins to the community, we will raffle off a free coin during the month of August. Follow link ABOVE for instructions for entering.
-

PRE-ORDER SHIPS IN SCALE TODAY!
The beloved Ships in Scale Magazine is back and charting a new course for 2026!
Discover new skills, new techniques, and new inspirations in every issue.
NOTE THAT OUR FIRST ISSUE WILL BE JAN/FEB 2026
You are using an out of date browser. It may not display this or other websites correctly.
You should upgrade or use an alternative browser.
You should upgrade or use an alternative browser.
Bluejacket Shipworks Lobster Boat 5/8” = 1’
- Thread starter Pathfinder65
- Start date
- Watchers 16
Going to be a bit of an intermission. Waiting on the arrival of a tool to help with the shaping of the bow blocks.
View attachment 65949
The new tool comes with certain conditions.
1) It goes under the Xmas tree
2) It can’t be used until after all the Holiday company goes home.
Condition number 1 has been satisfied. The new tool is all assembled and on my workbench.
Condition number 2 will be satisfied on January 3, 2019.
Back working in the shipyard.
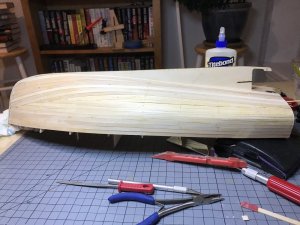
Started the planking of the hull. Very interesting procedure. With deck temporarily mounted to the frames, two 1/16 X 1/4 inch planks are glued to the frames on both the Port and S’board side starting 1/8 of an inch below the deck. The deck can then be removed and and the planking continued. A total of four 1/16 X 1/4 inch planks are glued from the deck down on both the Port and S’board side. Eight 1/16 X 1/4 inch planks are glued from the keel up towards the deck on the Port and S’board side. The planking is completed using 1/16 X 1/8 inch planks. The build picture shows the build status so far.
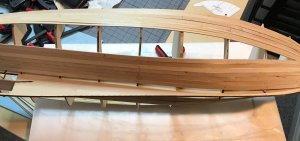
The build instructions indicated that the planks should be close fitted and glued to the frames as well as each other. I chose to only glue them to the frames and then add “bracing inside hull to glue the planks too. That seems to solve the problem of the up and down dips in planking. I’ve also added additional bracing on each side of the frames. The frames are only 1/8 of an inch thick.
I also did not use the blocks provided for the bow. I made several attempts at carving the profile required and decided my carving proficiency left a lot to be desired.
Started the planking of the hull. Very interesting procedure. With deck temporarily mounted to the frames, two 1/16 X 1/4 inch planks are glued to the frames on both the Port and S’board side starting 1/8 of an inch below the deck. The deck can then be removed and and the planking continued. A total of four 1/16 X 1/4 inch planks are glued from the deck down on both the Port and S’board side. Eight 1/16 X 1/4 inch planks are glued from the keel up towards the deck on the Port and S’board side. The planking is completed using 1/16 X 1/8 inch planks. The build picture shows the build status so far.

The build instructions indicated that the planks should be close fitted and glued to the frames as well as each other. I chose to only glue them to the frames and then add “bracing inside hull to glue the planks too. That seems to solve the problem of the up and down dips in planking. I’ve also added additional bracing on each side of the frames. The frames are only 1/8 of an inch thick.
I also did not use the blocks provided for the bow. I made several attempts at carving the profile required and decided my carving proficiency left a lot to be desired.
I have a very good result with Elmer's carpenter's wood filler. It dries fast, stainable (if needed).
Looking good
I was curious to see if there was a difference in wood fillers between the various types of paint. I’ve always used Acrylic’s on my models and the kit came with oil based paints.I have a very good result with Elmer's carpenter's wood filler. It dries fast, stainable (if needed).
A small experiment:
I covered the Port side with “Liquitex Modeling Paste” to see how well the gaps, bulges and depressions in planking would fill in.
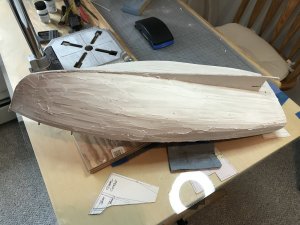
I think I might have overdone the application. I used my orbital hand sander to smooth out and remove the excess Liquitex. To remove the remainder and blend things in, I sanded by hand starting with 150 grit and finished with 400 grit sandpaper. There are some touch up spots left, but the overall result was better than I expected.
A word of Caution here. One should wear a mask and safety goggles during the sanding process,the “sawdust” created by sanding is very fine and is primarily Marble dust.
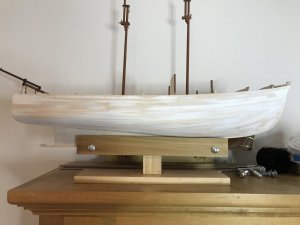
The work so far.
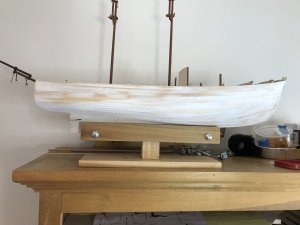
Jan
I covered the Port side with “Liquitex Modeling Paste” to see how well the gaps, bulges and depressions in planking would fill in.

I think I might have overdone the application. I used my orbital hand sander to smooth out and remove the excess Liquitex. To remove the remainder and blend things in, I sanded by hand starting with 150 grit and finished with 400 grit sandpaper. There are some touch up spots left, but the overall result was better than I expected.
A word of Caution here. One should wear a mask and safety goggles during the sanding process,the “sawdust” created by sanding is very fine and is primarily Marble dust.
The work so far.

Jan
Looks very good, Jan!!
For gap filling I like to sand the model on newspaper keeping all the sanding dust I then mix that with glue and fill gaps with it, if you keep it sticky enough it will even fill depressions. small gaps or cracks I just lay some glue right into the crack and sand over it the particles bind with the glue that will still be wet and fill it in nicely.
For gap filling I like to sand the model on newspaper keeping all the sanding dust I then mix that with glue and fill gaps with it, if you keep it sticky enough it will even fill depressions. small gaps or cracks I just lay some glue right into the crack and sand over it the particles bind with the glue that will still be wet and fill it in nicely.
I like your method. I’ll have to try that on my next build.
For this one I was sort of leery about too much sanding of the planks. They are Basswood and barely 1/16 of an inch thick. The build instructions advise to add “filler” to the inside of the hull in the places that sanding might thin out the planking too much. So I thought I would do this workaround.
I’ve used Liquitex on scenery and building flats on my RR layout, so I’m familiar with how it sets up and how well it covers.
I chose not use the kit supplied bow blocks, so for strength at the stem and to help keep the planking fixed to the stem I added quite a bit of Liquitex inside that part of the hull.
Looks very good, Jan!!
Thanks for the compliment and all you’re likes.
Progress so far:
Things that when wrong or were difficult.
The Rudder.
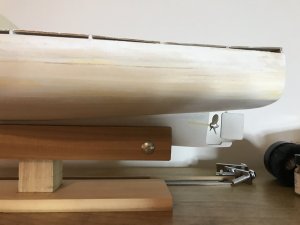
Needed to drill a 1/16 inch hole through the skeg for the bottom of the rudder post and then a 1/16 inch hole through the rudder. The location for the skeg hole was transferred from the plans to the skeg. I had also measured the propeller shaft on the plans and cut the shaft to that length. When I dry fitted the rudder it became apparent that there would be no way to mount the propeller. The end of the propeller shaft was butting up to the rudder. I shortened the propeller shaft and again dry fitted the propeller and rudder until I was satisfied by the fit.
Cockpit Sole (floor).
The cockpit sole comes in two pieces, they must be glued together and then then glued into the area behind the fourth frame. The top of the keel piece acts as a brace to hold the the two pieces. It became obvious very quickly that I had not gotten all the the frames (frame five through nine) inserted “exactly” into the keel. Some sanding was required to fix that error.
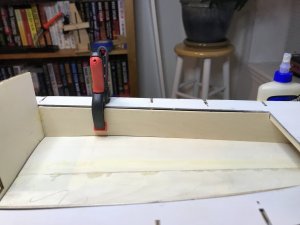
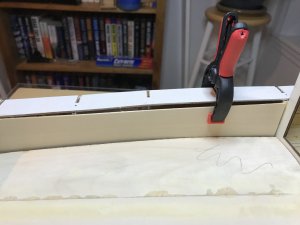
Cockpit side backing pieces.
There are two pieces that fit into the cockpit to to form the port and s’board sides. Dry fitting those presented another problem. The pieces have an ever so slight concave curve at the top and must fit under the deck. The the deck had been removed after the first planks were installed. I placed it back on the hull to see why the backing pieces didn’t follow the deck’s concave outline. I found the tops of frames five, six and seven were too high, (I can’t say if that was my error or not). But having adjusted those very frames to get the deck/sole to fit makes me think that the frames were slightly off.
Planking.
This only the second hull that I’ve planked. The planking from the keel up and deck down went well except for frame number four. I had to add a 1/16 inch thick piece of scrap on both the port and s’board side to get an area for the planks to attach.
Things that when wrong or were difficult.
The Rudder.
Needed to drill a 1/16 inch hole through the skeg for the bottom of the rudder post and then a 1/16 inch hole through the rudder. The location for the skeg hole was transferred from the plans to the skeg. I had also measured the propeller shaft on the plans and cut the shaft to that length. When I dry fitted the rudder it became apparent that there would be no way to mount the propeller. The end of the propeller shaft was butting up to the rudder. I shortened the propeller shaft and again dry fitted the propeller and rudder until I was satisfied by the fit.

Cockpit Sole (floor).
The cockpit sole comes in two pieces, they must be glued together and then then glued into the area behind the fourth frame. The top of the keel piece acts as a brace to hold the the two pieces. It became obvious very quickly that I had not gotten all the the frames (frame five through nine) inserted “exactly” into the keel. Some sanding was required to fix that error.


Cockpit side backing pieces.
There are two pieces that fit into the cockpit to to form the port and s’board sides. Dry fitting those presented another problem. The pieces have an ever so slight concave curve at the top and must fit under the deck. The the deck had been removed after the first planks were installed. I placed it back on the hull to see why the backing pieces didn’t follow the deck’s concave outline. I found the tops of frames five, six and seven were too high, (I can’t say if that was my error or not). But having adjusted those very frames to get the deck/sole to fit makes me think that the frames were slightly off.
Planking.
This only the second hull that I’ve planked. The planking from the keel up and deck down went well except for frame number four. I had to add a 1/16 inch thick piece of scrap on both the port and s’board side to get an area for the planks to attach.
Cockpit/sole and cockpit sides.
I’ve put the deck module to the side for the moment and worked on the cockpit/sole/floor and sides.
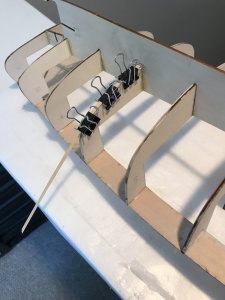
I’ve discarded the kits parts for those pieces and used them as a template for a news set. I also added 1/8 X 1/8 pieces of “ bracing on frames four through seven to have a firmer mount for the cockpit sole/floor.
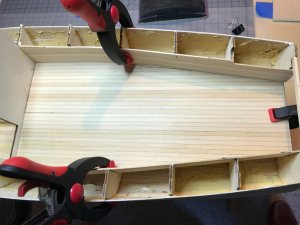
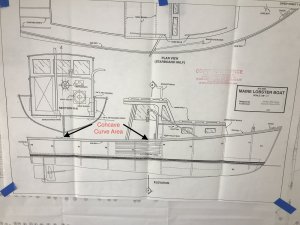
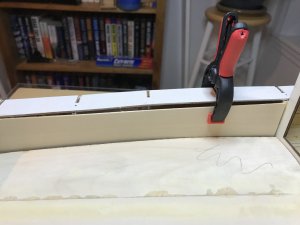
The dry fit looks good and I’ll probably finish the final gluing in the next couple days. I still need to adjust the deck fit to accommodate the concave curve between the middle frames.
I’ve also added areas of wood filler inside the hull to provide more strength. Especially in the bow area.
I’ve put the deck module to the side for the moment and worked on the cockpit/sole/floor and sides.
I’ve discarded the kits parts for those pieces and used them as a template for a news set. I also added 1/8 X 1/8 pieces of “ bracing on frames four through seven to have a firmer mount for the cockpit sole/floor.

The dry fit looks good and I’ll probably finish the final gluing in the next couple days. I still need to adjust the deck fit to accommodate the concave curve between the middle frames.
I’ve also added areas of wood filler inside the hull to provide more strength. Especially in the bow area.
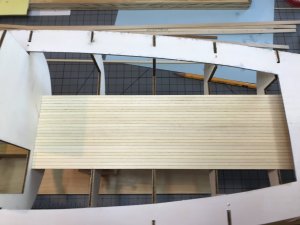
I very nice and clean deck. Is it comes with a kit prefabricated or you have to glue individual planks together?


