Bluejacket Tug Sequin 1/4” scale

Clamps:

While sulking about not being able to soak my planks in the bathtub I managed to manufacture a few clamps.

View attachment 107226

The frame spacing on the hull does not provide much surface to attach the planks. Each plank will need a slight bevel and be firmly seated against the plank above it.

You should have taped them to your legs and had a bath, :p:p:p:p,

best regards John,
 
Solution to soaking or steaming the garboard pieces.

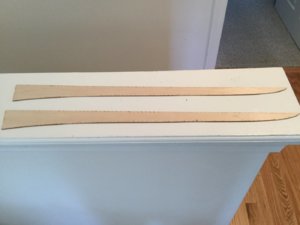
The garboard pieces are an odd shape. The part that will be attached to the stern is almost 1 3/4 inches across.

B6D93D7C-896C-4DA5-8F4E-398ACA0B3444.jpeg

Some the above posts have great suggestions on how to prepare them for final fixing to the hull.

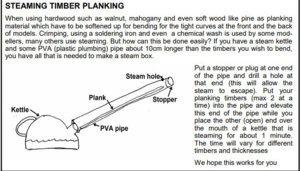
This morning I was cleaning up my basement workbench when I noticed the plank soaking jig I had used for my Enterprise build. It was a 1 inch diameter X 24 inch piece of PVC pipe with a fixed cap on one end and a removable cap on the other.

It was off to the hardware store to buy a 2 inch diameter X 24 inch piece of PVC and two end caps.

I think that will neatly solve my problem and keep the bath free of obstructions.
 
Oh Boy, who does not like a Tug. I have built several of their kits and have 2 stashed away. I have their true plank on frame Fair America. What a beauty. I will pull up a chair for this one. You are off to a good start. I have never used cork board f/ships but have many times used to build Rubber FF Airplanes.
Rick

Indeed, the Tug was on display in Bluejackets shop when I stopped in to buy the Lobster boat that I build . It very quickly went on my build list along with the Lackawanna, sea going Tug.
 
Solution to soaking or steaming the garboard pieces.

The garboard pieces are an odd shape. The part that will be attached to the stern is almost 1 3/4 inches across.

View attachment 107426

Some the above posts have great suggestions on how to prepare them for final fixing to the hull.

This morning I was cleaning up my basement workbench when I noticed the plank soaking jig I had used for my Enterprise build. It was a 1 inch diameter X 24 inch piece of PVC pipe with a fixed cap on one end and a removable cap on the other.

It was off to the hardware store to buy a 2 inch diameter X 24 inch piece of PVC and two end caps.

I think that will neatly solve my problem and keep the bath free of obstructions.

Once I bookmarked this small hint, which is similar to your idea, but especially works for normal sized planks

Unbenannt.JPG
seen at:
 
Yepper, that is one way and does work. Another is using a old coffee maker. The coffee maker takes water that it converts to steam to make the coffee. Either way works. I do like the steam method over boiling water with the material not being par boiled! Just my 2 cents worth. Years ago, I did their 310' 4 Piper USS Ward, USS Gambier Bay, USS Monitor (my 1st Blue Jacket kit build), CSS Virginia. I have stashed away their 1/8 America and a Mary Taylor. I at one time did not build POF, but solid hull. Has been awhile but maybe it is time to pull out that Mary Taylor!
Rick:cool:
 
Pilot house:

Yet another head scratching bending problem.


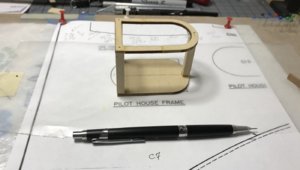
fullsizeoutput_264.jpeg

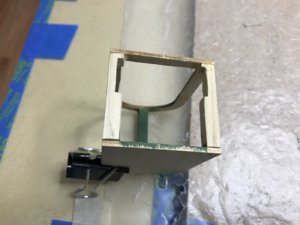
The above is the frame for the Pilot house. The curve at the front is approximately two inches in diameter.

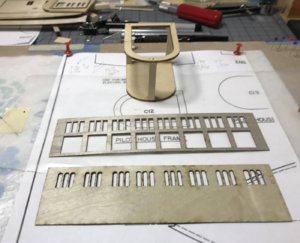
fullsizeoutput_265.jpeg

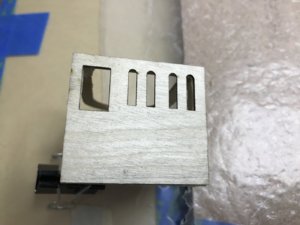
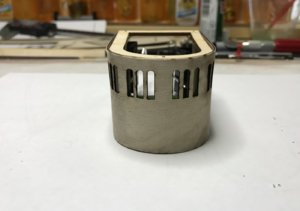
These two pieces make up the walls of the Pilot house and must be bent to fit the Pilot house frame.

The underlay is 1/32 of an inch thick. The overlay is !/64 of an inch. Both are 1 49/64 of an inch wide.

Plan A:

My plan is to make a jig from a 1 X 4 inch board, drill a 2 inch hole in the board, cut the board in half to get two pieces alike with the 2 inch diameters of the hole lined up, and having about 1 3/4 of an inch in width. Then it will be soak, use the barrel of a soldering iron to gently bend the pieces into the jig and repeat until I have the shape I need.

If anyone hears loud noises coming from this side of the Ocean, you'll know that plan A was a disaster and I am working on plan B
 
Hopefully, Plan 'A' will work out, but out of curiosity, what will be the plan "B"?

Plan B:
That plan involves ordering replacement parts, making a 2 X 4 inch form of the Pilot house, steaming/soaking the new parts and clamping them to the form.

Plan C:

If plan B isn’t successful then all parts will go live on the closet shelves and I’ll start to work on my Sopwith
Pup Kit.
 
We managed to survive Plan A:

The Pilot house frame needed a bit of adjustment on the rear columns.


Without the notches in the columns, the columns GlCJIQv%SeSkZwnX3pT+5Q.jpgwould be visible with the underlay attached.

fullsizeoutput_268.jpeg


The underlay drying out clamped to the Pilot house frame.

fullsizeoutput_267.jpeg

Plans B and C are no longer required.

Jan
 
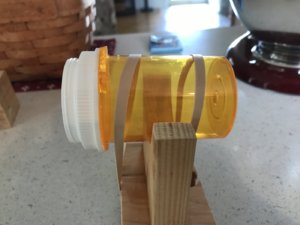
How did I do it "Modified plan A":

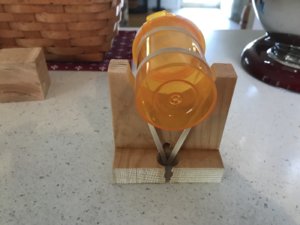
I placed the underlay in a small tray with boiling hot water in it. I waited about five minutes and checked the underlay for flexibility. I repeated the boiling hot water treatment until the underlay was flexible enough to place in my jig.

aa%s5PYOTz2QsRkTJFjq7g.jpg

+o454nVORUqOx9feyK%faA.jpg

The pill bottle's diameter was just a bit over the 2 inch diameter of the bend that I needed. I left the underlay clamped in the jig for several minutes to form the right shape. I then clamped the underlay to the Pilot house frame to let it dry.

Jan
 
Go to the hardware store
Get a basin for tapestry roll it will do the job it is very useful for soaking plank mine is 29’’ or 74mm long

By the way the Seguin is one of my kit in reserve so your build will be follow with a lots of interest.
 
Go to the hardware store
Get a basin for tapestry roll it will do the job it is very useful for soaking plank mine is 29’’ or 74mm long

By the way the Seguin is one of my kit in reserve so your build will be follow with a lots of interest.

Excellent idea, thank you.
 
Back
Top