No I just meant the winch on my launchway
-

Win a Free Custom Engraved Brass Coin!!!
As a way to introduce our brass coins to the community, we will raffle off a free coin during the month of August. Follow link ABOVE for instructions for entering.
-

PRE-ORDER SHIPS IN SCALE TODAY!
The beloved Ships in Scale Magazine is back and charting a new course for 2026!
Discover new skills, new techniques, and new inspirations in every issue.
NOTE THAT OUR FIRST ISSUE WILL BE JAN/FEB 2026
You are using an out of date browser. It may not display this or other websites correctly.
You should upgrade or use an alternative browser.
You should upgrade or use an alternative browser.
Bluenose Model Shipways build log - Mallacoota
- Thread starter mallacoota
- Start date
- Watchers 18
Never thought of that as I assumed gravity and well greased ways would facilitate the launch . . . of course with the champagne bottle kinetic energy boots. I'm looking forward to you launch-way. RIchNo I just meant the winch on my launchway
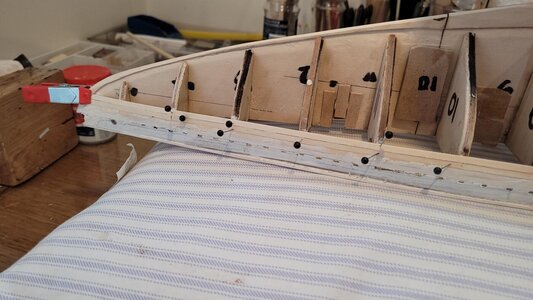
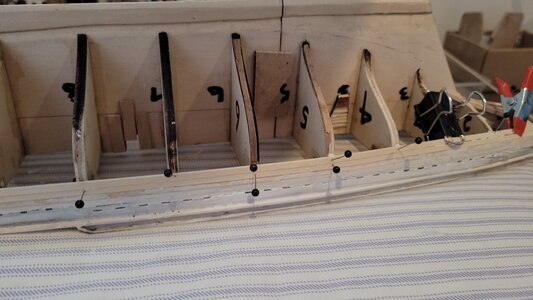
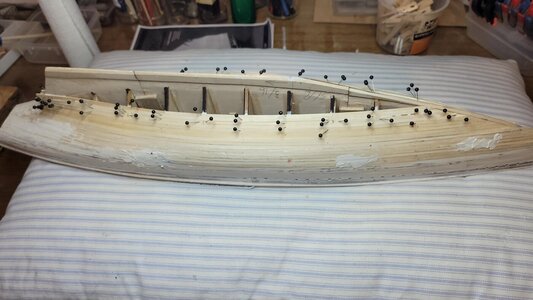
More planking. I find that on really straight run hulls like this I dont bother with the whole sectional approach. When there is no spiling required, and no stealers or drop planks it really just makes too much fuss of a straightforward job.I really just start at the waist and stop when I reach the keel. I mix the plank joins around but dont follow any rigid pattern as the whole idea of bulkheads makes scaling plank lengths meaningless anyway. Plus you are going to fill, sand and paint. With this POB hull planking is much slower because the bulkheads make CA glue inappropriate (for me) and I use good waterproof PVA which sticks better anyway but you can only do a few planks at a time. With the pearwood planks in the YQ POF model I used Zap CA medium as the wood was so good, and there were so many landing points and the whole planking only took half a day to complete
Hasnt yet been planed or sanded so a bit rough but will be tyhere by end of week I hope.
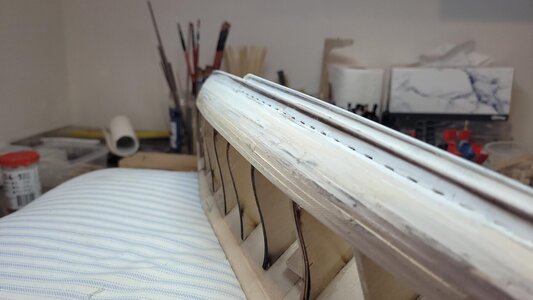 .
.
Hasnt yet been planed or sanded so a bit rough but will be tyhere by end of week I hope.

 .
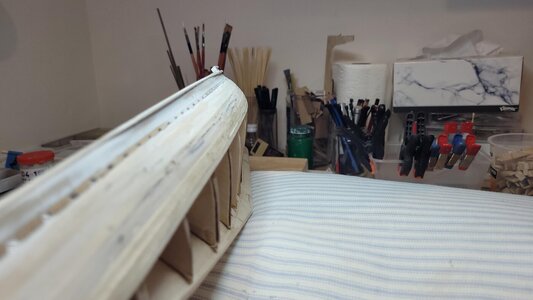
.Your camera lens and views make it look similar to the hull of a Viking longship from the angle seen and lens distortion. Maybe BN took a voyage that we don't know of.More planking. I find that on really straight run hulls like this I dont bother with the whole sectional approach. When there is no spiling required, and no stealers or drop planks it really just makes too much fuss of a straightforward job.I really just start at the waist and stop when I reach the keel. I mix the plank joins around but dont follow any rigid pattern as the whole idea of bulkheads makes scaling plank lengths meaningless anyway. Plus you are going to fill, sand and paint. With this POB hull planking is much slower because the bulkheads make CA glue inappropriate (for me) and I use good waterproof PVA which sticks better anyway but you can only do a few planks at a time. With the pearwood planks in the YQ POF model I used Zap CA medium as the wood was so good, and there were so many landing points and the whole planking only took half a day to complete
Hasnt yet been planed or sanded so a bit rough but will be tyhere by end of week I hope.
View attachment 257661View attachment 257662.
LOL...I think it is just my crummy photography
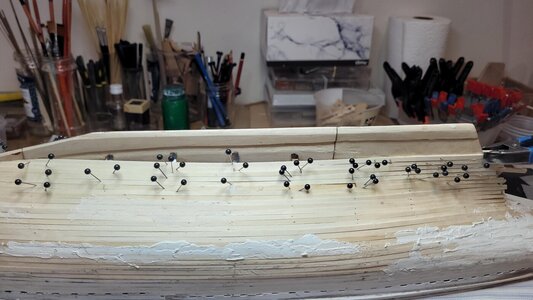
This is my last planking post just to show that with no plank tapering, no spiling and no drop planks or stealers...in other words the 1/8th x 1/16th just curved in place and stuck with PVA, you end up with an easy straight and parallel closure when you get to the keel. While I dont rate basswood all that highly these planking strips were quite good and easy to install. Even pinning it quite close to an end it rarely split. The pins are angled because the centre element of the ply bulkheads is as hard as rocks so I have pinned into the sides of them. Total used was 59 of the 70 planks but I dont know if this stock is specified elsewhere..?

Yes. I think you should keep it as you never know when you may need a piece of it for something else. RichThis is my last planking post just to show that with no plank tapering, no spiling and no drop planks or stealers...in other words the 1/8th x 1/16th just curved in place and stuck with PVA, you end up with an easy straight and parallel closure when you get to the keel. While I dont rate basswood all that highly these planking strips were quite good and easy to install. Even pinning it quite close to an end it rarely split. The pins are angled because the centre element of the ply bulkheads is as hard as rocks so I have pinned into the sides of them. Total used was 59 of the 70 planks but I dont know if this stock is specified elsewhere..?
View attachment 257811
Planning the deck planking. There is no false deck as you would usually get with a POB kit, another "cheap" move. It is the only POB kit I have built with only a single layer of hull planking and also no false deck to support the deck planks between bulkheads. If I want to edge glue the deck planks I will not be able to also pencil blacken them for caulking simulation...hmm..still to decide on that. Not sure which way to go. The deck planking is quite narrow and more square in profile than usual and that is more realistic than the common 0.5 x 3 or 1.0 x 3 or 4.... the profile does make them fairly strong and that might enable me to not edge glue them. The other thing to be considered is nibbing... I might give it a miss. The planks are so narrow and unsupported between bulkheads I cant see myself bothering unless I install some intermediate support beams near the waterway....hmmmm... more thinking needed. The nibbing would be very small.
Last edited:
- Joined
- Sep 3, 2021
- Messages
- 5,190
- Points
- 738

Maybe using a very thin sheet of plastic as a "false deck" is an option? Don't have experience with it and I don't know if the stanchions have sufficient height to allow this. But I think it might give the planks a better support and it would allow you to pencil the planks.Planning the deck planking. There is no false deck as you would usually get with a POB kit, another "cheap" move. It is the only POB kit I have built with only a single layer of hull planking and also no false deck to support the deck planks between bulkheads. If I want to edge glue the deck planks I will not be able to also pencil blacken them for caulking simulation...hmm..still to decide on that. Not sure which way to go. The deck planbking is quite narrow and more square in profile than usual and that is more realistic than the common 0.5 x 3 or 1.0 x 3 or 4.... the profile does make them fairly strong and that might enable me to not edge glue them. The other thing to be considered is nibbing... I might give it a miss. The planks are so narrow and unsupported between bulkheads I cant see myself bothering unless I install some intermediate support beams near the waterway....hmmmm... more thinking needed. The nibbing would be very small.
possibly..but I think I will get away with running them unsupported. The first few will tell me anyway.
- Joined
- Sep 3, 2021
- Messages
- 5,190
- Points
- 738

Good luck, hope it works for you.possibly..but I think I will get away with running them unsupported. The first few will tell me anyway.
Nothing prevents you from installing under the cross beams (they are called beams), if I understand correctly, supports. Moreover, they will not be visible under the deck deck, but this will give rigidity to your beams.Planning the deck planking. There is no false deck as you would usually get with a POB kit, another "cheap" move. It is the only POB kit I have built with only a single layer of hull planking and also no false deck to support the deck planks between bulkheads. If I want to edge glue the deck planks I will not be able to also pencil blacken them for caulking simulation...hmm..still to decide on that. Not sure which way to go. The deck planking is quite narrow and more square in profile than usual and that is more realistic than the common 0.5 x 3 or 1.0 x 3 or 4.... the profile does make them fairly strong and that might enable me to not edge glue them. The other thing to be considered is nibbing... I might give it a miss. The planks are so narrow and unsupported between bulkheads I cant see myself bothering unless I install some intermediate support beams near the waterway....hmmmm... more thinking needed. The nibbing would be very small.
Finished painting hull and installing deck timbers. Have tried to get a distressed look on deck by rubbing the pencil marks with steel wool and then clear coat then more steel wool. Fairly happy with it. Started on the cabin and steering box although I wont install them yet...just feeling like making them after all the planking. Obviously the cabin sits forward of where it is pictured on the pencil line.
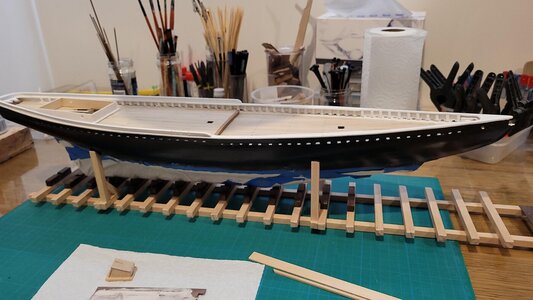
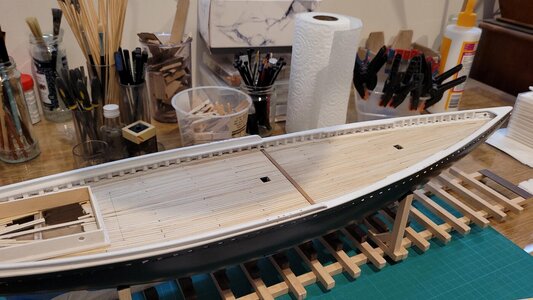


A couple of detail things...the old photos clearly show the top of the steering box is hinged on starboard side. Also the circular hatch just Port of wheel is marked on MS Plans as "unknown". It is actually a Lazarette hatch originally providing access to storage for dead bodies on hand (Thus derivation from Lazarus) but latterly used as service access to lower steering gear....dont even know where I found that a little while ago.?
From the resources that I have, illustrations below, the entire steering gear mechanism was within the wheel/gear case above the deck. The rudder stock was well encased in wood passing downwards and connected to the rudder.A couple of detail things...the old photos clearly show the top of the steering box is hinged on starboard side. Also the circular hatch just Port of wheel is marked on MS Plans as "unknown". It is actually a Lazarette hatch originally providing access to storage for dead bodies on hand (Thus derivation from Lazarus) but latterly used as service access to lower steering gear....dont even know where I found that a little while ago.?
While the "unknown function box or tub on the deck" was likely your "Lazarette" it is elsewhere speculated as a bottomless tub for stowage of extra boom tackle that I assume would be either spares or for use in broad reaches and runs where the typical boom tackle beneath the boom was hung as seen in many views of that.
Here is a series of photos of two reference sources:
First from what is commonly called Saga, p. 53 is a drawing of the wheel box and mechanism:
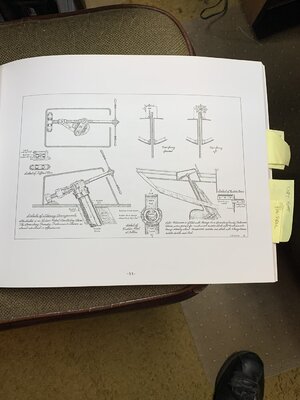
From other books and notably A Spirit Deep Within which is the book and specifications that W.J. Roue included, all state that typical equippage of BN was used and the only truly difference were her lines, excepting Ben Pine's rigging variations on Gertrud T. You can see that all of the steering mechanism is within the box and only the rudder stock and case extend below that.
Here are three pages from The American Fishing Schooners 1825 - 1935, Howard I. Chapelle,
Steering Mechanisms p. 635
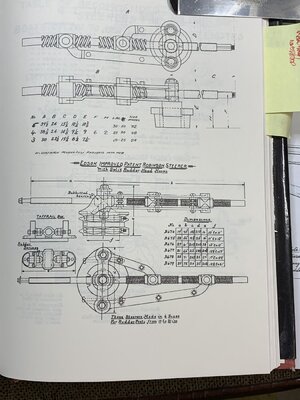
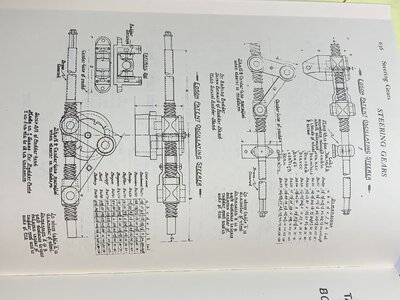
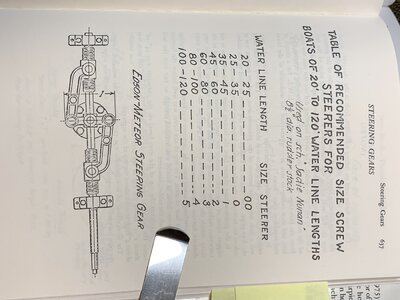
and lastly the rudder stock and case which are below the deck and wheel box
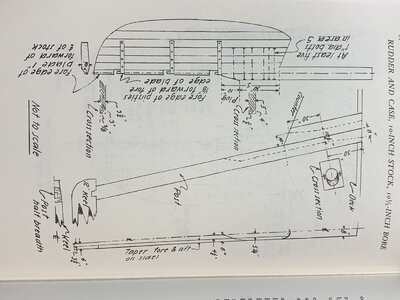
With the assumption that one of these types was used in BN as supported by that in the first BNII which closely copied BN, I feel it is safe to say that there was nothing below the wheel box steering mechanism. It would be interesting to see what the source of your understanding is as my port is always open to incoming vetted and referenced vetted resources. I am always learning as I go. Rich (PT-2)
I think I'm done here
Hi John. The deck looks nice with those narrow planks. What width did you use?Finished painting hull and installing deck timbers. Have tried to get a distressed look on deck by rubbing the pencil marks with steel wool and then clear coat then more steel wool. Fairly happy with it. Started on the cabin and steering box although I wont install them yet...just feeling like making them after all the planking. Obviously the cabin sits forward of where it is pictured on the pencil line.
View attachment 259700View attachment 259701
The ship on the launchway looks also good. The exhaust pipe is a nice added detail on the motorhouse.
I can hear the engine puffing. It’s almost the same sound as the 1.5 hp International engine as on the BN.
Are you going to give the launchway a angle? My idea is also to set the BN on a (wharf) ramp. With an angle so that the waterline is horizontal/level. This makes it easy to stake out and align everything that comes on the deck.
Regards, Peter
Last edited:
Yes Peter it will be on an angle, I just let it sit flat for convenience as a build support. The deck planking is 1/8th by 3/32 I think..certainly they are quite small profile.Hi John. The deck looks nice with those narrow planks. What width did you use?
The ship on the launchway looks also good. The exhaust pipe is a nice added detail on the motorhouse.
I can hear the engine puffing. It’s almost the same sound as the 1.5 hp International engine as on the BN.
Are you going to give the launchway a angle? My idea is also to set the BN on a (wharf) ramp. With an angle so that the waterline is horizontal/level. This makes it easy to stake out and align everything that comes on the deck.
Regards, Peter


