-

Win a Free Custom Engraved Brass Coin!!!
As a way to introduce our brass coins to the community, we will raffle off a free coin during the month of August. Follow link ABOVE for instructions for entering.
-

PRE-ORDER SHIPS IN SCALE TODAY!
The beloved Ships in Scale Magazine is back and charting a new course for 2026!
Discover new skills, new techniques, and new inspirations in every issue.
NOTE THAT OUR FIRST ISSUE WILL BE JAN/FEB 2026
You are using an out of date browser. It may not display this or other websites correctly.
You should upgrade or use an alternative browser.
You should upgrade or use an alternative browser.
Thank you all for the likes and suggestions.
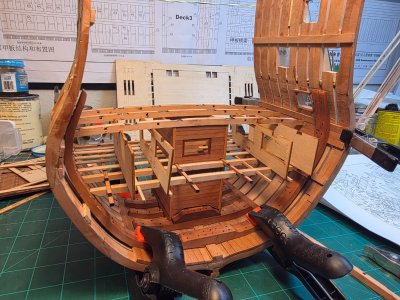
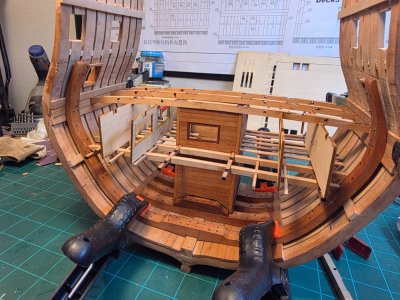
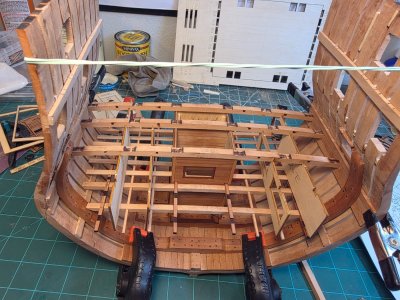
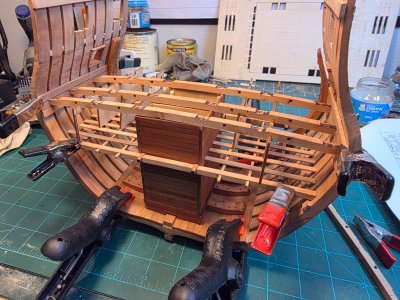
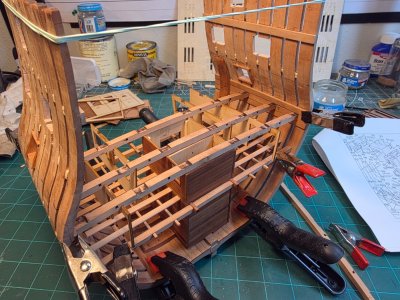
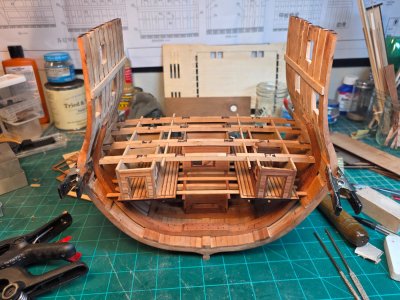
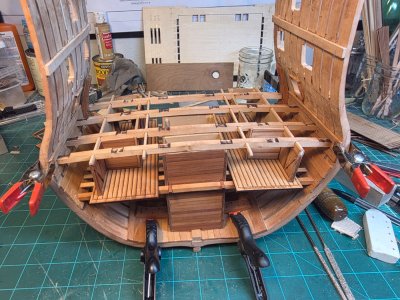
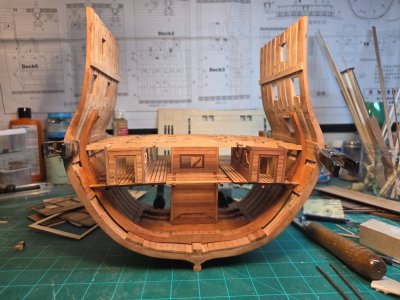
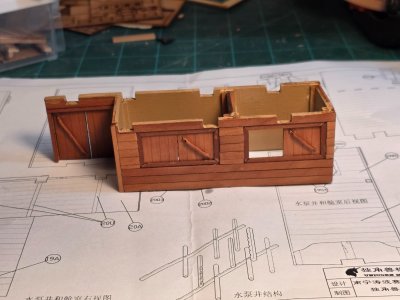
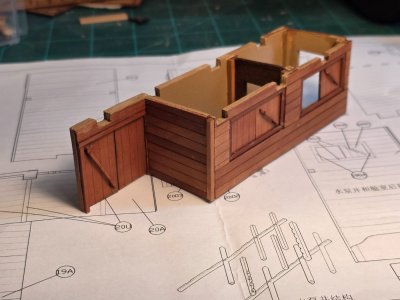
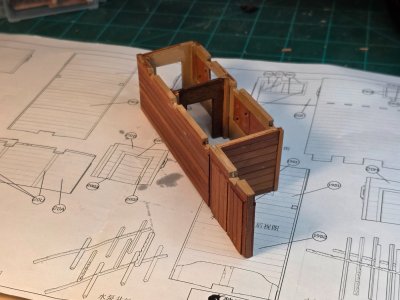
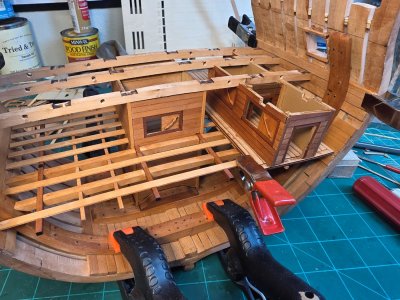
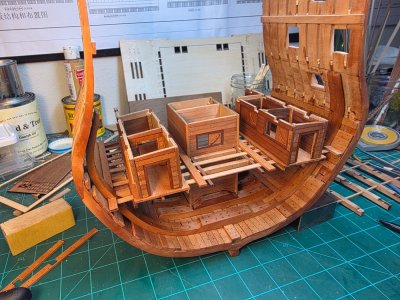
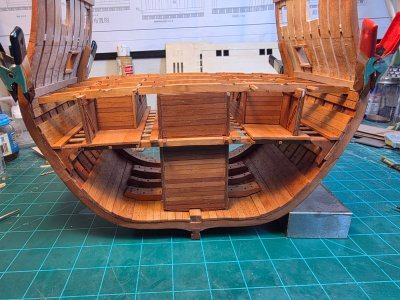
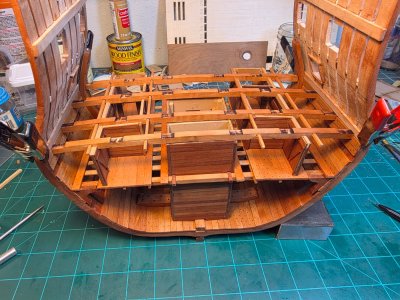
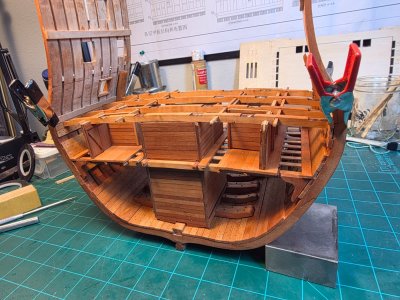
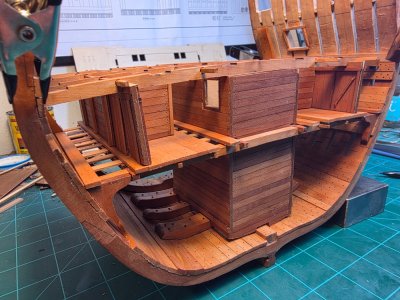
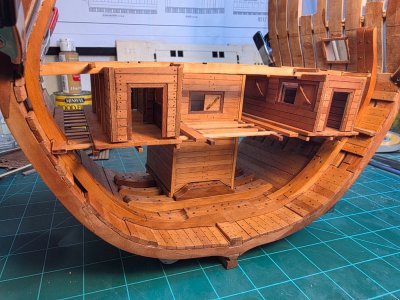
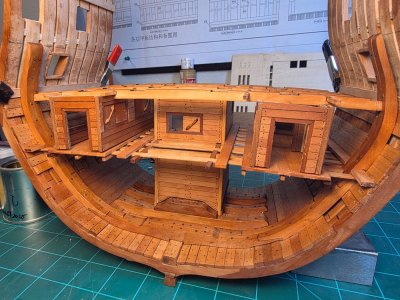
I finished one cabin. It was really a lot of work, but it was rewarding.
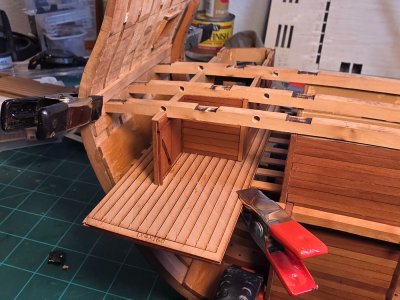
The cabin is installed (not glued) to check how it fits concerning the beams of the next deck. The deck planks are 2x5 mm. To provide the 2 mm I used 2 plates (is that the correct name?) that have laser cuts the planks used on the cabin (1×4 mm). And to my happiness, the beams fitted well, as seen in the images.
Next will be the other side cabin.
Cheers till the following posting....
Daniel


Looks wonderful !
Looks wonderful !
That's really turning out nice.
Neil
Thank you both !! But it isn't and will never be as the builts I posted at the start. Nevertheless, i am more than satisfied with my achievements so far on this built. And thank you all for the likes.
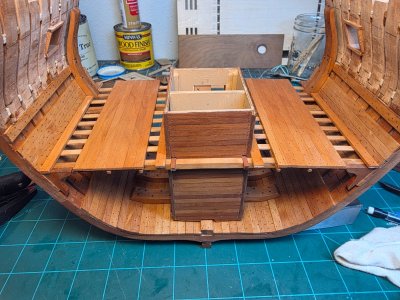
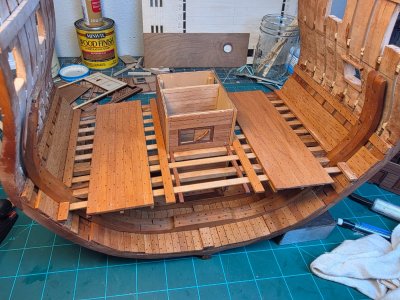
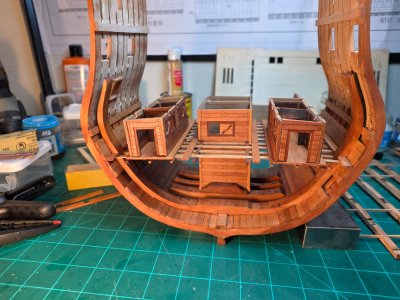
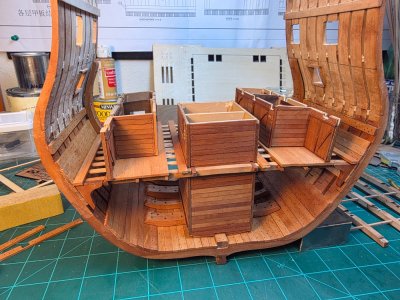
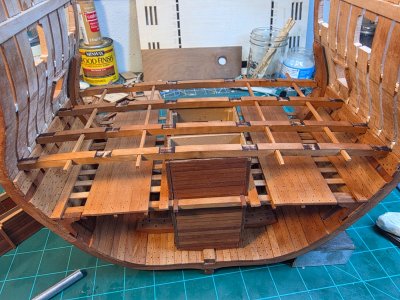
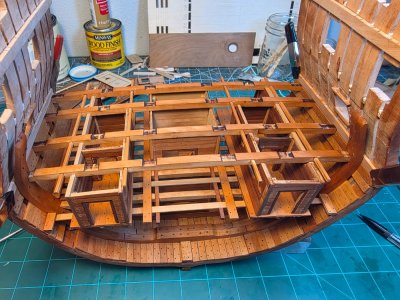
I have been moving forward with the built.
-Cabins were planked from inside too so the windows views looks nice.
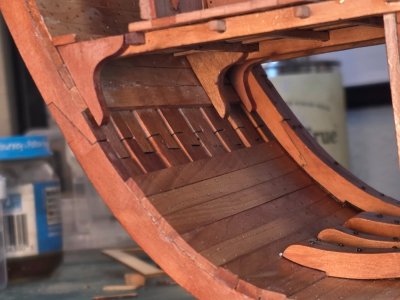
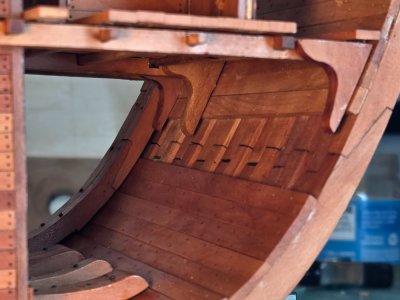
-Knees added. One pair of knees were missing in the kit. I did it from scratch. On the image are the knees that are in the middle.
-also the internal division of the cabins were missing. I did them from scratch too.
-Deck planks added and glued.
-Cabins aren't glued and I will never glue them. The beams of the next deck keeps them in perfect position.
-Next deck beams aren't glued either. I need to do a lot of work on that deck before fixing them.
-Cabins still need "fine tuning" to fit well all along the deck floor. The deck have a small curvature. I need to adjust the Cabins to it.
Well that's all folks for today ....
Have you all a happy labor day with family and/or friends or just alone enjoying a peaceful day !!!
Daniel
Very nice Daniel!
- Joined
- Mar 1, 2022
- Messages
- 694
- Points
- 308

Nicely done!
Very nice Daniel!
Nicely done!
Thank you guys !!!
And thank you all for the likes !!
Labor day gathering with grand kids was canceled because the youngest (1.5 YO) have a mild cold. And the elderly people, meaning "us" and my parents (90 and 91 YO) decided to avoid any risk. So I worked on the BR.
Did the stair and added an opening with a lid. Some builders did the opening, others didn't. I decided I will do it, if not what was the meaning of a stair that is blocked, at the middle, by the deck.
Here are the images showing the work.
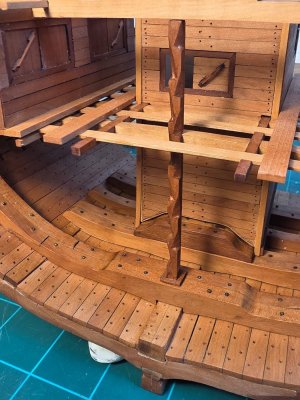
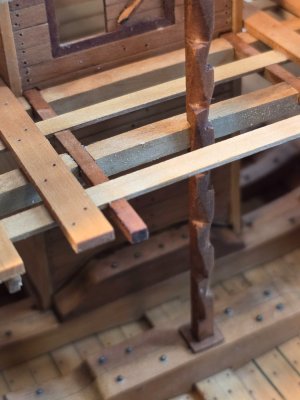
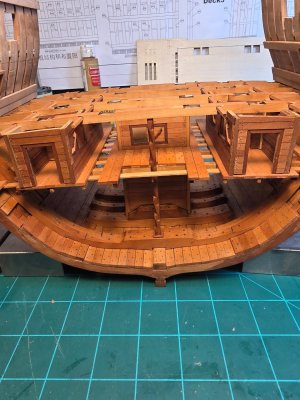
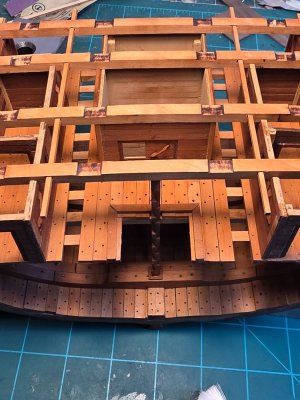
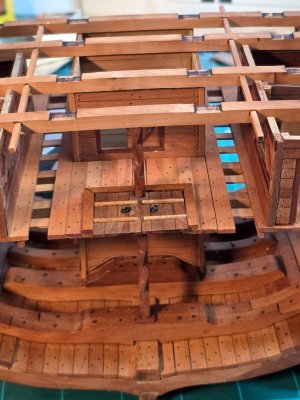
Ok guys... SORRY FOR YOUR NECKS !!!! HAHAHA. Unfortunately, again, the images upload in the wrong position. I think I am understanding why this is happening. All these pictures were taken in the normal position of the phone (vertical). When I upload images captured in the landscape position (phone horizontally), they upload well. Unfortunately, I can't recapture all those images, now that is all glued.
Cheers
Daniel
- Joined
- Jan 25, 2023
- Messages
- 545
- Points
- 308

Donnie has enabled the attachment editor, readers can use it to rotate the images. I don't think it saves the rotated image for other viewers, only for the reader themselves, but I just used it and it made viewing a lot easier. Look for the Attachment Editor button in the lower left corner of the post.
Thank you for the tip !!!!Donnie has enabled the attachment editor, readers can use it to rotate the images. I don't think it saves the rotated image for other viewers, only for the reader themselves, but I just used it and it made viewing a lot easier. Look for the Attachment Editor button in the lower left corner of the post.
Looks like someone (was it you ?), placed them in the correct position. Great and thank you or who did the job !!!!
SOS, is a great place !!
Cheers
Daniel
- Joined
- Jan 25, 2023
- Messages
- 545
- Points
- 308

I thought it just changed it for me, but I'm glad it fixed it for everyone.Thank you for the tip !!!!
Looks like someone (was it you ?), placed them in the correct position. Great and thank you or who did the job !!!!
SOS, is a great place !!
Cheers
Daniel
Looking perfect Daniel. Funny coincidence as I did the exact same cannon test this week.Hi guys
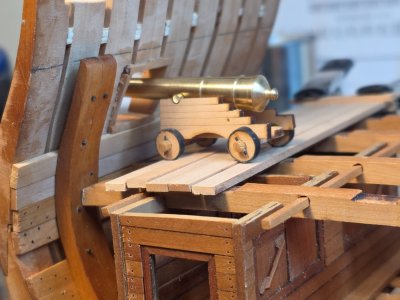
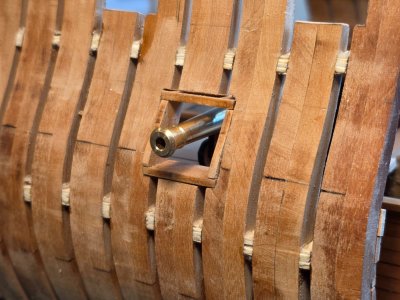
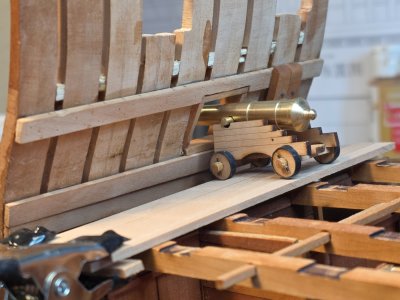
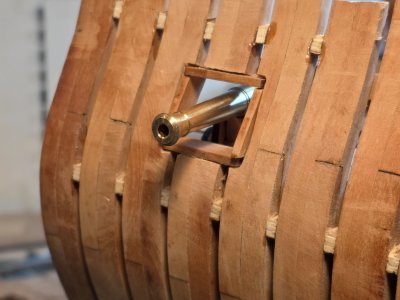
Before working on the next deck I wanted to check that the deck height with respect of the gunports opening was correct. For that I have to partially assemble the corresponding cannon. And YES !! the deck height is fine. See images.
Cheers !!!
Daniel
View attachment 542191View attachment 542192View attachment 542193View attachment 542194
 . Cheers Grant
Thank you Grant. I was happy that the cannon is fitting... for now... HAHAHA. Let me finish the deck and we hope for the best.Looking perfect Daniel. Funny coincidence as I did the exact same cannon test this week.. Cheers Grant
Thank you for all the likes too !
My small update:
The mainmast beams were installed and glued. The beams are precut in the kit, but you need to draw and cut the slots in the deck transversal beams that will support it. It ended very well (for my standards). For the slots I used the proxxon mini mill.
The unstained beams aren't glued yet.
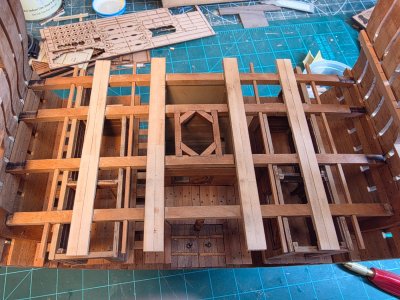
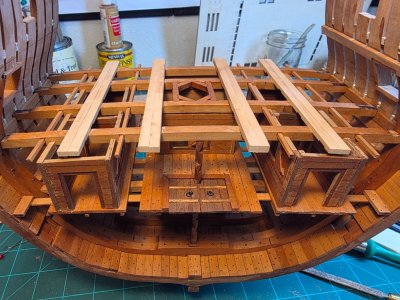
It looks wonderful !
Thank you Jeff !!!!It looks wonderful !
Hi guys, yesterday and today were productive modeling days. Something concerning my house internet equipment broke and the tech service can only come tomorrow. 2 evenings without watching TV so I used those few TV hours to work on the BR 
What you will see looks easy, nevertheless it was a lot of work. But no regrets at all. This kit is challenging and very well developed.
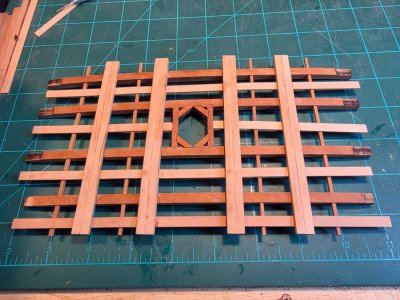
The upper cabins deck beams assemble has been finished. Something to pay attention is the beams thickness. The transversal beams, that are 2 glued together have different thicknesses. So be careful to pair them correctly. Moreover, based on the thickness they go in different places. The kit drawings show this very clear. See my last 2 images for this detail. I added a few deck planks to show what I meant. If those double beams are placed correctly, the deck beams seat flat against the thinner ones. The image shows it.
Have you all a good night !!
Daniel


Update, but before thank you for the likes.
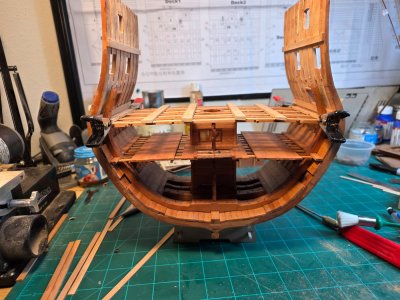
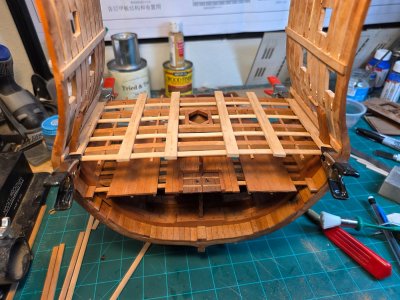
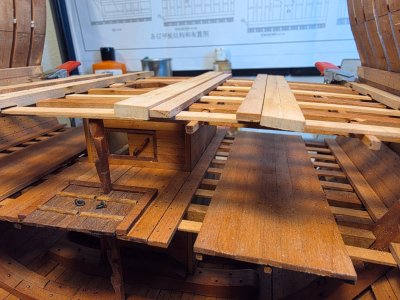
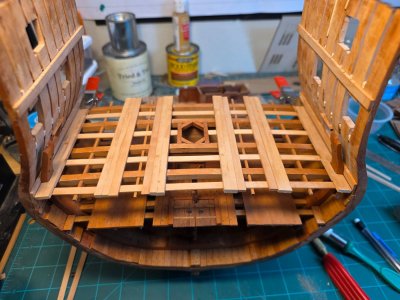
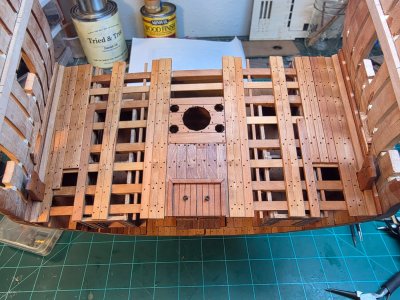
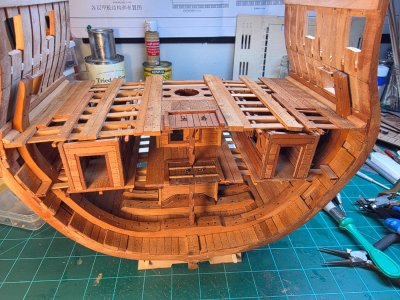
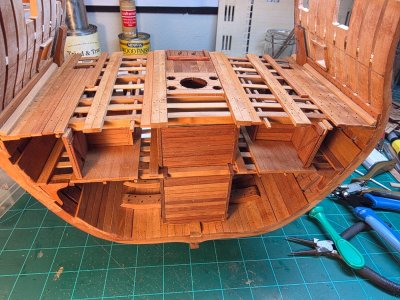
Here is where I am with Deck #2.
I have different pear wood colors. I did cut some planks and used them on this deck (see mainly back of lid). It was a kind of test. And I liked the diference between pear wood colors, so I will try to mix them on the following decks and or places that are starting to be more visible. This will slow my built, as I have to cut them from scratch to the correct width and thickness.
Cheers
Daniel
PS: the section behind the lid are 7x2 mm planks that I cut to make them fit correctly, instead of the 6x2 mm. I saw others did the same
Here is where I am with Deck #2.
I have different pear wood colors. I did cut some planks and used them on this deck (see mainly back of lid). It was a kind of test. And I liked the diference between pear wood colors, so I will try to mix them on the following decks and or places that are starting to be more visible. This will slow my built, as I have to cut them from scratch to the correct width and thickness.


Cheers
Daniel
PS: the section behind the lid are 7x2 mm planks that I cut to make them fit correctly, instead of the 6x2 mm. I saw others did the same
- Joined
- Jan 25, 2023
- Messages
- 545
- Points
- 308

I think them being really uniform is doing a disservice to the model. When the planks look like they came from different trees harvested in different years, it makes them visually interesting. It makes them pop. I am doing a little longboat from the same company as this kit. They supplied the floor planking as a single laser cut piece representing 5 planks. Because I agree with your sentiment I cut the planks apart and flipped a couple left for right to get just this effect. Can't say if it is worth it yet, but I am 100% behind you on the decision.


