• Win a Free Custom Engraved Brass Coin!!!
    As a way to introduce our brass coins to the community, we will raffle off a free coin during the month of August. Follow link ABOVE for instructions for entering.

CAF Granado 1/48 PoF Bomb Vessel by Signet

Wonderful series of photos and discussion, showing the considerable work you've accomplished! We were all wondering when we'd see and update.

Glad to hear you're feeling better and able to resume this log! Look forward to watching your continued progress.
 
That's kind of where I am to date. Hopefully my mistakes, and once in a while my ideas, will help someone else building this or other kits.
Hello, I have seen your comment and thank you very much for your feedback on the product。
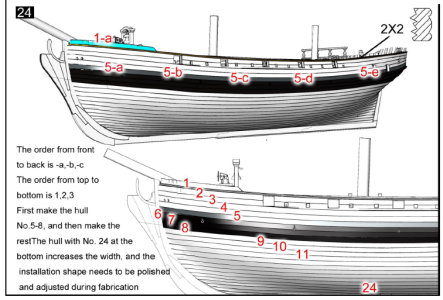
For most laser processed parts, I have added a margin of 0.2-0.3mm for polishing off carbon black。
But for a 1.5-thick deck, theoretically adding a margin of 0.1mm is sufficient, but considering the different production methods or errors of each person, increasing the width of the deck will make up for the problem. After all, it's much better to polish with margin than to leave gaps without margin。This is my little insight。
Your work is fantastic, appreciating a good piece is so enjoyable
Tom
 
After doing all the main deck structure and reinforcements, I needed to then place these parts properly to support the forecastle deck:
1763921957679.png
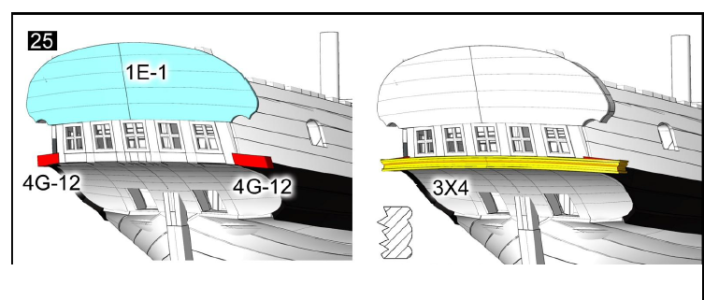
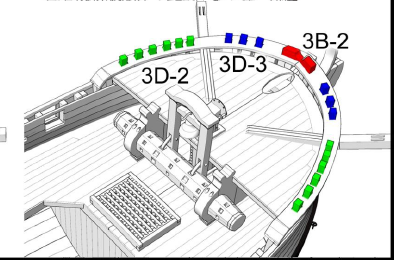
This is for proper location of the forecastle cross beams (below) and breathook (red part 4G-13) above. This is from a future instruction.
1763921714672.png
Note that the cross beam supports (A above) and longitudinal supports (B above) either side of the bowsprit clearly sit atop the breasthook (C above).

I first assembled the template and then tried to place it in position:
1763922308884.png
It doesn't fit. There are notches to go over the main deck beams (circled in red above), and between the notches the template is extended. But the carlings, installed in previous pages in the instructions, prevent this. Not wanting to remove the already installed carlings, I instead decided to modify the template:

On the left below is the original shape, with beam notches marked, and on the right is as modified:
1763922515399.png 1763922534963.png

After modification, the template fits in the proper location, and the markings to locate the beams can confirm this:
1763922596106.png

On my model, the breasthook ended up a distance away from the fore structure, so I added small supports, at exactly the same height, to help position it:
1763922654413.png
This holds the breasthook in place better.

Since the 4G-6 crossbeam is in 2 pieces, and I wanted to confirm proper beam locations prior to attaching it, I made a single piece temporary replacement for the split beam from 2 pieces of thinner 4mm wide stock glued together, and formed using the other cross pieces to obtain the correct curvature:
1763923000036.png

Using all these beams in place to check forecastle alignment I have:
1763923060794.png
Notice here that the beams are in line horizontally and very close to top of the breasthook. But something's wrong - the longitudinal beams are supposed to end up flush with the cross beams and SIT ON the breasthook, per the second diagram above. That can't be, as shown below:
1763923229240.png

I also took a piece of red cardboard and located the bottom of it to match beam support pieces 3D-3, marking the beam locations, and put it into place:
1763923344516.png
The bottom of the cardboard template, and therefore the support pieces 3D-3 cannot possibly fit on top of the breasthook.

After checking the kit's plans (very hard to locate the breasthook in the side cross section), as well as Goodwin's plans, I realized that the breasthook cannot possibly be located at the height determined by the template. Not only do the pieces mentioned above not fit atop it in that position, but I think the bowsprit would hit it when located.

I'll stop right here while I try to locate the bowsprit position to confirm this.

1763921253163.png

1763921937731.png
 
I'm sure you will end up figuring out this puzzling discrepancy., while maintaining the bowsprit angle/height. As usual, your work is superb and moving at a rapid pace.

Your log and descriptions of the modifications to the templates will be informative to those building this kit in the future!!
 
Looking at the plans, and roughing through the location, it was looking like the bowsprit would hit the breasthook:
1763940265959.png
I made the small H-shaped piece above to support the breasthook to what I /thought/ would be the correct height, about 2-3mm lower than the included template showed. Here I included a small shim to bring it to the original height, confirming the bowsprit would hit.

To be sure. So, time to fit the bowsprit to the bowsprit support piece:
1763934807232.png
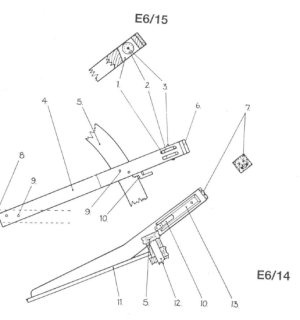
The end of the bowsprit must be shaped to fit into the roughly rectangular hole in 5B above. I marked the approximate size on the end of the bowsprit:
(Note that 5B above shows it being installed atop the planking, but it needs to fit between the main deck beams, so that might be much harder to do. I intend to mount this piece /before/ planking, so it can be sturdier and fit properly.)
1763934895465.png
The size of the projection should be roughly 3mm x 4mm but varies quite a bit. Nevertheless, I wanted to start out with a projection that would approximate the correct size, then sand to fit. I needed a way to cut the rectangular projection centered and rectangular, not angled like a parallelogram:

The method I devised to create the approximate rectangular projection was to use a table saw from either side to remove material, while using dowels taped to either side of the bowsprit to maintain it horizontal and vertical position:
1763939519369.png
1763939542183.png
1763939566793.png
I set the dowel at an angle of about 18 degrees, which approximates the angle between the bowsprit and the bowsprit mount, per the plans.
1763939582652.png
1763939630224.png
Then I removed the tape, turned the bowsprit 90 degrees, and went again, cutting from the opposite angle.
1763939685724.png
And ended up with a roughly rectangular protrusion:
1763939716246.png

Just having a rectangular protrusion, even at the correct angle, doesn't make it fit the unusually shaped hole in the mount:
1763939877411.png
Trimming with trial and error, I eventually made the 2 pieces fit acceptably:
1763939930110.png
1763939940251.png

While I think the shape of the protrusion and hole in the mount are probably accurate to the ship, the only thing visible is the small hole at the back of the mount. I think a simple drilled round hole would make the bowsprit easier to modify, putting just a round and centered protrusion on it, by hand, a lathe or similar method I used and turning the dowl. Extra faithfulness to the original seems unnecessary if you can't see it in the end.

With the lower height of the breasthook, I removed the shim and positioned the breasthook in place:
1763950180931.png
Then added the template and positioned the cross beams, as well as the extensions:
1763950212367.png
They fit perfectly onto the new breasthook location. I'll have to make new extension pieces out of scrap, as these aren't long enough. But I'm convinced I now have the correct location and height. I've rounded the top of the breasthook very slightly to match the curvature of the cross beams and deck.

Finally, I glued the breasthook in place using my modified template:
1763950600390.png

The bowsprit now misses the breasthook and the breasthook now establishes the forecastle beam level. I'll have to see where the side beam supports end up; I imagine I'll have to trim them a bit to get the right height at the front, but that's fine.

As mentioned above, the bowsprit step (5B above), while shown being installed /over/ the decking in the instructions, must be installed directly on the main deck beams for it to come out the correct height. This view shows the portion between the beams is the same as the template, which also must be used /over/ the decking:
1763951467651.png

That's it for tonight. Now I have to figure out where I was going before taking the bowsprit detour....
 
Last edited:
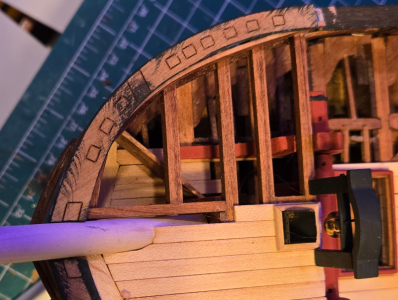
Continuing on with the forecastle support beams, I need to add the support members for them on either side. From drawing in Goodwin's book, I think I still have the breasthook higher than it should be (but lower than what the instructions indicated). But I like it at the height it is because it directly supports 2 longitudinal deck beams, and also the side supports.

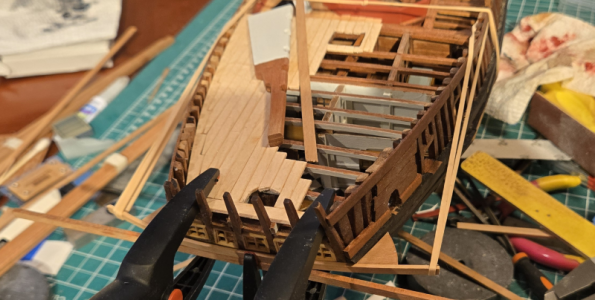
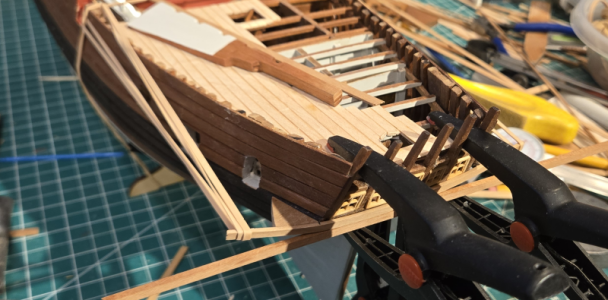
I started by bending the curved supports for the forecastle support beams by moistening with water, and then using a plank bender. I've never been good at this. Usually they break. These didn't break, but didn't get bent as well as I'd hoped. But I got them pretty close. To help them form in place, as well as hopefully keep them from breaking when mounting, I soaked them briefly in water (too long and they straighten back out), and clamped them roughly in place, to the required curvature:
1764043650341.png
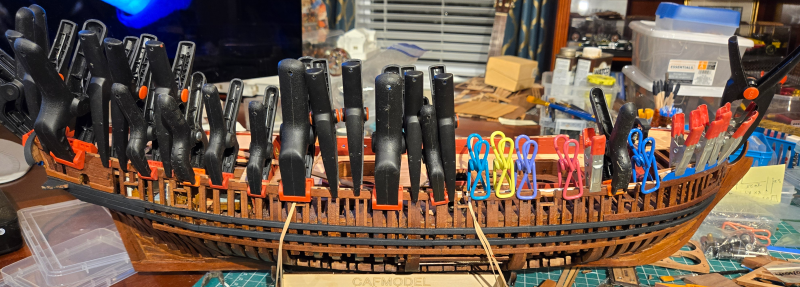
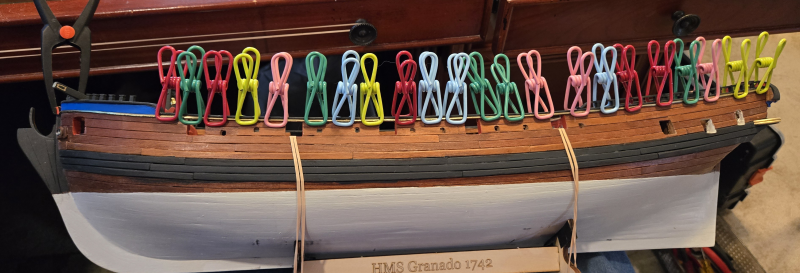
We all love our clamps, don't we?

I marked where these supports met the breasthook that they would rest upon, because IMHO they needed to be about half their thickness in order to mount directly on the breasthook. Here's the curved supports with thickness at ends reduced:
1764043838056.png

I also used a copy of the kit plans to confirm location of the slots for the cross beams, and widened them somewhat (much easier to do before mounting):
1764043886695.png
Rather than measure the location of the supports, I used the template to position the beams, one at a time. I started with the aftmost cross beam, and by trial and error, locating the correct position for the one beam, and approximate position toward the bow:
1764043934491.png
I took this photo after doing it with the beam mounted only to the windlass supports; I came back later and used the template, hoping the location would be the same. It was.
1764044032094.png
The idea here was not to try to locate the entire beam - I've had lots of problems doing that. I made it fit into only the first beam properly, clamped the rest in approximately the correct location, and CA glued only at the first beam.

I continued along, moving as required for each beam, clamping in place, and CA gluing a bit more, working toward the bow. I once again used my substitute beam to locate for the split one.
1764044162551.png

After everything was aligned and glued I removed the cross members until later in the process:
1764044334519.png
I stained the support on the starboard side, as CA glue will prevent stain from going on evenly, and it will be somewhat visible. I didn't bother on the port side, as it will be covered by decking.

I used quite a round-a-bout method to do this, making small changes in the process, but by doing that I feel confident that things are in the right place and should not cause any problems. That's a win, for me.

I'm considering working on the 8-sided mortar housings next, as I want them in place in order to deck tightly up to them. I certainly don't want to trim my installed decking later, or take a chance that things won't fit or have gaps. Again, a deviation from the instructions. But then that's me. :cool:
 
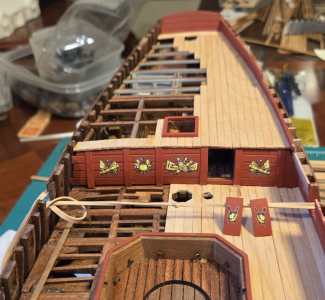
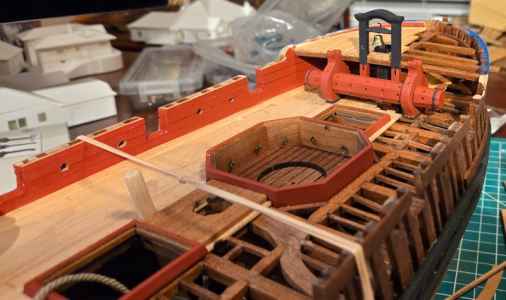
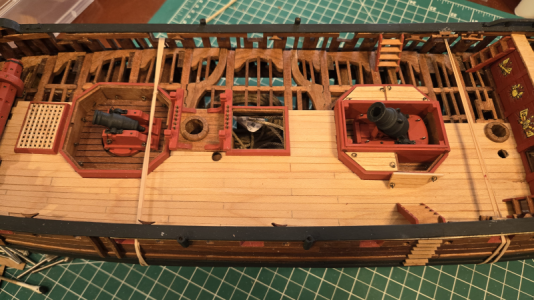
While working up the courage do the mortar surrounds, I decided instead to work on the two hatches for the main deck. The main hatchway is covered by four removable planks, one of which is notched for the anchor cables. The fore access hatch has removable grating on it. The reason I was going to work on these now is that per Goodwin they are mounted on the cross beams and structure, with the decking butting into them. But those with the kit are instead mounted atop the decking. And are a bit too low. But close enough, I decided to build them as provided.

Nothing unusual about removal of the laser cut pieces for the grating, but I want to point out that complex parts like this are far easier to remove when pushed out from the back toward the front of the sheet. The laser cut is wider on the front, so the parts don't wedge and tend to break:
1764174690734.png

In pre-assembly of the gratings, it appeared that unless each notch were filed or sanded, deepening them a bit, that the raised surfaces of the lower pieces would end up slightly lower than the raised pieces. Being too lazy to modify all the slots (and afraid of breaking them as well), I sanded the tops of the pieces slightly:
1764174806285.png
Those on the right have been sanded.

Assembly was the standard ladder method. I'd mount a couple and CA glue them from the back then continue. They need pressed snuggly in place:
1764174914684.png

These pieces are not as precise and don't fit quite as well as the milled pieces included with most kits, but they can be made curved, as these are, and the result is fine:
1764174992889.png
A little sanding on the edges, then sanding the top yields:
1764175041924.png

The coaming around the hatches should be tapered towards the top, per Goodwin, and slightly higher than these by about 1mm, but I just tapered them
1764175100415.png

And after a coat of Red Oxide paint, they're almost done:
1764175132060.png
I'll add the rings to the main hatch boards and finish them all later, along with the decking.

Now back to the mortar enclosures (unless I can procrastinate by doing something else in the meantime).
 
Ready for another of Signet's "Ignore the Instructions and Do It Your Own Way?" Well, welcome! I'd been avoiding making the 8-sided (turns out is IS octagonal, just not a regular octagonal) surrounds for the two ship mortars. CAF gives you a neat template of the correct shape, but my concerns were: 1) Not being able to see the inner surface, I'd get glue all over it, making a mess, 2) the glue would stick the structure to the template, and I'd damage in getting it off, 3) Even if the glue didn't stick, if it's a tight fit, it would be hard to get off without breaking.

The first thing I did was to take the assembled side pieces (1 and 2 mm thick pieces) place them into the octagonal framed area on all sides of the template. They didn't fit. Which meant, in my case, I had to reduce the outer size of the template. So I sanded until I got everything to fit in place.

I was still worried about my 3 points above, so thought if I made 4 mini-assemblies, that would be half the gluing to the template. So, after assembly of each pair of pieces, and sanding all edges to 22.5 degrees off of vertical, I tried assembling a pair:

1764341743104.png
Here I'm using a method I'd used previously on small parts, to insure a tight miter fit: simply stick each part onto some masking tape (or in my case, painter's tape), but the two closely together, add some glue to the notch, and bend and position:
1764341857211.png
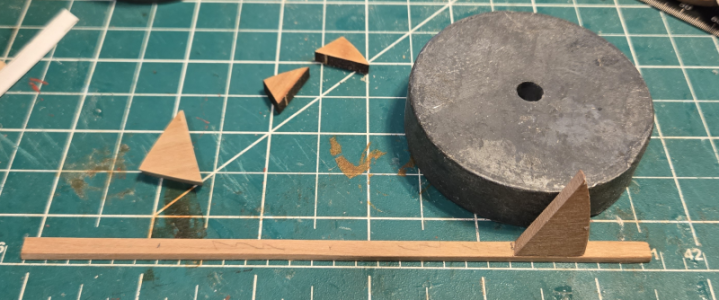
I actually made the first pair by making the tape long enough to fasten back on itself, making a triangle, but was concerned I'd over- or under-tighten the angle, so cut a small board at the required 45 degrees:
1764341933453.png
So, at least half of my joints would be tight. At this point, my plan was to place each assembly around the template, and glue in place using the template, while adjusting the length of each by sanding the ends to get a good fit.

The resulting 4 mini-assemblies:
1764342029776.png

And checking that they all fit into the mortar area:
1764342070987.png

After doing that, I couldn't help myself, I added all the pieces to a single length of tape:
1764342121715.png
and connected the ends to make the full shape, without glue:
1764342158819.png
As it turns out, it all fits together fine, but is too small to go over the template. Perhaps I'd sanded a bit too much? But it fit okay into the opening:
1764342243461.png
Here it's upside down, to use the finished edge to fit squarely on the mortar bed. This looked fine to me, so on the next one, I took a slightly bigger step, not using the mini-assemblies:
1764342325519.png
It's important to align each piece with the neighboring one. I straightedge helps. I tried to keep the reference edge off of the tape, and snug against its neighbor. A bit of glue is then added prior to bending:
1764342404929.png

After "bending" the assembly, and connecting the ends with tape, we have a pretty decent octagonal assembly:
1764342465715.png
And that's just holding it in my fingers, no square, no template just tape!

Each of the assemblies easily fit into the openings, which is a bit surprising because when using the template it was too tight, but now it fit!?
1764343044278.png
Here I was letting the assembly glue harden, while keeping it forced against the flat mortar beds. Again, upside down, to insure a flat surface.

After the glue dried, I placed each assembly in place and checked the level (per Goodwin, they are to be level even if the deck around them is not):
1764343150675.png
Close enough for government (and my) work. And they fit well into the openings, with just a bit of clearance. I'll glue in place them once they're finished.

I added the turning rings to the sides. I added four, for a total of 12, to space them closely. In retrospect, probably shouldn't have, but it's not bad.
1764343239490.png
After painting the housing Red Oxide, I set them aside for later. Now to work on the housing that fits into them.

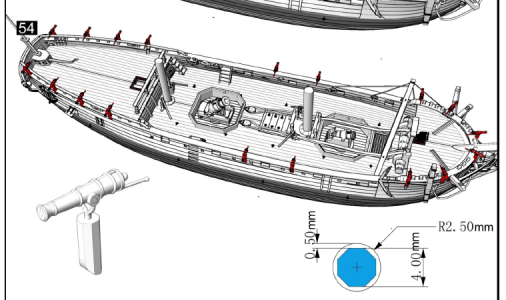
Concerning those parts, here's the instruction illustrations:
1764343548678.png
They don't say whether to glue the lower and upper assemblies together. I know on the original, these are all separate pieces. But I feel that it would be easier to work with if glued together. My intent is, like many of these kits, to show one mortar completely open with everything removed, and the other partially visible with most of these structures in place, as they are all very interesting. But I don't think I want to keep the pieces all separate, where they'd fall apart (I don't see any guides or anything to hold them in place even).

These pieces take up a lot of room, and I would imagine that prior to battle, they would all be removed on moved onto the tender that usually accompanies bomb vessels. So I'm considering gluing the side and end pieces together, in order to be able to remove or insert them all as an assembly, held in place by the structure, rather than being separate pieces. I'd appreciate any thoughts or ideas concerning this.
 
Looks like it turned out better than if you'd used the templates!!
It definitely turned out better for me. Done properly with the template, I'm sure it would have been more accurate, but this works, it fits, and while not perfect, well, it just works. ;-)
 
I decided to next work on the structure that protects the mortars when they are not in use. I started with the sliding hatches, as I wanted to be sure that the members the hatches slide over are spaced properly. The instructions show this part:
1764453328505.png
The referenced parts 1Fh-1 are here:
1764453390348.png
But when comparing the hatch cover parts versus the width of the hatch, it's obvious they aren't wide enough:
1764453449547.png
In fact, the instructions show 8 boards in use for the cover, but only 7 are included. I was going to cut 4 extra from the scrap, until I remembered that I only intend to show this structure on one mortar, rather than both, so just took an extra board for each cover.

After sanding the edges of the planks, including a slight bevel on the side that will be the bottom, I used my patented painter's tape method to attach the parts:
1764453647171.png
1764453677321.png
I checked the curvature of the end of the cover and selected a canned corn can for my use:
1764453770913.png
And taped the planks onto the can to create the curve:
1764453810715.png
Although it measured fine, the curvature tightened up a bit after it dried, so I probably should have used the slightly larger Progresso Chicken Tortilla Soup can. But I'll make it work.
1764453985969.png
I used the extra ends from the other mortar to help maintain the curvature while the glue dried. I put ample glue around the edges to strengthen it.
1764454034559.png
I found that the end with the end cover maintained spacing and curvature well, but the other unsupported end wanted to bend it be more, narrowing it somewhat. So I clamped the other ends in place and wet the white glue some to soften it and help make it the correct curvature.
1764454176534.png

Before continuing with this mount, I noticed I could see the top of the L-shaped brackets below the mortar supports on each side, and they created a gap with the mortar surround. This was because my planking ended up above the top of the L-shaped bracket. So I filled in those areas a bit to eliminate the gap:
1764454293399.png
1764454349868.png
I placed the removable parts within the mortar surround, and glued these four parts together, adding small blocks in the corner for strength. Notice I did /not/ glue any of these parts to the mortar surround - I wanted to be able to remove the assembly to show the mortar in firing position:
1764454445263.png
And I wanted to be able to remove just a single assembly to do this. So these added parts had to be an easy slip fit into the octagonal surround, yet glued to the removable parts. This isn't, of course, the way the parts were handled on the original ship. Each part was removable, to ease the assembly/disassembly and lesson the weight and space each part takes. But I have no intention of displaying it as separate parts, only as a complete assembly or as the mortar surround only.

I then added the small cover supports, gluing them to the removable structure only:
1764454729364.png

I then made and fit all the covers in place, for a slip fit:
1764454780824.png
As I believe they would have been in real life, I added cross-supports to strengthen the covers, and (on the original) to keep the boards connected. Then added eyebolts and rings.

This upside down view shows 3 of the 4 covers in place, as well as gussets to securely support them, all glued to the removable section. None of this glue will show, of course:
1764454912343.png
I added a messy amount of glue to insure the assembly would remain one piece during and after removal.

The completed removable supports and covers will look like this. I'm leaving one cover loose to show storage areas when mortar is not in use:
1764455039308.png
I will add the rings to the covers later, after another coat of paint. Without the covers, it looks like this:
1764455088630.png

And finally, with the entire assembly removed, we see the mortar in combat configuration:
1764455129837.png
This removable area will either be left in place, to show these parts when mortar is not being fired, or hidden away if I decide to not include it, as it does not represent the separate pieces that it would when normally removed. But this makes it much sturdier, and easier to switch out.
 
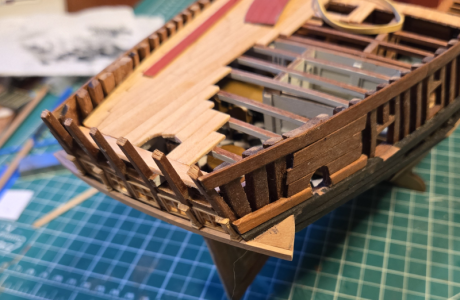
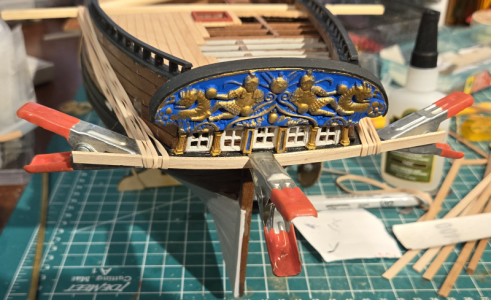
I've decided to plank the aft deck under the quarterdeck next. The planks for this are precut, but don't follow my required area very well:
1764642945620.png
While the curve to them is nice, my structure isn't that shape. And unfortunately, they don't have any extra length on them. And like all the planking, they require sanding the edges to get them the correct width (about 0.5mm is added per plank x 12 means it's over-width by about 6mm, probably more). IMHO, these would really be easier to do using just 5mm planks, as each piece has to be sanded, and then shaped at the end. Some 1.5x5mm strips were included, but I have no idea where I might need them, and I'm certain there aren't enough to do all the areas with strips.

In trying to use as many of the area's planking as possible, I inserted 3x1.5 strips at the center, then intend to use modified area planks for the rest:
1764643230203.png
Even after sanding, the laser-cut planks have gaps that the strips do no. I'm not that pleased with the result, but it will be pretty well covered by the deck above.

I left only a small area without decking, to give an impression of the deck and framing below. I'd do more, but the captain's deck will be much more visible, so I'll concentrate more on that.
1764643410130.png
Again, this doesn't look very good, but will be almost entirely covered. I didn't cut out for the aft hatch to the bread room, as I don't intend for it to be left open.
 
Last edited:
Back
Top