Caldercraft HMS Victory 1:72 by Gilbertm

I think I'll be a keen observer to your project Gilbert. From your comments to Kurt, I'm thinking this may have been my kit originally as I sold one to Kurt. So I may have a special interest and believe it is in very good hands!
I knew I had bought the kit from somebody a few years ago, wanting to build the grand ship, but times had changed, and it looked like many years till I would get a chance and Gilbert was looking and ready!

It takes a team to make things work and we all can watch and see how this ship is built.
 
I think I'll be a keen observer to your project Gilbert. From your comments to Kurt, I'm thinking this may have been my kit originally as I sold one to Kurt. So I may have a special interest and believe it is in very good hands!
Hey Ken
Quite funny indeed.
 
Congratulations Gilbert.

As you may know I am currently ‘marooned’ on this model with half a hull complete with copper plating and awaiting some more free time to move on, however this is a wonderful albeit complex kit that you will receive many hours (years), of enjoyment.

Regards
PeterG
THanks Peter
Indeed, time is the most difficult thing to find and it's priceless
 
I knew I had bought the kit from somebody a few years ago, wanting to build the grand ship, but times had changed, and it looked like many years till I would get a chance and Gilbert was looking and ready!

It takes a team to make things work and we all can watch and see how this ship is built.
Kurt
I'll do my best in order to build a great ship :)
 
Hello friends
As I have now completed the Amerigo Vespucci, I am starting a new project: 1:72 Caldercraft HMS Victory.
I was looking to purchase this kit a few months ago and thanks to SoS, one of our members has agreed to sell me his kit (thank you Kurt).
I brought back the large and heavy box back to France and I am now ready to get started.
In order to have all the elements at hand, I purchased a few books that I am sure will guide me thru the process.
Let's now get started :p
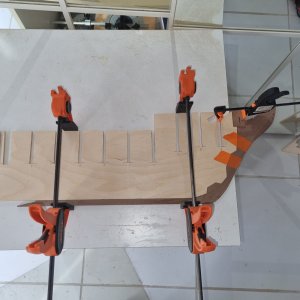
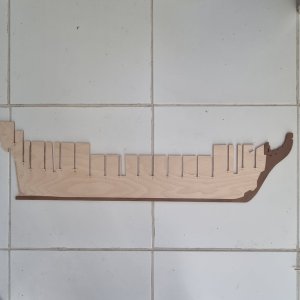
Some pictures below

View attachment 505263
View attachment 505264
View attachment 505265
View attachment 505266View attachment 505267
I'm about to fit the wales to my Victory. I'm producing 'anchor stock' planks for the lower one, as per drawings in Mckay & Magowan books. Starting milling them today using a jig I made.
 
I'm about to fit the wales to my Victory. I'm producing 'anchor stock' planks for the lower one, as per drawings in Mckay & Magowan books. Starting milling them today using a jig I made.
Are you going to taper them in thickness as they approach the bow so they match the thickness of the plank of the bottom and thus seat properly in the rabbet?
Allan
 
Are you going to taper them in thickness as they approach the bow so they match the thickness of the plank of the bottom and thus seat properly in the rabbet?
Allan
That's my intension, Allan. Something I've noticed with the drawings in the said books, is the lower wales consists of 5- equal thickness planks, where-as Jotika's say 4- 1mm + 1- 0.5mm thick. Looks like I'll have to look up some 'real life' photos.
 
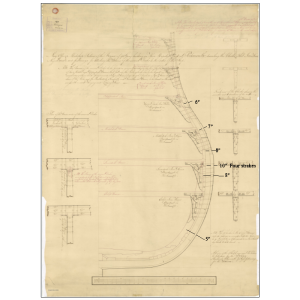
For a first rate the planking thicknesses would be as shown below based on the David Steel scantlings. The drawing is the second rate HMS Boyne (98) 1810 but the dimensions I wrote are for a first rate to give an idea of the overall thicknesses. The main wale total thickness at 1:72 scale would be just over 3.5mm. By the same token, the planking of the bottom would be a total thickness of five inches. (5/72)X25.4= 1.76mm I think the main thing is the differences in thickness of the wales, thickstuff (that is the term in the scantlings for anyone wondering :) ) above and below the wales, and the planking of the bottom. If your planking of the bottom is thicker than 1.76mm, just find the difference between it and the other planking on the drawing so they stand proud of the planking of the bottom the right amount. Then again, this kind of precision may not be all that important for many as long as there is some kind of differential of thickness of the wales, thickstuff, and plank of the bottom.
Allan

Cross section Boyne 1810 with dimensions of wales.PNG
 
Last edited:
For a first rate the planking thicknesses would be as shown below based on the David Steel scantlings. The drawing is the second rate HMS Boyne (98) 1810 but the dimensions I wrote are for a first rate to give an idea of the overall thicknesses. The main wale total thickness at 1:72 scale would be just over 3.5mm. By the same token, the planking of the bottom would be a total thickness of five inches. (5/72)X25.4= 1.76mm I think the main thing is the differences in thickness of the wales, thickstuff (that is the term in the scantlings for anyone wondering :) ) above and below the wales, and the planking of the bottom. If your planking of the bottom is thicker than 1.76mm, just find the difference between it and the other planking on the drawing so they stand proud of the planking of the bottom the right amount. Then again, this kind of precision may not be all that important for many as long as there is some kind of differential of thickness of the wales, thickstuff, and plank of the bottom.
Allan

View attachment 505686
Thank you, Allan, much appreciated.
Stuart
 
Hello friends
I am starting the build of the Caldercraft HMS Victory.
I plan to add lights inside the hull and officers quarter and I am investigating where are the best places to add LEDs. I have ordered 3mm warm white 12V LEDs and should receive them quite shortly.
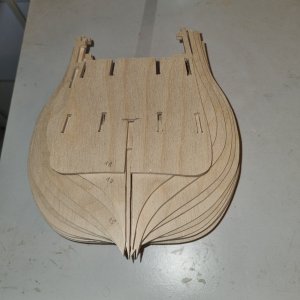
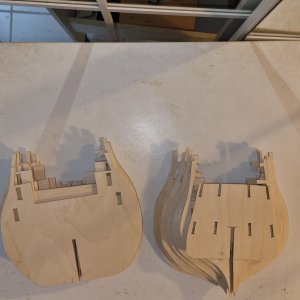
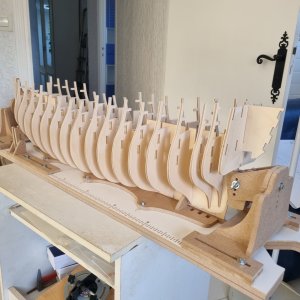
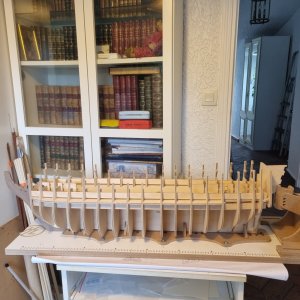
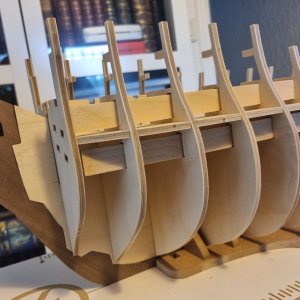
In the meantime I have assembled the keelson, bulkheads, the middle deck, the dummy gunports, the quarter deck and the gunport patterns. Of course dry fit only at this stage. I have also tapered the keel for the bearding line.

Dry fitting the hull allows me to precisely determine where to include the LEDs.
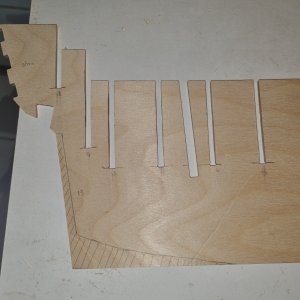
When assembling the hull, I had to widen the slots on the bulkheads and on the keel in order to fit smoothly. As noted by other builders, the slots where a bit too narrow.
One interesting thing to mention is the fact that the laser cut plywood for the various parts (bulkheads, keel, ...) are not burnt on the side which is very nice and avoids sanding. By the way the quality of the wood is excellent.
I also noticed that I had to widen the foremost slot on the keel and the hole on bulkhead 1 in order to fit the foremast and the bowsprit. I am glad I checked that before gluing the skeleton.

Some pictures below

20250309_161050.jpg
20250309_161115.jpg
20250309_161143.jpg
20250310_102427.jpg
20250313_100720.jpg
20250313_103203.jpg
20250314_145841.jpg
20250314_145857.jpg
 
Hi Gilbert
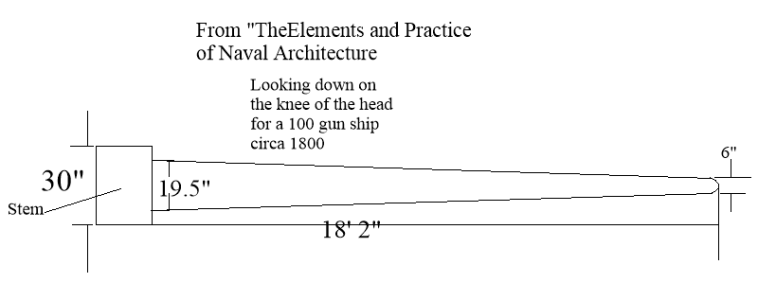
Are you going to taper the knee of the head? From David Steel:
1742039698783.png
Victory may very well be a little different, especially in length, but the taper would be close to the dimensions shown, and very noticeable. Longridge shows the taper in his drawing of the knee of the head in the Anatomy book. I am curious to know if Mckay shows this or gives dimensions in the Anatomy book.
Allan
 
Hi Gilbert
Are you going to taper the knee of the head? From David Steel:
View attachment 507397
Victory may very well be a little different, especially in length, but the taper would be close to the dimensions shown, and very noticeable. Longridge shows the taper in his drawing of the knee of the head in the Anatomy book. I am curious to know if Mckay shows this or gives dimensions in the Anatomy book.
Allan
Hi Allan
I am not sure what that knee is? Tapering at the stem?
Thanks for letting me know
 
Bonjour Gilbert
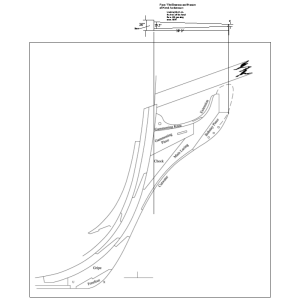
The knee of the head is the forward most assembly that is attached to the stem. Picture below better explains. Most manufacturers ignore this prominent feature in the instructions for some reason. I thought maybe cost, but the cost to print a picture like the one below is negligible. As a result of this taper not being explained in most kits, it is not done by most model builders of today, so if you leave it alone, you will not be the first. :) In any case I hope you find this interesting and maybe useful to you.
Allan
1742084379187.png
 
Last edited:
Bonjour Gilbert
The knee of the head is the forward most assembly that is attached to the stem. Picture below better explains. Most manufacturers ignore this prominent feature in the instructions for some reason. I thought maybe cost, but the cost to print a picture like the one below is negligible. As a result of this taper not being explained in most kits, it is not done by most model builders of today, so if you leave it alone, you will not be the first. :) In any case I hope you find this interesting and maybe useful to you.
Allan
View attachment 507628
Hello Allan
Thanks for your explanations. Very instructive.
I believe that I'll follow what most builders do and not taper this part :)
Cheers
 
Hallo Gilbert,

Geweldig dat je deze kit van Kurt hebt kunnen overnemen. Toen ik mijn kit ontving was ik erg onder de indruk. Niet alleen van het gewicht (15kg) maar zeker ook van de kwaliteit van het geleverde materiaal. Absoluut een hele goede keuze de kit van Caldercraft.

Je schrijft dat je een paar boeken hebt gekocht. Ik moet zeggen dat de meeste ervan me erg bekend voorkomen. Die zul je nog hard nodig hebben. Een Victory bouwen is immers ook erover studeren.

Ik ben zelf in maart 2022 met dit geweldige project begonnen

Momenteel is de romp helemaal klaar, de masten zitten erop en ik ga beginnen met het touwwerk.

Ik ben zelf pas een paar maanden actief op SOS en ik moet zeggen, er gaat hier een wereld voor je open. Ik probeer hier mijn hele proces in een paar hoofdstukken in een notendop samen te vatten totdat ik weer in sync ben. Ik heb ook gemerkt dat je een trouwe volger van mijn build report bent geworden. Bedankt hiervoor.

Voor meer details over mijn avontuur, kijk eens op mijn Nederlandse bouwblog. De reacties van andere goede bouwers zijn ook zeer de moeite waard. https://www.modelbouwforum.nl/threads/hms-victory-van-caldercraft-door-wil.281364/

Ik blijf je volgen. Veel succes met deze geweldige uitdaging.
 
Back
Top