Cap San Diego 1/160

Joined
Nov 22, 2019
Messages
176
Points
143

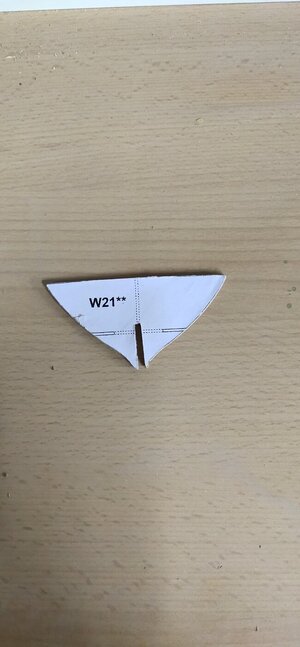
I'm going to make my first scratch project after months of research. Not sure if this should be posted here as i won't use plans exactly but a model. The problem is that the model is on paper so must be copied on wood. But it won't be a wooden model either as most probably other materials will be used.

Cap San Diego was a hybrid cargo and liner launched in 1961. The "white swan" as was nicknamed is a 159 m, 10000 dwt ship which ran a regular schedule between Germany and South America, completing 120 round trips until 1981. After being sold and running under different names and under Spanish flag and also flags of convenience as a tramp trader, the run-down ship was scheduled for scrapping in 1986, when She was bought by the city of Hamburg
km1-cap-san-diego.jpgcap-san-diego.jpgScan20200225154855_001.jpg0-00012.jpg
 
This will get a very interesting project !!!
I recognized, that you want to build her in 1:160, the drawings are in scale 1:200 ...
 
Since i built mostly 1/700 scale i didnt have problem with space. Now i will need a dedicated space. My place is roomy but full of things so i had to go to the basement. There, i concentrated all my tools and make a decent working enviroment
WhatsApp Image 2020-10-29 at 19.45.12.jpeg
 
This will get a very interesting project !!!
I recognized, that you want to build her in 1:160, the drawings are in scale 1:200 ...
Yes model is printed in A3 paper in 1/200. It proved to be 3 cm shorter than advertised. So I had to reprint the first batch of plans by 31% larger than 28% as initially calculated in order to get the 100cm 1/160 model.
I also wanted to check for other misfits which may occur, while gaining some experience on how the model would be made and look.
So I printed out the model in A4 and made the hull using hard paper. There were some errors, not sure if caused by downsizing or simply are model fails but all can be fixed
IMG_20201004_170916.jpgIMG_20201031_074135.jpg
 
Started scratchbulit today. Wood makes a lot of dust. I didn't cut the sides, will explain in another post. The problem with this plan is that since its for paper model bulkhead slots are only 1mm wide. I need them to be 6 or 8 depends how thick will be the wood for the frame. But if i expand this part's slot to 8mm it will affect the shape of it so I need to figure out a way to make up for this. Rest of the bulkheads seems that won't be affected.
 

Attachments

  • IMG_20201112_182259.jpg
    IMG_20201112_182259.jpg
    117.6 KB · Views: 4
Bulkheads cutted. Also the bow hull piece. Tomorrow will put putty and sand 'til smooth. Also need find a way to precisely cut the vertical slots. Width should be 3 mm instead of 1, as appears on the paper model plan.
Finally I coated the edges of the hull piece with epoxy resin. The Chinese plywood proved to be of low quality but due to lockdown shops will be closed for weeks to come and i can't wait that long.
IMG_20201121_184323.jpgIMG_20201121_185016.jpgIMG_20201121_185042.jpg
 
Last edited:
Working on small scales like 1/700 gave me the patience which makes up for lack of experience working with wood. I managed to cut the stern part even at its smallest detail using basic equipment. Putty, sand and put pieces together so I can see getting some shape after almost 2 weeks of work. Epoxy sealed the wood but I will coat again later before final sanding. I also marked the bulkhead slots with 1 mm tape to form the desired 3 mm width to be cuttedIMG_20201122_103745.jpgIMG_20201122_110836.jpgIMG_20201122_165850.jpg.
 
Adding the bulkheads. Unfortunately I won't put other than these two small during the weekend. I wait for the ordered polyurethane glue. It will fill the gaps and save me from sand work plus will glue them more strong
 

Attachments

  • IMG_20201127_181829.jpg
    IMG_20201127_181829.jpg
    85.5 KB · Views: 9
just finished fitting the bulkeads on frame. In my occassion fiting them vertical is the one thing. The other is that, since i redrew the slots and cut them by hand, some misfittings were possible. So i measured the vertical distance from the frame to each bulkhead edge to make sure its equal, both port and starboard.
A couple were glued wrong(although vertically positioned). Was afraid to remove them but did it without casualties. A few more had to be trimmed a bit.

5.jpgtrap_selfies-6080.thumb.jpg.09060be66eaa0edd6d0dc3925f517b05.jpg

The hull at the moment is a bit flexible but i guess that will be corrected in the next phase with it will strengthen.
My question is
The second rear part of the hull is some milimeters off center line. Which is the best way to ensure it will remain straight during planking? Or do i have to cut it and make a second frame part from scratch again?
 
Hello, Mike! The hull that long, like yours, better be reinforced. One of the ways (not intrusive) to glue balsawood blocks or other timber between the bulkheads. Another way, in my opinion, a better but intrusive way, to cut notches in the bottom of the bulkheads and reinforce them with a square strip. (see my sketch below). I am not an artist and hope you can get an idea of what I want to say.
IMG_1752.jpeg

Also, when you will plank the hull, make sure to use alternate sides for a few planks on each board and starboard to avoid asymmetry.
 
Hello, Mike! The hull that long, like yours, better be reinforced. One of the ways (not intrusive) to glue balsawood blocks or other timber between the bulkheads. Another way, in my opinion, a better but intrusive way, to cut notches in the bottom of the bulkheads and reinforce them with a square strip. (see my sketch below). I am not an artist and hope you can get an idea of what I want to say.
View attachment 197160

Also, when you will plank the hull, make sure to use alternate sides for a few planks on each board and starboard to avoid asymmetry.
Thank for your support.
As you may notice, the initial paper model plan calls for a 3 decker ship. In my A4 printed test model this proved quite rigid even not proper paper have been used. However that would require too much woodwork which I would like to avoid as a begginer.
Putting square strips would be an option but this would prevent me from filling the space between the bulkheads which is a must. Why? Because I'm going to plank the model by aluminum sheet 0.2mm thick which is easier to work with, than wood. But this thing has to sit somewhere so my model won't look like a Coke can. After research I decided to use polystyrene, lighter and easier to give it shape
The first results were quite satisfactory. Hull now its solid and straight even I'm not done yet. When main deck will be added it will be fine
IMG_20201206_194054.jpgIMG_20201206_194027.jpg
 
After research I decided to use polystyrene, lighter and easier to give it shape
The first results were quite satisfactory. Hull now its solid and straight even I'm not done yet. When main deck will be added it will be fine
Glad you have a solution that works!
 
while working on the hull would like to share some picture of a fine built model built by a German(most information online are in German language). Its in the same scale 1/160 and built in the usual way with wooden planks etc.
cap55.jpgcap66.jpgcap57.jpgcap62.jpgcap56.jpg
 
Interesting build! I remember visiting her in Hamburg as an deck apprentice some 30 years ago. A very nice ship, and one of very few general cargo ships still around.
 
Started working last Sunday. And every evening until today . Managed to fill all the space between sections with polystyrene. It is easy to work with but also sensitive easy to shrink under little pressure.To fix these I used trimmed polystyrene mixed with PVA glue and bit of water to make a kind of paste.I used as a filler. I believe rest imperfections will be corrected by applying layers of extra thin putty and sanding. Its going to be a long and critical phase for the final shape of hull.
Tomorrow I will cut the 3 piece deck and make some fitting tests
IMG_20201207_200456.jpgIMG_20201213_095523.jpgIMG_20201210_205129.jpgIMG_20201213_094534.jpgIMG_20201210_205133.jpg
 
Done with polysterene filling. I also cut the deck, 3 pieces. After several tests I glued it on hull. Engraving the deck centerline made it sit tight on bulkhead ends creating a bevel towards them as in the real ship. I m quite pleased with it as this detail is missing from ready made models even the quality ones at 1/100 scale. Finally I put some filler to seal the deck with the hull . On weekend I will do the rest of it.IMG_20201217_181220.jpgIMG_20201217_181239.jpg
I also started my first wood scratch project, making the rudder and its base.
IMG_20201216_190300.jpgIMG_20201216_194055.jpgIMG_20201217_163704.jpgIMG_20201217_185930.jpg
 
I spread the putty all over the hull. Waited 24 hours then sanded it. The second layer done only topical. Hull is 99% ready for aluminum planking. However cause of lockdown supplies are hard to get so not sure, maybe proceed with some scratch built projects
IMG_20201220_092458.jpgIMG_20201220_180811.jpgIMG_20201220_180848.jpg
 
Back
Top