Great progress.
Jan
Jan

 |
The beloved Ships in Scale Magazine is back and charting a new course for 2026! Discover new skills, new techniques, and new inspirations in every issue. NOTE THAT OUR NEXT ISSUE WILL BE MARCH/APRIL 2026 |
|
 |
As a way to introduce our brass coins to the community, we will raffle off a free coin during the month of August. Follow link ABOVE for instructions for entering. |
|


 I also strongly recommend adding card stock to the back of the area that will be bent. This helped keep everything together and adds support. The card stock is not visible once you attach the structures. I used white so it would blend in easily as all interior structures are painted white.
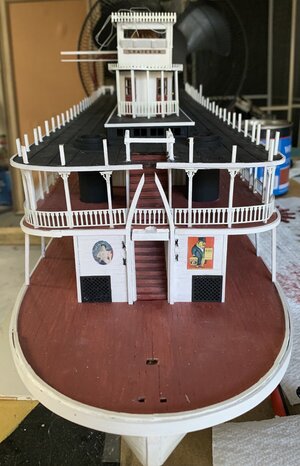
Here is one of the bent Texas sides.I failed to post some of the work required to bent the wood for the fronts and backs of the structures on the boiler deck. The kit supplies jigs for each bend required and there are two on the boiler deck and one on the Texas structure. I did all these together and have some pics of the Texas jig and results. I the laser lines for the bends are not deep enough to move the wood without having it crack so it will be important to use your knife to deepen these to allow for an easy bending. The instructions are helpful for this step. A needle nose pliers is required to start the bending. I started with the end and worked my way back. The bending was done with pliers and by hand. I then used the jig to get the full bend to form.View attachment 261191View attachment 261192 I also strongly recommend adding card stock to the back of the area that will be bent. This helped keep everything together and adds support. The card stock is not visible once you attach the structures. I used white so it would blend in easily as all interior structures are painted white.
View attachment 261206


")
Thanks Peter. This has been a very enjoyable build. Lots of very different operations and while the size of the ship is big it is easy to work with fittings and details.Sinds my last visit, you made a nice progress, Barry. A lot of fine details and now the eye catching paddle wheel! Looks very good! I got a deja-vu ........
Regards, Peter