Sound good, Barry.
Waiting for the pictures of the paddles witch makes her a real paddle steamer.
Regards, Peter
Waiting for the pictures of the paddles witch makes her a real paddle steamer.
Regards, Peter
 |
As a way to introduce our brass coins to the community, we will raffle off a free coin during the month of August. Follow link ABOVE for instructions for entering. |
 |
 |
The beloved Ships in Scale Magazine is back and charting a new course for 2026! Discover new skills, new techniques, and new inspirations in every issue. NOTE THAT OUR FIRST ISSUE WILL BE JAN/FEB 2026 |
 |


Looking really awesomeAdding the structures to the hurricane deck was pretty straightforward. The trusses are made from wood parts supplied in kit along with brass made into the hog truss. I debated for a while whether to use the white line supplied in the kit or use actual wire for accuracy. I decided to stay with the supplied line as it really didn’t look out of place on the ship. Building and adding the staircase to the pilot house has probably been the most challenging step so far. This structure is very flimsy and you will need to take your time securing it to the deck and pilot house platform. I also decided to locate the ship’s bell on the Texas roof vs the skylight roof. While this may not be historically accurate it made more sense to me to have it tied into the pilot house and be in a position where it could be heard better. Captain’s choice here! With all the items in place now I added the trim brass and to the hurricane deck and trimmed the posts to appropriate length. I am glad I left them long as this made the process much easier to do. The loose lines at the rear of the ship relate to the rear trusses and will be secured once the supports are fit. This step is done in conjunction with the paddle wheel attachment. So now it’s on to the paddle wheel assembly and the related supports. View attachment 265317View attachment 265318
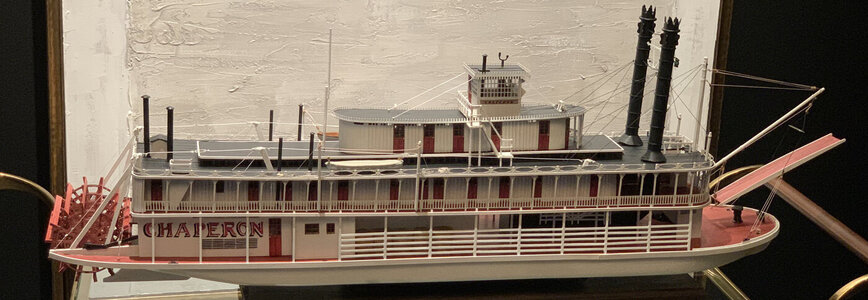
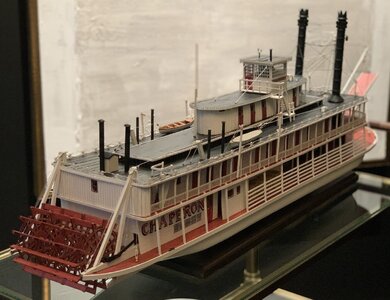
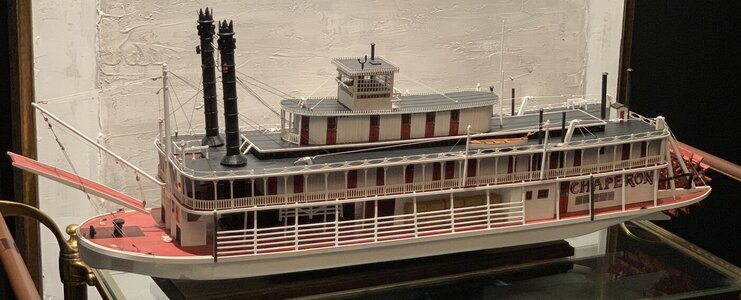
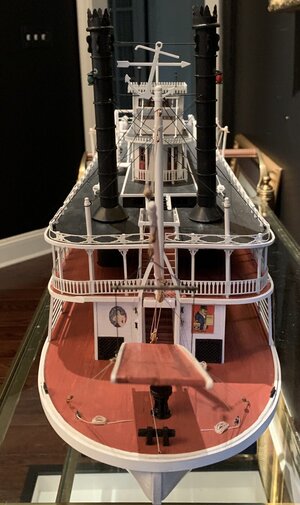
You made yourself a very good looking Paddle Steamer!With the stacks completed I was able to complete the build this week. This mostly consisted of attaching the life boats, loading platform and all working rigging. I had previously built the masts, lifeboats and other structures while waiting for my deck planking to arrive. This actually made the completion steps a bit more straightforward. I generally like to build stand alone structures during the build as a means to take a break from more repetitive tasks like planking and battens on this project. The standing rigging for the stacks was a bit confusing looking at the plans as some of the lines drawn lose their dimension being in two dimensions. There is logic to the counterbalancing sought to be achieved so as long as you carefully study the plans and related pics it will become clear.
The working rigging on the ship is all straightforward. The setting of the loading platform is a bit of a challenge. While I am satisfied with how my version came out I do think it could be better. Take your time on this process. It’s the line that secures the lower rear of the platform that really determines the angle. The instructions provide only adequate guidance here. View attachment 269204View attachment 269205View attachment 269203View attachment 269206
Thanks Peter. While the end result is always nice to look at, the real enjoyment is in the “process” of planning, building and learning.You made yourself a very good looking Paddle Steamer!
Regards, Peter
Hallo @Barry1After working on a couple of smaller projects during the past 12 months I decided to build a riverboat steamer. This kit is based on the Chaperon which was built in Chambersburg, Ohio in 1884. The real boat was 120 feet long, 21 feet wide and 4 feet deep. It was operated on short trade routes and excursions between Bowling Green and Mammoth Cave. The Chaperon was sold prior to WW1 and taken to the Mississippi and renamed the Choctaw where she sailed on the Tallahatchie River until 1922 when she was destroyed by fire.
I researched the different steamer kits available and chose this one primarily as the instructions were done by Ben Lankford and Bob Crane. Crane does an excellent job with plans and instructions. The quality of the kit looks very good. The wood is all in good shape and laser cutting is excellent. The second pic shows most of the parts for the hull laid out before gluing View attachment 252145View attachment 252146
Day 1 was kit inventory, going through the various Britannia parts(they need some work) and preparing the keel and bulkhead parts for assembly. This consisted mostly of removing char and performing some intial fairing work on the first 5 bulkheads and front and rear parts. All are clearly marked for fairing lines.


Thanks much for the feedback. This was my favorite build project to date. It’s a big model and finding the right place for it has been, let’s say, a challenge.Barry two things: First - congratulations on your birthday. May it be a special day for you and your family. Secondly I want to congratulate you on your completed Chaperon. Whilst I cannot follow all build logs, I did follow the last few posting and wanted to tell you that I think you have built an exquisite model. Well done!
Thanks!!
Happy Birthday.
Jan
Thanks!Happy birthday, Barry!
Thanks!!Also from my side a Happy Birthday.
Regards, Peter


