The copper I gotta looks great and adds a lot to the model. Good work!
-

Win a Free Custom Engraved Brass Coin!!!
As a way to introduce our brass coins to the community, we will raffle off a free coin during the month of August. Follow link ABOVE for instructions for entering.
-

PRE-ORDER SHIPS IN SCALE TODAY!
The beloved Ships in Scale Magazine is back and charting a new course for 2026!
Discover new skills, new techniques, and new inspirations in every issue.
NOTE THAT OUR FIRST ISSUE WILL BE JAN/FEB 2026
You are using an out of date browser. It may not display this or other websites correctly.
You should upgrade or use an alternative browser.
You should upgrade or use an alternative browser.
Constellation, the sloop of war c.1856 in 1:36 scale for R/C sailing
I edited the post before last to explain more about the copper tape and it color change, and stuck a video in for kicks.
In between coppering each side of the bottom, I gave my fingers a rest by working on the tops.
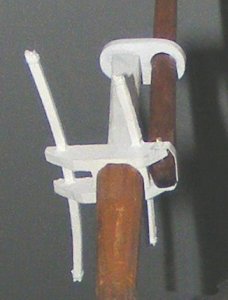
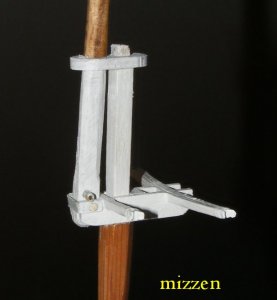
I found a lot of similarities in warships of the 1840's and later and the merchant ships of the time. The use of patent trusses, the shape of the tops, and other details seem to blur the line between warship and merchant ship so many modeling guides try to enforce. Constellation's tops were very thin, and shaped much like those on a clipper ship, except a bit larger. The deck of the top are a single piece (the British favored two-piece tops at this time) and sit on typical cross-trees and trestle-trees. "sleepers" sit on top, sandwiching the platform between them and the cross-trees. (the "restored" ship does not have sleepers)
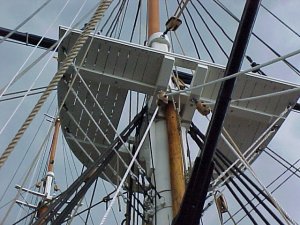
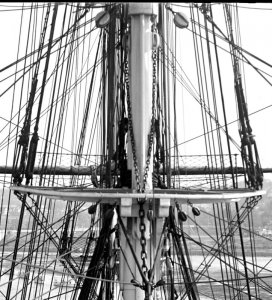
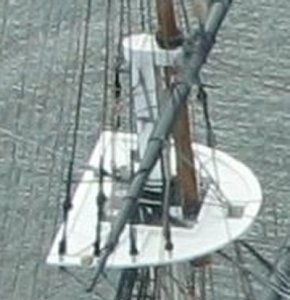
Mine are made from basswood and constructed pretty much the way the "prototypes" are.
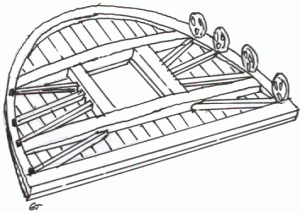
I built up the top rail in 1/16" thick basswood pieces to keep the grain running around the perimeter. The inside was trimmed to shape and the decking applied to it's bottom. The actual top has gaps between the deck planking, so I just laid them along side each other without pressing them together too hard. Then the decking and the rail were trimmed to shape together. The sleepers were glued on and stiffen the platform, as welll as catch the ends of the short planks front and back of the lubber hole.
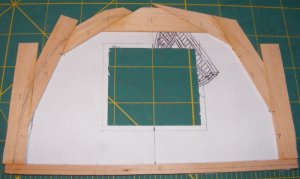
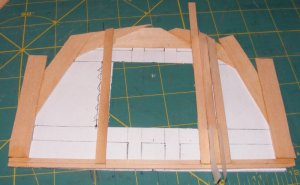
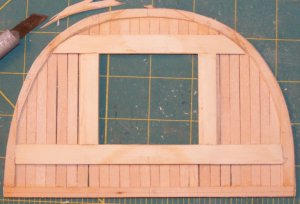
A covering board is wrapped around the whole top hiding the plank ends. A hole for the yard sling was made, and cleats that spread the compression of the topmast shrouds were installed.
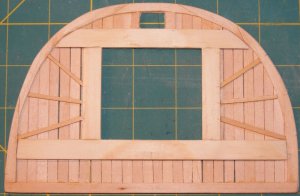
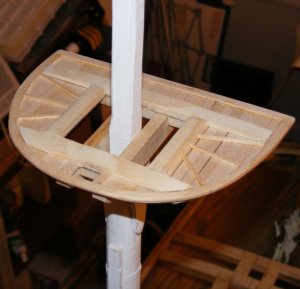
As the main top was made and the plan seemed to be working, I got into the fore and mizzen tops, and then painted them all.
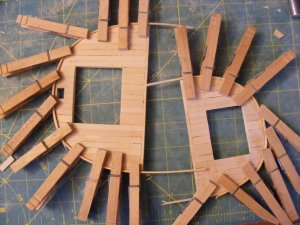
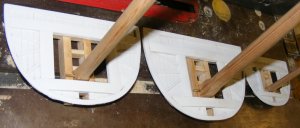
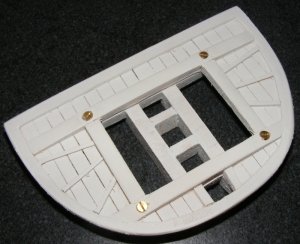
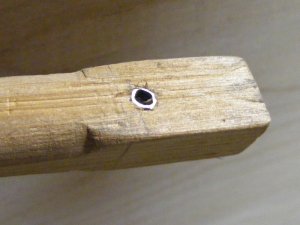
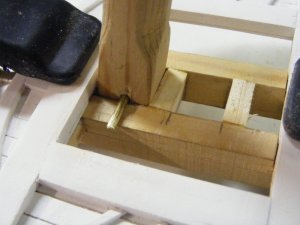
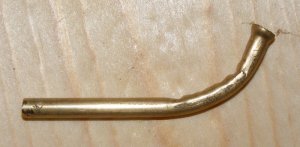
The tops are fastened to the cross trees with 4 #2 brass wood screws. Having rebuilt and restored a lot of old models, I've become a little obsessed with being able to take things apart again when it's not really critical that they get glued. I just went with simple brass rod for the topmast fids. These need to be functional as that's how I'm going to collapse the rig
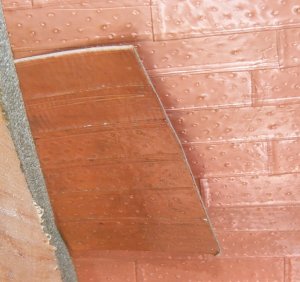
Brought the copper in from outside after a week or so to compare with the new stuff. Pretty happy with where that's going. Note the copper still sticks to the card, and it did the wood block as well.
In between coppering each side of the bottom, I gave my fingers a rest by working on the tops.
I found a lot of similarities in warships of the 1840's and later and the merchant ships of the time. The use of patent trusses, the shape of the tops, and other details seem to blur the line between warship and merchant ship so many modeling guides try to enforce. Constellation's tops were very thin, and shaped much like those on a clipper ship, except a bit larger. The deck of the top are a single piece (the British favored two-piece tops at this time) and sit on typical cross-trees and trestle-trees. "sleepers" sit on top, sandwiching the platform between them and the cross-trees. (the "restored" ship does not have sleepers)


Mine are made from basswood and constructed pretty much the way the "prototypes" are.

I built up the top rail in 1/16" thick basswood pieces to keep the grain running around the perimeter. The inside was trimmed to shape and the decking applied to it's bottom. The actual top has gaps between the deck planking, so I just laid them along side each other without pressing them together too hard. Then the decking and the rail were trimmed to shape together. The sleepers were glued on and stiffen the platform, as welll as catch the ends of the short planks front and back of the lubber hole.


A covering board is wrapped around the whole top hiding the plank ends. A hole for the yard sling was made, and cleats that spread the compression of the topmast shrouds were installed.


As the main top was made and the plan seemed to be working, I got into the fore and mizzen tops, and then painted them all.


The tops are fastened to the cross trees with 4 #2 brass wood screws. Having rebuilt and restored a lot of old models, I've become a little obsessed with being able to take things apart again when it's not really critical that they get glued. I just went with simple brass rod for the topmast fids. These need to be functional as that's how I'm going to collapse the rig


Brought the copper in from outside after a week or so to compare with the new stuff. Pretty happy with where that's going. Note the copper still sticks to the card, and it did the wood block as well.

Last edited:
I had cut mast caps from some oak, but didn't like them at all, so I laminated some aircraft ply and made new ones
The bowsprit cap was oak, and it came out ok, so I kept it.
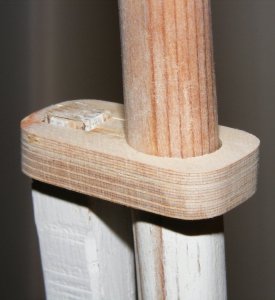
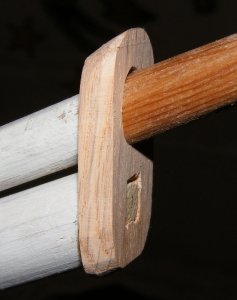
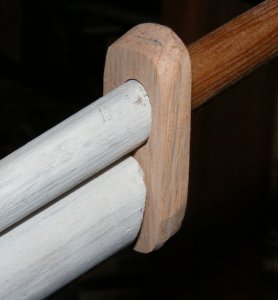
The bowsprit became a little project of it's own.
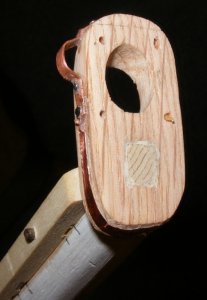
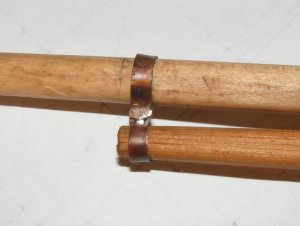
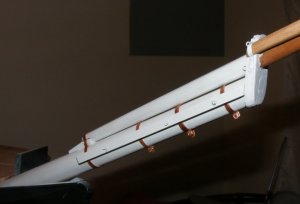
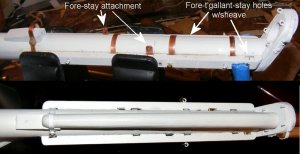
The topmasts got cross-trees and trestle-trees made of laminated bass and caps of aircraft ply.
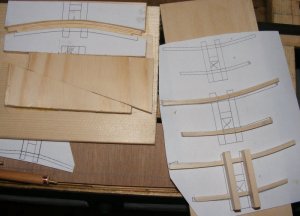
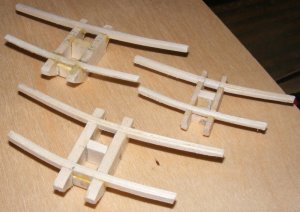

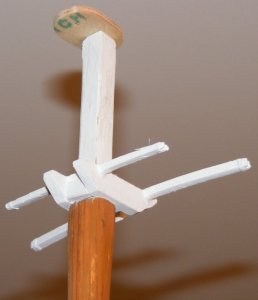
Eyebolts for various fitting to attach under the cap were installed, as well as some "ironwork" where the lift blocks attach to the cap were made of copper.
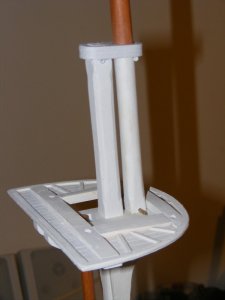
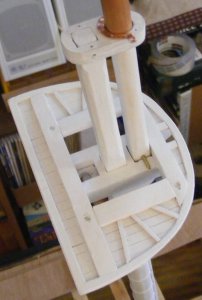
And spencer masts were made from ordinary dowel pins.

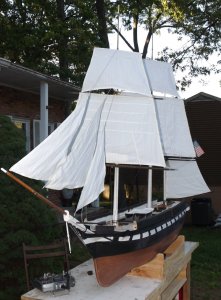
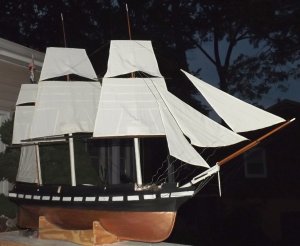
Some more paint and it now being Spring, it was outside for a picture or three.
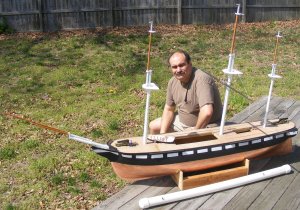
About now I decided to set a goal of sailing the model by July. She wouldn't be "finished" but jury rigged enough to actually sail and not just float.
The bowsprit cap was oak, and it came out ok, so I kept it.


The bowsprit became a little project of it's own.


The topmasts got cross-trees and trestle-trees made of laminated bass and caps of aircraft ply.


Eyebolts for various fitting to attach under the cap were installed, as well as some "ironwork" where the lift blocks attach to the cap were made of copper.


And spencer masts were made from ordinary dowel pins.

Some more paint and it now being Spring, it was outside for a picture or three.

About now I decided to set a goal of sailing the model by July. She wouldn't be "finished" but jury rigged enough to actually sail and not just float.
So, here it was the middle of April, 2010. I wanted to get the hull in the water again, but I didn't just want a float test, I wanted a sail - so I made a goal to jury rig her enough to sail by July. The first weekend I had available in July was that of the 10th, so that became my target.
There were several items that would have to be done to be able to sail the model, even jury-rigged:
The yards needed were cut and shaped. A nice thing about this time period is how much simpler spars were compared to the relatively complex shapes of earlier times. Three lower yards and three tops'l yard were made for now.

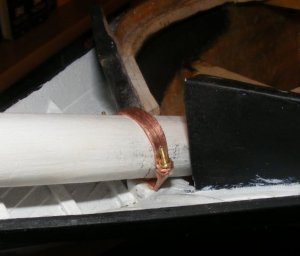
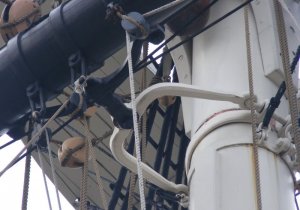
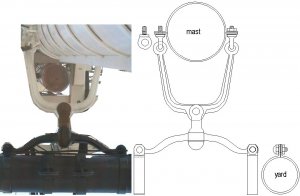
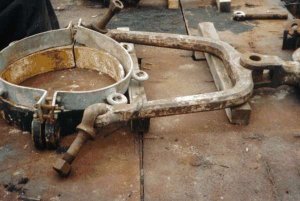
Constellation had iron "patent trusses" on her lower yards. what is great about these things is they hold the yard off the mast and allow it to brace sharper to either side than the old method, and the harp portion attached to the mast has space for the topmast to lower through it, a big help since that's how I'm going to reduce the rig for transport. I made mine from 1/8" sheet aluminum with brass screws. The eyebolts are 1/16" brass rod formed with round-nose pliers and threaded to match the nuts I bought. The bands are all cut from brass sheet. These were difficult for me and they still aren't as good as I'd like, but they aren't awful and have proved quite functional. The hardest part was the "yoke" that attaches to the yard. They were cut from the sheet so the center hole was available, then heated and twisted 90° on the ends to provide the attachment points for the yard bands. Amazingly, I only broke and had to remake one. The tops'l yards each get one of these yokes as well, and I haven't had as much luck making them this time around.
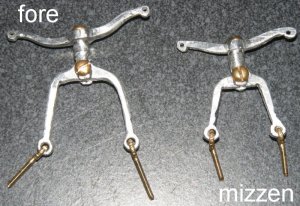
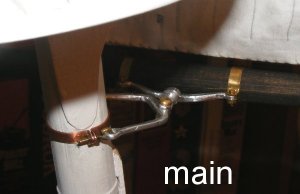
Sails, on the other hand, I understand. I repaired sails on the vessels I worked on, and worked for a sail-maker near Annapolis for a couple of years. I'm very particular about sails on models and feel most modelers panic as soon as they see a piece of cloth as if it threatens their masculinity or something. I have a web-page about making sails especially about sewing bolt ropes and NOT stitching seams, HERE.
I focused on making the three tops'ls (pronounced top sills), the jib, and the driver, or "spanker." (These used to be two different sails that turned into two words for the same sail.)
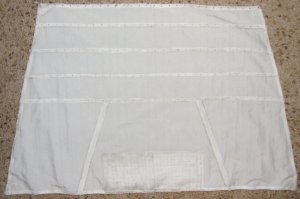
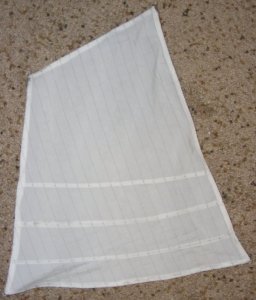
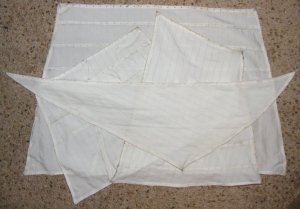
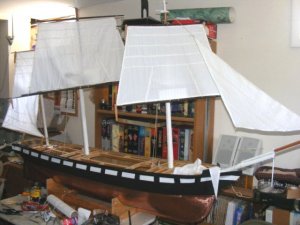
above: Main tops'l, driver, fore & mizzen tops'l with jib, and driver.
I also carved a quick and nasty gaff and boom for the driver.
The original winch drums were wood drums with plastic compact-disc flanges. They warped oddly and were unusable. I got a sheet of 1/8" thick PVC and made a new set of drums.
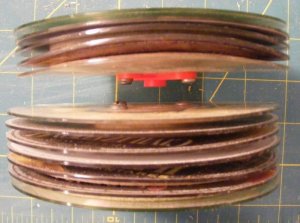
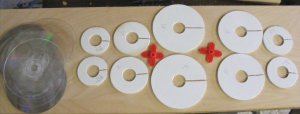
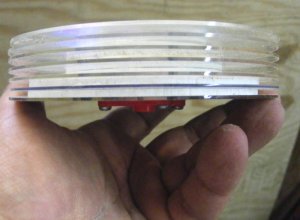

The steering was handled with nylon string guided through brass screw-eyes in wood blocks, hot-glued to the inside of the hull, to connect the tiller to the rudder servo.
 Brace Testing Video
By the time my target weekend in July was near, the forecast was for Northerly winds at 10 miles-per-hour on Saturday which was perfect as I was launching from the South shore of the creek and if anything went wrong she'd get blown back to me. Unfortunately, I had to be somewhere else on Saturday. Sunday was forecaste to have light variable winds mainly from the East and South. Well, you get what you pay for.
There were several items that would have to be done to be able to sail the model, even jury-rigged:
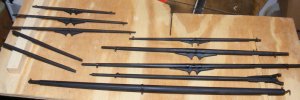
- Shape the still rough cut yards; fore course, fore tops'l, crossjack, and mizzen tops'l yards.
- Complete the yard trusses with mast bands and banding to attach them to the yards
- A gammon "iron" for the bowsprit.
- Rudder control & steering.
- Winch drum for the braces.
- Make the sails for the planned sailing suit of; 3 tops'ls, spanker, and jib.

The yards needed were cut and shaped. A nice thing about this time period is how much simpler spars were compared to the relatively complex shapes of earlier times. Three lower yards and three tops'l yard were made for now.

Constellation had iron "patent trusses" on her lower yards. what is great about these things is they hold the yard off the mast and allow it to brace sharper to either side than the old method, and the harp portion attached to the mast has space for the topmast to lower through it, a big help since that's how I'm going to reduce the rig for transport. I made mine from 1/8" sheet aluminum with brass screws. The eyebolts are 1/16" brass rod formed with round-nose pliers and threaded to match the nuts I bought. The bands are all cut from brass sheet. These were difficult for me and they still aren't as good as I'd like, but they aren't awful and have proved quite functional. The hardest part was the "yoke" that attaches to the yard. They were cut from the sheet so the center hole was available, then heated and twisted 90° on the ends to provide the attachment points for the yard bands. Amazingly, I only broke and had to remake one. The tops'l yards each get one of these yokes as well, and I haven't had as much luck making them this time around.


Sails, on the other hand, I understand. I repaired sails on the vessels I worked on, and worked for a sail-maker near Annapolis for a couple of years. I'm very particular about sails on models and feel most modelers panic as soon as they see a piece of cloth as if it threatens their masculinity or something. I have a web-page about making sails especially about sewing bolt ropes and NOT stitching seams, HERE.
I focused on making the three tops'ls (pronounced top sills), the jib, and the driver, or "spanker." (These used to be two different sails that turned into two words for the same sail.)


above: Main tops'l, driver, fore & mizzen tops'l with jib, and driver.
I also carved a quick and nasty gaff and boom for the driver.
The original winch drums were wood drums with plastic compact-disc flanges. They warped oddly and were unusable. I got a sheet of 1/8" thick PVC and made a new set of drums.


The steering was handled with nylon string guided through brass screw-eyes in wood blocks, hot-glued to the inside of the hull, to connect the tiller to the rudder servo.
 Brace Testing Video
By the time my target weekend in July was near, the forecast was for Northerly winds at 10 miles-per-hour on Saturday which was perfect as I was launching from the South shore of the creek and if anything went wrong she'd get blown back to me. Unfortunately, I had to be somewhere else on Saturday. Sunday was forecaste to have light variable winds mainly from the East and South. Well, you get what you pay for.
Sunday, July 10th, 2011, the model and it's equipment and accessories, were stuffed into the Tahoe.
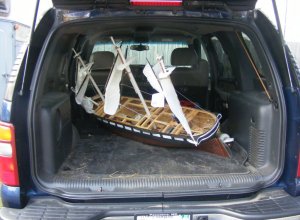
We drove less than 1/4 mile to the public pier at Sloop Cove on Stoney Creek in Pasadena Maryland and I got the model ready to launch. Only one winch was used to turn the main yard, while the other lower yards were attached to it so they all turned together. The tops'l yards were pulled around by the sail. Besides the 42 pound ballast "torpedo" bolted to her keel, about 12 pounds of lead shot in baggies was placed inside to trim her. She also had her battery, RC equipment, and I also tossed the tools in her - still she floated about an 1-1/2" above her load waterline. I also taped a CCD camera to her mizzen mast for some on-board video.
I didn't put the sub-deck on her, I didn't think it would serve any purpose except maybe getting wet and warping or delaminating.
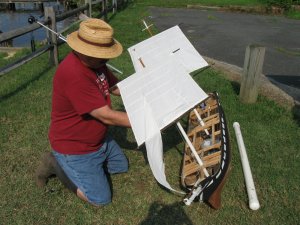
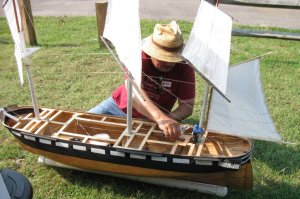
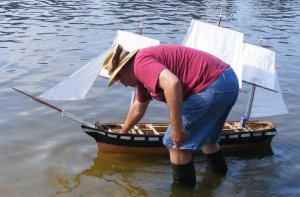
I trained my lady Denise on the camera and put her in charge of taking video however she saw fit so I could concentrate on the model.
As noted, the wind was shifty, flukey, light with gusts to 15 now and then, no two gust from the same direction. The model handled ok, considering, though I can't really say she "sailed." She bungled about like a kid just learning to drive a stick-shift. Then the battery failed. Turns out it was completely shot and I had to replace it. Fortunately she was pointed for my shore and the breeze sent her right to it eventually bumping her forestay on one of the private piers some fifty yards down stream. The only way to get her was to swim. It being over 90° out, I didn't mind so much, but swimming isn't my strong suit and I realized I should have brought a flotation vest along to make it easier.
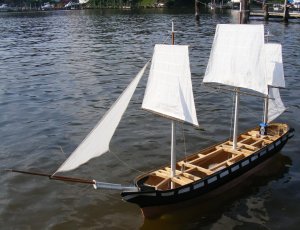
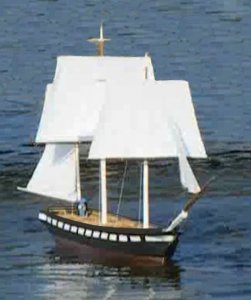
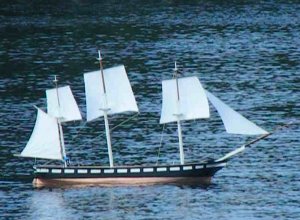
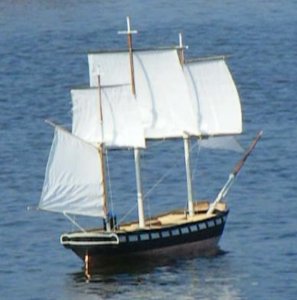
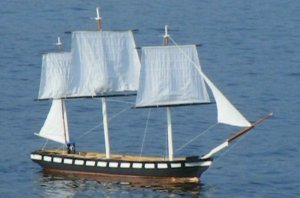
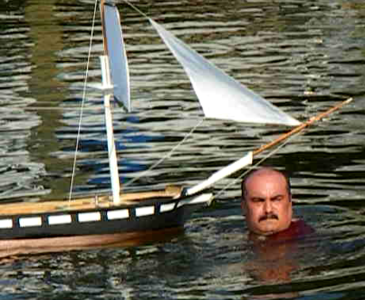
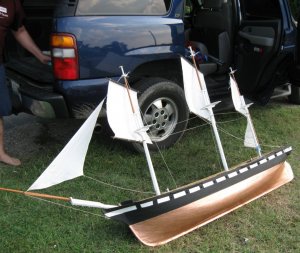
Getting her ashore, I got the ballast off, collapsed the rig, and stuffed her into the Tahoe and on home we went.
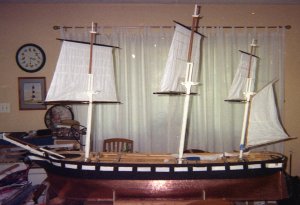
Here's the full video of the model's first sail, all 26 minutes.
The on-board camera video was anti-climatic at best and unless I can sync it with the main video and show it picture-in-picture, it's pretty much useless.
In all,the whole thing was a bit disappointing. She was under-sailed for the weather, and the wind was so flukey as to be aggravating. Aside from that she sailed when she sailed, and I supposed the mission was a success.

We drove less than 1/4 mile to the public pier at Sloop Cove on Stoney Creek in Pasadena Maryland and I got the model ready to launch. Only one winch was used to turn the main yard, while the other lower yards were attached to it so they all turned together. The tops'l yards were pulled around by the sail. Besides the 42 pound ballast "torpedo" bolted to her keel, about 12 pounds of lead shot in baggies was placed inside to trim her. She also had her battery, RC equipment, and I also tossed the tools in her - still she floated about an 1-1/2" above her load waterline. I also taped a CCD camera to her mizzen mast for some on-board video.
I didn't put the sub-deck on her, I didn't think it would serve any purpose except maybe getting wet and warping or delaminating.


I trained my lady Denise on the camera and put her in charge of taking video however she saw fit so I could concentrate on the model.
As noted, the wind was shifty, flukey, light with gusts to 15 now and then, no two gust from the same direction. The model handled ok, considering, though I can't really say she "sailed." She bungled about like a kid just learning to drive a stick-shift. Then the battery failed. Turns out it was completely shot and I had to replace it. Fortunately she was pointed for my shore and the breeze sent her right to it eventually bumping her forestay on one of the private piers some fifty yards down stream. The only way to get her was to swim. It being over 90° out, I didn't mind so much, but swimming isn't my strong suit and I realized I should have brought a flotation vest along to make it easier.


Getting her ashore, I got the ballast off, collapsed the rig, and stuffed her into the Tahoe and on home we went.


Here's the full video of the model's first sail, all 26 minutes.
The on-board camera video was anti-climatic at best and unless I can sync it with the main video and show it picture-in-picture, it's pretty much useless.
In all,the whole thing was a bit disappointing. She was under-sailed for the weather, and the wind was so flukey as to be aggravating. Aside from that she sailed when she sailed, and I supposed the mission was a success.
Last edited:
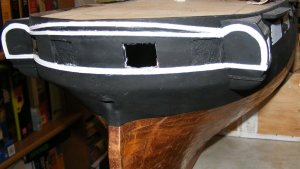
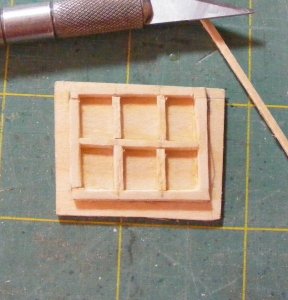
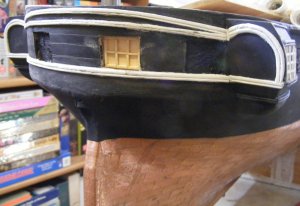
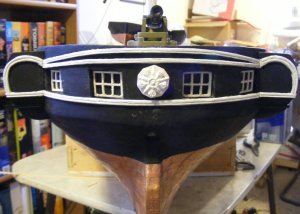
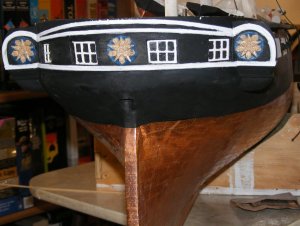
With that landmark out of the way, I moved onto stern windows. First I sucked it up and cut one port out completely. Made a window that would be inserted into the hole from inside. That looked like it would work, so I set my jaw and made more holes in the hull. Made more windows, epoxied everything in place painted it all and viola!
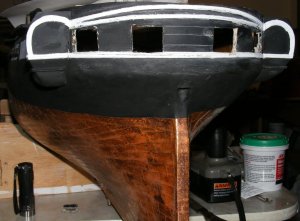
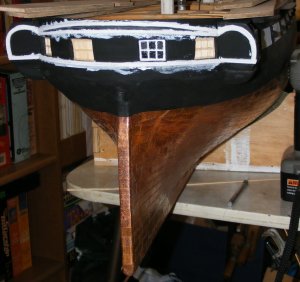
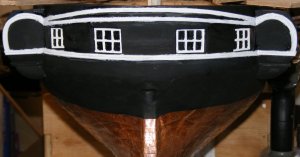
The ship has three medallions that she's worn since 1855, these are her constellation of stars.
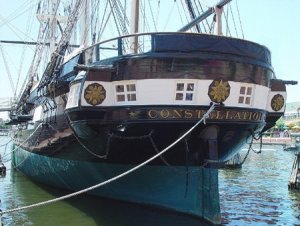
I carved one of the stern medallions from skulpty, but it was too bulky looking, so I started over with some boxwood I had and sheet plastic.
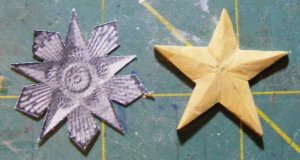

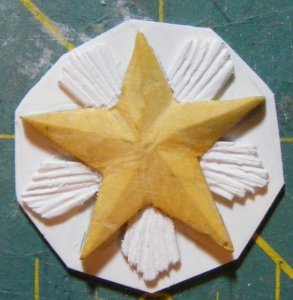
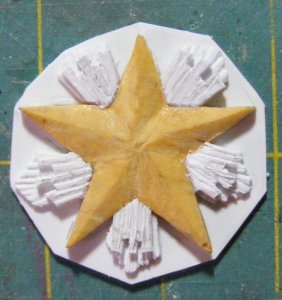
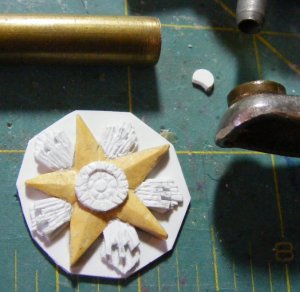
This was about as good as these fat fingers were going to manage...
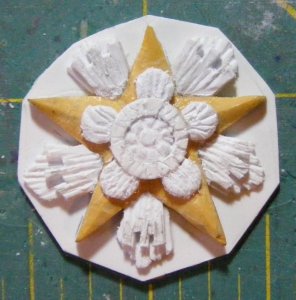
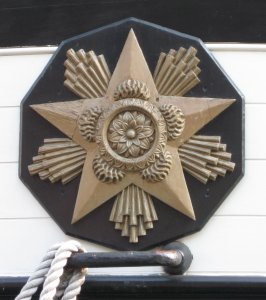


The ship has three medallions that she's worn since 1855, these are her constellation of stars.

I carved one of the stern medallions from skulpty, but it was too bulky looking, so I started over with some boxwood I had and sheet plastic.


This was about as good as these fat fingers were going to manage...


Like the gunport lids, I pressed the original into some clay and cast 3 medallions in resin.
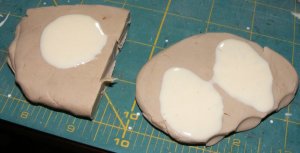
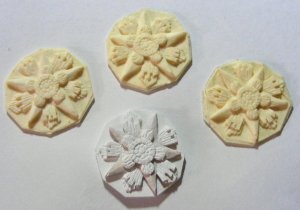
I have no idea what color these this were painted, but I was certain they were painted something beside's gold on black. I've seen this style of star in various depictions from the 1840's and 50's usually they were gold stars on a blue field, just like the flag, so that's what I went with. When the paint dried, they got some clear coat and were glued to the stern.
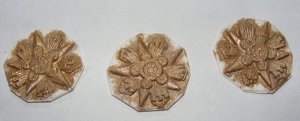
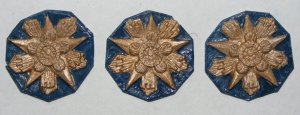
A lot of other little things got done after the sail. Some oak strips were epoxied into the hull as backers for the chain-plate attachment. The underside of the plywood subdeck was painted. And I built two of the ships boats - that will be a separate post.
Then I lost my job, moved, and basically everything turned upside down and hasn't flipped back yet. The model was literally shelved.


I have no idea what color these this were painted, but I was certain they were painted something beside's gold on black. I've seen this style of star in various depictions from the 1840's and 50's usually they were gold stars on a blue field, just like the flag, so that's what I went with. When the paint dried, they got some clear coat and were glued to the stern.


A lot of other little things got done after the sail. Some oak strips were epoxied into the hull as backers for the chain-plate attachment. The underside of the plywood subdeck was painted. And I built two of the ships boats - that will be a separate post.
Then I lost my job, moved, and basically everything turned upside down and hasn't flipped back yet. The model was literally shelved.

Last edited:
That is a great job on the stars and windows. These details bring life to the ship
One day I was contacted by an old Pride of Baltimore shipmate who is now the director of Historic Ships Baltimore, the custodians of the Constellation, and asked if I would bring the model to the National Maritime Day event at the NS Savannah in Baltimore. Models I've built or restored are on display in public places, but I've never had a model out for this sort of event. I also didn't know if I could get Constellation operational to sail in the pool they said they were building.
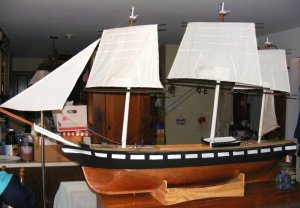
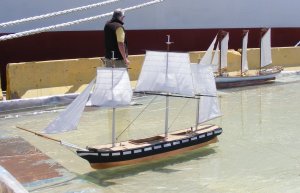
No longer having a space to work on her, I commandeered a cabinet behind the couch as my workbench. The model would be set-up in the same configuration as her first sail. This time I tacked down her sub-deck with hot-glue and stuffed her into the lady's Ford Windstar. On the site the pool wasn't quite deep enough for her to really sail. She went a few feet and grounded on the uneven bottom. But a few people came over to talk about her. One person told me about the Model Expo at the Chesapeake Bay Maritime Museum in St Michaels Maryland in two weeks!

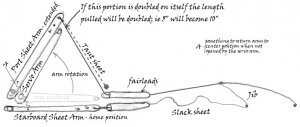
I had been knocking around ideas for sheeting the heads'ls for some time. Most modelers don't want to deal with loose-footed, overlapping sails and find some cheat to keep from it. Clubs, booms, cutting the sail short, all of which may function, but not the way the actual boat did. Those that do address the issue trying to retain some prototypical function and appearance, tend to use constant tension systems that pay out what they haul in, which isn't how heads'ls work; or they use multiple servos which wasn't an option for me.
When you're sailing and you want to come-about, or tack, generally, you cast off the jib sheet, turn the boat through the wind, and sheet in the jib on the other side. The jib usually overlaps the mast and shrouds, so you need a sheet for either side of the boat. Eventually I found a very simple, single servo, set-up that looked like it would work. The sail arm servo directly sheets the spanker, but it also pushes against one of two free floating arms with the heads'l sheets attached. When it pushes one arm, sheeting in the heads'ls on that side, the other arm is free, slacking the other sheets. I cobbled together the set-up in the model and had her ready for St Michaels.
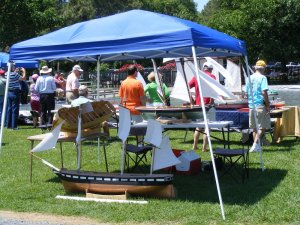
We found a deal on one of those gazebo tent things so we wouldn't get fried by the late May sun, and I took all three models to display. I thought Pride of Baltimore would get all the attention considering our location, but it was the bare hull of Macedonian most folks asked about.
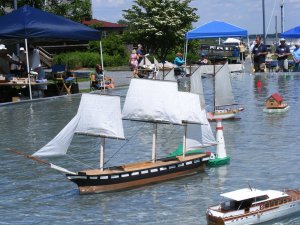
The museum set up a much larger pool for the models to run in, but it was still just a little too shallow for Constellation, even floating an 1-1/2" high in the water. The pool was in a space between several buildings, which had the wind doing funky things, but she sort-a sailed. The Semaphore Sheeter seemed to work with the single jib though the servo needed more swing than my set-up gave it.
Some video of the event that includes Constellation.
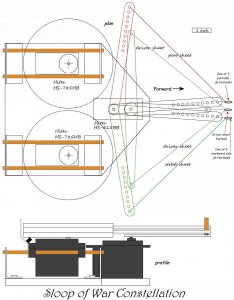
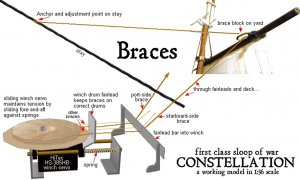
Using a winch to brace the yard has it's problems. The winch drum is a circle, the yard where the brace attaches is traveling in a circle, but the brace itself is a moving vector. Simply, if the yard is moved away from square across the hull, the side paying out will go slack. That's not a big issue above deck, but a slack brace at the winch drum will come off and tangle. To always maintain tension on the braces, I had planned (back near the start of this thread) to use springs. Discussing the issue on the scale Sail forum on RCgroups.com, we came up with putting the winch on rails with springs to push it back and maintain constant tension on the braces.
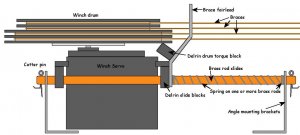
The servo is attached to Delrin plastic blocks that slide on the brass rods. A guide is attached to one block that steers the lines to the correct part of the drum. No alterations are made to the servo at all. The baces are rigged with the springs under tension. As the yard is braced and slack appears on one side, the server is pushed back on the rails maintaining tension in the brace.
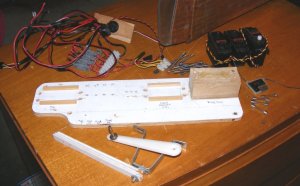
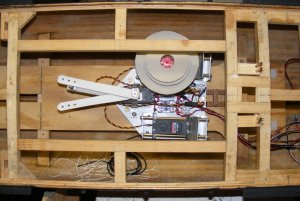
I redesigned Constellation's servo tray to place two of these set-ups side-by-side aft of the semaphore sheeter on a single pallet.
To build a new pallet, I had to take apart the old one, which was oddly sad.
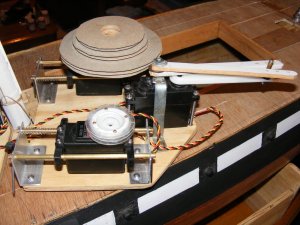
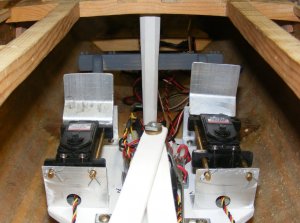
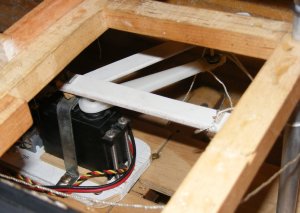
Of the winch servos started acting odd, so I swapped it out with another one. All this required was taking off the winch drum, unplugging the servo, and loosening 4 screws. The servo can remain on it's slide-blocks, two cotter pins removed and the rods slid out to remove the servo.
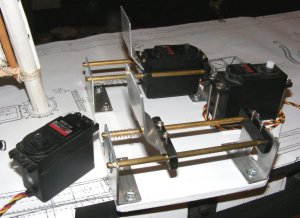
The pallet is screwed to the mechanical deck in the model with three brass wood screws, just forward of the main mast step. With the winches side-by-side, it shortens the whole thing and makes accessing it through the main hatch easier.
old
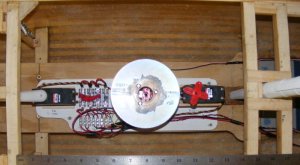
New
No longer having a space to work on her, I commandeered a cabinet behind the couch as my workbench. The model would be set-up in the same configuration as her first sail. This time I tacked down her sub-deck with hot-glue and stuffed her into the lady's Ford Windstar. On the site the pool wasn't quite deep enough for her to really sail. She went a few feet and grounded on the uneven bottom. But a few people came over to talk about her. One person told me about the Model Expo at the Chesapeake Bay Maritime Museum in St Michaels Maryland in two weeks!


I had been knocking around ideas for sheeting the heads'ls for some time. Most modelers don't want to deal with loose-footed, overlapping sails and find some cheat to keep from it. Clubs, booms, cutting the sail short, all of which may function, but not the way the actual boat did. Those that do address the issue trying to retain some prototypical function and appearance, tend to use constant tension systems that pay out what they haul in, which isn't how heads'ls work; or they use multiple servos which wasn't an option for me.
When you're sailing and you want to come-about, or tack, generally, you cast off the jib sheet, turn the boat through the wind, and sheet in the jib on the other side. The jib usually overlaps the mast and shrouds, so you need a sheet for either side of the boat. Eventually I found a very simple, single servo, set-up that looked like it would work. The sail arm servo directly sheets the spanker, but it also pushes against one of two free floating arms with the heads'l sheets attached. When it pushes one arm, sheeting in the heads'ls on that side, the other arm is free, slacking the other sheets. I cobbled together the set-up in the model and had her ready for St Michaels.


We found a deal on one of those gazebo tent things so we wouldn't get fried by the late May sun, and I took all three models to display. I thought Pride of Baltimore would get all the attention considering our location, but it was the bare hull of Macedonian most folks asked about.
The museum set up a much larger pool for the models to run in, but it was still just a little too shallow for Constellation, even floating an 1-1/2" high in the water. The pool was in a space between several buildings, which had the wind doing funky things, but she sort-a sailed. The Semaphore Sheeter seemed to work with the single jib though the servo needed more swing than my set-up gave it.


Some video of the event that includes Constellation.
Using a winch to brace the yard has it's problems. The winch drum is a circle, the yard where the brace attaches is traveling in a circle, but the brace itself is a moving vector. Simply, if the yard is moved away from square across the hull, the side paying out will go slack. That's not a big issue above deck, but a slack brace at the winch drum will come off and tangle. To always maintain tension on the braces, I had planned (back near the start of this thread) to use springs. Discussing the issue on the scale Sail forum on RCgroups.com, we came up with putting the winch on rails with springs to push it back and maintain constant tension on the braces.

The servo is attached to Delrin plastic blocks that slide on the brass rods. A guide is attached to one block that steers the lines to the correct part of the drum. No alterations are made to the servo at all. The baces are rigged with the springs under tension. As the yard is braced and slack appears on one side, the server is pushed back on the rails maintaining tension in the brace.
I redesigned Constellation's servo tray to place two of these set-ups side-by-side aft of the semaphore sheeter on a single pallet.


To build a new pallet, I had to take apart the old one, which was oddly sad.


Of the winch servos started acting odd, so I swapped it out with another one. All this required was taking off the winch drum, unplugging the servo, and loosening 4 screws. The servo can remain on it's slide-blocks, two cotter pins removed and the rods slid out to remove the servo.

The pallet is screwed to the mechanical deck in the model with three brass wood screws, just forward of the main mast step. With the winches side-by-side, it shortens the whole thing and makes accessing it through the main hatch easier.
old

New

Last edited:
Motivated to do more work, I made the t'gallant poles for all three masts. (When the t'gallant and royal masts are a single spar, the royal portion is called a "pole" and the whole thing is the t'gallant pole) Not having enough space overhead to set the model up-right with the poles in, I laid claim to the garage as my own, cleaned everything out and set up shop.
I worked mainly on figuring out the control lines and fairleads inside the hull.
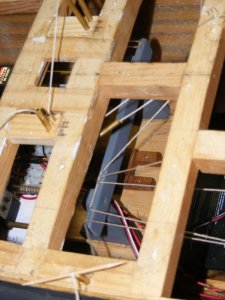
Control line routing diagram. This one's a little more up-to-date than what I was working from at the time, as I simplified things a bit since then.

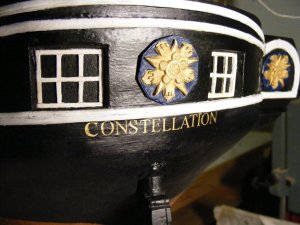
I also ordered some dry-transfer lettering for the ship's name on the stern. Finding gold letters the right size meant ordering them from the UK.
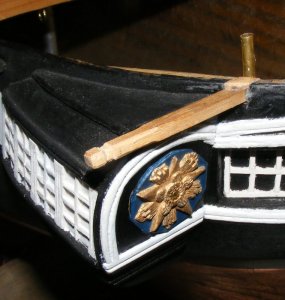
Bumpkins, or boomkins, as you prefer, were installed for and aft.

I'm building this model of the ship as she appeared when new, based mostly on a painting of her at Naples in 1856 by deSimone. That painting shows a signal hoist at the mizzen truck.
That's something I'd like to include on the model except that I have no idea what the signal means.
I cannot find those particular pennants in any signal system I've been able to find. One is a white pennant with a blue bar, the other looks like a white tapered swallow-tail with red borders top and bottom. Pennant, flag, burgee, or anything else; I cannot find those patterns in any flag set - including modern.
I could just put that signal on the model anyway, but it may not really be appropriate. It could mean "Send a plumber!" or "My bottom is fouled" or "I have a lovely bunch of coconuts" Who knows? I don't.
The possibilities are 1. it's a private US Navy signal. 2. It's a private Kingdom of Naples signal, or 3. deSimone just made it up.
There are several editions of Captain Marryat's (RN) Code of Signals available online. The system assigns numbers to every warship of the major powers of the time, and all the merchant ships registered with Lloyd's. The Tenth edition, dated 1847 contains the number 564 for the American frigate Constellation. The next edition available online is dated 1855, but the French stopped publicly posting the list of their warships, so this and later editions no longer contain numbers for warships other than the British.
I'm assuming the new sloop of war Constellation would take the number of the frigate she replaced, and not knowing what her private USN number was, or what the code in the painting was, etc etc etc - I'm going with Marryat's 10th edition.
To that end, Marryat says;
The rest of the yards, t'gallants and royals, and the driver's gaff and boom were made and painted.


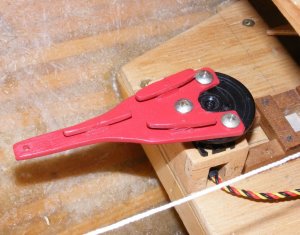
The rudder servo got a new arm with cleats to make adjusting the rudder cable easier, and the fairleads were epoxied into the hull.
The cleat in the middle is for the line that will run to the ship's wheel so it will turn as the rudder moves.
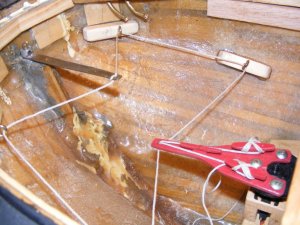
The mechanical decks were taken out, sanded, and painted. I had to replace one of the beams these decks attach to, the epoxy, it seems never set up right, and the beam eventually just came loose. I put in a new beam and made sure eveything set up properly.
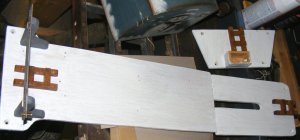
All this effort was to get to where I could close up the deck. With everything inside the hull in place, or so I hoped; fairleads, through deck tubes, rudder controls, etc, I was ready to lay down the sub-deck. Well, not really "ready" as I had this nagging "locking my keys in the car" feeling, but I couldn't find anything I'd missed, so, on with the deck!


I worked mainly on figuring out the control lines and fairleads inside the hull.


Control line routing diagram. This one's a little more up-to-date than what I was working from at the time, as I simplified things a bit since then.

I also ordered some dry-transfer lettering for the ship's name on the stern. Finding gold letters the right size meant ordering them from the UK.

Bumpkins, or boomkins, as you prefer, were installed for and aft.


I'm building this model of the ship as she appeared when new, based mostly on a painting of her at Naples in 1856 by deSimone. That painting shows a signal hoist at the mizzen truck.

That's something I'd like to include on the model except that I have no idea what the signal means.
I cannot find those particular pennants in any signal system I've been able to find. One is a white pennant with a blue bar, the other looks like a white tapered swallow-tail with red borders top and bottom. Pennant, flag, burgee, or anything else; I cannot find those patterns in any flag set - including modern.
I could just put that signal on the model anyway, but it may not really be appropriate. It could mean "Send a plumber!" or "My bottom is fouled" or "I have a lovely bunch of coconuts" Who knows? I don't.
The possibilities are 1. it's a private US Navy signal. 2. It's a private Kingdom of Naples signal, or 3. deSimone just made it up.
There are several editions of Captain Marryat's (RN) Code of Signals available online. The system assigns numbers to every warship of the major powers of the time, and all the merchant ships registered with Lloyd's. The Tenth edition, dated 1847 contains the number 564 for the American frigate Constellation. The next edition available online is dated 1855, but the French stopped publicly posting the list of their warships, so this and later editions no longer contain numbers for warships other than the British.
I'm assuming the new sloop of war Constellation would take the number of the frigate she replaced, and not knowing what her private USN number was, or what the code in the painting was, etc etc etc - I'm going with Marryat's 10th edition.
To that end, Marryat says;
The Flags used in this Code of Signals should be six feet in the standing part and eight in the fly; and the Pendants four feet by eighteen.
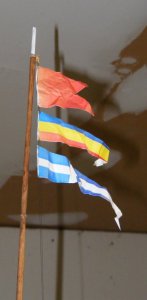
So, I drew up the hoist for 564 to 1:36 scale, printed it on the color printer, and hoisted it up on Constellation's mizzen. Yes, these are paper, I just wanted to see how it looked. I eventually made a set on cloth, but I'm hoping to get some nice printed version eventually.
The rest of the yards, t'gallants and royals, and the driver's gaff and boom were made and painted.


The rudder servo got a new arm with cleats to make adjusting the rudder cable easier, and the fairleads were epoxied into the hull.
The cleat in the middle is for the line that will run to the ship's wheel so it will turn as the rudder moves.


The mechanical decks were taken out, sanded, and painted. I had to replace one of the beams these decks attach to, the epoxy, it seems never set up right, and the beam eventually just came loose. I put in a new beam and made sure eveything set up properly.

All this effort was to get to where I could close up the deck. With everything inside the hull in place, or so I hoped; fairleads, through deck tubes, rudder controls, etc, I was ready to lay down the sub-deck. Well, not really "ready" as I had this nagging "locking my keys in the car" feeling, but I couldn't find anything I'd missed, so, on with the deck!
Last edited:
The "sub-deck" is like "underlayment" in a house. It's a sheet of 3/16" luan plywood cut into 2" wide strips so it would form to the camber as well as the sheer.
I painted epoxy everywhere I could reach of the deck framing and as I laid each strip of the subdeck, starting from outboard and working inboard, I completely coated the underside and edges of each strip with epoxy not only to seal it, but to glue it.
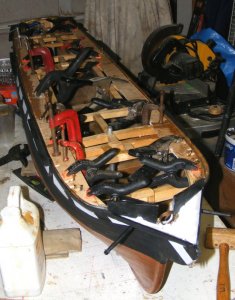
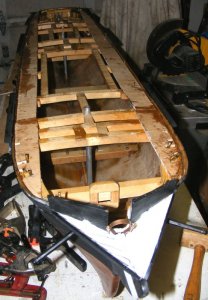
The second set inboard went in next.
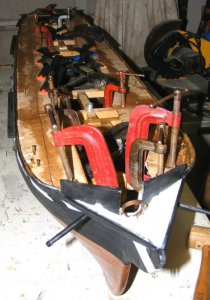
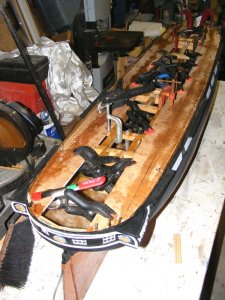
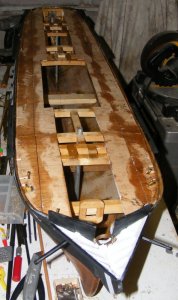
And finally the two center strips.
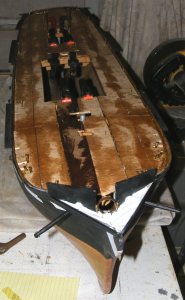
Seams, and any nooks an crannies were filled with body-filler. It was unseasonable warm this late in October and the filler went off so fast I hardly had time to use it. The hull was masked off and after some scraping and sanding, the last of the 4oz cloth from when the hull was first glassed was epoxied on the deck.
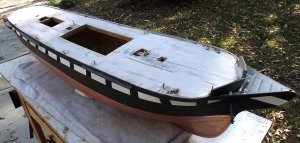
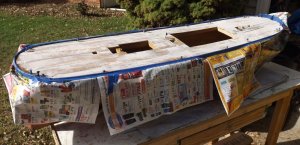
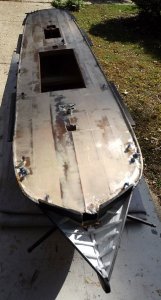
Planning ahead is important for the success of any project - I really ought to try it some time.
I knew I needed access hatch fore and aft, but I never got around to designing the things till right now.
I cut out the deck for each hatch, framed up the cut-out, and then framed the opening so the hatch would sit in it. The underside of the hatch and the framing in the opening got painted white.
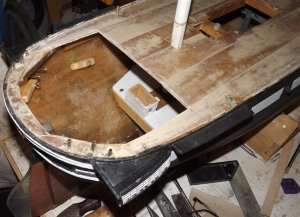
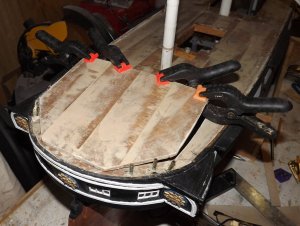
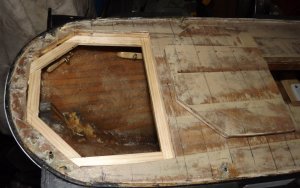
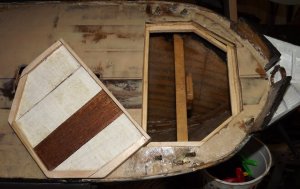
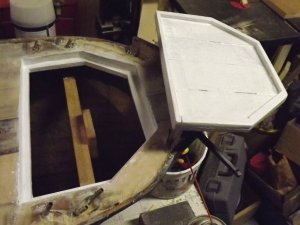
It was time for decking to commence...
I painted epoxy everywhere I could reach of the deck framing and as I laid each strip of the subdeck, starting from outboard and working inboard, I completely coated the underside and edges of each strip with epoxy not only to seal it, but to glue it.


The second set inboard went in next.


And finally the two center strips.

Seams, and any nooks an crannies were filled with body-filler. It was unseasonable warm this late in October and the filler went off so fast I hardly had time to use it. The hull was masked off and after some scraping and sanding, the last of the 4oz cloth from when the hull was first glassed was epoxied on the deck.


Planning ahead is important for the success of any project - I really ought to try it some time.
I knew I needed access hatch fore and aft, but I never got around to designing the things till right now.
I cut out the deck for each hatch, framed up the cut-out, and then framed the opening so the hatch would sit in it. The underside of the hatch and the framing in the opening got painted white.


It was time for decking to commence...
Last edited:
Remember folks to click a pic to see it fullsize
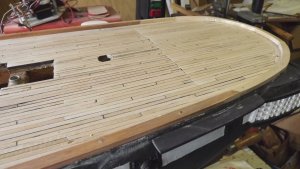
Constellation's deck was planked with different width boards over her life time. The earliest photo that shows her deck, comparing things like men's feet and other items of a known size, looks like deck planks were about 8" wide.
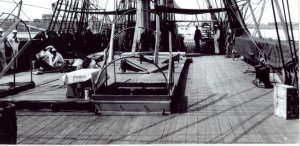
Based on the deck framing to get a plank length about 20' or so, the scale planks measure 3/16" x 3/16" x 6-5/8" planks in 1:36 scale. I built in 3/4" deck beams, covered with a 3/16" thick plywood sub-deck, and covered with epoxy and 4oz glass cloth. To say it was over-kill is to understate it. The perimeter of the deck where it meets the hull is a critical joint. Two 1/8 strips are glued on top of each other in the hull forming the "deck clamp" but the beams don't sit on it, but rather are notched on top and glued in from under it. The sub-deck sit on the beams sandwiching the clamp in between. The subdeck fits inside the edge of the hull and slightly more than 3/16" below its edge. The deck planking makes the deck flush with the top of the edge of the hull. This seam is covered with cap-rail that's more of a log. Inside of this some triangle shaped wood which forms the waterway around the edge of the deck. The deck isn't joggled in any source I can find as all the plank ends are covered by this rail and waterway.

The spar deck is 61" long and 12-1/4" wide at it's widest point. The ends are nearly half round and there's maybe two plank widths on either side's "bulge," ie: the deck is nearly rectangular, with rounded off corners.
61" requires 9.2 6-5/8" planks end-to-end and 12-1/4" requires 67 3/16" planks across - that's 616.4 planks to cover the deck. But wait! There's a 14-1/4" x 6" main hatch and a 6" x 3-1/4" battery hatch opening. They add up to 104 planks I don't need. I estimated the "corners and other small hatches and openings will negate some 12 planks, so that's 616-116=500.
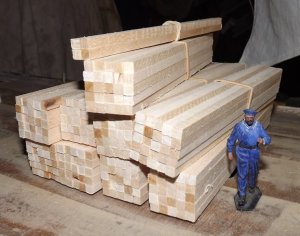
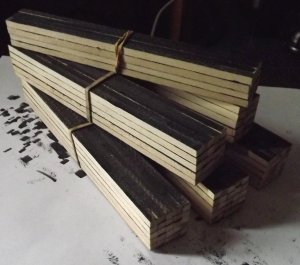
I wanted to plank the deck with some maple I had, but rigging my table saw to mill up 3/16" square planks wasn't working, so I broke down and bought 3/16" square strips 48" long. That gave me 7 pieces from each 4' length leaving a piece about 1-1/2" long for the scrap box. I chopped up piles of little sticks, and used a fat permanent marker on two sides to be the "pitch" in the deck seams.
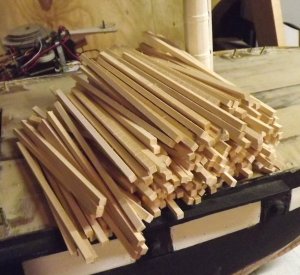
It was April 5th 2015 when time and weather agreed to allow me to start actually laying the deck.
The deck is laid in a 5 plank pattern. That's what the lines drawn on the sub-deck are for. In the first image below, from the left, looking forward (right), the first plank stops at line (deck beam) #1, the second at 4, the third at 2, the forth at 5, the fifth at 3, and then it starts over at 1. This staggers the butts so there's four planks between butts on the same beam. I started aft center and worked forward and out, using gelled cyanoacrylate (super-glue) to glue the planks down, running a bead down the "bottom" and one side. There were a couple of times I messed up and had to pull off a plank or two, but I actually was able to reuse the piece both times, so there was very little waste, or even scrap left over.
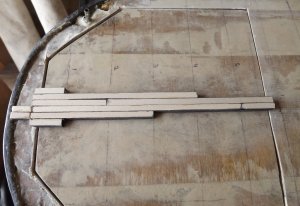
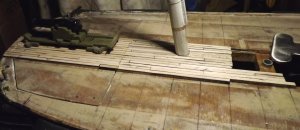
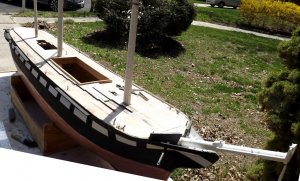
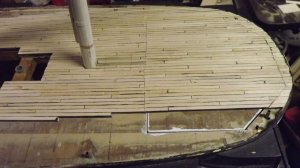
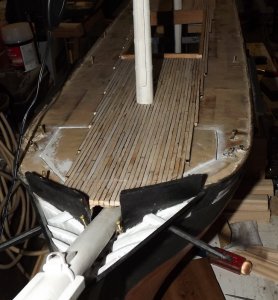
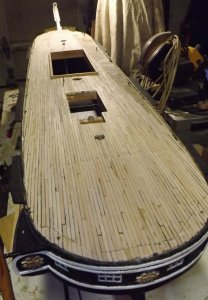
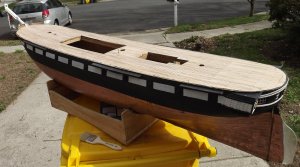
By April 16th the deck was complete.
Constellation's deck was planked with different width boards over her life time. The earliest photo that shows her deck, comparing things like men's feet and other items of a known size, looks like deck planks were about 8" wide.

Based on the deck framing to get a plank length about 20' or so, the scale planks measure 3/16" x 3/16" x 6-5/8" planks in 1:36 scale. I built in 3/4" deck beams, covered with a 3/16" thick plywood sub-deck, and covered with epoxy and 4oz glass cloth. To say it was over-kill is to understate it. The perimeter of the deck where it meets the hull is a critical joint. Two 1/8 strips are glued on top of each other in the hull forming the "deck clamp" but the beams don't sit on it, but rather are notched on top and glued in from under it. The sub-deck sit on the beams sandwiching the clamp in between. The subdeck fits inside the edge of the hull and slightly more than 3/16" below its edge. The deck planking makes the deck flush with the top of the edge of the hull. This seam is covered with cap-rail that's more of a log. Inside of this some triangle shaped wood which forms the waterway around the edge of the deck. The deck isn't joggled in any source I can find as all the plank ends are covered by this rail and waterway.

The spar deck is 61" long and 12-1/4" wide at it's widest point. The ends are nearly half round and there's maybe two plank widths on either side's "bulge," ie: the deck is nearly rectangular, with rounded off corners.
61" requires 9.2 6-5/8" planks end-to-end and 12-1/4" requires 67 3/16" planks across - that's 616.4 planks to cover the deck. But wait! There's a 14-1/4" x 6" main hatch and a 6" x 3-1/4" battery hatch opening. They add up to 104 planks I don't need. I estimated the "corners and other small hatches and openings will negate some 12 planks, so that's 616-116=500.
I wanted to plank the deck with some maple I had, but rigging my table saw to mill up 3/16" square planks wasn't working, so I broke down and bought 3/16" square strips 48" long. That gave me 7 pieces from each 4' length leaving a piece about 1-1/2" long for the scrap box. I chopped up piles of little sticks, and used a fat permanent marker on two sides to be the "pitch" in the deck seams.


It was April 5th 2015 when time and weather agreed to allow me to start actually laying the deck.
The deck is laid in a 5 plank pattern. That's what the lines drawn on the sub-deck are for. In the first image below, from the left, looking forward (right), the first plank stops at line (deck beam) #1, the second at 4, the third at 2, the forth at 5, the fifth at 3, and then it starts over at 1. This staggers the butts so there's four planks between butts on the same beam. I started aft center and worked forward and out, using gelled cyanoacrylate (super-glue) to glue the planks down, running a bead down the "bottom" and one side. There were a couple of times I messed up and had to pull off a plank or two, but I actually was able to reuse the piece both times, so there was very little waste, or even scrap left over.


By April 16th the deck was complete.

Last edited:
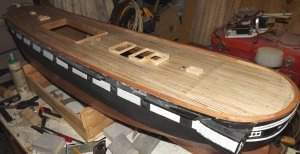
You thought I decked over the hatches didn't you?
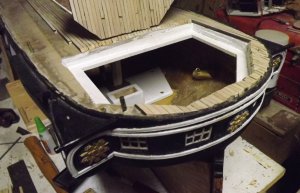
The great cabin sky-light, companionways, and capstan are all combined into one hatch right over the battery.
The cap rail was made from 3/8" x 1/2" bass in two pieces on either side, and several smaller pieces at the bow and stern. It's glued and nailed with copper nails and covers the deck edge completely around the boat.
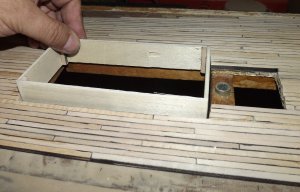
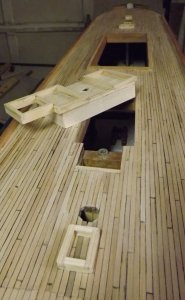
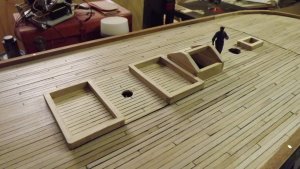
Fore and aft hatches open and closed.
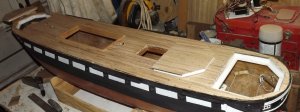
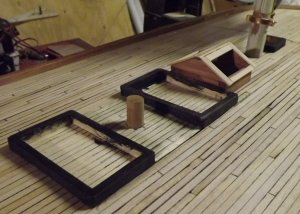
Cap rail installed and hatch coamings getting fitted.
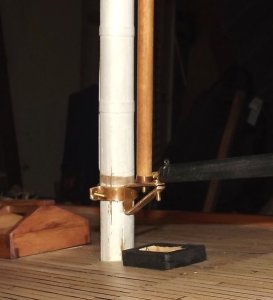
The ship had an iron fitting for the spencer and driver masts, the model got copper.
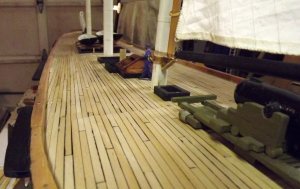
The deck furniture installed and painted. The green and black thing is a pivot gun, we'll get to those later.
Constellation didn't have bulwarks like we might think of on Constitution or some other ship. She had hammock irons, but instead of tarred canvas or oilcloth covers, her's were wainscotted.
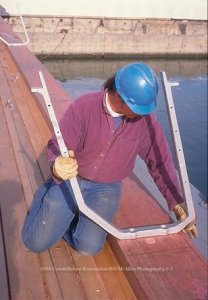
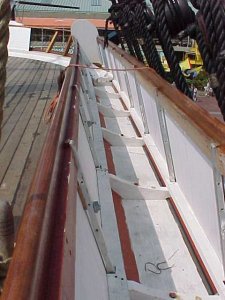
I didn't really need to recreate that on the model, so I decided to make shaped wooden blocks, cover them in sheathing to represent the wainscotting, and shape some wood on top to represent the tarp covered hammocks.
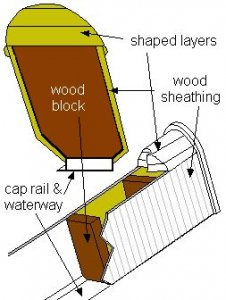

The great cabin sky-light, companionways, and capstan are all combined into one hatch right over the battery.
The cap rail was made from 3/8" x 1/2" bass in two pieces on either side, and several smaller pieces at the bow and stern. It's glued and nailed with copper nails and covers the deck edge completely around the boat.


Fore and aft hatches open and closed.


Cap rail installed and hatch coamings getting fitted.

The ship had an iron fitting for the spencer and driver masts, the model got copper.

The deck furniture installed and painted. The green and black thing is a pivot gun, we'll get to those later.

Constellation didn't have bulwarks like we might think of on Constitution or some other ship. She had hammock irons, but instead of tarred canvas or oilcloth covers, her's were wainscotted.


I didn't really need to recreate that on the model, so I decided to make shaped wooden blocks, cover them in sheathing to represent the wainscotting, and shape some wood on top to represent the tarp covered hammocks.

Last edited:
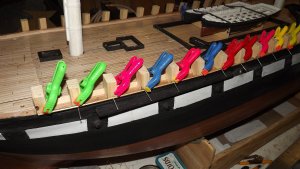
First the waterways were installed and scuppers located and installed. These are brass tube epoxied into drilled hole through the water way and out the side of the hull. All the block stanchions were cut, drilled through the top, glued, and held in place with a 4p finish nail.
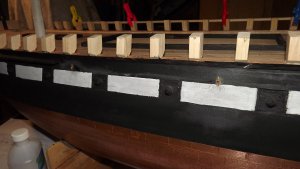
The bulwarks are in four sections, two port and two starboard, divided by the companionway. Each section has a downward face that gets a narrow sheet to cover it, inboard and outboard; then the upright inboard and outboard faces. Where sheet blocks were in the bulwark was blocked in before the 1/16" bass sheets was glued on.

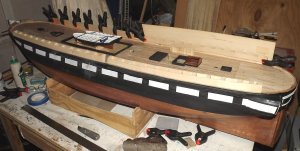
After the sheathing was on, and the outboard face scribed to look like wainscotting, every thing got paint.

I covered the bulwark "temporarily" with 1/8" balsa sheet, figuring it would be easy to remove once I figured out what I was going to do. Most paintings of Constellation show hammocks in the bulwark with out tarps over them, and I'd like to finish them that way, but I haven't figured out how I'm going to do it. Also, National Maritime Day was only two weeks away, so I worked on something else.
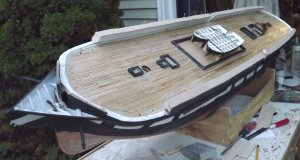
Somehow the only actually bit of fixed bulwark was at the bow, but the portions I left when the hull was cut down all those years ago, seemed to have shrunk somehow and needed to be built back up.
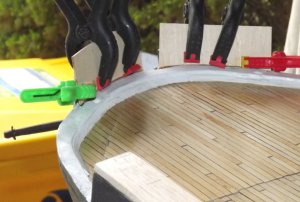
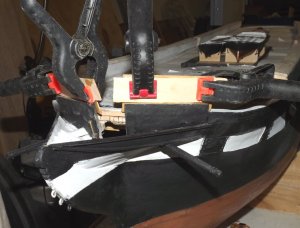
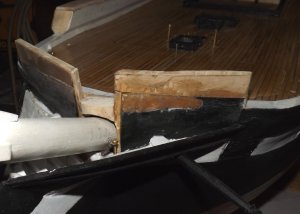
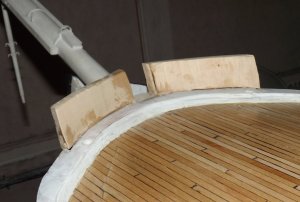
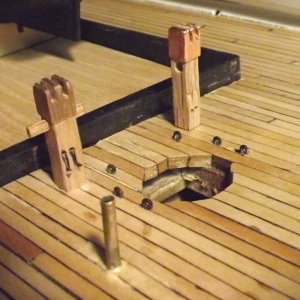
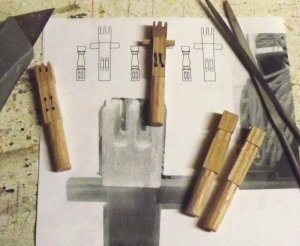
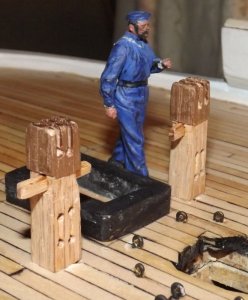
Eyes were installed around the base of each mast as shown in the 1888 deck plan and several photos. The fore and main masts have a pair of the bronze capped bitts forward of them, with a pin-rail behind them. There are made of oak as they need to be functional.
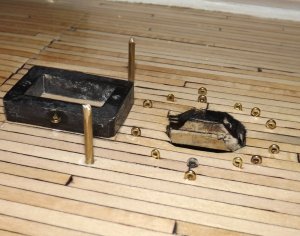
What am I forgetting? Oh, cat heads!

The bulwarks are in four sections, two port and two starboard, divided by the companionway. Each section has a downward face that gets a narrow sheet to cover it, inboard and outboard; then the upright inboard and outboard faces. Where sheet blocks were in the bulwark was blocked in before the 1/16" bass sheets was glued on.


After the sheathing was on, and the outboard face scribed to look like wainscotting, every thing got paint.

I covered the bulwark "temporarily" with 1/8" balsa sheet, figuring it would be easy to remove once I figured out what I was going to do. Most paintings of Constellation show hammocks in the bulwark with out tarps over them, and I'd like to finish them that way, but I haven't figured out how I'm going to do it. Also, National Maritime Day was only two weeks away, so I worked on something else.

Somehow the only actually bit of fixed bulwark was at the bow, but the portions I left when the hull was cut down all those years ago, seemed to have shrunk somehow and needed to be built back up.


Eyes were installed around the base of each mast as shown in the 1888 deck plan and several photos. The fore and main masts have a pair of the bronze capped bitts forward of them, with a pin-rail behind them. There are made of oak as they need to be functional.


What am I forgetting? Oh, cat heads!
Last edited:
In scale, the catheads are 7/32" square. That was perfect to laminate them in seven layers of 1/32" bass sheet even leaving three openings for sheaves. The sheaves don't function, but are just slices of mahogany dowel glued in place.
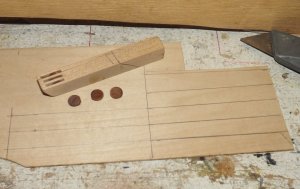
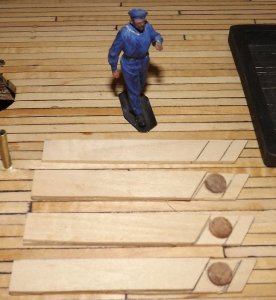
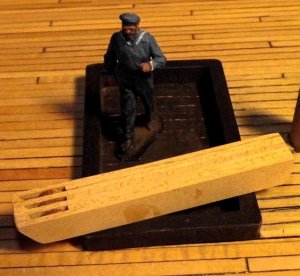
Cutting the holes in the hull for the catheads is another example of my planning ahead. There was a time before the deck went on I could have cut a simple notch in the hull, but now I had to bore a square hole at a steep angle just below the finished deck. The actually went very well, and the cats fit in nice and snug and secure. Once they were epoxied in place, and a brass pin drilled through to make sure, I cut the knees that go under them from maple. These were epoxied and pinned as well.
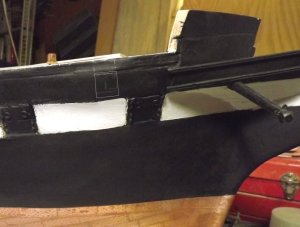
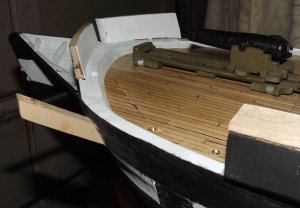
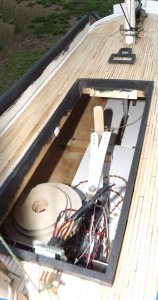
The servos and wiring were put back in and the switch mounted in it's planned-for place under the skylight.
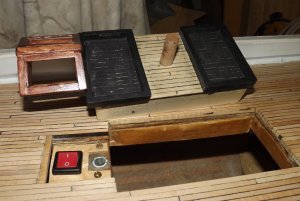
I opted to stack up some more balsa on the bulwarks to represent them with the tarps on, for now at least.
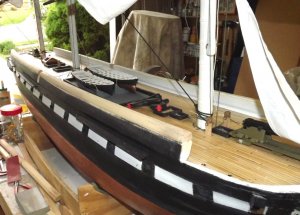
The time until Maritime Day was getting short. Her rig is only temporary, and up till now there was hardly any of it, but this time her masts were their full height and I planned to set all three heads'ls and her t'gallants, so more stays and bowsprit rigging was in order.
By the night of the 15th, she was as ready as I could manage.


Cutting the holes in the hull for the catheads is another example of my planning ahead. There was a time before the deck went on I could have cut a simple notch in the hull, but now I had to bore a square hole at a steep angle just below the finished deck. The actually went very well, and the cats fit in nice and snug and secure. Once they were epoxied in place, and a brass pin drilled through to make sure, I cut the knees that go under them from maple. These were epoxied and pinned as well.


The servos and wiring were put back in and the switch mounted in it's planned-for place under the skylight.


I opted to stack up some more balsa on the bulwarks to represent them with the tarps on, for now at least.

The time until Maritime Day was getting short. Her rig is only temporary, and up till now there was hardly any of it, but this time her masts were their full height and I planned to set all three heads'ls and her t'gallants, so more stays and bowsprit rigging was in order.
By the night of the 15th, she was as ready as I could manage.


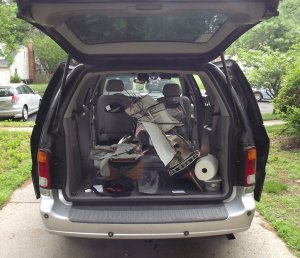
So it was up and at 'em, stuff the models in the lady's van, after taking out the seats and the wrestling match that was, then head up to Baltimore.
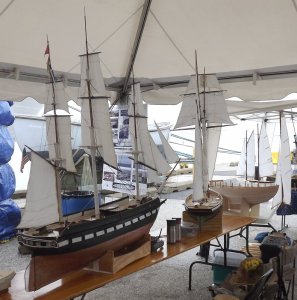
This time there were more of us modelers attending and we got to set up with the other exhibitors near the end of the dock. I took along Pride of Baltimore as well. The director of Historic Ships Baltimore was a shipmate on Pride in '81 and I thought he might like to see it.
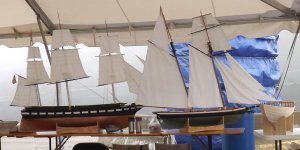
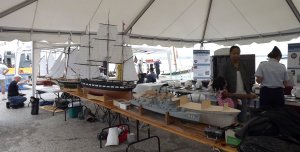
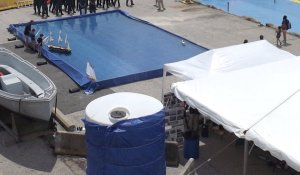
It took two of us to get her in the water - she seemed to have put on some weight since she was here last. They built a larger pool this year, but it was still a bit too shallow. despite not doing much sailing, she looked nice.
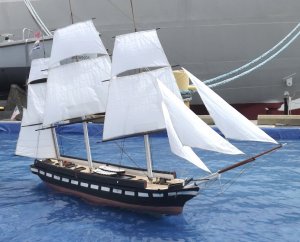
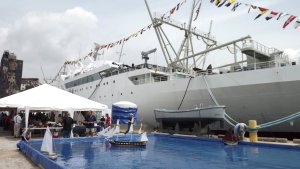
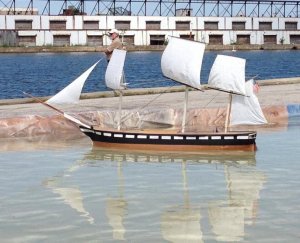
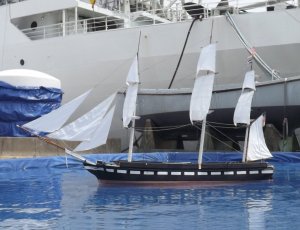
She changed a little in appearance since last time too...
left 2014 - right 2015
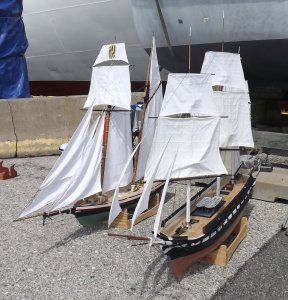
Waiting for a ride home
A compilation of all the "sailing" video at the Port Expo.

This time there were more of us modelers attending and we got to set up with the other exhibitors near the end of the dock. I took along Pride of Baltimore as well. The director of Historic Ships Baltimore was a shipmate on Pride in '81 and I thought he might like to see it.


It took two of us to get her in the water - she seemed to have put on some weight since she was here last. They built a larger pool this year, but it was still a bit too shallow. despite not doing much sailing, she looked nice.


She changed a little in appearance since last time too...
left 2014 - right 2015


Waiting for a ride home

A compilation of all the "sailing" video at the Port Expo.
Last edited:
When built, Constellation was armed with
16 x 8-inch shell guns
4 x 32-pounder guns
2 x 10-inch pivot mounted shell guns (removed July 15 1859)
and a 12 pdr boat howitzer.
I'm only modeling the two pivot guns on the spar deck, and the boat howitzer.
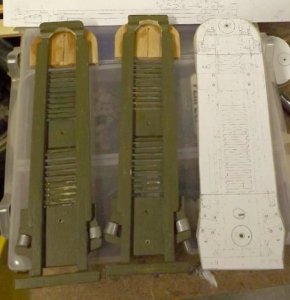
Some research directed me towards a plan in the National Archives for the pivots on the US steam frigate Mississippi, dated 1855. This is a portion of that drawing reduced from my 1:36 scale version:
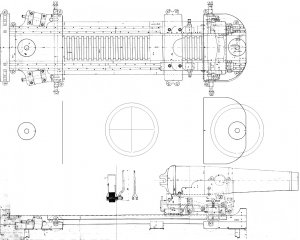
While I had good evidence of the guns and carriages, there was nothing that showed the lay-out of the iron tracks, or "circles," for them on her deck.
Pivots were also, and probably more accurately referred to as "shifting guns." In Preparation of Vessels of War for Battle, 1855 (pdf available on Google books), diagrams show how bow and stern shifting guns were operated. You might notice that the tracks on the deck don't correspond to the wheels (trucks) on the back of the carriage. That's because the tracks aren't for the trucks but for the front of the carriage that had iron skid plates underneath to ride on the tracks. Anyway, this is my guide when I get around to figuring out photo-etching and get to making the things.
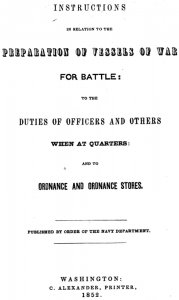
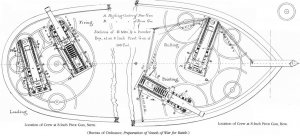
Here's a 1:32 scale model of the sloop of war Savannah (a razeed frigate) with a bunch of neanderthal looking sailors handling the pivots.
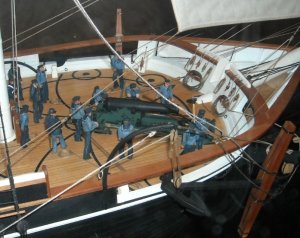
The guns and carriages I started way back in 2008, before I restarted working on the hull. I initially was lead to believe that she had simple circle tracks for her pivots, and I assumed the tracks were for the trucks to ride on, so I modified the Mississippi drawing to duplicate the aft pallet with the trucks, forward in place of the pallet without the trucks. That's what you'll see in most pictures.

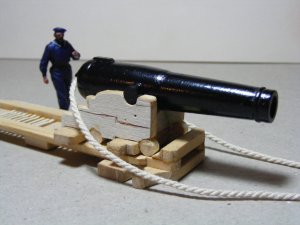
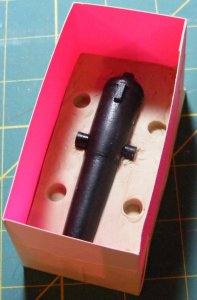
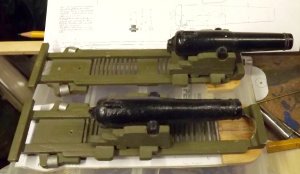
I didn't have a lathe yet, but DanL from RCGroups turned a beautiful tube for me from a drawing I emailed him. I added the touch-hole hump, the trunnions, and sharpened up the muzzle band. Then I made a rubber mold to cast a copy in resin. The rubber mold wound up with bubbles, but I made the cast anyway. Yes, I know the cast tube looks like it was dredged up from the sea bottom, but it's just a sort of place-holder for now, until I get around to casting a better pair (and retire the wood original).
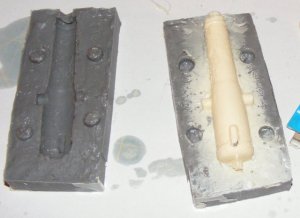
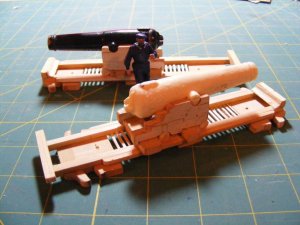
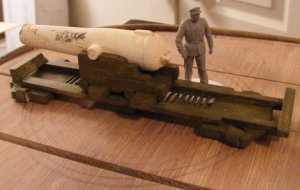
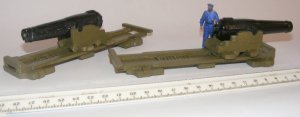
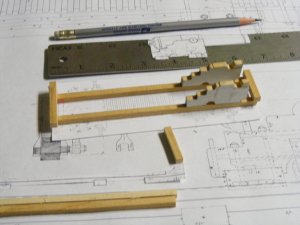
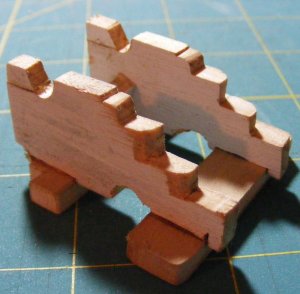
Since I'm going with the Savannah like style of deck circles, I began to retrofit the carriages to the original Mississippi drawing. There's a lot of iron-work details to go on these guns, all part of my learning to photo-etch, which hasn't happened yet.

16 x 8-inch shell guns
4 x 32-pounder guns
2 x 10-inch pivot mounted shell guns (removed July 15 1859)
and a 12 pdr boat howitzer.
I'm only modeling the two pivot guns on the spar deck, and the boat howitzer.
Some research directed me towards a plan in the National Archives for the pivots on the US steam frigate Mississippi, dated 1855. This is a portion of that drawing reduced from my 1:36 scale version:

While I had good evidence of the guns and carriages, there was nothing that showed the lay-out of the iron tracks, or "circles," for them on her deck.
Pivots were also, and probably more accurately referred to as "shifting guns." In Preparation of Vessels of War for Battle, 1855 (pdf available on Google books), diagrams show how bow and stern shifting guns were operated. You might notice that the tracks on the deck don't correspond to the wheels (trucks) on the back of the carriage. That's because the tracks aren't for the trucks but for the front of the carriage that had iron skid plates underneath to ride on the tracks. Anyway, this is my guide when I get around to figuring out photo-etching and get to making the things.


Here's a 1:32 scale model of the sloop of war Savannah (a razeed frigate) with a bunch of neanderthal looking sailors handling the pivots.

The guns and carriages I started way back in 2008, before I restarted working on the hull. I initially was lead to believe that she had simple circle tracks for her pivots, and I assumed the tracks were for the trucks to ride on, so I modified the Mississippi drawing to duplicate the aft pallet with the trucks, forward in place of the pallet without the trucks. That's what you'll see in most pictures.


I didn't have a lathe yet, but DanL from RCGroups turned a beautiful tube for me from a drawing I emailed him. I added the touch-hole hump, the trunnions, and sharpened up the muzzle band. Then I made a rubber mold to cast a copy in resin. The rubber mold wound up with bubbles, but I made the cast anyway. Yes, I know the cast tube looks like it was dredged up from the sea bottom, but it's just a sort of place-holder for now, until I get around to casting a better pair (and retire the wood original).


Since I'm going with the Savannah like style of deck circles, I began to retrofit the carriages to the original Mississippi drawing. There's a lot of iron-work details to go on these guns, all part of my learning to photo-etch, which hasn't happened yet.


Last edited:
A working model without a crew, to me, looks odd. I'm not modeling the Marie Celeste, but, in fact, a warship, which tend to have pretty large crews. Constellation had a complement of some 20 officers, 220 sailors, and 45 marines. I don't intend to include all of them, but there will be between 30-40 figures visible, in little vignettes or scenes around the deck and in the rig.
Being a 1:36 scale model, and the great popularity of 1:35 scale figures, this would be relatively easy. I didn't expect to find 1850's Naval figures, but I thought there would be some Civil War period ones, and I could alter them to be more mid-1850's. What CW sailors I could find cost as much as $20 for a single figure, so I obviously had to do something else.
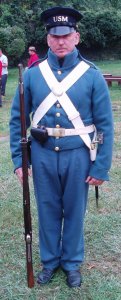
I first needed to determine what officers, sailors and Marines looked like in 1856. The simplest are the Marines as I have reenacting buddies that do Marines of that period. My problem is whether the sky blue field uniform was worn aboard ship? The Marines are fussy about such thing to this day, and I want to get it right.
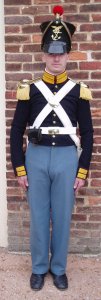
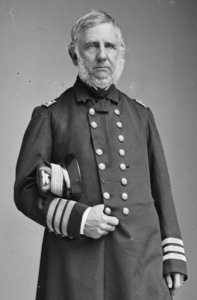
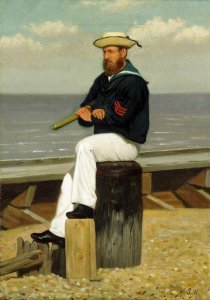
Officers are bit more defined. As I'm modeling the ship in operation at sea, I intend the crew to be more work-a-day in appearance, so the officers will probably all be in wheel-hats rather than those fore-n-afters. The photo is of Captain Charles Bell, Constellation's first captain.
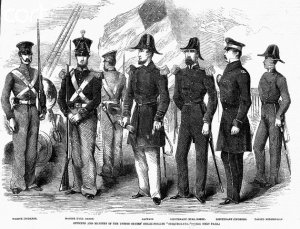
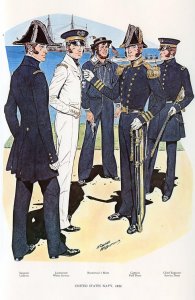
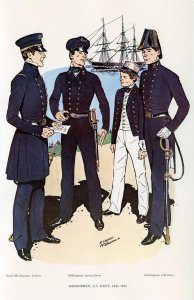
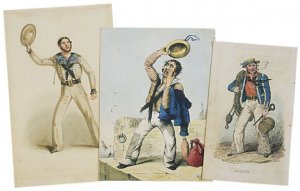
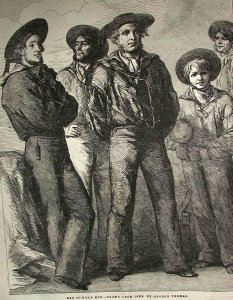
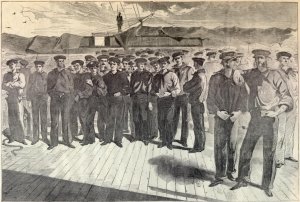
Sailors are easier, sort of. They didn't actually have uniforms until the 1820's or so, especially when at sea, but by the mid-1850's they actually did, though there was a lot of leeway in how the men could "spiff-up" their uniforms, and you see a lot of embroidery of all sorts on period uniforms. As you can see, there's a lot of variety in the appearance of sailors in the 1850's.
So, CW period figures being too cost prohibitive, I went searching for substitutes and for $5 I found a box of 5 WWII Soviet Naval Troops, and from this set came Constellation's first crewman; Ivan.

Ivan's painting was based on information at Fayle's Model RR & Figure Painting Site, (website's gone now) . Obviously my technique needs work, but Ivan main job is to give a sense of scale in the many photos you've seen him in. The plan is make a few "masters" of officers, sailors, and Marines to cast the entire crew from in resin, then repose most of them for placement on the model.
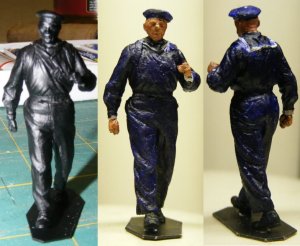
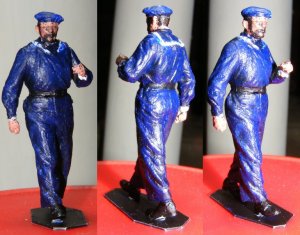
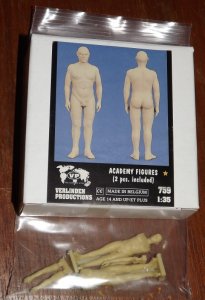
Meet, Naked Guys. Naked Guys went on sale for $5 for the pair. They will get cloned, clothed, and made to look like the various crew I need, then those new "masters" molded, cast, reposed, etc, along with Ivan's brothers.
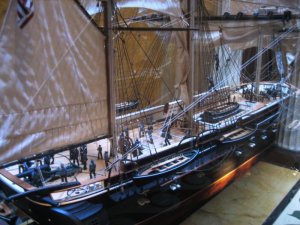
I want a ship with a crew like the Savannah model here. I just have to be more careful placing them so they don't get snagged in the control lines.
Being a 1:36 scale model, and the great popularity of 1:35 scale figures, this would be relatively easy. I didn't expect to find 1850's Naval figures, but I thought there would be some Civil War period ones, and I could alter them to be more mid-1850's. What CW sailors I could find cost as much as $20 for a single figure, so I obviously had to do something else.
I first needed to determine what officers, sailors and Marines looked like in 1856. The simplest are the Marines as I have reenacting buddies that do Marines of that period. My problem is whether the sky blue field uniform was worn aboard ship? The Marines are fussy about such thing to this day, and I want to get it right.


Officers are bit more defined. As I'm modeling the ship in operation at sea, I intend the crew to be more work-a-day in appearance, so the officers will probably all be in wheel-hats rather than those fore-n-afters. The photo is of Captain Charles Bell, Constellation's first captain.


Sailors are easier, sort of. They didn't actually have uniforms until the 1820's or so, especially when at sea, but by the mid-1850's they actually did, though there was a lot of leeway in how the men could "spiff-up" their uniforms, and you see a lot of embroidery of all sorts on period uniforms. As you can see, there's a lot of variety in the appearance of sailors in the 1850's.


So, CW period figures being too cost prohibitive, I went searching for substitutes and for $5 I found a box of 5 WWII Soviet Naval Troops, and from this set came Constellation's first crewman; Ivan.

Ivan's painting was based on information at Fayle's Model RR & Figure Painting Site, (website's gone now) . Obviously my technique needs work, but Ivan main job is to give a sense of scale in the many photos you've seen him in. The plan is make a few "masters" of officers, sailors, and Marines to cast the entire crew from in resin, then repose most of them for placement on the model.


Meet, Naked Guys. Naked Guys went on sale for $5 for the pair. They will get cloned, clothed, and made to look like the various crew I need, then those new "masters" molded, cast, reposed, etc, along with Ivan's brothers.

I want a ship with a crew like the Savannah model here. I just have to be more careful placing them so they don't get snagged in the control lines.

Last edited:
Hello Jerry,you did a fantastic job,also I really like that your deck planking is to scale,many builders using to wide planks on their models.
Zoltan
Zoltan
Ship's Boats
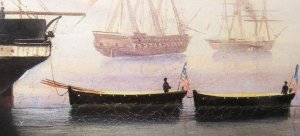 two of Constellation's boats from the Naples portrait.
While at the National Archives in College Park Maryland, looking for the ship's spar deck plan and other stuff, I found a drawing of ship's boats, specifically Constellation's boats! I got a print of the plan, and a digital scan.
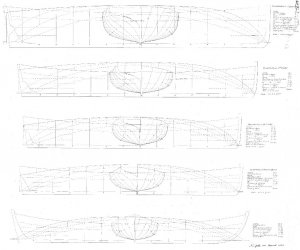
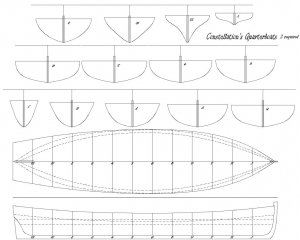
Only the lines are given, no construction details such as seats, decking, etc. I used the scan I got to scale the plan to 1:36 and made up sheets for form patterns for each boat. These are set up for building each boat upside-down on a build-board just like any hull I build. The sheets are meant to be printed on full-sheet labels so I can stick them on the wood and cut to the lines.

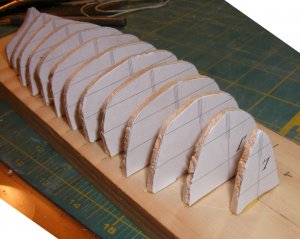
I set about starting with the 1st cutter. After cutting the forms from a sheet of 1/8" balsa they were glued to the build-board. I used balsa because if something inadvertently got glued to a form, the form would give and not the model part. Bass strips were cut from a 1/32" thick sheet, dipped in ammonia and bent over the forms and held with rubber-bands - these are the frames or ribs that will stay in the model. The keel, stem, stern-post, and transom, all of basswood, were glued to the ribs. Then planking commenced.
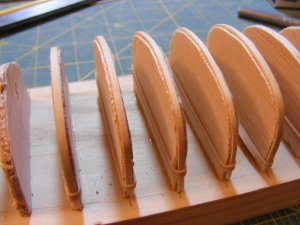
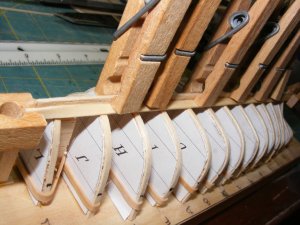
All the boats except the launch are lapstrake or clinker-built. The overlap of the planks works like stringers reducing the need for heavy frames and makes for a lighter-weight hull - an important feature of a boat that's lifted a lot. In planking a model though, it means I have to spiel the planks - there's no corner cutting allowed, no paint could hide it.
There's a few ways to simulate clinker planking on a small model. Some use beveled planks thicker on their bottom edge than their top edge, and basically carvel plank the model. I chose to actually lap the planks.
(Note: the base-board is wider than the forms, making it tricky to clamp the planks. I narrowed the board to be narrower than the forms for the next boat see next post)

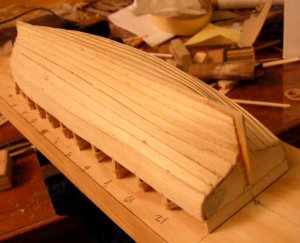
When the planking was done, the transom and stem were cut free, and the hull lifted off the forms. Some touch-up was needed where a couple of the ribs came loose near the sheer, but It was a success and there was no damage to the forms at all.

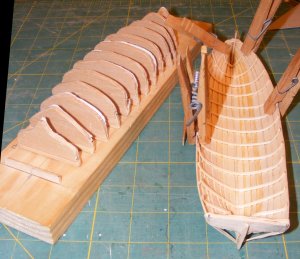
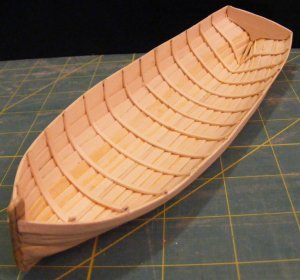
More ribs were glued in between the original ribs giving the boat a rib about every scale foot. Seat clamps, rub rails, oar notches, and seats were fitted.
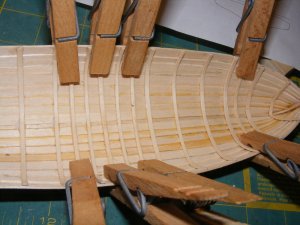
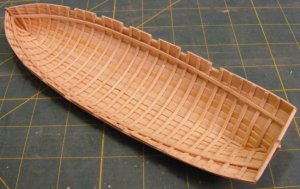
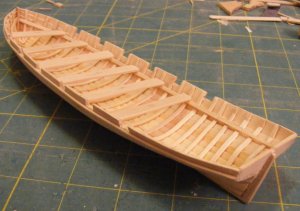
 two of Constellation's boats from the Naples portrait.
While at the National Archives in College Park Maryland, looking for the ship's spar deck plan and other stuff, I found a drawing of ship's boats, specifically Constellation's boats! I got a print of the plan, and a digital scan.

Only the lines are given, no construction details such as seats, decking, etc. I used the scan I got to scale the plan to 1:36 and made up sheets for form patterns for each boat. These are set up for building each boat upside-down on a build-board just like any hull I build. The sheets are meant to be printed on full-sheet labels so I can stick them on the wood and cut to the lines.


I set about starting with the 1st cutter. After cutting the forms from a sheet of 1/8" balsa they were glued to the build-board. I used balsa because if something inadvertently got glued to a form, the form would give and not the model part. Bass strips were cut from a 1/32" thick sheet, dipped in ammonia and bent over the forms and held with rubber-bands - these are the frames or ribs that will stay in the model. The keel, stem, stern-post, and transom, all of basswood, were glued to the ribs. Then planking commenced.


All the boats except the launch are lapstrake or clinker-built. The overlap of the planks works like stringers reducing the need for heavy frames and makes for a lighter-weight hull - an important feature of a boat that's lifted a lot. In planking a model though, it means I have to spiel the planks - there's no corner cutting allowed, no paint could hide it.
There's a few ways to simulate clinker planking on a small model. Some use beveled planks thicker on their bottom edge than their top edge, and basically carvel plank the model. I chose to actually lap the planks.
(Note: the base-board is wider than the forms, making it tricky to clamp the planks. I narrowed the board to be narrower than the forms for the next boat see next post)


When the planking was done, the transom and stem were cut free, and the hull lifted off the forms. Some touch-up was needed where a couple of the ribs came loose near the sheer, but It was a success and there was no damage to the forms at all.


More ribs were glued in between the original ribs giving the boat a rib about every scale foot. Seat clamps, rub rails, oar notches, and seats were fitted.


Last edited:


