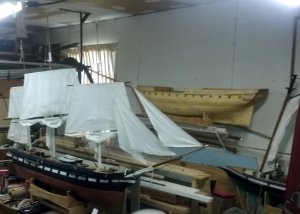
Constellation, the sloop of war c.1856 in 1:36 scale for R/C sailing

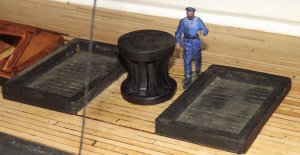
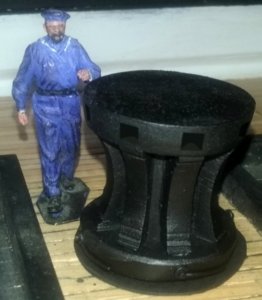
I finally made the capstan. I didn't have measurements for it, so I used the photo of me with it to guess at it.
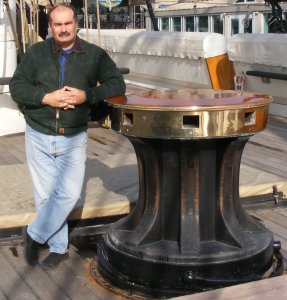
capstan_and_me.jpg

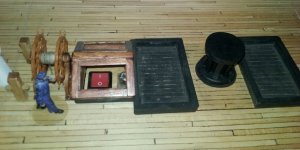
The barrel is a 3/4" maple dowel, and the rest is mahogany. Some of what was used in the restored ship's hatch combings in fact. It needs holes for the bars, pawls, and a bass-plate yet, but there's not a stump sticking out of the deck any more.
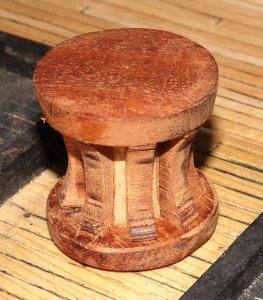
con20180525a.jpg con20180525c.jpg

Pawls, holes for the bars, and a bit of 1/32" aircraft ply for the base plate, and the thing's nearly complete. I'm not sure what was on top in 1856. They put copper on it now. So, it'll just be left till I figure it out.
con20180526a.jpg
 
Last edited:
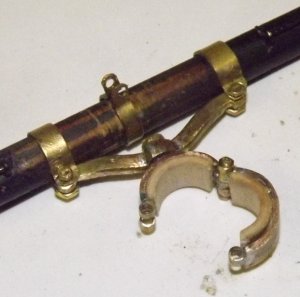
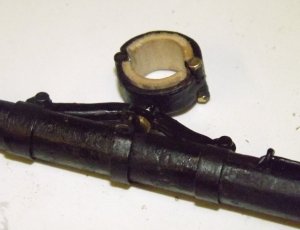
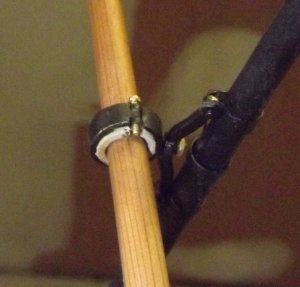
I spent a couple of hours making a yoke or bow, for the fore tops'l yard. This is the thing that attaches to the yard and connects to the parrell. The main tops'l yard's and all three lower's were made from aluminum, but the last one took three tries to get and came out, well meh.

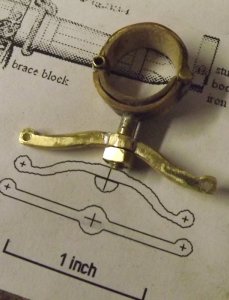
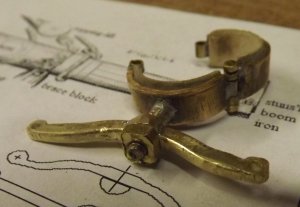
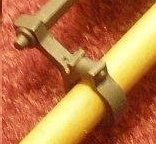
I tried a different idea in their construction this time, since my soldering has gotten better. I cut some brass rod and hammered it square, or mostly square; then bent it to the right shape as my pattern. I hammered the ends a bit more to widen them and used files to shape them. I cut a notch down the middle of some rod about double the diameter of the first one, then cut off about an 1/8" giving me two half-round pieces. These got soldiered top and bottom to the center of the bow, forming the swell that the parrell pin goes through. After some filing and cleaning up, I drilled the hole in the swell and 1/16" holes in the ends.
Then something happened with the drill press that startled me, I jumped, and the part flew off somewhere. I spent the day "cleaning" the shop trying to find it with no luck.

So tonight I did it all again, but with some hope of finding the errant part eventually, I went about making the mizzen bow instead. when it came time to drill, I dug out the 2-direction sliding vice thing for the drill press, instead of holding it by hand with pliers, and everything came out fine with no unscheduled flights.

The parrell shown is for the fore tops'l yard which is why I was making that bow, I haven't made the mizzen tops'l yard parrell yet. I do need to enlarge the hole slightly because the bow is supposed to go all the way on the post more than shown.
con20180529b.jpg con20180529c.jpg

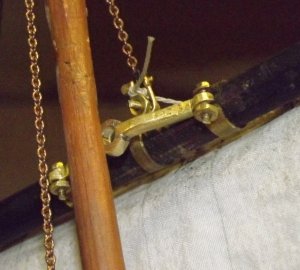
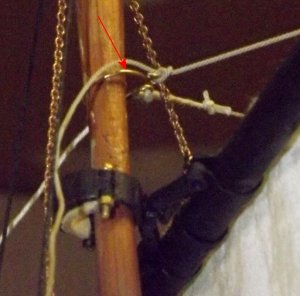
Mounted on it's yard, the chain is the tye for the tops;l halyard, and the bit of line is the end of one of the main tops'l yard braces. The little nuts and bolts are 0-80 x 1" hex head bolts I bought 100 of years ago with some matching nuts, and some "scale nuts."
con20180529f.jpg
 
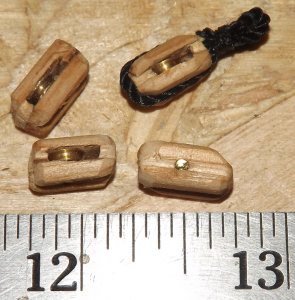
I've been using some brass frame blocks for brace blocks on the yards, they aren't the correct style for the ship, but I needed functional blocks on the braces. I also only have so many of them, so to free a few up for duty below deck, I made up 6 functional wood-shell blocks for the braces. They're ok, and they work, but I don't care for how they turned out. I used some white cedar for the shell, which is too soft and open-grained. I have some branches from a fruit tree, though I don't know what fruit, and I'm going to try and mill some of it to use for blocks. Till then, these will do.
con20180604a.jpg con20180604b.jpg
 
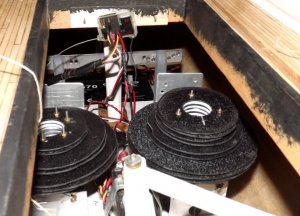
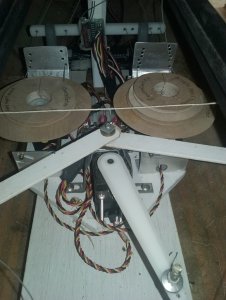
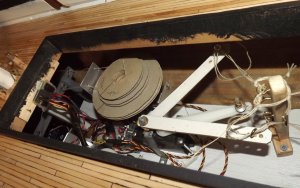
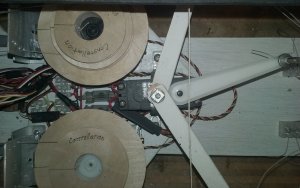
As the braces go on and off the winch drum, the go through a fairlead plate that's attached to, and moves with the winch, and guides the braces onto the correct drum so they don't get crossed. When the braces leave the fairlead they go off in various directions and angles which would actually prevent the winch servo from being able to slide fore-and-aft to maintain tension. A fairlead bar aft of the winches guides the braces straight to the winch fairleads to alleviate that problem.

Originally this bar mounted on two knees and looking like a riding bit (or a hitching post for us horse folks) was wood with screw-eyes on top. These small eyes were to be replaced with larger ones when I found some.
con20140827g.jpg

This was replaced with a metal bar with holes instead of eyes. This worked fine, but I was worried that it would unduly wear the brace lines over time and added too much friction to the system.
con20150526a.jpg

Today I replaced the metal bar with a strip of plastic cut from a cutting board. This stuff looks like Teflon, but I don't think it actually is. My concern now is the line with saw into this thing. I think I will make one with sheaves instead of just holes that will cut the friction and ease my concerns about it damaging the lines or the lines damaging it. First I'll see how this one works out, and any wear that appears will tell me at what angle to install the sheaves in the new bar.
con20180611b.jpg
If you're wondering why the new bar has so many fewer holes than the old one, it's because I reduced the braces from 5 pairs to 3 pairs. Only the tops'l yards are actively braced now.
 
So, I moved onto rigging the main and mizzen tops'l braces when I noticed the winch servos were turning 4.5 time instead of the 3.5 times they're supposed to.
I searched my manual for my Spektrum DX6 transmitter years ago to find settings for servo travel and centering and assumed when I couldn't find it, that it couldn't do it. I couldn't understand how it was changed on my winch servos. I swapped out the servo and got the same result, so I made yet another set of winch drums based on the number of rotations the winches were making.
I posted my dilemma on RCGroups and one fellow sent me a PDF of the manual for the newer version of the DX6 - which does have features to change the servo travel and centering. I couldn't find my paper manual to show that my older version didn't have this feature, so I found a PDF online and guess what... it does have these features (I checked the transmitter to verify it)! I don't know why I couldn't find it for all these years when I was specifically looking for it, probably a case of looking for your glasses that are on your head.
Checking these setting I found them all out of whack. I reset them to give 4.5 rotations to fit my new winch drums.
con20180624b.jpgnew aircraft ply winch drums in place.

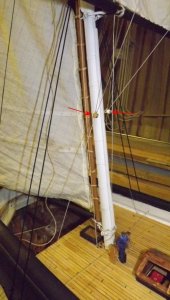
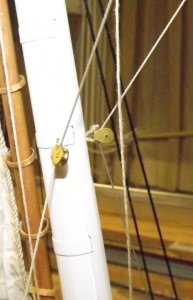
The braces come above deck to a pair of "span-blocks" mounted a little over half way up the mizzen, to the brace blocks on the yard, then back to a ring in the mizzen topmast that rides on top of the mizzen tops'l yard parrel, as discussed three or four posts back.

con20180623h.jpg con20180623c.jpg con20180623j.jpg

Here's a VIDEO of the fore and main tops'l braces in action for the first time (she's only used one winch up to this point). Careful, this is edge-of-the-seat stuff.
 
Last edited:
It was tedious work, and tore up my finger tips working with all these little copper razors, but it really was something when it was done.
I did the starboard side, worked on making the tops for the lower masts, then coppered the port side. Then I dragged my copper-bottomed-pot down to the Naval Academy for show-and-tell in the museum workshop.
View attachment 35900View attachment 35902View attachment 35903View attachment 35904View attachment 35905

Here's an annoying little GIF (there's another kind?) of some of the copper going on...
View attachment 35901

And a video (caution, it may be a bit loud)
Hi Jerry,

You are doing a great job on this ship. Great hull proportions and the copper really brings it to life.

Steve
 
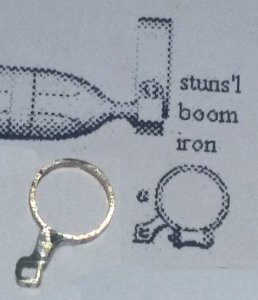
I had to drive 18 miles to get to a shop that carried brass and had square tube, but it was nice to stroll around a real hobby shop again. They are so rare any more, and who knows how long this one will be around.

Anyway, I soldered some rod to the end of the square tube, then cut the rod and tube to length. This I soldered to a slice of round tubing. I used one of those alligator-clip extra-hands things to get what's in the picture.
con20180630a.jpg

I'm not happy with it at all. The angles are wrong, there's too much solder, and the extra-hand gizmo just isn't precise enough.

Somewhere a while back I found and saved an image of irons someone made that are exactly what I'd like to have. I can't remember the model, the maker, or even where I found the picture.
stunsl_iron.jpg
To makes something even close to that, and 12 of them at that, I'm gonna have to devise some sort of jig. I'm going to take a shot at drilling holes in a ceramic tile and using steel pins to hold everything in position as I solder it. I have soldering paste, and I hope that will give me better control of my joints.
 
Excellent project Jerry,

Making everything work on this scale is creating a lot of extra challenges. I like the use of the cds on the which drums.
 
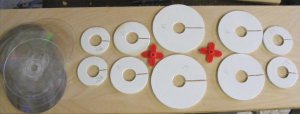
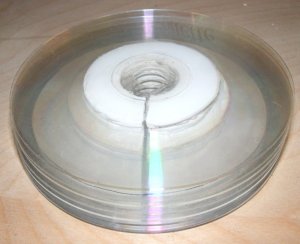
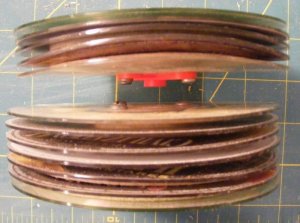
The drums made of CD flanges with wood drums warped badly and were unusable.
45698

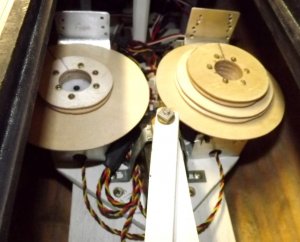
I reused the wood drums with chipboard(card) flanges and that worked fine for testing and a few sails, but card wasn't gonna last long term...
45701 45702

So I got some 1/8" pvc sheet and saved the clear CDs from the packs of CD-Rs we got at work and made a new set.
One of these was used for the models first sail but they disappeared during my last move and I've never found them again.
45699 45700

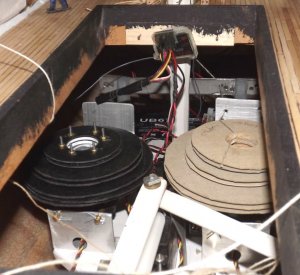
I got some black plastic sheet and made yet another set with more drums that I thought would handle the tacks and sheets of the courses along with the course and tops'l braces - this made them tall to the point of silly. Also, glue wouldn't stick to the black plastic very well, so I needed threaded rods to keep everything clamped together.
45704 45703

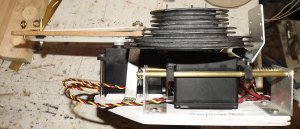
These never actually got used. The last time the model sailed the chipboard and wood one was used-again. After the sail, I ordered some aircraft ply and made a set with 1/8" drums and 1/16" flanges. I also opted to only brace the tops'l yards, so I only needed 4 drums on the main/mizzen, and 2 on the fore. Being wood, gluing them wasn't an issue, but I reused the threaded rods from the black ones anyway, to attach the servo mounts to the bottoms.
45705

These also never got used because of the rotation/size problem talked about previously which ended up with me making, hopefully, the last set of winch drums.
I left the threaded rods in the last set and used #1 roundhead woodscrews to attach the servo mounts. The flanges on these are also 1/32" ply with 1/8" thick drums.
45706

These are installed right now, and working.
 
Last edited:
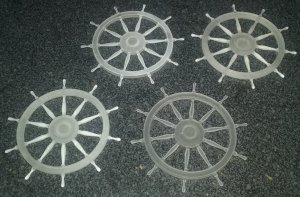
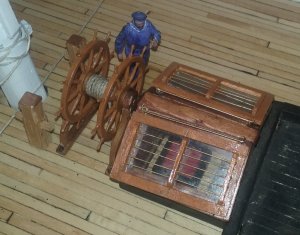
I got 4 3D printed wheels from Shapeways that Model Monkey rescaled up to 1:36 for me. Two for Constellation and two for Macedonian.
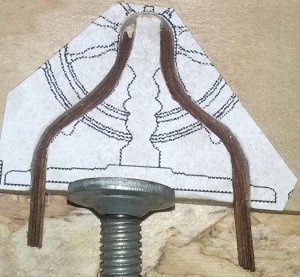
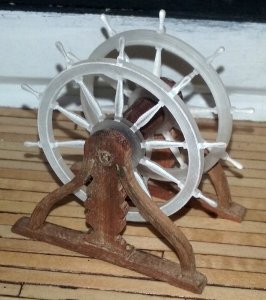
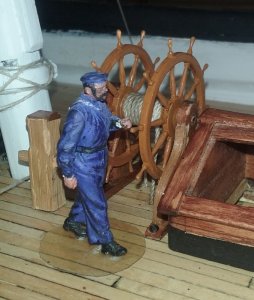
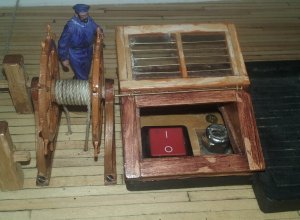
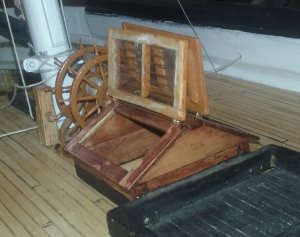
The helm's made of mahogany. The curved braces laminated from some strips left over from a kit. and the base and uprights are some scrap from a musical instrument build. A bit of 5/16" mahogany dowel and some brass rod for the drum. A bit of paint and some clear coat, and Ivan looks like he has a proper job. It's attached to the deck with 4 round head wood screws.
I intended to make the wheel operate when the rudder was moved, but when I broke off a spoke while painting it, I decided it was too delicate to be spinning back and forth, and made it stationary.
con20180708a.jpg con20180709a.jpg con20180710a.jpg
con20180712a.jpg con20180712c.jpg

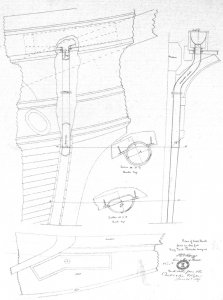
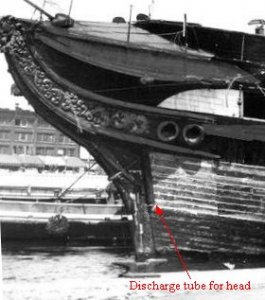
There's a laundry list of little details to do on the hull yet; pin rails, gunport eyebrows, cat head cats, head carvings, boarding steps, etc. There's gunport lids to install for the stern windows, but that will be the very last thing to go on. The Pin rails at the base of the masts have turned balusters[?] with sheaves in their bottoms I have to figure out yet; I'm considering making one and casting the rest in resin. There's the poop-chute and the seats in the head. This will just be some shaped wood as it doesn't need to function or be hollow for some little spider to take up residence in. :) There's also a few eye-bolts to place on the hull, especially around the head area, for rigging fastening points, which brings me to another item I've been having trouble making - bullseyes. Almost all the head rigging is adjusted with bullseyes, the stays on the masts, and a bunch of them are attached to the shrouds as fairleads for lines coming down to the pin rails. Turning these from some Delrin rod seems like the best bet for getting something functional, we'll see how that goes.
cathead_cat.jpg steps.jpg
headpipe.jpg poop_chute.jpg
 
WOW what a build. I am also an RC enthusiast, I fly RC planes and drones and drive RC cars and trucks, but haven't got to the boats yet. I would love to see this ship run. I'm waiting for the tall ship event this year October 3-9th for fleet week. I plan on taking a ton of Pictures of the Constellation including drone pictures of the upper mast rigging and such.
 
Maybe we can arrange a sail for you to see, and I can get some drone footage of her sailing? wink wink nudge nudge
I'm only down the road a piece in Severna Park
 
Absolutely! I would be happy to shoot some video and stills of that ship sailing along. I video a lot of vessels in the harbor as they come from the Bay into port under the Key Bridge. I have Drone will Travel Brother. Severna park isn't that far for me, I'm just on the other side of the key bridge in Old Dundalk. I have a feeling my Grandson would love a road trip to see an awesome RC ship. He got the Ship Bug from me and I'm not afraid to tell his momma I infected him lol Lets set up a good weekend with light winds, but enough to keep the ship under sail. Ill shoot my number at you through PM
 
The garage is my shop, but in winter it's the annex to the refrigerator because it rarely gets above 40° f (5° c?) even on days when it's warmer than that outside.
I bring batteries and things that shouldn't be refrigerated into the house, and little to nothing happens out there unless it must, like recently making counters for playtesting a wargame (I have far more hobbies than money).
But Spring is a month away, and maybe more spring-like weather will come sooner. Till then, I've been doodling ideas for getting certain projects done, like making the chain-plates, improving the rope-walk, making the pin-rails, and putting working sheaves on the heads'l semaphore arms.
con20181128a.jpg
 
Back
Top