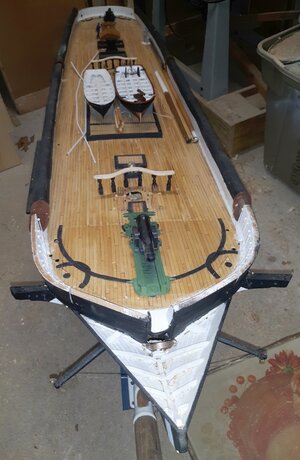
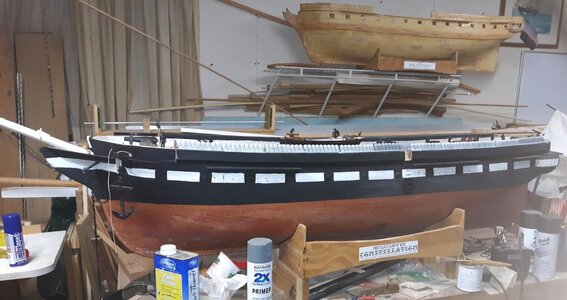
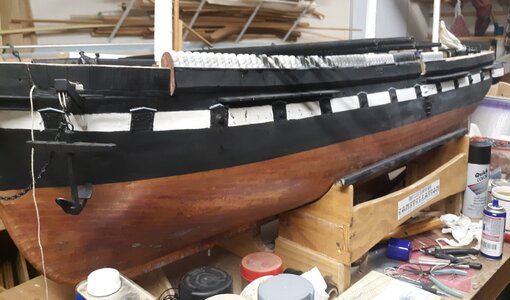
Constellation, the sloop of war c.1856 in 1:36 scale for R/C sailing

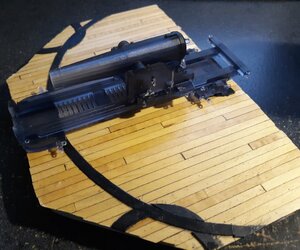
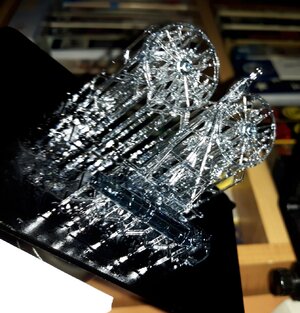
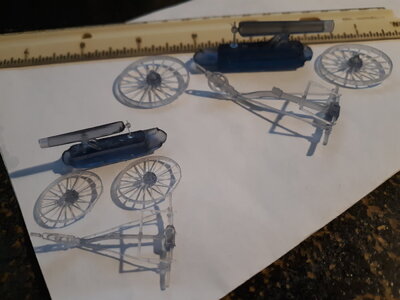
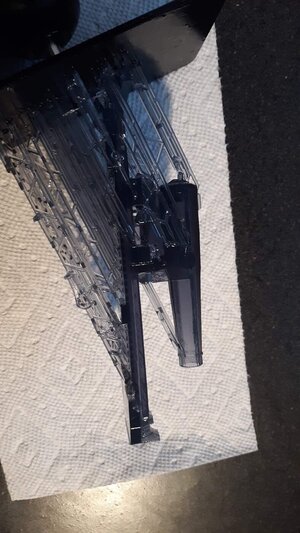
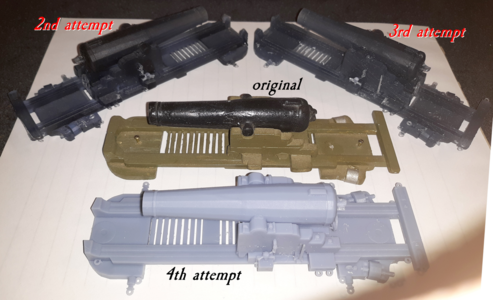
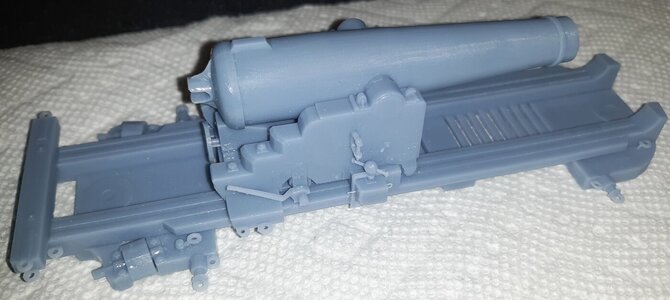
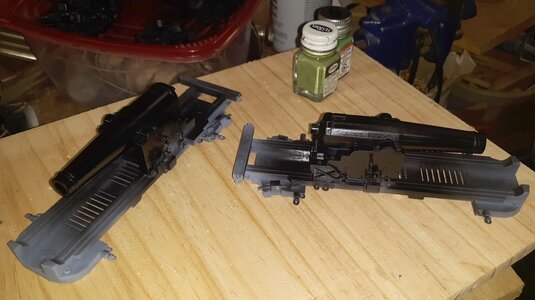
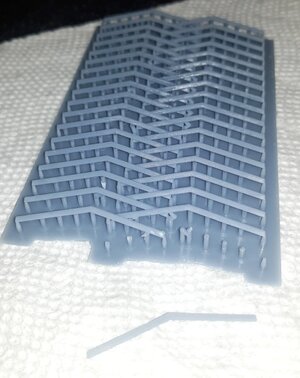
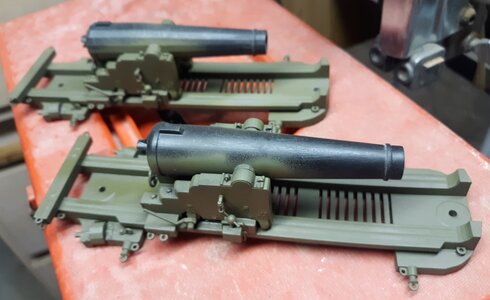
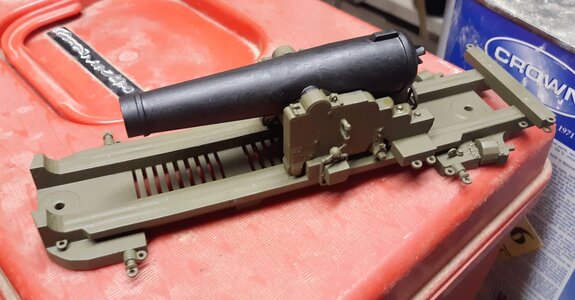
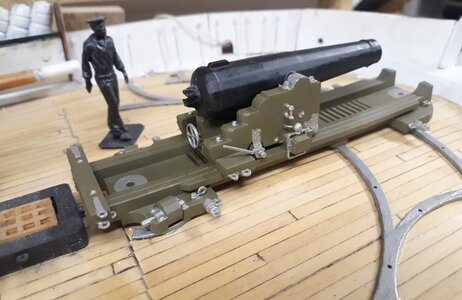
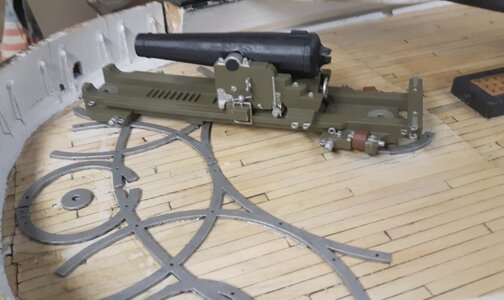
Took another shot at printing the pivot gun again back on the 14th, as a single piece, since printing it in separate parts all failed. Got much better results, but not perfect. The last bit to print, the front end of the slide, didn't turn out, the gun's cascabel, and some other details didn't turn out, but I think I can repair it by reprinting just those bits and gluing them on. This was printed with a translucent resin that's supposed to be stronger than the gray stuff.
I need two of these so I'll be printing another one with new supports to address the issues this one had. If that one turns out, I'll print a third one and this one will become a knickknack, though I'll go ahead with the fixes.

con20200914f.jpg con20200919a.jpg
 
I have a project I started nearly 19 years ago, so here's a "build log" for it, but first we need to go back in time and get caught up...

I've built working model boats of all sorts, but most being smallish tended to bob like corks in Baltimore's Inner Harbor where I sailed them. I wanted to build something large that would sail like a boat. I was inspired to action by a model of the Rattlesnake I saw in back-issue of Model Ship Builder magazine, but wasn't sure what boat to build.
View attachment 33453

The hermaphrodite, or "jackass" bark was a favorite rig...
View attachment 33454

But a friend suggested a local boat that had (it's 1999) just gone into dry-dock for restoration; the sloop of war Constellation, which the more I thought about it, the more it sounded like a good idea.
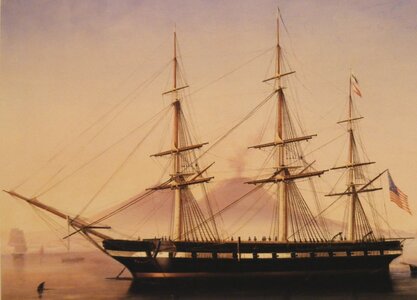
View attachment 33452 Constellation at Naples 1856 by Tomasa deSimone

I won't get into the "controversy" surrounding this boat besides saying, this vessel is not and never was a frigate by any measure. The only people that buy that story also think the world is flat. Her history can be found Here

I made a visit to the National Archives in College Park Maryland and came home with her lines in 1:36 scale, her 1854 sail plan, and several other drawings of the ship, even the lines for her boats.

Rattlesnake was built with extended forms on a baseboard, something like Harold Hahn's method, and that's how I went about building Constellation. The forms were cut from thin plywood paneling pulled out of my house when I remodeled it on a particle-board base, also scrap from the remodel. The keel is 1/2" birch plywood.
View attachment 33455

Before I started planking I came across a book by William Mowell about building the iron frigate Warrior. He battened the forms instead of planking and covered the hull in layers of brown paper packing tape, which he covered in masking tape, made a fiberglass mold from that, and laid up a fiberglass hull in that mold, the original "plug" being destroyed. This seemed like a great idea and a mold would allow me to easily make more than one hull, in fact, I decided to make three; one as the RC model, and two unrigged static models; one to be donated and the other sold, figuring a local Baltimore company would like a 5 foot hull of the Constellation in their lobby, and the money would pay for the whole project.
View attachment 33456

So off on this tangent I went...
View attachment 33457 View attachment 33458 View attachment 33459

The idea was to lay on planking and other details on the "plug" to impart things like plank lines and moldings to the mold, but there were a lot of such details not shown on anything I found at the archives, so I had more research to do. In the mean time we moved to a small farm and the plug was store under plastic in the corner of the barn.
View attachment 56691

The wife and I split up, we sold the farm and the plug went into a storage unit. I bought a house with a workshop in a separate building and in 2009 pulled the old plug out to resume work on it, a decade later.
View attachment 33461 View attachment 33460

Next up: How NOT to build a hull
Hallo Jerry alias @JerryTodd
we wish you all the BEST and a HAPPY BIRTHDAY
Birthday-Cake

Are you still sailing the Constellation? Or do you work on a new project?
 
Thanks all for the birthday wishes.
Constellation has sat in the garage on her little trailer since May 2019 except when she's rolled outside so I can work on something in the garage.
While I was working a noon-9pm job with no fixed days off, I had little time or energy to work on anything. I no longer work there, but it seems everyone's gotten wind of that and I'm constantly called to do something, or go somewhere. Added to that is a wargame designed and have been focused on for a couple of months now.
Yeah that all sounds like excuses to me too, but that's all I've got
 
"Triggered" is a term we all here more frequently now, and I have to admit, I have been.
Someone asked me to 3D print a plate to mount a "smart thermostat" in an outlet box and it with that done, and now having a vat of resin on the printer, it "triggered" me to print some more.

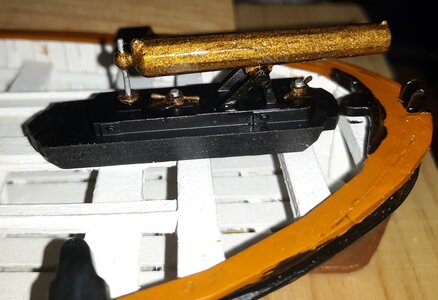
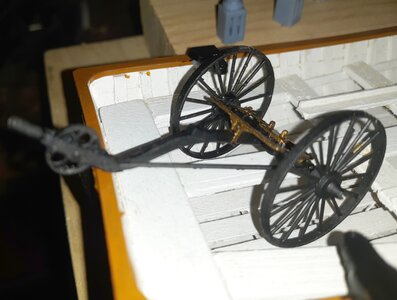
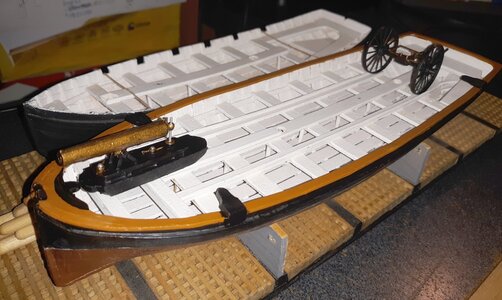
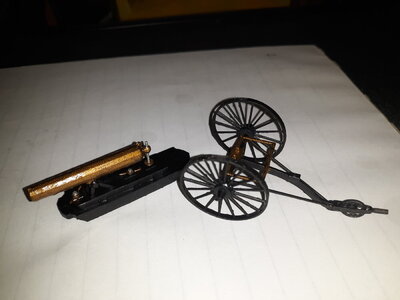
I threw the file for the boat howitzer on and got a real nice print of the little gun and it's carriage in about 1:72 scale. Emboldened by something so fine coming out so well, I re-scaled it to Constellation's 1:36 scale and tried again. It printed perfectly. I must have spent hours looking at it and marveling at how something I created from so many dots and lines in Anim8or could be turned into a real-life object with every detail I gave it sitting in my hand.

I think clicking on an image will open it up full size

Just finished printing, boat howitzers in 1:72 and 1:36 scales, The boat howitzer and carriage where it will live in the launch.

con20220227a.jpg con20220227d.jpg con20220227.jpg

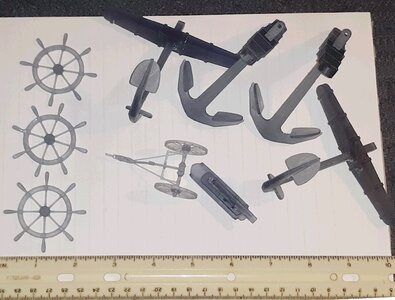
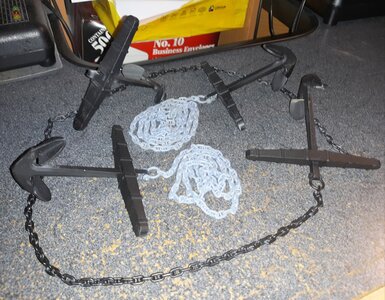
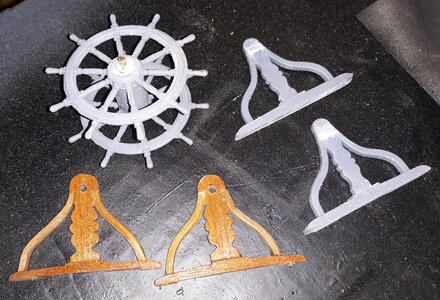
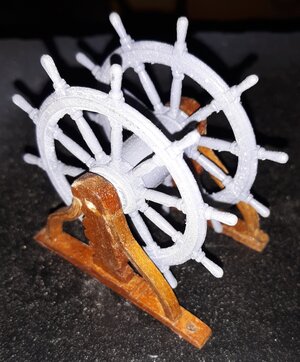
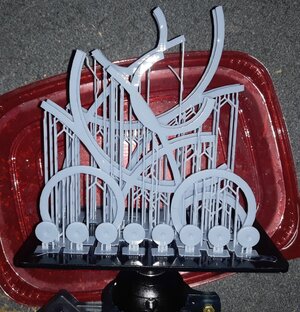
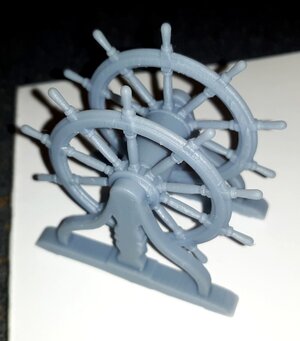
Getting over myself I went for the anchors. The first one was perfect, so I threw caution to the wind and printed another. I need two more, but a friend needed a steering wheel for his 4 foot schooner, so I printed three for him, just in case.

Two anchors and the boat howitzer, all 1:36 scale
con20220302f.jpg

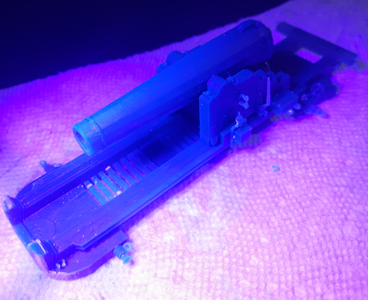
With my luck running so well, I took a risk and printed the pivot gun again. It did not come out perfectly, but with a little repair work, it can be usable. I'm going to rearrange the supports some where the failures occurred and give it another try. If that works out, I'll print it again and figure out what to do with the first two tries.

fresh off the printer and being zapped with UV light to fully cure the resin.
received_218732707083150.jpeg con20220303b.png

The STL for the anchor is downloadable on Thingiverse
 
All the anchors are printed (it's takes about 4 hours each, and I can only fit one at a time).
Here's the wheels for a friend, the boat howitzer, and the anchors
con20220309.jpg

The pivot guns are not quite up-to-snuff, so I'm going to rearrange the supports and give it another shot.
If that works I'll probably fix these up a bit and make a set of diorama bookends with them and some crew figures.
con20220309b.jpg

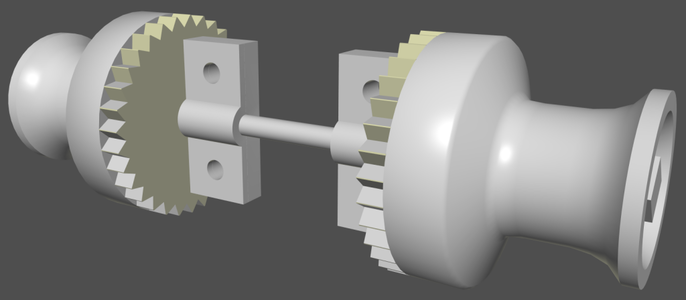
The 3D model of the windlass that's going with the wheels is nearly done. That will be 1:24 scale-ish on a 4-foot model hull.
3Dwindlass3.png
 
Last edited:
I got another bottle of this strong resin, but in gray this time, and printed the pivot gun again, with the supports rearranged to fix the bits that were failing before.
Here's a pic of part of my growing pivot gum collection:
con20220314_guns_guns_guns.png

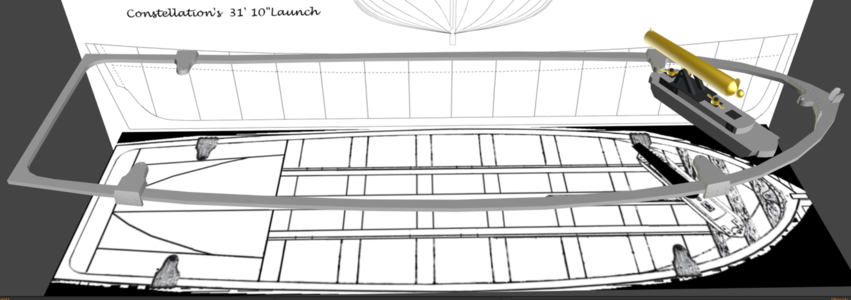
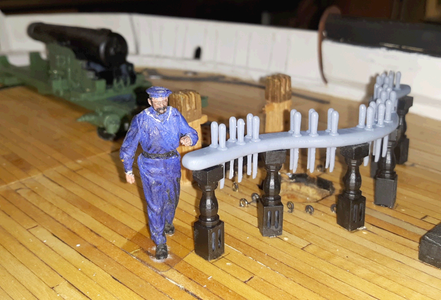
I started to model the fittings or pivot points for the boat howitzer and figured, why not model the whole rail with them attached. I had to make it in two parts to
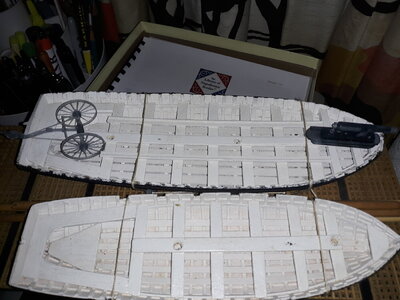
fit in the printer. Once I sand the top of the hull to make a smooth flat surface to glue to, I'll fasten the rail down to the boat and paint everything. I need to model stuff to go in the boats; oars, casks, bailers, etc.
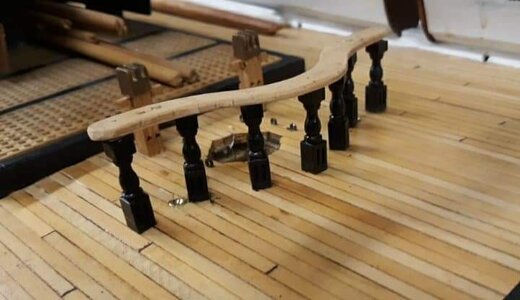
launch_rail.pngcon20220314g.jpglaunch.png

I started the 3D model for the gun in 2009 basically just for kicks, not for 3D printing. I added details to it for printing it, but never redid the gun barrel. Those lines you see on it in previous prints are facets because the 3D model is has too few polygons to look smooth. I made a new high-poly barrel and it prints much more smooth looking than before. I'll file the previous one a bit to smooth it out and use these last two prints on the model.
con20220315a.jpg

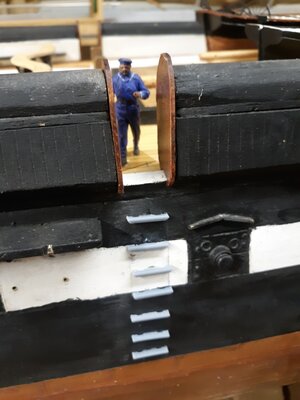
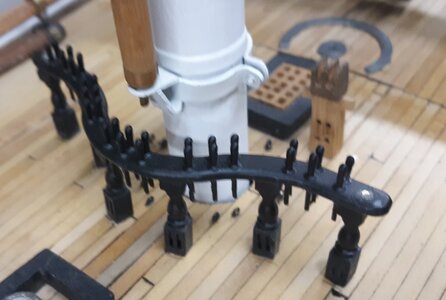
I also reprinted the pin-rail stanchions, boarding steps, and block shells in this stronger resin. Now that the weather seems to be getting a bit warmer, I can work in the shop and get some of this stuff painted and fastened in place on Constellation. Though I'm thinking of modeling the gun circles with more detail and replacing the hand-cut styrene ones on there now. Other items include binnacles, bitts, hammocks, and the most difficult item (for me) the filigree work on the tailboards.
 
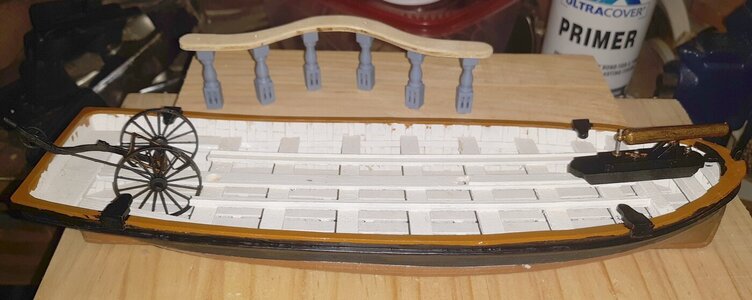
Glued down the rail on launch and gave it and the gun an initial coat of paint (there's some touch-up to do). I'm gonna model some oars for all the boats, and they all need spars, sails, and rudders. I'm not sure how much other paraphernalia would be in stored boats. I thought of the gun's ammo boxes, water cask, hardtack box, but I don't think all that would remain in the boat all the time.

con20220316g.jpg con20220316h.jpg
con20220316i.jpg con20220316j.jpg con20220316l.jpg
 
Last edited:
Started painting the pivot guns, I need to dig out the airbrush, bruch painting these things is getting tedious.

con20220319a.jpg con20220319b.jpg

Took down the rig so I can get the hull on the bench and start attaching the things I've been printing.
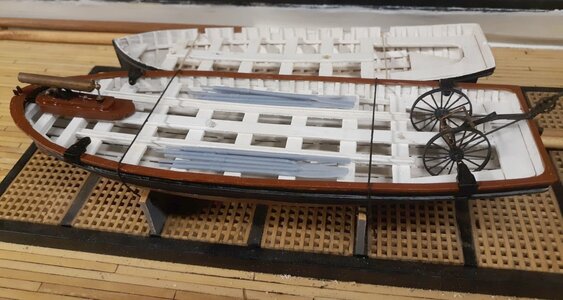
con20220321a.jpg

Some items attached so far.... boarding steps, stanchions, and made some oars for the boats
con20220322e.jpg con20220322k.jpeg con20220322j.jpg
 
I installed a 3D printed wheel I got from Shapeways a while back, but a spoke seemed to break off every time I looked at it, so I printed a new one that's not so fragile.
con20220324a.jpg

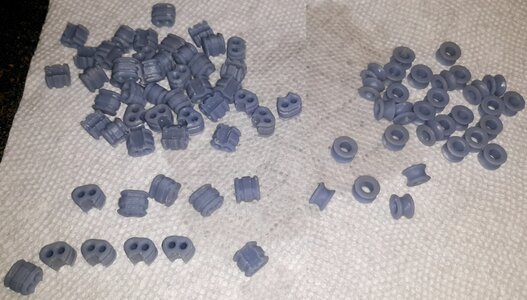
I also printed bulls-eyes and shroud fairleads in varying sizes. Shroud-fairleads, also known as "sizing trucks" for who knows what reason, are one of those common-place things no one seems to know about or notice.
con20220325a.jpg shroud_fairleads.png

New pin-rails with belaying pins were made.
con20220326b.png con20220406b.jpg

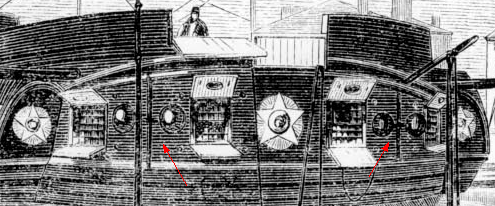
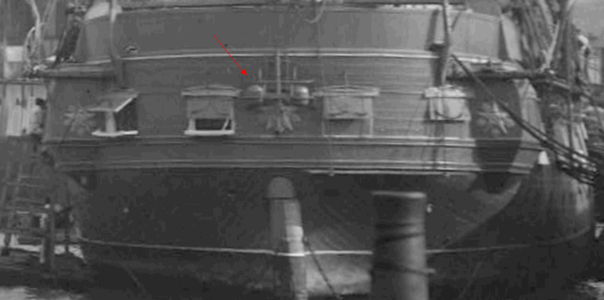
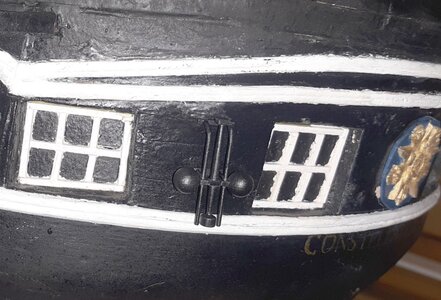
When I started this model, Geoffrey Footner gave me a copy of a drawing from a Harper's Weekly sort of publication showing Constellation in the dry dock at Charlestown (Boston) in 1859 on returning from her first cruise. This is the earliest image of the stern of the ship I've ever found. A lot has been "simplified" in the sketch, especially the odd circles between the stern ports that I have never figured out until very recently, thanks to another modeler that happened to be putting these things on his model, and described what they are in his build log. They are Night Lifebuoys, designed by a Royal Navy officer around 1818, and very common in the world's navies right up to the 1910s, and a 4 globe version at least into the late 1930s - I saw a photo of the 4-globe version on HMS Hood.

stern1859.png constellation1901.png

Constellation carried two of these up to 1900 and only one after that. I made a very basic model of them from all the pictures I could find.

con20220405a.jpg

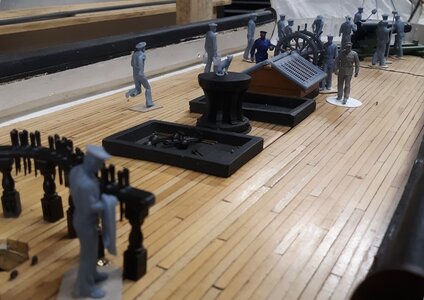
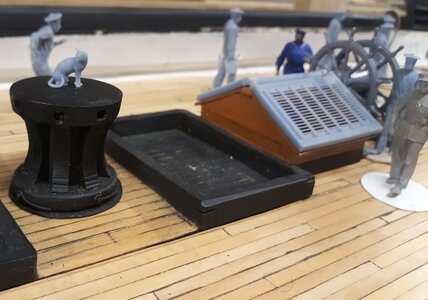
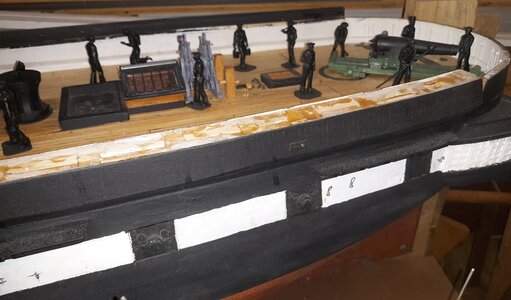
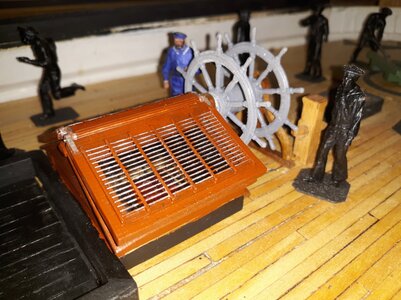
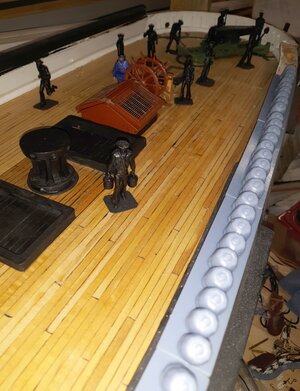
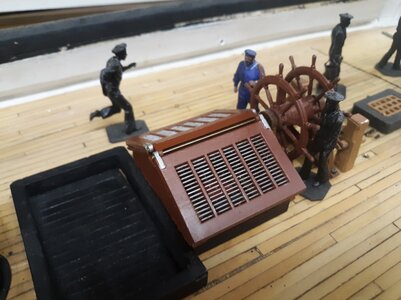
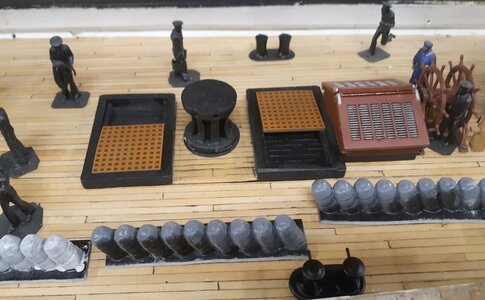
I found files for Civil War sailors on CGTrader, got a few, resized theem to 1:36 scale and printed them. I'll alter a few in the file, and some after printing to get about 40 men working the ship, and a couple of cats, and a rat. I also made new panels for the skylight that are more detailed and better sized than the clumsy ones I made. Stella, the ship's cat sits on her favorite perch on the catstand, I mean capstan.
con20220408c.jpg con20220408e.jpg

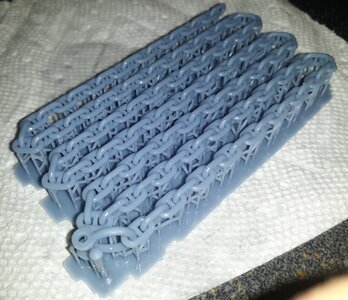
The latest adventure in 3D printing has been making articulated studded anchor chain to go with the previously printed anchors. It took a few tries before I got it where the links weren't bonded together. Four sets are all printed, attached, and painted.

con20220410b.jpg con20220410e.jpg

I have a couple of things in development; hammocks to cap the bulwarks in place of the rounded over balsa; new deck circles for the pivot guns; more hatch gratings; some smaller sized blocks, pin rails for on the bulwarks; seats for the heads; new medallions for the stern; and some custom poses for the figures I have.
I'm gonna milk ever penny out of this 3D printer :)
 
The crew got a base coat of black before getting painted, and the port side rounded-over balsa cover was removed from the bulwarks...con20220418b.jpg

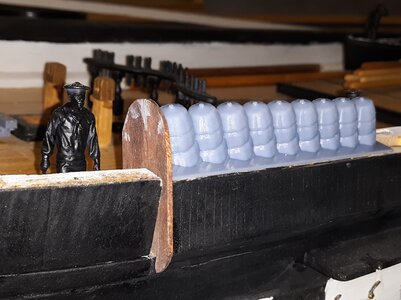
'cause I've always intended to model the hammocks there since they're visible (uncovered) in the painting I'm basing the model on. This is a test print that's ok, but the cinched-up end looks off to me and the raft they're on needs to be a little thicker. That's easily taken care off now that the difficult part of making them hollow so they didn't use up so much expensive resin is solved.
con20220420b.jpg

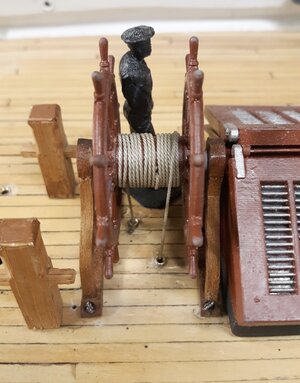
I sawed off the pedestal from the new wheel I printed and drilled the drum to accept a brass rod so I can use the original wooden pedestal I made for the old, discarded wheel. I like the wood one better. Now that the wheel can spin, I think I'll return to plan A and connect it to the tiller so it'll spin when the rudder moves.
con20220419c.jpg con20220419d.jpg

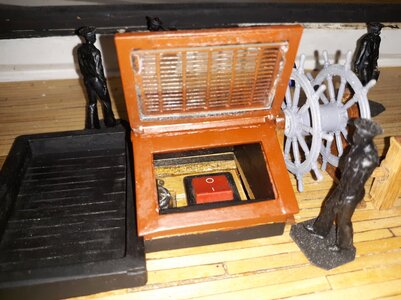
The skylight got painted and it's glass installed. The glass is from a couple of microscope slides I found a long time ago.

con20220419e.jpg con20220419g.jpg
 
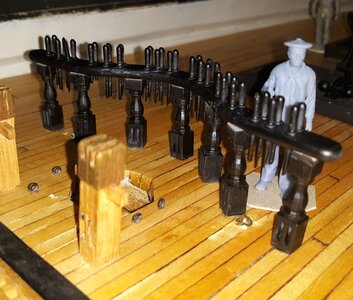
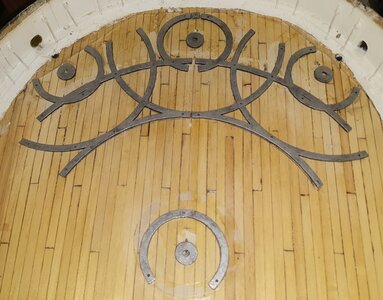
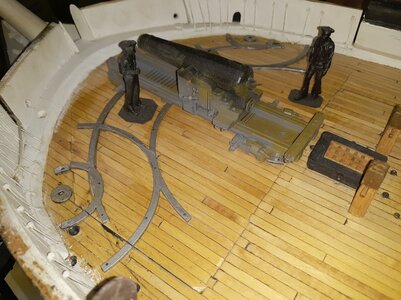
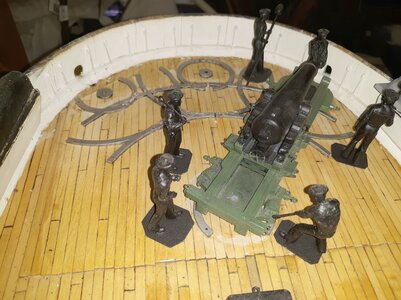
I already planned to 3D model new gun-circles, or rails for the pivot gun to replace the hand-cut styrene ones I had made. The were modeled more along the lines as shown in a Naval Ordnance manual diagram...
pivots.jpg

Once modeled they were divided into parts that would fit into the printer and printed...
con20220503a.jpg

I sprayed them with a base coat of black, then brush painted them with Testor's "Steel"
con20220504a.jpg con20220504b.jpg

Here they are with a second coat of steel, the guns, and some crew "the shadows."
con20220505a.jpg con20220505b.jpg

Then I got back to printing hammocks
con20220505c.jpg
 
Looks like I skipped over the hammocks...

In nearly every painting, (especially the one I'm trying to make the model look like), sketch, and photo of the ship, her hammocks are in the bulwarks, uncovered; so I wanted to model her that way. When I put the bulwarks on, I didn't have a plan for making hammocks, so I covered them with sheet balsa rounded over to look something like they were covered with tarpaulins, intending, at some point, to replace that with hammocks, somehow.
constellation1856a.jpg

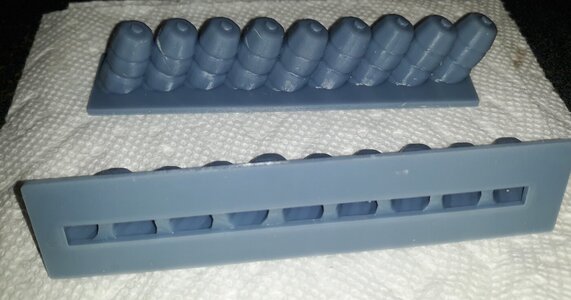
Because this is a sailing model, I wasn't too keen on the idea of cloth hammocks actually stuffed into the bulwarks. I figured to probably carve a few, glue them together, mount them on a plank to seal the open top of the bulwarks, make a mold from that and cast a few of these "trays" in resin, paint them up and glue them on. With 3D printing, I "carved" one up on the computer, made them hollow, stuck a few together on a "tray" and printed them out.

Each hammock is the same model, but I placed them on their "trays" in not perfect rows, and some leaning a little this way or that. They're also hollow to save on resin and some weight.
con20220420a.jpg

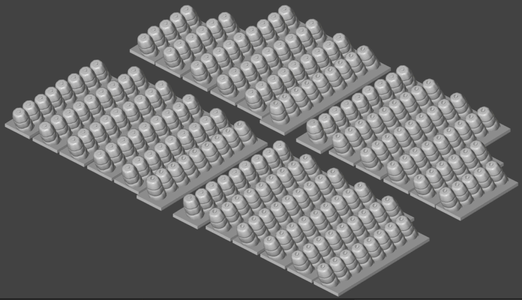
There's 200 hammocks represented, that'll get painted "canvas" ( a mix of tan and white). The trays are a little over sized and get trimmed to the tops of the bulwarks.
hammocks2.png A battalion of hammocks

con20220424c.jpg con20220420h.jpg

The printed went down for a couple of weeks and I'm just getting back to printing these things. They're all made for the post side and about half the starboard side is done.
 
The new skylight didn't close properly, the center piece needed to be wider to set the hinge points further apart. Also, looking at photos, the bars were IN the sash and not on it, so I made a new skylight.
con20220523a.jpg

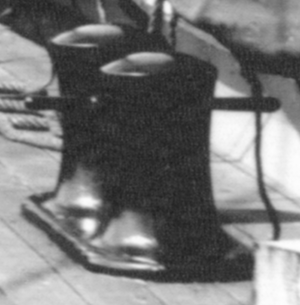
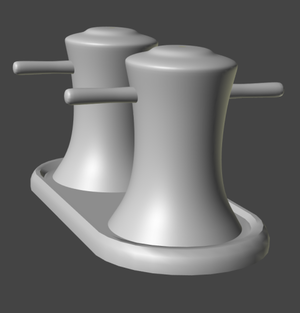
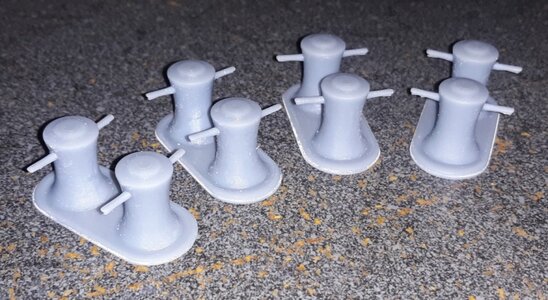
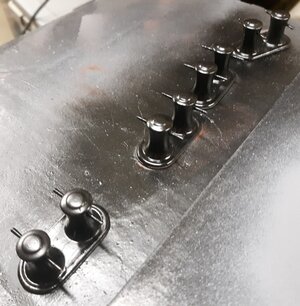
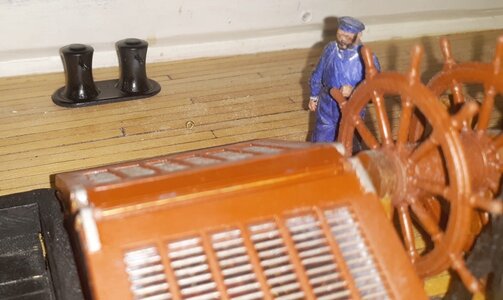
There's four sets of iron bitts on the spar deck. Part of the reason I've held off gluing on the hammocks is I thought I needed to install hawse pipes through the bulwark near these bits. Going through all the photos and paintings of the ship, I couldn't find any holes for lines to pass through anywhere. Since the bitts have these handles sticking out of them, I figure they were used more as fairleads to turn some line, like a halyard, so a gang could haul it down the deck.
bollards.png bollards3d.png con20220524f.jpg
con20220525e.jpg con20220525a.jpg

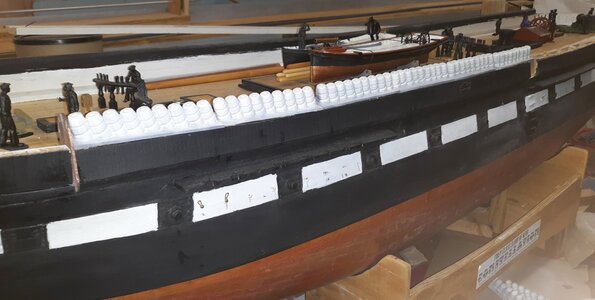
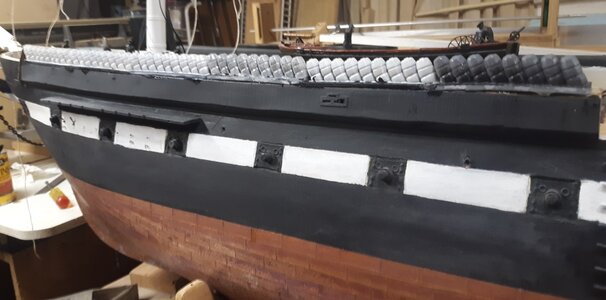
Since I don't need to make any holes in the bulwarks after all, I started gluing on the hammocks with slow cure epoxy. The picture shows about 1/4 of them are glued down.
con20220526b.jpg

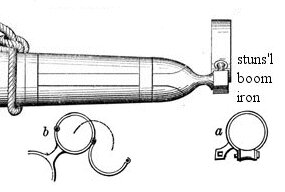
The ship carried stuns'ls at least till the 1880s (This model represents her in 1856). Photos in the 1880's and later show the stud at the end of the yard for the fitting, but the fittings are gone. Today, the studs are still at the end of the yards.
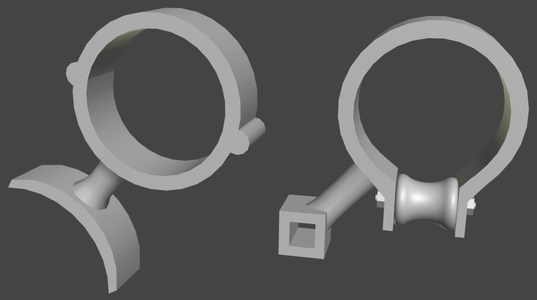
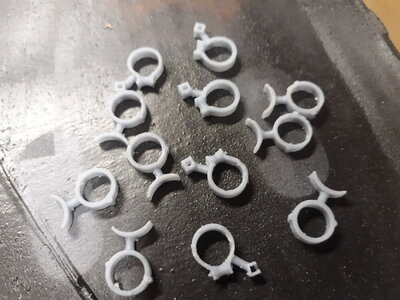
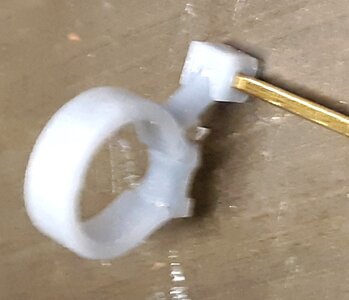
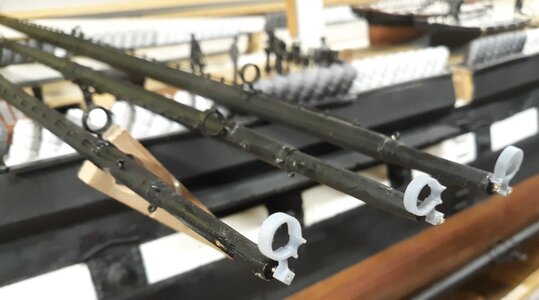
I don't intend to have functional studs'ls , but the booms are visible in the paint of 1856, so they're going on the model. I decided to 3D model and print the fittings to the diagram below. Checking the fit, that stalk on the outboard fitting was too short, and the one on the inboard fitting a little too long. The model was adjusted and the parts printed again. A couple of them didn't print, so I printed another batch to replace the lost ones and to have some spares.
stunsl_boom_iron.jpg stunsl_boom_irons.png con20220528a.jpg

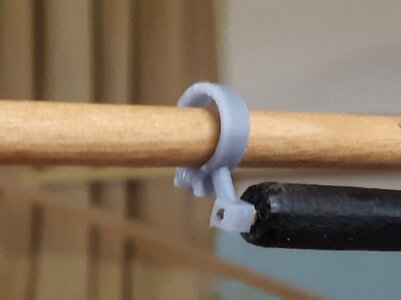
I used a bit of bamboo skewer to make the square stud in the end of the yard to test the fit. I haven't been able to find any brass square stock, so I'm probably going to have to hammer or file some round rod square. Anyway, the adjusted fittings will work out nicely, so they got primed and painted.
con20220528b.jpg con20220528c.jpg

Finally, I made the railings for the tops, only the main top is shown here, but all three are made. I have to make the netting that stretched along these things, which means making a jig to weave them on. There's holes and other things that have to be done to the top to hang blocks, and set up rigging, so I haven't glued these in yet for fear of them being damaged while doing the other work.
con20220528f.jpg
 
With the hammocks glued down port-side, I turned the hull around to prep for the starboard side. I printed eyebrows for the gunports and installed them on the port side, first thing now was installing them on the starboard side.
con20220602a.jpg con20220603a.jpg

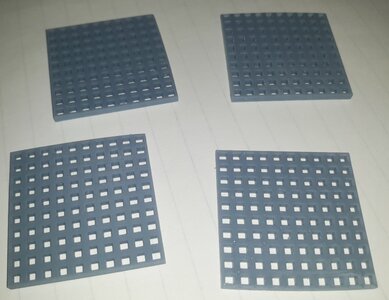
Printed some gratings for the companionway hatches at the capstan. The bitts got glued in place as well.
con20220601a.jpg con20220603d.jpg

The square rod came in, and I got right to installing the stuns'l boom irons
con20220605a.jpg con20220605b.jpg con20220605d.jpg con20220605e.jpg
 
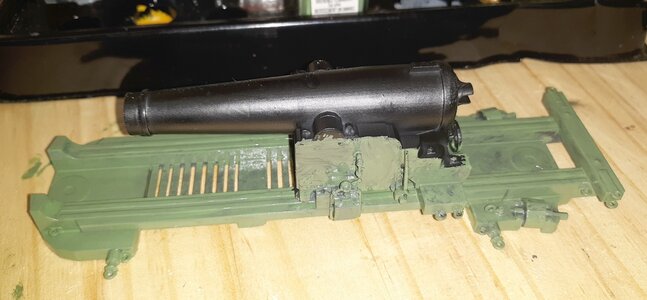
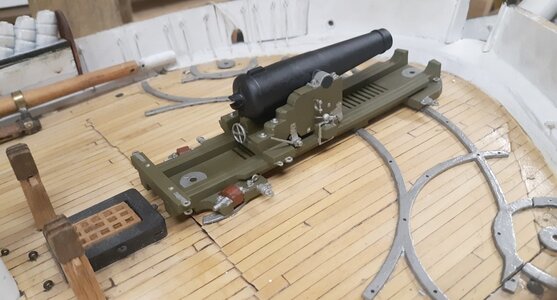
It took some searching to find enamel paints that weren't $20 an ounce, but I did and got a few bottles of Steel, Rust, Brass, and most importantly, Olive, which was no sooner unpackaged than it was in the airbrush and going on the pivot guns..

con20220606a.jpg I love my airbrush - doing this with a brush was a literal pain.

con20220606b.jpg Touching up the barrel of overspray

con20220606c.jpgFlat Steel brings out the iron details, more of which need doing, but you get the idea.
 
I fastened down the fore mast pin rail and touched it up with paint. The main has the fore-tops'l braces running through it and the whole are a little off, so I have to look into that before fastening it in place.
con20220615a.jpg

The pivot guns got painted, but the photos show some touch-up is still needed, Once finished, and clear-coated, they'll get screwed to the hatches and rigged with their tackles and such.
con20220615b.jpg con20220615c.jpg

I decided to use .020" brass wire for the stirrups for the footropes on the yards. I need 56 of them and this seems the best way of going about it. But I bought the wire I have to make strops for the dead-eyes, so I shifted to that long put-off project.
con20220615g.jpg

First I removed all the jury-rigged stuff from the hull, eye-pins, chain-plates screwed on, etc. Then I started cleaning up and repairing the chain-plate sets I had made and finished up a couple that were nearly done. I have four pair made, leaving about 22 more pairs to make. I wanted to use #1 nuts and bolts to attached the dead-eye strop to the strap on the chain-plate, and the thimbled-eyes at the end of the shrouds, but they're expensive (even more-so now-a-days), so I'm going to use brass nails (escutcheon pins), cut and peened instead. The pins are a bit hard to peen without messing something up, so I annealed a few to soften them, and that seems to be working better.
I gave one of the previously blackened sets a coat of primer, since it all gets painted eventually, that's the picture below. When installed, a #2 brass round-head wood screw goes where the toothpick is, so each chainplate can be removed if need be with much difficulty. An oak strip was epoxied inside the hull before the deck went on, to give these screws something to bite into.
con20220615e.jpg
 
Most of what I've been doing on Stella has been installing eyes. In the tops, the waterways, on the masts, and other places in preparation of actually permanent rigging. There's no picture evidence, so you'll just have to take my word for it until I have something worth photographing. ;)

I've also been working on Pride of Baltimore, a 1:20 scale RC Baltimore Clipper. I don't have a build log here, but you can see that project by clicking on the flags in my signature below.
 
Back
Top