Good afternoon Rob. Nicely done. Cheers Grant
-

Win a Free Custom Engraved Brass Coin!!!
As a way to introduce our brass coins to the community, we will raffle off a free coin during the month of August. Follow link ABOVE for instructions for entering.
-

PRE-ORDER SHIPS IN SCALE TODAY!
The beloved Ships in Scale Magazine is back and charting a new course for 2026!
Discover new skills, new techniques, and new inspirations in every issue.
NOTE THAT OUR FIRST ISSUE WILL BE JAN/FEB 2026
You are using an out of date browser. It may not display this or other websites correctly.
You should upgrade or use an alternative browser.
You should upgrade or use an alternative browser.
Thank you for the kind comment Grant! This kit has been fun and I am really learning a lot.Good afternoon Rob. Nicely done. Cheers Grant
Rob
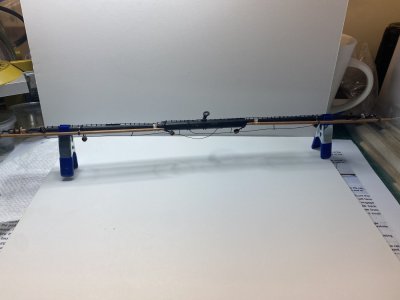
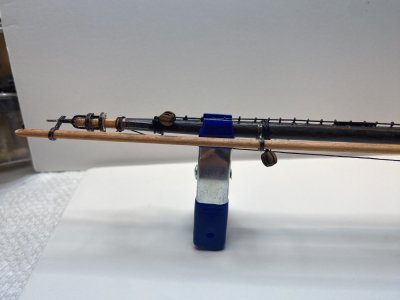
After delaying about as long as I could I finally stepped the mast onto the hull section.
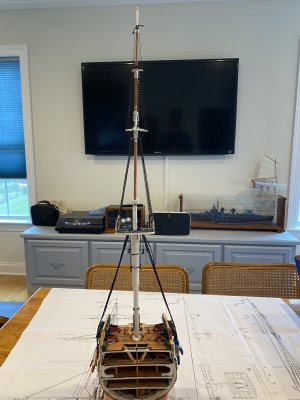
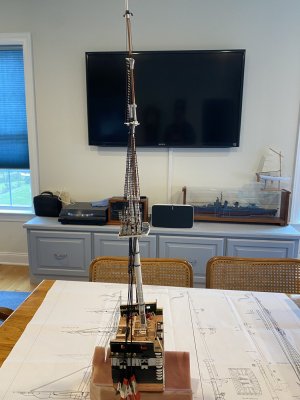
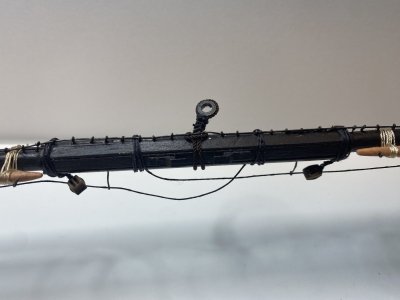
The lower mast is supported by 6 shrouds, 5 are connected with deadeyes and the 6th called the swifter, is attached by a block and lanyard system. This gives it easier adjustability than the other shrouds.
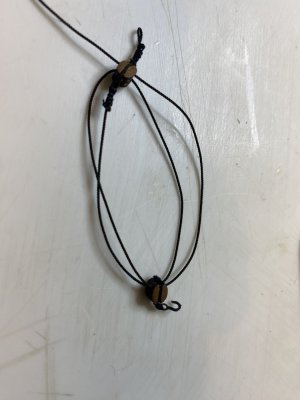
The instruction would have you use a triple and double block for the swifter, but after seeing the discussion by Tom Culb, I decided to follow his advise and use 2 double blocks. The most forward shroud attaches to a deadeye then goes up around the mast and goes forward as the swifter. Since I believe this element of the ship will have a lot of visual impact, I rigged the block and lanyard using the model expo beautiful blocks I had. You can see they are a step up from what I used on the cannons. I also used the rope of scale 0.5mm (0.019" line). One of the blocks was seized to a hook. The other block I made a loop at one end by wrapping a line that will be used as the lanyard around a drill bit. I then seized that and seized a block to that. the long end of the lanyard was then run through the blocks.

- Joined
- Mar 13, 2025
- Messages
- 644
- Points
- 268

Beautifully done.After delaying about as long as I could I finally stepped the mast onto the hull section.
View attachment 550282
View attachment 550283
The lower mast is supported by 6 shrouds, 5 are connected with deadeyes and the 6th called the swifter, is attached by a block and lanyard system. This gives it easier adjustability than the other shrouds.
The instruction would have you use a triple and double block for the swifter, but after seeing the discussion by Tom Culb, I decided to follow his advise and use 2 double blocks. The most forward shroud attaches to a deadeye then goes up around the mast and goes forward as the swifter. Since I believe this element of the ship will have a lot of visual impact, I rigged the block and lanyard using the model expo beautiful blocks I had. You can see they are a step up from what I used on the cannons. I also used the rope of scale 0.5mm (0.019" line). One of the blocks was seized to a hook. The other block I made a loop at one end by wrapping a line that will be used as the lanyard around a drill bit. I then seized that and seized a block to that. the long end of the lanyard was then run through the blocks.
View attachment 550286
Thank you for your kind words!Beautifully done.
Laced into place my first deadeyes and lanyards and the blocks for the swifter. I used the ratline guide and set the distance between deadeyes as described in the instructions. I used an alligator clam to hold the Shroud around the deadeye and seised the shroud line around the deadeye. I then measured again to make sure the distance was what I wanted. I laced the lanyard onto the deadeye. I used black line, as this is what is used on the Constitution currently. I then attached the swifter block by engaging the hook to the eyebolt and tightening the lines until they were approximately the distance between deadeyes. I then passed the shroud line through the loop of the black set, tightened it and seized the shroud line. The block set rope is dark brown from Ropes of Scale but it is hard to see the difference in the picture. It is more noticeable by eye. I will trim the lines for the seizing after I am happy with the setup.
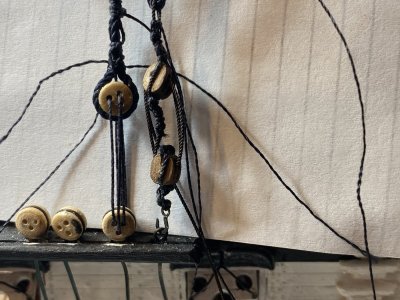

I am unhappy with the blocks used on the swifter. It looks too bulky in the position it is and not graceful enough. I am going to tighten up and lengthen the space between the blocks a bit. Meanwhile I laced the first deadeye on the port side. This is actually going easier. I used a "helping hand" to hold the deadeye after I got the length I wanted. It made it much easier to seize the shroud to it.
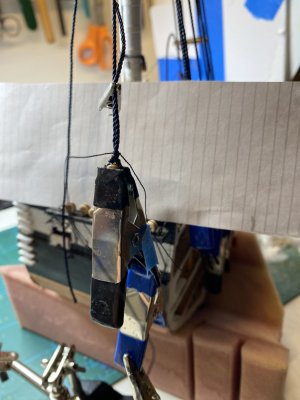
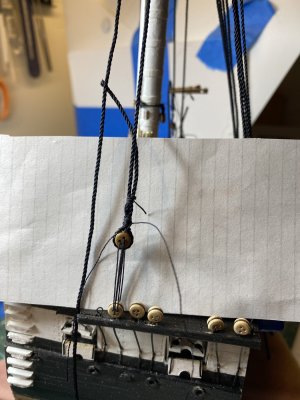


One observation here is that I am VERY happy I did not yet attach the cap rails. I think I would be constantly bumping into and bending those delicate objects. I think anyone building this or even a regular Constitution should delay installing those, as well as the fighting top rear fence until the end.
I lengthened the distance of the blocks for the swifter and I am more pleased with how they look.
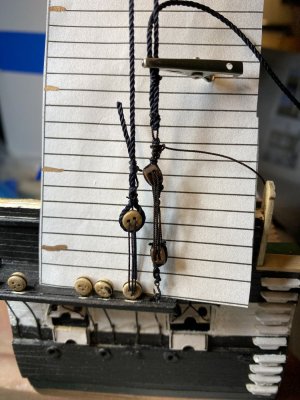
One problem with using a double instead of a triple block when you set up the stiffer block and tackle system is that the free end of the line ends up going over the top block and hangs down. I was not pleased with this and decided to make a "pseudo" triple block in the bottom by feeding the line through one of the two free holes unoccupied in the triple block. This enabled the line to feed up from the bottom. I tied off the line above the upper block with a series of half hitches.
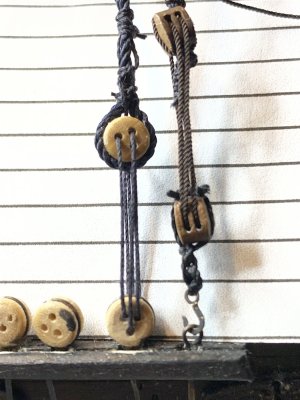
As you can see the line now feed off from the top. As this is suppose to be a sort of adjustable standing rigging, I am unsure at this point how I should end this line? Do I make a few coils and attach it to the swifter? Should I bring it over the rail and place it on a belaying pin? Should I just cut it short like the lanyards of the dead eyes? Any input would be greatly appreciated.
I lengthened the distance of the blocks for the swifter and I am more pleased with how they look.

One problem with using a double instead of a triple block when you set up the stiffer block and tackle system is that the free end of the line ends up going over the top block and hangs down. I was not pleased with this and decided to make a "pseudo" triple block in the bottom by feeding the line through one of the two free holes unoccupied in the triple block. This enabled the line to feed up from the bottom. I tied off the line above the upper block with a series of half hitches.

As you can see the line now feed off from the top. As this is suppose to be a sort of adjustable standing rigging, I am unsure at this point how I should end this line? Do I make a few coils and attach it to the swifter? Should I bring it over the rail and place it on a belaying pin? Should I just cut it short like the lanyards of the dead eyes? Any input would be greatly appreciated.
While trying to decide what to do with the deadeyes, replacing the lines with better quality line, I decided to build the guard rail for the fighting top. I am not going to put it on until most everything is finished. The wood is thin, only 1/32" and there is a warning to be careful. So of course while taking the pieces out of the wood support I snapped a part of a frame off. Luckily, using CA, it was easy to fix. I used CA to cover the wood parts to hopefully strengthen them.
I painted one side of the frames and base and using dabs of CA I attached one end of the netting. Letting the CA set I then stretched the other end and tacked it along the way with dabs of CA. The netting came out nice and tight.
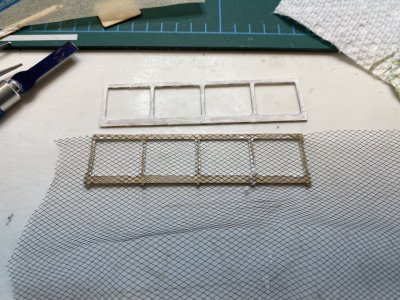
I cut off most of the netting then using wood glue carefully aligned the 2 frames and clamped them together.
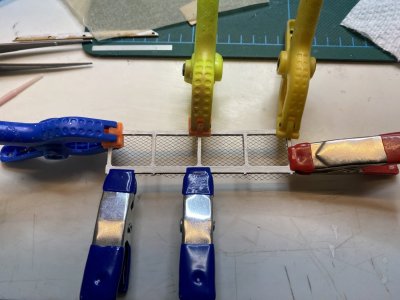
I then glued "reinforcing blocks" in place.
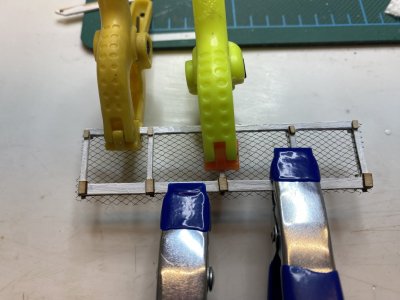
Once everything had set, I trimmed the netting off the sides and bottom and attached it to the base and touched up the paint.
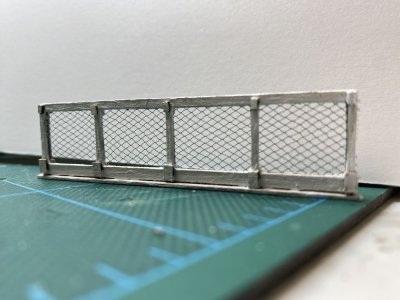
This will be stored away until the end of construction.
I painted one side of the frames and base and using dabs of CA I attached one end of the netting. Letting the CA set I then stretched the other end and tacked it along the way with dabs of CA. The netting came out nice and tight.

I cut off most of the netting then using wood glue carefully aligned the 2 frames and clamped them together.

I then glued "reinforcing blocks" in place.

Once everything had set, I trimmed the netting off the sides and bottom and attached it to the base and touched up the paint.

This will be stored away until the end of construction.
- Joined
- Jan 3, 2025
- Messages
- 36
- Points
- 48

Why have you left out the Gun Tackle? It would be necessary to run the guns out. Is it because the blocks are so far out of scale? I had to cut down some of the blocks to get them to fit. In my model, I noticed that the carriages for the long guns are too large, and the carriages for the carronades are too small; or the guns themselves are out of scale.I finally installed all the cannonades. for some reason the breaching line for the last one was just a fraction too small to fit. I had to replace it. Replacing it was a little bit difficult and it brought home how much easier it is to do the rigging for each piece of armament separate from the ship itself. I know I would have had a much more difficult time with all the lines and would probably have damages pieces of the ship.
View attachment 522034
View attachment 522036
You are correct I left out the gun tackle. I found the deck already too full and as you said the blocks are way too bulky. I have recently gotten much better blocks from model expo, syren models and Dry -Dock models. They are much better looking and I will be using them on the mast and yards.Why have you left out the Gun Tackle? It would be necessary to run the guns out. Is it because the blocks are so far out of scale? I had to cut down some of the blocks to get them to fit. In my model, I noticed that the carriages for the long guns are too large, and the carriages for the carronades are too small; or the guns themselves are out of scale.
Rob
Last edited:
I am taking a lot of time to ensure that the deadeyes are fairly leveled with each other. I am using a divider (compass) to measure the distance between the channel and the bottom of the deadeye.
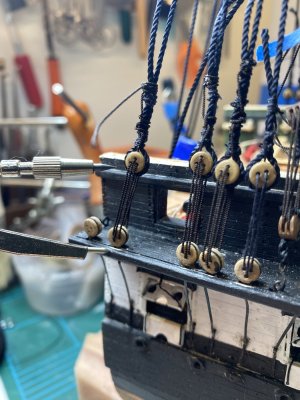
I then used an alligator clip to "crimp" the line around the dead eye and make sure it lines up the way I want it to After making sure several times it is exactly the length I want, I tack the deadeye to the line with a spot of CA. I then hold the deadeye and line close to the ship using a clamp held by a "helping hand.
When I was seizing the shrouds to the deadeye, I had problems with the seizing sliding up the shroud line whenever I finished because of the triangular shape of the area. I solved this by first tying the seizing line to only one of the shroud lines, close to the deadeye.
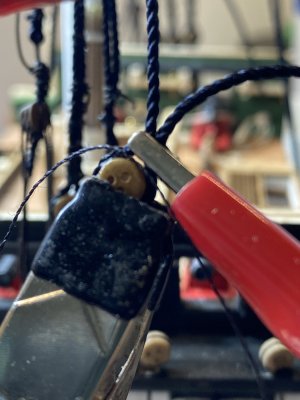
It was then easy to keep the line in place when it was seized.
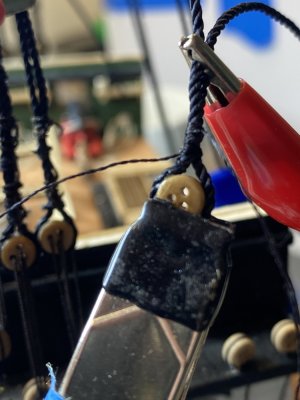
I then lashed the deadeyes together using ropes of scale 0.5mm dark brown line.
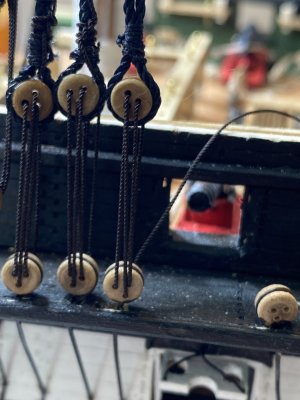

I then used an alligator clip to "crimp" the line around the dead eye and make sure it lines up the way I want it to After making sure several times it is exactly the length I want, I tack the deadeye to the line with a spot of CA. I then hold the deadeye and line close to the ship using a clamp held by a "helping hand.
When I was seizing the shrouds to the deadeye, I had problems with the seizing sliding up the shroud line whenever I finished because of the triangular shape of the area. I solved this by first tying the seizing line to only one of the shroud lines, close to the deadeye.

It was then easy to keep the line in place when it was seized.

I then lashed the deadeyes together using ropes of scale 0.5mm dark brown line.

Last edited:
Looks like your careful work is paying off!
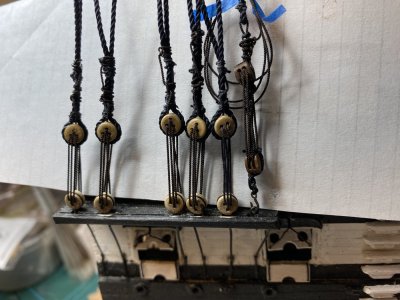
Well the deadeyes on one side are finished. Once both sides are finished I will trim the ends of the shrouds so they are even and do a third seizing of the shroud lines. As you can see I have left the spare line of the swifter coiled up and taped to the swifter shroud. Still not sure what to do with this line. Any suggestions?

Last edited:
The other side of the ship is now done.
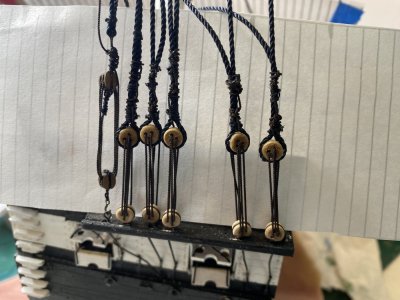
After that I seized the shrouds (each loop to itself) just below the fighting platform. That tightened things up a bit and straighten out the shrouds. It should make it easier to ratline.
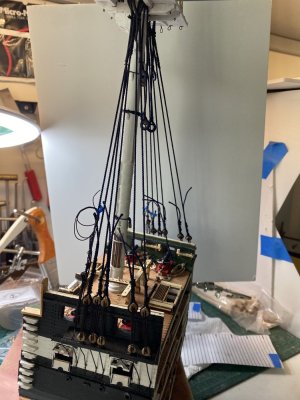
I am happy how things are shaping up.
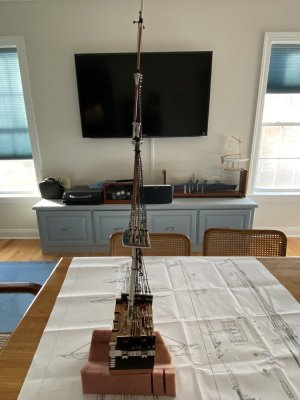
Before I ratline, I will be installing the Bentinck shrouds which go through the main shrouds. I am not going to do it using the method shown in the book. It looks way too clumsy. I will be doing it more like Tom Culb did it without many of the out of proportion thimbles the instructions would have you use.
I will be going on vacation for the next few weeks. I look forward to doing more work on this great cross section when I return!

After that I seized the shrouds (each loop to itself) just below the fighting platform. That tightened things up a bit and straighten out the shrouds. It should make it easier to ratline.

I am happy how things are shaping up.

Before I ratline, I will be installing the Bentinck shrouds which go through the main shrouds. I am not going to do it using the method shown in the book. It looks way too clumsy. I will be doing it more like Tom Culb did it without many of the out of proportion thimbles the instructions would have you use.
I will be going on vacation for the next few weeks. I look forward to doing more work on this great cross section when I return!
Last edited:
Enjoy your vacation, Rob!
Thank you!Enjoy your vacation, Rob!
- Joined
- Jan 3, 2025
- Messages
- 36
- Points
- 48

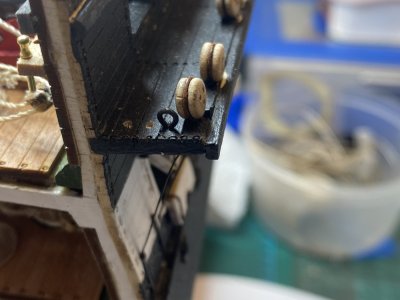
The "extra" eyebolts may be for tarps for shade or other tie-downs we do not know about,The instructions would now have you do the cap rails that have the hammock stanchions and netting on it. These PE hammock stanchions are very delicate and I know I will be bumping and bending them into useless pieces of plastic and metal in no time. So while I may assemble them now I will not attach them until the end. NB Now in the process of rigging the ship I HIGHLY recommend that you do NOT install these until after the ship is rigged. They will only get in the way. Using 1/8 X 1/4" strip they want you to cut a double round profile on the outside facing surface. This is way above my abilities, so I just rounded the outside surface. Instead of 2, I made the cap rail twice as long to make it easier to handle. I drew the lines where they want the stanchions in mirror images going from the center. This, when cut, will produce 2 cap rails aligned the correct way port and starboard.
They want you to put eyebolts on the inside surface of the cap rail. I am not sure why these eyebolts are here. I don't see them used on the plans but they may be used for the rigging so I will include them. Beware one picture in the instructions shows them installed on the outer surface of the cap rail also, but I can find no evidence that they belong there. So using my trusty pin vise I drilled some holes in the inner side of the strip to attach eyebolts. I also made holes in the center of the top for the hammock stanchions.
After the eyebolts were in place I painted the cap rail black.
View attachment 524750


