Constructo 1799 Enterprise help

6B57B90E-E5E7-4363-8E47-D81DFE850367.jpeg

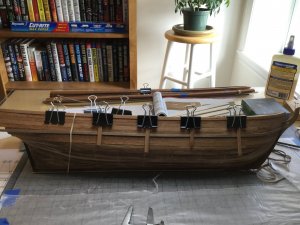
The start of the “complicated” dry fit, measure, trim and finally glue a piece of the remaining planks on this side of the hull. The first planking wasn’t worrisome since I knew it would be covered by the final veneer. It’s my first try of this type of modeling and it’s turning into a great learning experience.
 
Last edited:
Ahoy Mr. Pathfinder,
It would appear that you learn quickly. Did you carve a rabit in the keel before you started planking?
 
Hi Mike,

That was one the items stressed in some the “how to books” that I’ve read. When I started I had no idea what that procedure was for, but it became apparent when I did the first planking and the “garboard plank” (I think that’s the right term) would not lie flush or follow the curve of the hull. I had not permantly fastened the last three planks. I Removed those planks and used my Dremel tool with a Router bit to cut an indentation into the keel (the rabbet?). After replacing the planks I’d removed, I made a paper template of the area the last plank had to fit in. After cutting, trimming, sanding, gluing, all the planks seemed to fit. After an application of a liberal amount of Modeling Paste and more sanding, most of my semi-skilled errors weren’t visible.
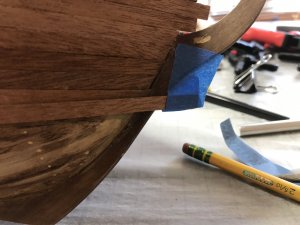
 
Glues and gluing.

I’ve been experimenting with various glues. I’ve found several things of interest.

The AC glues thin or thick applied to a piece wax paper take some time to “dry”. I’ve been able to use that method to transfer small amounts to the bow and stern sections of the planks I’ve been working with.

The woodglues when applied to a piece of wax paper dry quickly, but using a brush lightly dipped in water and then in the glue it spreads easily.

Wiping off the residue wood glue after placing a plank, one can use a piece of wax paper under the jaws of a clamp or large rubber band to hold the plank in place until the glue dries.
 
As I said Mr. Pathfinder, you do learn quickly. Your work looks nice also.
I do like your narrative on wood glue.
 
Another part of the learning curve:

I’ve gotten to point where the clamps that I’ve been using no longer help holding the planks while the glue dries.

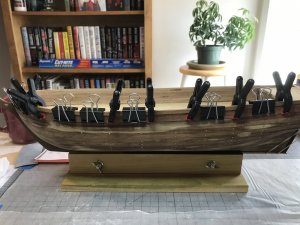
So I had to improvise. A clamp holding a short piece of the 1st planking material up tight against the hull works great.

B0061889-2239-4513-842C-68C8270BB7FF.jpeg

The idea worked great to hold the wale in place while glue dried/ set?
 
Hull holder/vise:

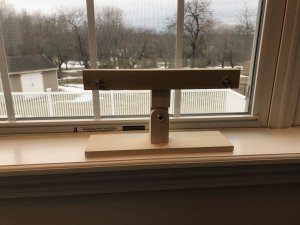
I decided it was time to get a new hull holder/vise. While searching the Internet and the various forums I found a lot of commercial and many DIY examples. Though I’m not a woodworker and have limited tools I thought I could build what I needed.

EA9AB148-747F-46F5-BD8B-3E4141879753.jpeg

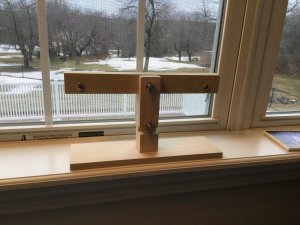
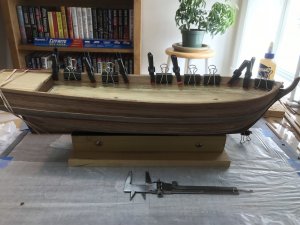
This is my effort. Tomorrow I will seal and paint it.

The jaws are poplar 1/2 X 1 1/2 X 14 inches. The base is poplar 1/2 X 5 X 14 inches. The upright is poplar 1 1/2 X 1 1/2 X 7 inches. The bolts are 1/4 inch -20 X 2 inches with washers and wing nuts. I used the lid from a plastic pill container to trace the curve of the upright joints.

DEB3AB06-7B29-440F-83D4-43F3578612C3.jpeg
 
Last edited:
Dave, thank you for the compliment.

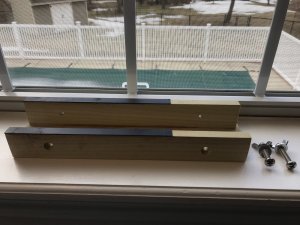
Build another “Gizmo” today. I’ve tried cutting, shaping and planing some of the 2nd planking material. I buggerd up a lot of the material using a sharp knife blade and steel ruler as a guide.

I thought there had to be a better way.

I found some commercially available items on the Internet, but decided to try building something myself.

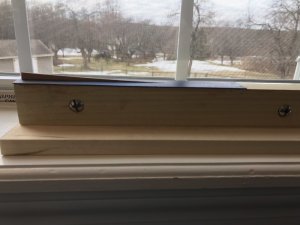
I used Poplar again. The rails are 1/2in X 1 1/2 in by 12 inches. The base is 1/2 in X 5 in X 12 inches. The bolts, washers and wing nuts are the same as those I used or the hull vise/holder/clamp.


FE157EB2-221E-4654-9ACF-771A06ECA7A5.jpeg44B3FFF1-F293-4AB2-9DC2-D3FC71FBC4D6.jpeg

I glued Plastistruct Styrene strips to the rail tops to prevent gauging the wooden rails.
 
G'day pathfinder
Both your gizmo and your build are great. It looks like to me that we have a dark horse amongst us.
Welcome aboard the SOS and happymodeling
Greg
 
Hi Mike and Greg,

Thank you for your comments. I’ve made a lot of mistakes and I’m mentally filing away things I will do differently on my next build.
Every day I find more how to “build information” on the forum.

I decided I wasn’t pleased with the look of the “Poop Deck”. The planking just didn’t look right. So...

97DF8346-9B2B-49E0-8022-404DB4C4BD0E.jpeg

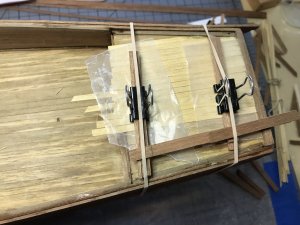
Poop deck in process of re-planking. A little more “clamping innovation”. There is a slight bow to the deck and no good way to fix a clamp to hold the planks in place. I’ve been spreading on glue about three planks wide, laying down the planks, wiping off the excess glue and the placing wax paper between the planks and the hold down clamp. After couple of hours of drying time, I repeat the process.
 
Your „clamping innovation“ is realy looking interesting
Maybe you should try a glue which is drying , hardening in shorter time, so you would not need a clamping of f.e. the deckplanks. I normally use a wood glue (Name is Ponal express) which is hardened after latest 5 minutes. So enough time to correct if necessary but fast enough. Even if you press two wooden parts together, so very thin layer of glue it hardens in appr. 1 min...... i guess something similar is also available in US.....
BTW: important is to learn and to be open for new things, we all could learn every day something new. More important is not to make mistakes once more.
You are making here a good progress and your experience is growing with every single plank, and off course with every model.
 
Hi Pathfinder,

Great work and progress, looks like you were born to start with this hobby.
At least you are enjoying it as you make the greatest progress on your model of us all. Except for John off course who is working at 10 models at once :).

Like to see your progress and new ideas.

Regs Maarten
 
Hi Maarten,

I’m definitely enjoying myself. There have been a lot of “how do I do this moments” and I’m sure there will be a lot more of those. I’ve have another hobby that I’ve enjoyed for years ( Large Scale Trains).

I’m fascinated and intrigued by the models and modelers on this forum. I’m slowly working my way through the posted contents of the many threads.
 
Masts and bowsprit:

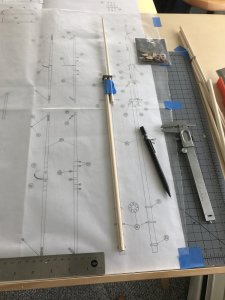
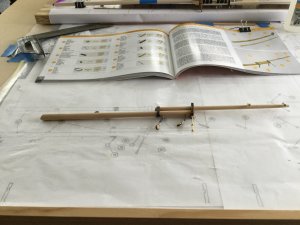
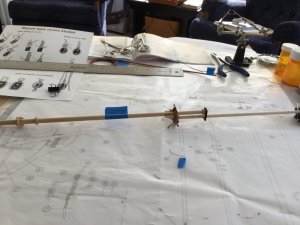
I’ve started work on the bowsprit and masts. I’m finding it difficult to decipher what parts go where. I find that I have to look at the build plans as well as the rigging plans to find where to fasten the various blocks.

The only knot I know how to tie are my shoelaces. So knots have become another research item.

CA5690C2-B2C0-44E4-9347-061C20BD9DED.jpeg4D8F8CD3-0A42-4D95-B1BD-CEC78BFAB6C7.jpeg9A84AE9C-5074-481A-AA22-EEC96EA44B5F.jpeg

I found a book on line “The Art of Rigging” by George Biddlecombe. That and other finds on the Internet have helped with understanding the purpose and use of various knots.
 
Masts and bowsprit:

I’ve started work on the bowsprit and masts. I’m finding it difficult to decipher what parts go where. I find that I have to look at the build plans as well as the rigging plans to find where to fasten the various blocks.
...........
I found a book on line “The Art of Rigging” by George Biddlecombe. That and other finds on the Internet have helped with understanding the purpose and use of various knots.

Very good progress with the mast construction and the start of the rigging.

YES oh YES

Sometimes it is necessary to take one or two looks into plans or Instructions !!!!

We can see on your desk, that there is a thick instruction booklet with the kit, much more than most kits have and you are already starting to get a small library...... that is a real good Basis for improvement
 
Back
Top