-

Win a Free Custom Engraved Brass Coin!!!
As a way to introduce our brass coins to the community, we will raffle off a free coin during the month of August. Follow link ABOVE for instructions for entering.
-

PRE-ORDER SHIPS IN SCALE TODAY!
The beloved Ships in Scale Magazine is back and charting a new course for 2026!
Discover new skills, new techniques, and new inspirations in every issue.
NOTE THAT OUR FIRST ISSUE WILL BE JAN/FEB 2026
You are using an out of date browser. It may not display this or other websites correctly.
You should upgrade or use an alternative browser.
You should upgrade or use an alternative browser.
Cutter Alert 1/48 cross section [COMPLETED BUILD]
- Thread starter DST07
- Start date
- Watchers 18
-
- Tags
- alert completed build cutter
Very nice work. The discussion on thick stuff was interesting. The planking was intended to reinforce the frame joints, so follow the chocks with the thick stuff. It curves!
Thanks to everyone.
Another small update:
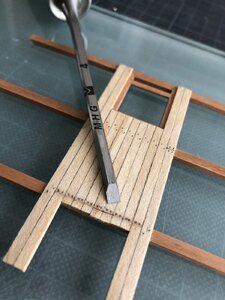
I cut the planks from a maple piece. I want to leave most of the section unplanked and decided to just plank the area in the center of the deck.
The caulking is done by the "2B Pencil" method. It was easy to do and looks good.
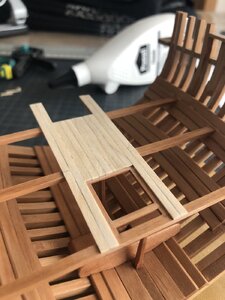
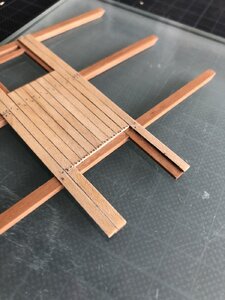
After sanding and a coat of oil:
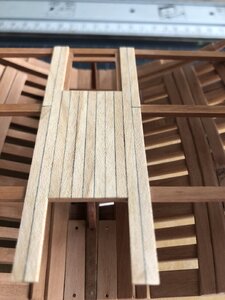
I also did the hatchway to the hold... at least a part of it. I should have planned the cross section to include all of the hatchway. Now it is "hanging in mid air" unsupported. The same will be true for the main hatchway and grating on the main deck
Can't change that now, so I will just continue and see how it turns out...
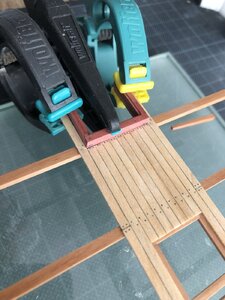
Anyway, I cut the pieces for the hatchway and the lap joints on the small table saw. The wood I used is pink ivory. I bought a small piece years ago to turn pens and thought it would be cool to represent the red color with it:
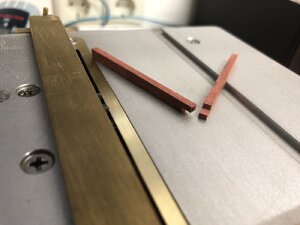
The rabbet for the grating was cut by hand with an Xacto knife and a small chisel. The sides are tilted 5° but it's difficult to see it on the model.
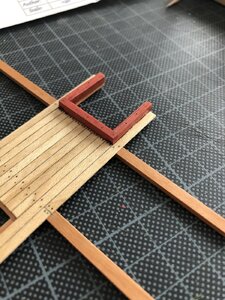
According to AOTS the rabbet was only cut in the longer pieces of the frame (coamings). A batten was attached to the short pieces of the frame to support the grating. I will try to cut a rod with only 0,5mm wide sides...
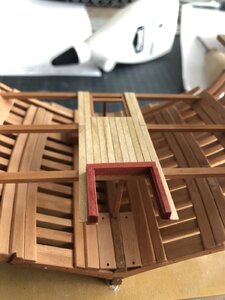
After clean up with sandpaper and oiled the color of the wood really turned red(ish):
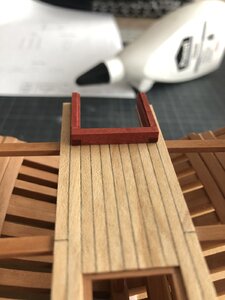
Another small update:
I cut the planks from a maple piece. I want to leave most of the section unplanked and decided to just plank the area in the center of the deck.
The caulking is done by the "2B Pencil" method. It was easy to do and looks good.

After sanding and a coat of oil:

I also did the hatchway to the hold... at least a part of it. I should have planned the cross section to include all of the hatchway. Now it is "hanging in mid air" unsupported. The same will be true for the main hatchway and grating on the main deck
Can't change that now, so I will just continue and see how it turns out...
Anyway, I cut the pieces for the hatchway and the lap joints on the small table saw. The wood I used is pink ivory. I bought a small piece years ago to turn pens and thought it would be cool to represent the red color with it:

The rabbet for the grating was cut by hand with an Xacto knife and a small chisel. The sides are tilted 5° but it's difficult to see it on the model.
According to AOTS the rabbet was only cut in the longer pieces of the frame (coamings). A batten was attached to the short pieces of the frame to support the grating. I will try to cut a rod with only 0,5mm wide sides...

After clean up with sandpaper and oiled the color of the wood really turned red(ish):

- Joined
- Jul 22, 2017
- Messages
- 331
- Points
- 268

Hello Dan,Thanks to everyone.
Another small update:
I cut the planks from a maple piece. I want to leave most of the section unplanked and decided to just plank the area in the center of the deck.
The caulking is done by the "2B Pencil" method. It was easy to do and looks good.
View attachment 161285
After sanding and a coat of oil:
View attachment 161286
I also did the hatchway to the hold... at least a part of it. I should have planned the cross section to include all of the hatchway. Now it is "hanging in mid air" unsupported. The same will be true for the main hatchway and grating on the main deck
Can't change that now, so I will just continue and see how it turns out...
Anyway, I cut the pieces for the hatchway and the lap joints on the small table saw. The wood I used is pink ivory. I bought a small piece years ago to turn pens and thought it would be cool to represent the red color with it:
View attachment 161340
The rabbet for the grating was cut by hand with an Xacto knife and a small chisel. The sides are tilted 5° but it's difficult to see it on the model.
According to AOTS the rabbet was only cut in the longer pieces of the frame (coamings). A batten was attached to the short pieces of the frame to support the grating. I will try to cut a rod with only 0,5mm wide sides...
View attachment 161341
After clean up with sandpaper and oiled the color of the wood really turned red(ish):
View attachment 161342
Do not worry about the minor miscalculation. The reason I love scratch building is because we always learn something from one model to the next.
Also, your use of timbers and use of Danish oil makes your model very attractive. Keep going Dan, before you know it you'll have it displayed on a mantle or shelf and be able to walk around a saying, "Yes!!! I did that!!!"
Raymond
... I love scratch building is because we always learn something from one model to the next.
..."
Raymond
Absolutely true! First thing I learned today was "never rush anything" and "do not use superglue again".
I took off the deck by soaking the white glue joints with a drop of water for about 5min and a gentle pull on the deck beams.
The hardest part was to get the pillars loose because I superglued them.

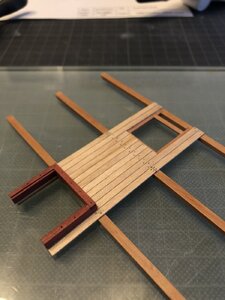
I treenailed the deck planks by pressing small indents with an awl and "filling them up" with a sharp pencil.
Now I have to go through my books and build logs in the forum to check the treenail pattern for the thickstuff planks. Then the deck will be glued back in place and the build continues.
- Joined
- Jul 22, 2017
- Messages
- 331
- Points
- 268

Outstanding Buddy. You are a Rockstar.Absolutely true! First thing I learned today was "never rush anything" and "do not use superglue again".
I took off the deck by soaking the white glue joints with a drop of water for about 5min and a gentle pull on the deck beams.
The hardest part was to get the pillars loose because I superglued them.
View attachment 161375
I treenailed the deck planks by pressing small indents with an awl and "filling them up" with a sharp pencil.
Now I have to go through my books and build logs in the forum to check the treenail pattern for the thickstuff planks. Then the deck will be glued back in place and the build continues.
For the same reason I am usually using only water based wood glueAbsolutely true! First thing I learned today was "never rush anything" and "do not use superglue again".
I took off the deck by soaking the white glue joints with a drop of water for about 5min and a gentle pull on the deck beams.
The hardest part was to get the pillars loose because I superglued them.
View attachment 161375
I treenailed the deck planks by pressing small indents with an awl and "filling them up" with a sharp pencil.
Now I have to go through my books and build logs in the forum to check the treenail pattern for the thickstuff planks. Then the deck will be glued back in place and the build continues.
Much much better - well done 

Nicely done! I’m enjoying this thread!
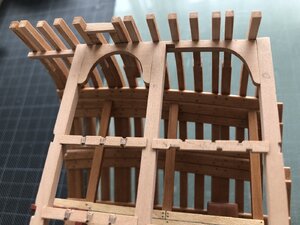
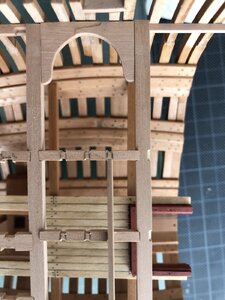
The main deck clamps are installed. I simplified them by making one piece instaed of two.
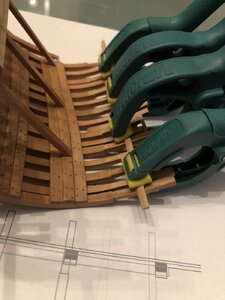
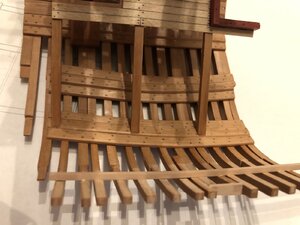
The deckbeams are cut and dryfitted. I was happy that they are aligned AND level. I imagined this step to be harder than it actually was
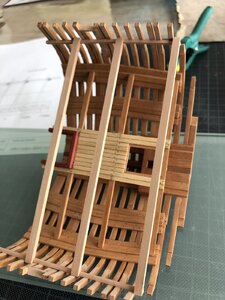
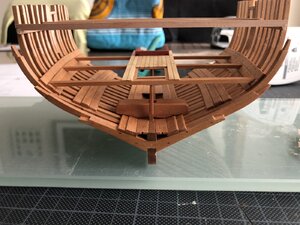
I'm planning to cut the notches for the carlings on the plan then bent them to shape. Only then I will build the sailroom to be able to measure the height from the model. Hope this works...
Thanks to everyone for Your motivating words


The deckbeams are cut and dryfitted. I was happy that they are aligned AND level. I imagined this step to be harder than it actually was


I'm planning to cut the notches for the carlings on the plan then bent them to shape. Only then I will build the sailroom to be able to measure the height from the model. Hope this works...
Thanks to everyone for Your motivating words
Thank You Raymand for Your kind words and everybody who is following along.
An outstanding modeler sounds good but I'm far from it . Although with every little succes we gain confidence.
This evening's work consisted of cutting the notches for the carlings and the carlings themselves.
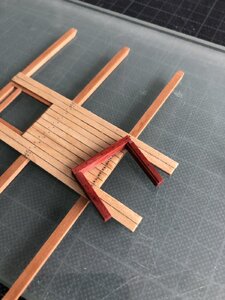
To cut the notches I built a small vise with angled jaws. The two blocks are glued to a base and hold the workpiece tight enough to mill it.
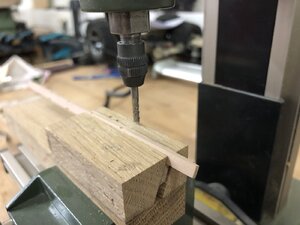
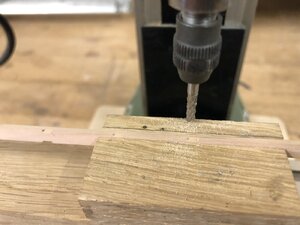
Then I test fitted the beams and carlings on my plan (the beams are temporarily fixed with rubber cement). The notches are marked for the ledges and ready to be milled.
I marked the required width (approximated for simplicity) so I don't accidently cut with the wrong diameter...
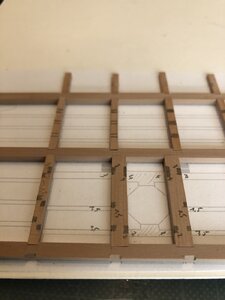
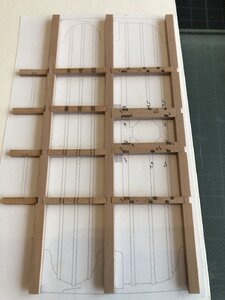
I'm surprised at how well it went to cut the notches and sand the carlings to the correct angle of the notches. The result is visually the same as to cut them by hand with chisels but a lot faster (once the "vise" was ready).
I will chisel the ones that remain visible.
An outstanding modeler sounds good but I'm far from it
This evening's work consisted of cutting the notches for the carlings and the carlings themselves.
To cut the notches I built a small vise with angled jaws. The two blocks are glued to a base and hold the workpiece tight enough to mill it.


Then I test fitted the beams and carlings on my plan (the beams are temporarily fixed with rubber cement). The notches are marked for the ledges and ready to be milled.
I marked the required width (approximated for simplicity) so I don't accidently cut with the wrong diameter...


I'm surprised at how well it went to cut the notches and sand the carlings to the correct angle of the notches. The result is visually the same as to cut them by hand with chisels but a lot faster (once the "vise" was ready).
I will chisel the ones that remain visible.
beautiful workmanship
After a little pause I can finally continue work on the cross section. After all it has to be finished when I receive the Trident Alert 
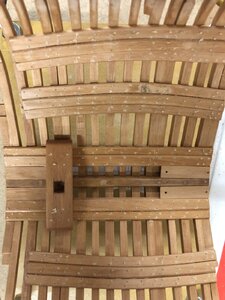
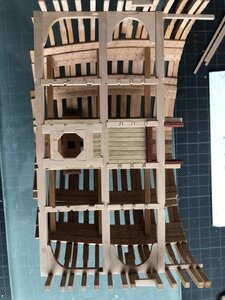
Added a few planks on the lower deck for the sailroom:
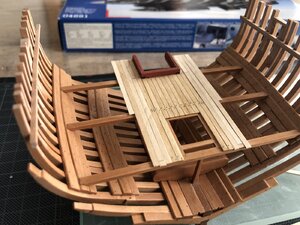
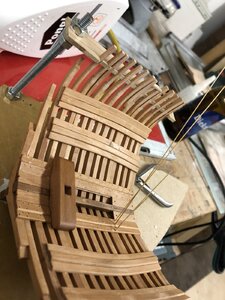
And the main deck framework is done, glued and sanded. Now I can start work on the sailroom...
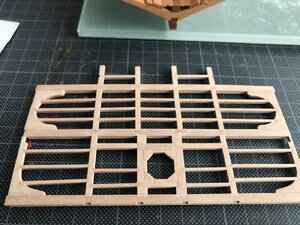
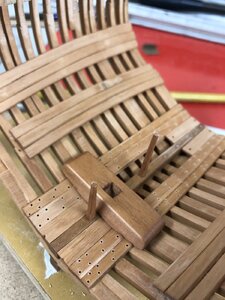
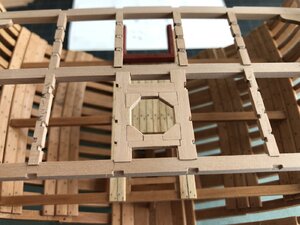
I rounded the corners of the main Hatchway frame:
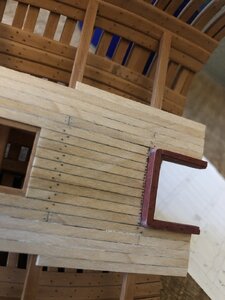
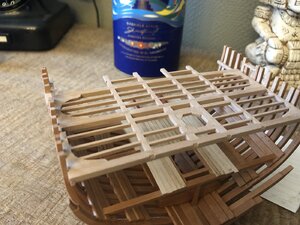
Still have to apply oil to the sanded areas to bring everything back to the same tone.
Added a few planks on the lower deck for the sailroom:

And the main deck framework is done, glued and sanded. Now I can start work on the sailroom...

I rounded the corners of the main Hatchway frame:


Still have to apply oil to the sanded areas to bring everything back to the same tone.
- Joined
- Apr 20, 2020
- Messages
- 6,241
- Points
- 738

Hello DanAfter a little pause I can finally continue work on the cross section. After all it has to be finished when I receive the Trident Alert
Added a few planks on the lower deck for the sailroom:
View attachment 172771
And the main deck framework is done, glued and sanded. Now I can start work on the sailroom...
View attachment 172772
I rounded the corners of the main Hatchway frame:
View attachment 172774
View attachment 172773
Still have to apply oil to the sanded areas to bring everything back to the same tone.
it's looking beautiful

You better hurry because the alert is coming soon


