



True storyExcellent work, write-up and drawings, Dom.

 |
The beloved Ships in Scale Magazine is back and charting a new course for 2026! Discover new skills, new techniques, and new inspirations in every issue. NOTE THAT OUR NEXT ISSUE WILL BE July/August 2026 |
|
 |
As a way to introduce our brass coins to the community, we will raffle off a free coin during the month of August. Follow link ABOVE for instructions for entering. |
|
True storyExcellent work, write-up and drawings, Dom.


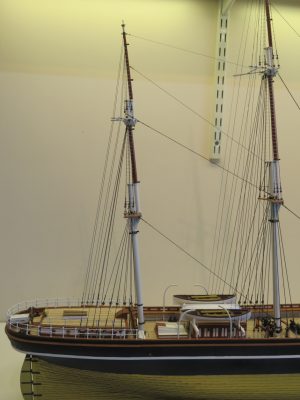
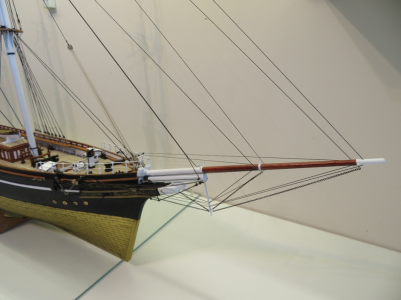
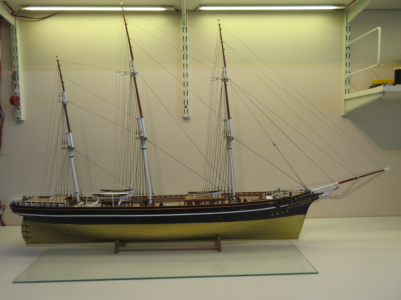


A nice picture of you in the mountains, Dom. Good to see you back on the yard with some new additions.Part 49: Ex-Summer Holiday (Slow) Restart – Some Missed Details:
After a long late summer break up in the Austrian mountains (very nice), I am now picking up where I left off after finishing the standing rigging. I still have a little bit of decorating/sorting out to do on the house after the building work, which is soaking up some of my spare time, but I can now start working on the model again.
View attachment 636989
At 3000m - halfway through a 9.5hr hike (I’m very tired!)
Back-2-it: Unfortunately, I wasn’t able to do anything after the last post, so I am trying to remember what comes next. My intention was to start working on the jibs, but after looking at the model with fresh eyes, I spotted a couple of things (probably many more to come) that I had missed:
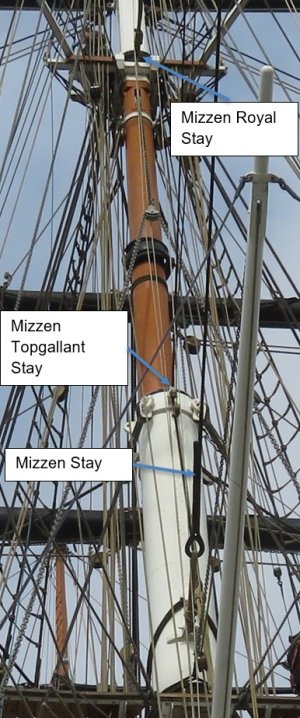
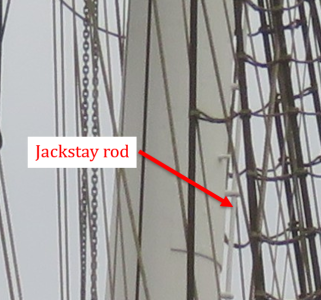
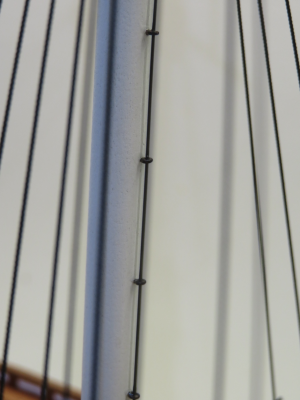
Mast jackstays: Because hoops are not used to secure the spencer and spanker sails to the masts, jackstay rods are fitted down the back of the main and mizzen masts. The luffs of the main spencer and spanker sails are lashed to the rods to secure them. The jackstays are fitted to the back of the masts in a similar manner to those on the yards using eyelets and are 1” in diameter (same as on the yards).
View attachment 636990
The mizzen jackstay rod
I used 0.5mm brass rod and made up some small eyelets for them. Fortunately, they weren’t too hard to fit at this stage, but it would have been a nightmare to do once the yards and running rigging were in place. I wasn’t sure whether to paint them white or leave them as “black” iron (the rods are painted white now), but I found an earlier photograph that showed the rods were left “iron black”, which I prefer because it gives some contrast against the mast otherwise, you would not know they were there.
View attachment 636991
Jackstay on the back of the main
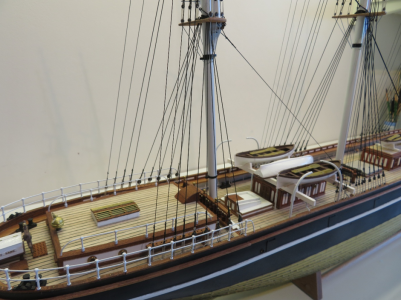
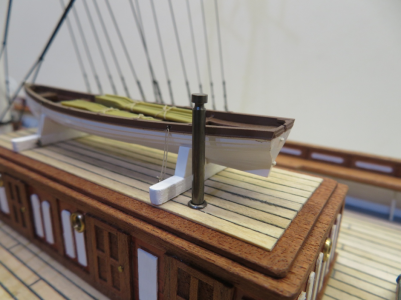
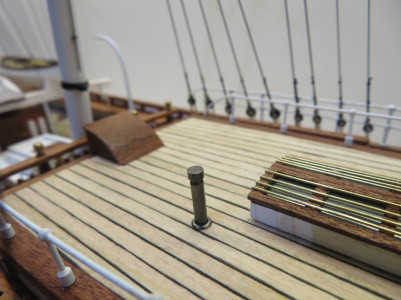
Stove pipe/chimney: There is a cook’s range at the rear of the forward deck house with a straight stove pipe coming through the roof just offset from the Gig. Surprisingly, Campbell missed this off his plans. I used 2.5mm brass tube, which looks about right in scale, made a small top and used a small eyelet for the base, which I then soldered together. There is also a small stove in the saloon of the poop deck house with a short chimney that comes out just forward on the port side of the skylight which I made up in a similar way. I blackened the pipes and fitted them.
View attachment 636992
View attachment 636996
Not much, but at least it gets the build underway again.
Next up: back to the rigging! Forward jibs and staysail.
Good morning Dom. Wow 9hrs in the mountains……must have felt really good when you got back to the hotelPart 49: Ex-Summer Holiday (Slow) Restart – Some Missed Details:
After a long late summer break up in the Austrian mountains (very nice), I am now picking up where I left off after finishing the standing rigging. I still have a little bit of decorating/sorting out to do on the house after the building work, which is soaking up some of my spare time, but I can now start working on the model again.
View attachment 636989
At 3000m - halfway through a 9.5hr hike (I’m very tired!)
Back-2-it: Unfortunately, I wasn’t able to do anything after the last post, so I am trying to remember what comes next. My intention was to start working on the jibs, but after looking at the model with fresh eyes, I spotted a couple of things (probably many more to come) that I had missed:
Mast jackstays: Because hoops are not used to secure the spencer and spanker sails to the masts, jackstay rods are fitted down the back of the main and mizzen masts. The luffs of the main spencer and spanker sails are lashed to the rods to secure them. The jackstays are fitted to the back of the masts in a similar manner to those on the yards using eyelets and are 1” in diameter (same as on the yards).
View attachment 636990
The mizzen jackstay rod
I used 0.5mm brass rod and made up some small eyelets for them. Fortunately, they weren’t too hard to fit at this stage, but it would have been a nightmare to do once the yards and running rigging were in place. I wasn’t sure whether to paint them white or leave them as “black” iron (the rods are painted white now), but I found an earlier photograph that showed the rods were left “iron black”, which I prefer because it gives some contrast against the mast otherwise, you would not know they were there.
View attachment 636991
Jackstay on the back of the main
Stove pipe/chimney: There is a cook’s range at the rear of the forward deck house with a straight stove pipe coming through the roof just offset from the Gig. Surprisingly, Campbell missed this off his plans. I used 2.5mm brass tube, which looks about right in scale, made a small top and used a small eyelet for the base, which I then soldered together. There is also a small stove in the saloon of the poop deck house with a short chimney that comes out just forward on the port side of the skylight which I made up in a similar way. I blackened the pipes and fitted them.
View attachment 636992
View attachment 636996
Not much, but at least it gets the build underway again.
Next up: back to the rigging! Forward jibs and staysail.

 . Rigging a complex ship like the CS never seems to end. As Peter V says it’s all in the details and you are owning this. Cheers Grant
Hi Grant,Good morning Dom. Wow 9hrs in the mountains……must have felt really good when you got back to the hotel
| No. | Fore and Aft Sails | Reefs |
| 1 | Flying Jib | |
| 2 | Outer Jib | |
| 3 | Inner Jib | |
| 4 | Fore Topmast Staysail | |
| 5 | Main Royal Staysail | |
| 6 | Main Topgallant Staysail | |
| 7 | Main Topmast Staysail | |
| 8 | Mizzen Topgallant Staysail | |
| 9 | Mizzen Topmast Staysail | |
| 10 | Mizzen Staysail | |
| 11 | Main Spencer | |
| 12 | Spanker | reefed |
| Foremast | ||
| 13 | Fore Royal | |
| 14 | Fore Topgallant | |
| 15 | Fore Upper Topsail | Reefed |
| 16 | Fore Lower Topsail | |
| 17 | Fore Course | Reefed |
| Main Mast | ||
| 18 | Main Skysail | |
| 19 | Main Royal | |
| 20 | Main Topgallant | |
| 21 | Main Upper Topsail | Reefed |
| 22 | Main Lower Topsail | |
| 23 | Main Course | Reefed |
| Mizzen Mast | ||
| 24 | Mizzen Royal | |
| 25 | Mizzen Topgallant | |
| 26 | Mizzen Upper Topsail | Reefed |
| 27 | Mizzen Lower Topsail | |
| 28 | Crossjack | Reefed |


You made the right choice, Dom. Make a decent study of what you are intending to do with the rigging and the sails. But what a challenge to fit that amount of sails on your model. Working on different things from time to time keeps it fun.Part 50: Sorting Out the Sail Plan
Rather than launching into the sails and running rigging, I have been going through various references and pictures to decide how I am going to proceed. This is a critical decision point for how the model will turn out, so I want to take my time. Generally, I will follow Campbell’s sail and rigging plans as much as possible as these are probably the ones that are more “correct” for this model. Suffice to say that it is not practical for me to try and include “every” piece of rigging at this scale - enough, and no further!
Square Sails: there is plenty of information available about how yards and square sails are generally rigged on ships of this type and I am certainly not going to go into the detail here, it’s far too much! You can look at Zoly’s post on the SOS which gives a good sense about what running rigging is needed for each yard and sail Square-rigged sail parts and running rigging | Ships of Scale . Each sail was set by adjusting its shape using leech, bunt, slab and clew lines, so there is a lot of running rigging associated with each one - and there are a lot of sails to deal with on the Cutty Sark! It’s a case of being very methodical, checking which size of ropes and blocks are needed for each sail and where they are belayed - I may be some time!
Note 1: The heads of the square sails on the Cutty Sark were attached to the yard jackstay rods by short lengths of rope yarn called rovings. The sails were not continuously lashed around the mast as some models often have them. This was done on the ship so that the sail could be rapidly cut away from the yards in an emergency.
Note 2: Not all of the sails had reef bands, and I have not been able to find out which ones did, or if some of the lower sails had two reef bands. Again, Richard advised that this was a very variable thing and to go with Campbell’s plans which show the fore and main lower course, the mizzen crossjack and the upper topsails had single reefs.
Jibs: The problem I ran into here is that it is not clear which jibs were fitted to the Cutty Sark and their arrangement. Some information says she ran with two jibs (flying and jib) but other references and images show her with either two or three jibs and a fore topmast staysail. Many of the paintings of the Cutty Sark were by artists who had never seen the ship in full sail, and since many clippers sailed with three jibs and a fore stay sail, that is generally what they painted.
Jock Willis' Specification for the Sails on the Cutty Sark:
Sails. 1 Flying Jib, 3 Standing Jibs, 2 Fore Topmast Staysails, 2 Fore Sails, 2 Upper Fore Topsails, 2 Lower Topsails, 2 Top Gallant Sails, 1 Royal (Fore), 2 Main Sails, 1 Royal (Main), 2 Upper Main topsails, 2 Lower Main topsails, 2 Main Top Gallant sails, 1 Main Skysail, 1 Main Topmast Staysail, 1 Main Spencer, 1 Mizzen Cross Jack, 1 Mizzen Top Gallant Sail, 2 Upper Mizzen Topsails, 2 Lower Mizzen Topsails, 2 Spankers, 1 Mizzen Topmast Staysail, 1 Mizzen Top Gallant Staysail, 3 Topmast Studding Sails, 3 Top Gallant Studding Sails, 2 Lower Studding Sails, 2 Wind Sails, 1 Main Top Gallant Staysail, set of boat sails, spars and gear complete as specified. A Quarter Deck Awning to after hatch with stanchions complete with wire ridge rope, 2 setting pins, 6 palms assorted, 24 sail needles assorted, 6 sail hooks and 4 iron rubbers.
The initial specifications say something else, but the sail and rigging arrangement was changed (as for many ships under construction and fitting out) before she even left the yard, so they are not a reliable source of information. The rigging was certainly changed from Captain to Captain, and it would be expected that when the ship was on the tea runs, they would crowd-on as much sail as possible as needed. Sankey swears she only carried two jibs, based on his grandfather’s say The Ship Cutty Sark , but that was probably over a later period in the ship’s rich history.
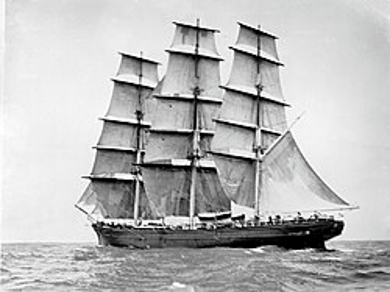
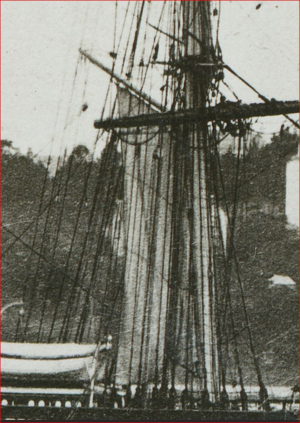
I contacted Richard Dunn and he agreed that it was difficult to pin down any specific arrangement. He said that the rigging evolved constantly and was not a fixed thing and he has found at least three versions of the foremast stays, based off photos. The famous shot by Captain Woodget clearly shows her running with two jibs and a fore topmast staysail.
View attachment 638524
Taken by Captain Woodget while she was becalmed
Based on photos and other rigging plans, the ship probably sailed with a flying jib, a jib and a fore topmast staysail when she was on the wool runs (when Captain Woodget’s picture was taken). However, it has to be remembered, that in her full tea rig, she had taller masts and a longer jibboom, and other references state that she sailed with an inner and outer jib as well as the flying jib and topmast staysail. The only difference for the three-headsail arrangement was that the outer jib was not hoisted.
So, at this point, I am still dithering about which way to go! The set of sails I purchased from HisModel included a flying jib, inner and outer jibs and the fore staysail, so do I crowd-on the sails, or pare back? Decisions, decisions!
Staysails: Again, there are some differences from period to period, but in general, she carried a fore topmast staysail, a main royal staysail, a main topgallant staysail, a main topmast staysail, a mizzen topmast staysail, a mizzen topgallant staysail and a mizzen staysail.
Spencer sail: is a small quadrilateral shaped sail attached to a gaff on the rear of the main mast. There is no boom and the sail was set in a similar way to the head sails. The sail was attached to the jackstay rod on the back of the main mast with lashings. It was not clear in any references how the sail was attached to the gaff, but Richard sent me a picture that he had which clearly shows that rather than being lashed to the gaff (which would not be practical because of access), it was attached using hoops (I made up some blackened brass rings to do the job).
View attachment 638525
The spencer sail
Note: Campbell’s plans show the mizzen topgallant staysail, the mizzen staysail and the spencer sail on the same sail plan, but in practice, the mizzen staysail and spencer would never be set at the same time.
The Spanker/Driver: this is a large quadrilateral sail that is attached to the mizzen mast jackstay rod in the same way as for the spencer. There is a metal rod that runs the length of the underside of the gaff which is fixed at both ends through which metal hanks attached to the head of the sail could run (there were other methods used during the ships time, but the rod is probably the easiest to use). The bottom of the sail was not lashed to the boom but was pulled taught using the outhaul.
Summing up: it is another situation for the model builder to decide, based on various records and images regarding which sail plan you go with, there is certainly prescedence for several arrangements - take your pick!
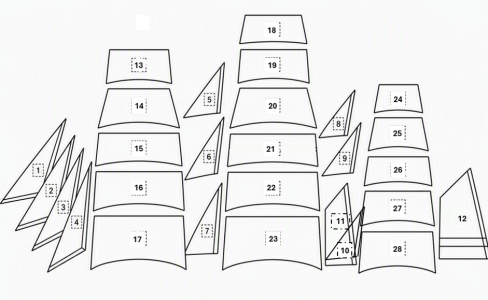
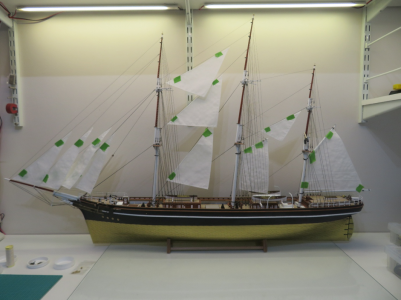
Here is a simplified view of the sail arrangement for the Cutty Sark (without any stunsails) that I think will be my choice and omitting the mizzen staysail (10).
View attachment 638526
No. Fore and Aft Sails Reefs 1 Flying Jib 2 Outer Jib 3 Inner Jib 4 Fore Topmast Staysail 5 Main Royal Staysail 6 Main Topgallant Staysail 7 Main Topmast Staysail 8 Mizzen Topgallant Staysail 9 Mizzen Topmast Staysail 10 Mizzen Staysail 11 Main Spencer 12 Spanker reefed Foremast 13 Fore Royal 14 Fore Topgallant 15 Fore Upper Topsail Reefed 16 Fore Lower Topsail 17 Fore Course Reefed Main Mast 18 Main Skysail 19 Main Royal 20 Main Topgallant 21 Main Upper Topsail Reefed 22 Main Lower Topsail 23 Main Course Reefed Mizzen Mast 24 Mizzen Royal 25 Mizzen Topgallant 26 Mizzen Upper Topsail Reefed 27 Mizzen Lower Topsail 28 Crossjack Reefed
View attachment 638527
The Fore and Aft Sail Arrangement
I am not sure about the size of the mizzen topmast staysail, it looks on the small side, but I could not find an authentic scale size for it. The sail set that I purchased from HisModel included the four head sails, but there is no mizzen topgallant staysail (it was not always set), so I will make one to complete the set (I need to find some suitable cloth that matches the other sails, or order some from HisModel).
Next up: The lower ratlines, sheer poles and fairleads (so much fun!)

That is looking very nice, Dom. And indeed, making those tiny rigging-parts is very ‘jar-full’ ……Part 51: Rigging Part 6. The Lower Ratlines, Sheer Poles and Fairleaders + Visit to the SS Great Britain
My wife and I were out and about visiting some friends and relatives in the southwest. While we were down there, we took the opportunity to visit the museum ship SS Great Britain in Bristol, which was very interesting, so I have posted a few pictures on the SOS here SS Great Britain.
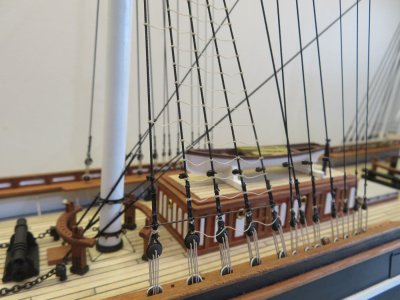
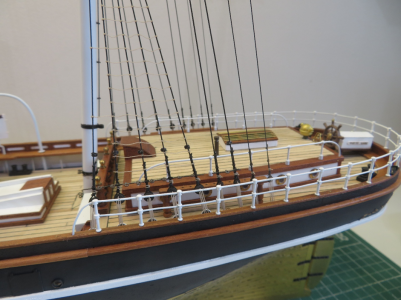
I haven’t had much time to work on the ship over the last couple of weeks, but I have done some work on the lower shrouds and ratlines, so I thought I would just post current progress just to keep the log going. I have managed to finish the port side, so I have included a bit more detail in this part. I will work on the starboard side this coming week, but because it is just a “rinse and repeat”, I will just post a few pictures when that is done.
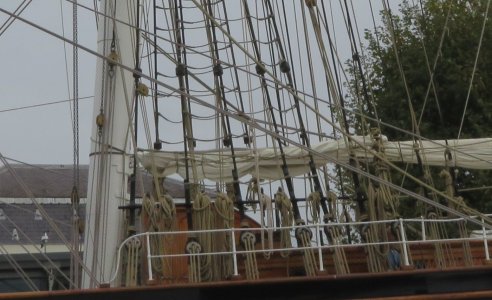
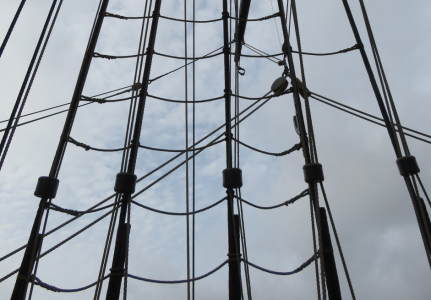
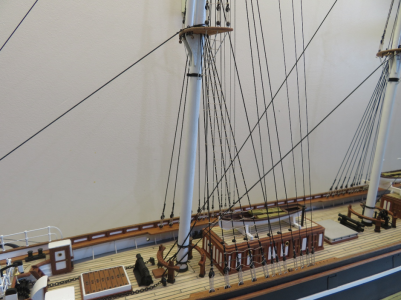
Lower ratlines: On each mast, the ratlines on the lower shrouds span the aft four shrouds with one link to the foremost shroud every fifth run. The rope used for the ratlines on the lower shrouds is slightly thicker than on the upper shrouds, but technically, at scale, the ratlines would be 0.1mm on the upper and 0.17mm on the lower (which is too small to be dealing with on the model and is almost invisible from any distance!). The smallest diameter of rope available from Ropes-of-Scale is 0.25mm, which is what I used on the upper shrouds, and stepping to 0.35mm would make them too thick, so I kept at 0.25mm for the lower ratlines as well - I doubt anyone will notice 0.08mm!
View attachment 643347
Lower shrouds and ratlines. Note the fairleads attached to each shroud.
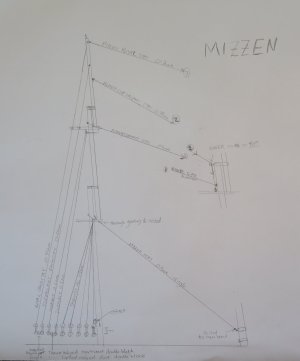
A plain 1” iron sheer pole/spreader is attached to the bottom of the shrouds just above the deadeyes on the fore and main mast. On the mizzen, the pole has eyes welded to provide some additional belaying pin positions.
View attachment 643348
Mizzen sheer poles with belaying pins
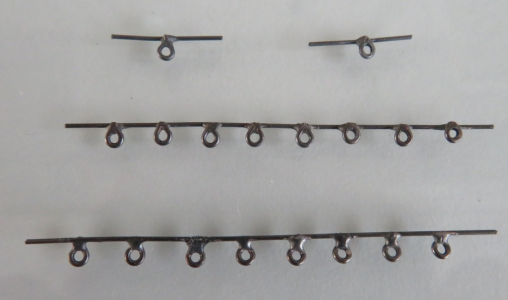
I used some 0.5mm brass rod for the poles, and to make the belays on the mizzen, I soldered cut down 1mm copper eyelets onto the rod, which was not straight forward because the shrouds are not evenly spaced. There is also a short pole on the mizzen backstays that can be seen in the picture:
View attachment 643349
Mizzen Sheer Poles (one or two are a bit “iffy” , but they will do the job)
Note: a lot of models use a wooden batten for the spreader rather than a rod, which is wrong.
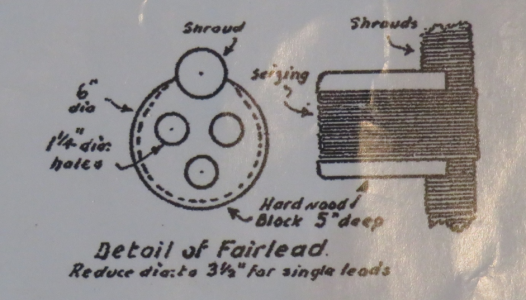
The Fairleaders: The fairleaders are used to keep the ropes for the bunt, leech and clew lines for each of the sails against the shrouds. The cylindrical fairleads that can be seen in the image were made of lignum and were in 6” in diameter and 5” deep, shaped to sit against the shroud and were seized in place (just above the seizings on the shrouds). Note: Longridge used a wooden batten lashed to the inside of the shrouds for this, but I could not find any references or images to support this, only for the cylindrical ones (which are much neater anyway!).
Campbell’s plans show that the shroud fairleads had three holes for the ropes to run through to their belaying positions. Smaller single fairleads were also attached to some of the backstays. It is not clear from Campbell’s plans which stays backstays had fairleads attached, fortunately, I was able to make out the ones that did from my pictures.
View attachment 643350
Detail of the fairleads attached to the lower shrouds (Campbell)
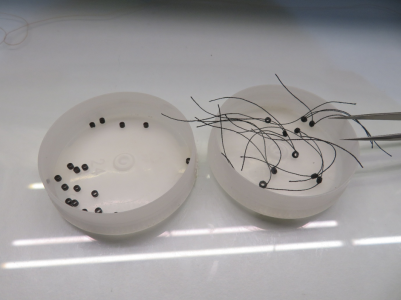
The scale size for each fairlead is 2mm x 1.7m (which is tiny!), and I needed to make 52 (I also needed a few extras because they will be needed for some of the other running rigging). Obviously, no chance of drilling three small holes, but a larger 1mm one is sufficient because I will be using 0.25mm rope for the running rigging that uses them. I had a lot of problems making them all the same size, but the biggest issue was that they kept splitting and I was lucky to get one in five, so most were scrap. With many coins in the jar, I temporarily paused and eventually found some high-quality 2mm hardwood dowels which worked a lot better, however, suffice to say, I’m not doing that again anytime soon! To finish them, I swilled the blocks around in some gloss black paint and wrapped them with some turns of thread. I did not want to make them larger, which would have made them easier to do, because they would have been “out-of-scale” and look wrong. The smaller single fairleaders were just too small for me to make, so I used the same size on the shrouds and the backstays (which at this scale are indistinguishable at any distance). Attaching them to the shrouds was not such and easy task, and in the end, I used some CA gel to hold them in the correct position and then tied them with the thread.
View attachment 643351
Making the fairleads
View attachment 643352
Fore
View attachment 643355
Main
View attachment 643353
Mizzen
Next up: Rinse and repeat for the starboard side