On Saturday I had some time to work on the ship. I wanted to cut a couple thin strips to use to basically mark the side of the ship to make sure the gun port alignment would look good. So I got out my Byrnes saw. And next thing you know I was totally out of control. An hour and a half later I had the following. I cut 8 Cherry planks for the whales, a .25" x .25" cherry piece for the keel, two rabbet strips, 4 thin boxwood strips for marking the gun port alignment etc. and about 40 3/64" Alaskan Cedar planks. I also cut some parts for the stern on the scroll saw. Here it is all piled on and around the model.

I didn't take any photos of this but, the next thing I did was take a 1/8" x 1/4" strip to square up the backbone. I measured the distance between the bulkhead at the center of the ship along the backbone and then cut two equal length pieces and glued one on each side. I didn't take any photos before but there was an easily visible curve along the center of the ship which is gone now.
As a side note I thought I would mention even though I have the Byrnes table saw, I still use my little Proxxon shown below for cutting strips to length, and other light duty one time cut sort of stuff. Largely because I keep a fine tooth blade on it for really clean cuts, and a 36 tooth Carbide on the Byrnes.
The next thing I did was glue the stern timbers on. Here is really the first design error I found since I started building this. The stern timbers extend past the back of the backbone because I didn't take into account the angle on the stern post in my design. Not a big deal just need to grind it down but thought I'd show it to everyone.
I also used my Ships of Scale clamps to add the cheeks on the front. I'm calling the clamps that because I saw them here on this web site. They're great clamps and reasonably priced from Menards.
Yesterday I planked the mortar beds with some very thin walnut planking from the scrap bin, and glued them in. I did not do any type of seams on the planking because this will be under the mortar in the bottom of an octagonal hole so probably 95 covered. You can also see the side braces I added the day before to straighten the keel.
And the larger View
I glued a ledge on the back of one of the bulkheads. It is curved to match the crown of the deck, so the subdeck piece will be glued down to match the arc of the bulkheads.
And finally roughed in the stern timbers to match the bulkhead and stern post, and glued on the rabbet strips. When I glued the rabbet strip on I realized the rabbet was just slightly narrower than the backbone. Don't think this will cause any problems, but the reason is the plywood I used is .208" thick and the keel will be .25" thick.

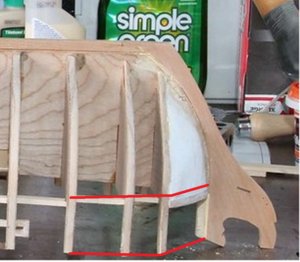
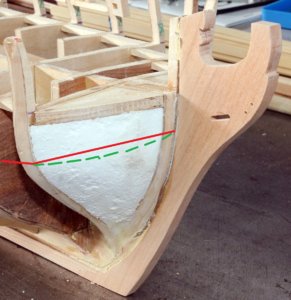
If I were building a kit, I would be very confident that the next step I should work on is filling in the bow and stern blocks and then fairing the hull, before I put anything on it that I might eventually break off. However; with this not being a kit, I think I'm going to approach it a little differently. The one thing I haven't felt confident with on this whole process is the construction of the upper stern area around the cabins. So I'm going to work on framing the stern to the point that I feel confident this little project is going to be successful before I spend hours sanding the hull smooth. I'm also thinking I may frame the gun ports before I do any fairing, to strengthen the ears on the bulkheads.
So here's where I'm at now. I have cut out the formers for the cabin area etc, as well as cut out the wing transom. I cut the wing transom in from two 1/8" pieces of basswood and the soaked them in water for about an hour and clamped them to a piece of wood that was cut to match the camber of the rest of the deck. The wing is on the workbench held by the clamp.
Hoping to get some of this put together tonight, here's how it sits now.


