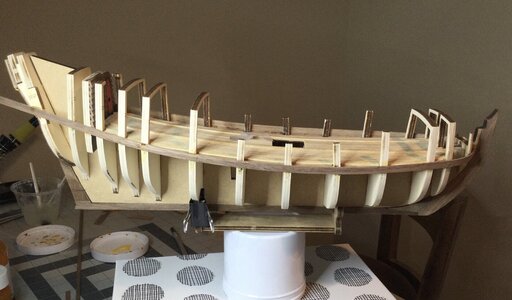
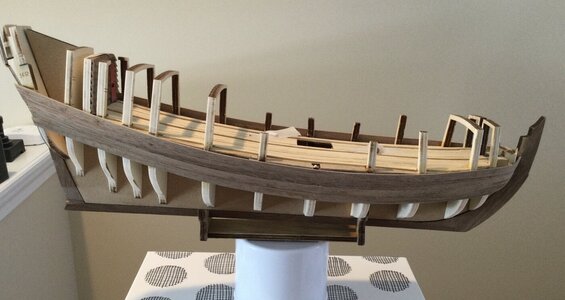
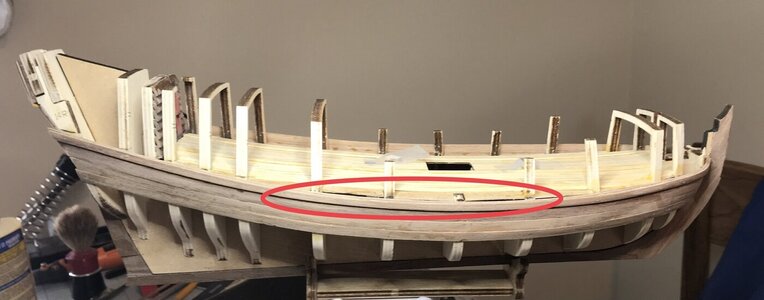
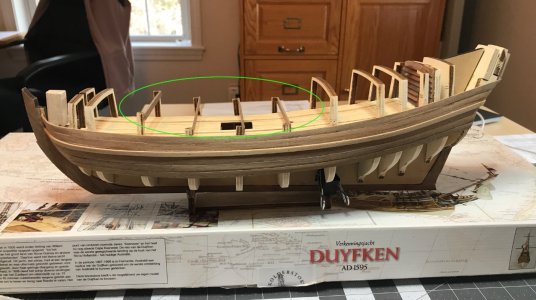
Good morning Jan. Hull fairing is something I am very nervous about. Especially if the bulkheads are soft wood as I may change the symmetry. I do agree with Paul tho. If I look at the last stern bulkhead it would seem that the planks would just touch the outer end of the bulkhead (May be photo angle which creates this perspective). Cheers GrantYes and no, That is a bit of a tricky area and needs a bit more work. My major problem was in the bow. The starter plank was OK but the next set of planks would not fit flush and bow out. Sort of a clinker effect. My other mistake was using a short sanding block (about 4 inches long) to do the fairing. Since then I've acquired three different sanding blocks (1 and 2 inches wide and 8 inches long).
Sanding blocks
I also use Heinrich's approved coarse sandpaper method.
-

Win a Free Custom Engraved Brass Coin!!!
As a way to introduce our brass coins to the community, we will raffle off a free coin during the month of August. Follow link ABOVE for instructions for entering.
-

PRE-ORDER SHIPS IN SCALE TODAY!
The beloved Ships in Scale Magazine is back and charting a new course for 2026!
Discover new skills, new techniques, and new inspirations in every issue.
NOTE THAT OUR FIRST ISSUE WILL BE JAN/FEB 2026
You are using an out of date browser. It may not display this or other websites correctly.
You should upgrade or use an alternative browser.
You should upgrade or use an alternative browser.
Duyfken 1/50 scale - Kolderstock
- Thread starter Pathfinder65
- Start date
- Watchers 23
-
- Tags
- duyfken kolderstok
- Joined
- Sep 3, 2021
- Messages
- 5,190
- Points
- 738

Time spend fairing the bulkheads is time well spend and yes, this is experience speaking...The RE-DO:
View attachment 357315
I had a busy weekend but managed to start a "Re-Do" of this part of the build. When I started this build I was learning a lot of new skills. Fairing the hull was a new skill. I was a little bit timid with my effort at the time. The planking of this hull just was not going according to Hoyle. So with a lot of hot water and perseverance I stripped the planks, sanded the bulkheads, checked the lay of the plank and I'm ready to start the planking process again.
I didn't pay close enough attention during fairing the frames of my Bluenose and had to pay my dues during planking.
My words of wisdom? Don't start planking until utterly satisfied with the fairing.
Yup, You and Paul are correct the last bulkhead needs a bit more work.I’m very careful in that area because that is the one spot that I’ve done a lot of pre-work.Good morning Jan. Hull fairing is something I am very nervous about. Especially if the bulkheads are soft wood as I may change the symmetry. I do agree with Paul tho. If I look at the last stern bulkhead it would seem that the planks would just touch the outer end of the bulkhead (May be photo angle which creates this perspective). Cheers Grant
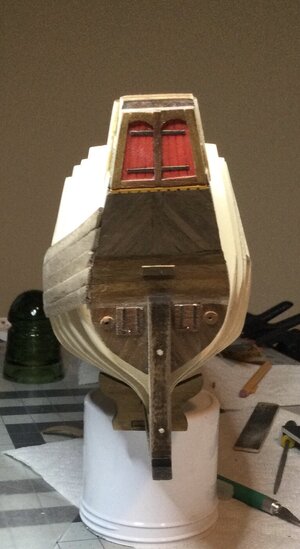
Good morning Jan. Awesome. I really like your standThe Re-Do progress:
View attachment 358180
The first plank in place after some “dedicated” fairing. I was little timid the first time around fairing the hull and my planking effort was. We will see how try number two turns out.
Seems like it’s like last winter and I’m working in the shipyard to take break from clearing snow from the driveway. Two trips out so far, fortunately the forecast amount of up to 14” of snow isn’t happening.
Anyway, “Re-Do” number 2 wasn’t the answer. The base plank sat a little to high so “Re-Do” number 3 is in progress.
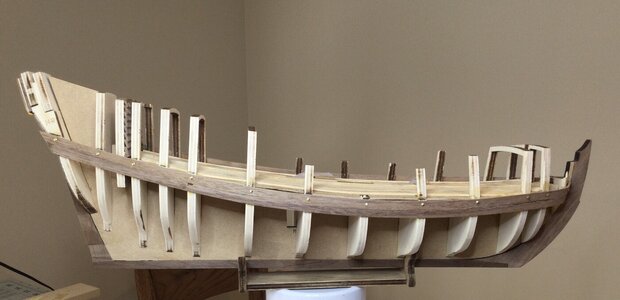
This time I pinned the first plank while wet, let it dry and then applied dabs of glue to the inside edges of the bulkheads. The second plank was dry fitted, soaked and clamped in place. I was surprised that it actually laid in the way I thought it should. I’m making great progress with two planks in place.
A discussion with Hans resulted in a bit of filing, sanding and fitting at the bottom of the stern keel piece.
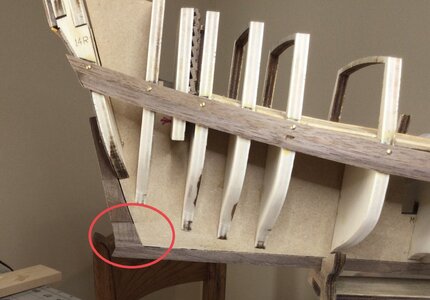
As with the WB build the bottom two planks fit into and end at the edge of the keel. It was good time to complete that before I got to far planking the hull.
Anyway, “Re-Do” number 2 wasn’t the answer. The base plank sat a little to high so “Re-Do” number 3 is in progress.

This time I pinned the first plank while wet, let it dry and then applied dabs of glue to the inside edges of the bulkheads. The second plank was dry fitted, soaked and clamped in place. I was surprised that it actually laid in the way I thought it should. I’m making great progress with two planks in place.

A discussion with Hans resulted in a bit of filing, sanding and fitting at the bottom of the stern keel piece.

As with the WB build the bottom two planks fit into and end at the edge of the keel. It was good time to complete that before I got to far planking the hull.
- Joined
- Jan 9, 2020
- Messages
- 10,566
- Points
- 938

It's looking very good, Jan. Remember the wales, while you still have access to clamp them.View attachment 359943
A very slow process. Plank number 4 was a “PITA”. Took four tries to get a good fit. I need to do an inventory of planks. I’ve managed to mangle quite a few.
Thank you for that reminder, that will probably be my next step.It's looking very good, Jan. Remember the wales, while you still have access to clamp them.
Yup, it's been some time since I worked on the little ship. The current frigid cold here keeps from working on the SB. I need to cut and trim the gunports on that and prefer to make that sawdust outside.Good to see you back at the Little Dove, Jan.
Jan
Sometimes you do, sometimes you don't.
I think I might have mentioned my solution for not breaking the tops of the frames earlier.

Didn't take long. While holding the hull and adding clamps to fix a plank in place there was this tiny "snapping" sound. The photo shows the result.
Time for a Re-Do squared.
Jan
I think I might have mentioned my solution for not breaking the tops of the frames earlier.

Didn't take long. While holding the hull and adding clamps to fix a plank in place there was this tiny "snapping" sound. The photo shows the result.
Time for a Re-Do squared.
Jan
A Re-Start of your Duyfken, started with a Re-Do …….Sometimes you do, sometimes you don't.
I think I might have mentioned my solution for not breaking the tops of the frames earlier.
View attachment 495660
Didn't take long. While holding the hull and adding clamps to fix a plank in place there was this tiny "snapping" sound. The photo shows the result.
Time for a Re-Do squared.
Jan
All the best for a smooth sailing from now on, Jan.
Regards, Peter

