-

Win a Free Custom Engraved Brass Coin!!!
As a way to introduce our brass coins to the community, we will raffle off a free coin during the month of August. Follow link ABOVE for instructions for entering.
-

PRE-ORDER SHIPS IN SCALE TODAY!
The beloved Ships in Scale Magazine is back and charting a new course for 2026!
Discover new skills, new techniques, and new inspirations in every issue.
NOTE THAT OUR FIRST ISSUE WILL BE JAN/FEB 2026
You are using an out of date browser. It may not display this or other websites correctly.
You should upgrade or use an alternative browser.
You should upgrade or use an alternative browser.
Duyfken 1/50 scale - Kolderstock
- Thread starter Pathfinder65
- Start date
- Watchers 23
-
- Tags
- duyfken kolderstok
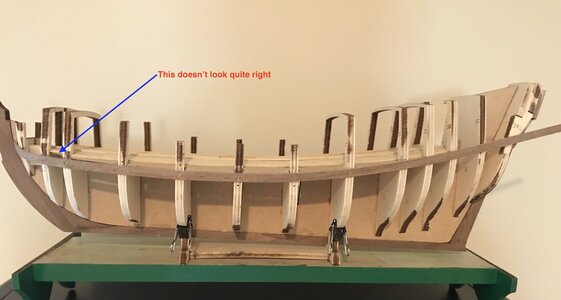
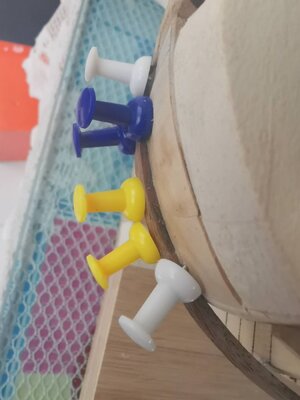
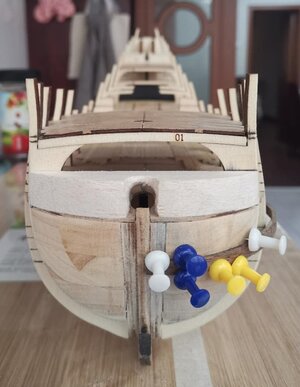
Indeed, I used the clamps to hold everything together temporarily while I turned the hull every which way to see how the plank was laying up against the bulkheads. I marked all the areas that looked troublesome and that needed further work.Another thing Jan. Those clamps ... get out the push pins and hammer and "nail" them to the bulkheads - you know what I mean by nailing .....
I have to admit it was fun to work on the "Little Dove".
Jan
Is the deck not flush on the bulkheads?
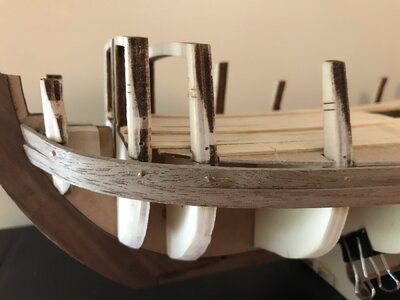
I used brads to hold the the first plank in place and dry fitted the second plank to try to figure out where I went wrong.
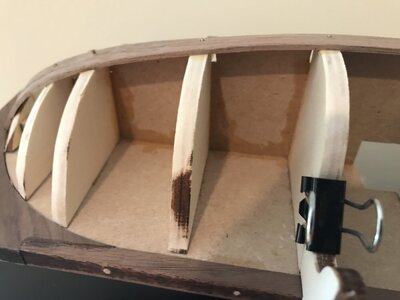
I don't see any gaps between the deck and the bulkheads .
Everything appears to be correct. Maybe I need to do a better bend of the plank at the bow to compensate? It's all in the dry fit stage so there is time to make a fix.
Jan
- Joined
- Jan 9, 2020
- Messages
- 10,566
- Points
- 938

Maybe it's a case of the plank not being bent enough, but even so, now you see why I said that you need to use balsa filler blocks on the bow sanded to shape. (Irrespective of what Hans said). Remember to apply the planks wet and then use the push pins to clamp them into place until the wood is dry.
Thanks for looking at my problem. It's sort of vexing. I soaked the planks and used the "K" iron to do the bends and pinned them as you suggested. Gonna scratch my head a bit and figure out what's not right.Maybe it's a case of the plank not being bent enough, but even so, now you see why I said that you need to use balsa filler blocks on the bow sanded to shape. (Irrespective of what Hans said). Remember to apply the planks wet and then use the push pins to clamp them into place until the wood is dry.
Jan
@Heinrich
Looking at your new WB/SW build log prompted me to do some more work on my "Little Dove". I've read, re-read and read again your posts on "Fairing" and realized that just once around the block on that piece of work is not sufficient nor does it result in a good base for laying all the planks. So following your example I sanded, fit, sanded, fit and sanded some more to get the first plank laid properly. Please excuse all the clamps (I known you use pins), they are only holding the plank while I check for fit. By your example I found that the stern needs just as much attention as the stem area.
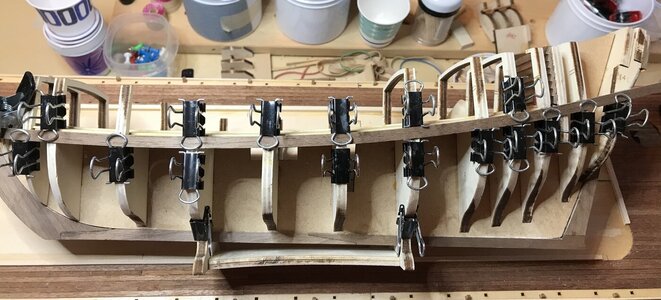
Port side first plank following the Kolderstok markings clamped and drying.
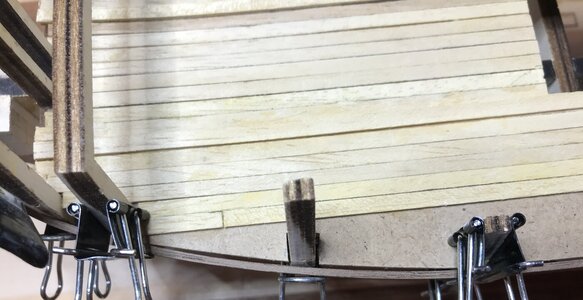
Rib/Frame #4 needs a little more work.
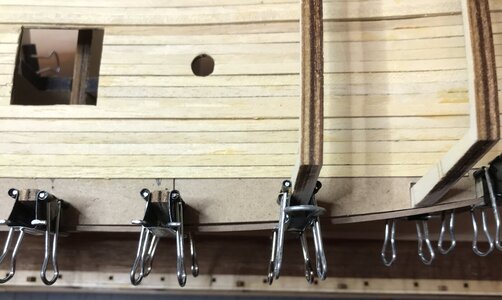
Rib/Frames #7 & #8 need a slight touch up.
Thank you my friend for showing the way. I am very glad to have learned this part of "Fairing and Planking". I had given up trying to figure out what was wrong and why my first plank was not flush with the deck.
Jan
Looking at your new WB/SW build log prompted me to do some more work on my "Little Dove". I've read, re-read and read again your posts on "Fairing" and realized that just once around the block on that piece of work is not sufficient nor does it result in a good base for laying all the planks. So following your example I sanded, fit, sanded, fit and sanded some more to get the first plank laid properly. Please excuse all the clamps (I known you use pins), they are only holding the plank while I check for fit. By your example I found that the stern needs just as much attention as the stem area.

Port side first plank following the Kolderstok markings clamped and drying.

Rib/Frame #4 needs a little more work.

Rib/Frames #7 & #8 need a slight touch up.
Thank you my friend for showing the way. I am very glad to have learned this part of "Fairing and Planking". I had given up trying to figure out what was wrong and why my first plank was not flush with the deck.
Jan
- Joined
- Jan 9, 2020
- Messages
- 10,566
- Points
- 938

Jan, I am very happy if my log and Piet's excellent tutorial were of help. That is what I meant by achieving a sense of personal accomplishment building a Kolderstok model. Without any bevel lines on the bulkheads or demarcations on every single bulkhead for each and every strake, you are required to develop a feeling for fairing and how the lines of the boat flow - thus it is a new skill that you have learnt and one which you can apply to all future builds. Well done!
Duyfken is/was a small ship, so in my opinion her model in 1:50 is just too small and the fine details can't be worked out properly. Although in general I am in favour of this scale, I believe my scratch built 1:40 model is a better size. Several colleagues in the Sydney Model Ship Builder Club built fine models of Duyfken in 1:50 from the Modellers Shipyard kit.
János
János
- Joined
- Jan 9, 2020
- Messages
- 10,566
- Points
- 938

I agree that 1:50 is on the small side Janos. The Willem Barentsz I am building now is also 1:50 so you certainly have your work cut out. The reality is that the smaller models are becoming more popular as lack of available space is sometimes at a premium. However, if you have the space for a larger model, that would always be preferable.Duyfken is/was a small ship, so in my opinion her model in 1:50 is just too small and the fine details can't be worked out properly. Although in general I am in favour of this scale, I believe my scratch built 1:40 model is a better size. Several colleagues in the Sydney Model Ship Builder Club built fine models of Duyfken in 1:50 from the Modellers Shipyard kit.
János
Indeed, I'm looking forward to more skill lessons. Placing the strakes on my other builds would have resulted in a better outcome if "only" I had known what "fairing" really was about. I thank you and Piet again for sharing your technique.Jan, I am very happy if my log and Piet's excellent tutorial were of help. That is what I meant by achieving a sense of personal accomplishment building a Kolderstok model. Without any bevel lines on the bulkheads or demarcations on every single bulkhead for each and every strake, you are required to develop a feeling for fairing and how the lines of the boat flow - thus it is a new skill that you have learnt and one which you can apply to all future builds. Well done!
Jan
Last edited:
A little progress.
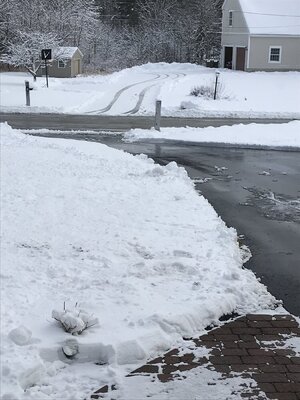
A chance to work in the boatyard after clearing the driveway of snow.
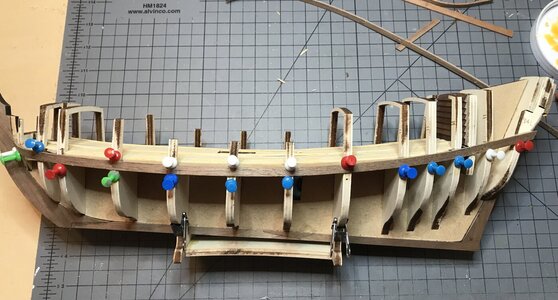
The first strake (plank) was done a couple of days ago, after a lot of fitting, sanding and fitting it was glued in place yesterday.
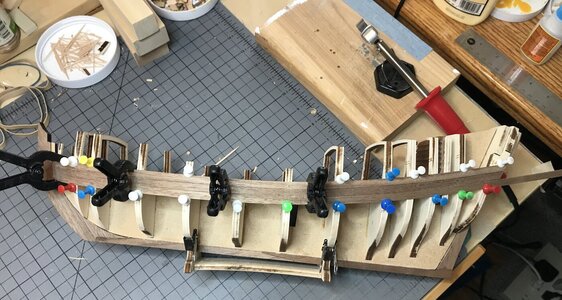
This mornings effort was to fit, sand, etc. the next strake under the 1st. But after several oops moments with the smaller frame parts (I broke two of them) I decided to start planking up as well as down. Currently the planks are clamped in place and drying.
Jan
A chance to work in the boatyard after clearing the driveway of snow.

The first strake (plank) was done a couple of days ago, after a lot of fitting, sanding and fitting it was glued in place yesterday.

This mornings effort was to fit, sand, etc. the next strake under the 1st. But after several oops moments with the smaller frame parts (I broke two of them) I decided to start planking up as well as down. Currently the planks are clamped in place and drying.
Jan
Snow? That’s a four letter word. Send some down here to Florida. I’d love to see some again. 
Feel your pain though as we lived in NH for eleven years.
Feel your pain though as we lived in NH for eleven years.
This will be my next project after finishing the ‘Cutty Sark’ next year , the Duyfken has so much history , with a crew of 300 ! We saw and visited her replica in Sydney years ago that inspired me to build her
Not much progress today. Lots of bad words working on my other build, So to clear my mind I switched builds.
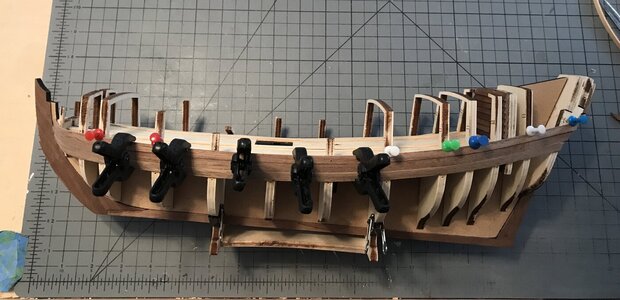
I managed to set and glue plank number three without doing any major damage. This plank is the first of two to fit above the initial plank. I’ve inadvertently broken a couple of break off frames and decided to plank up to avoid breaking more.
Jan

I managed to set and glue plank number three without doing any major damage. This plank is the first of two to fit above the initial plank. I’ve inadvertently broken a couple of break off frames and decided to plank up to avoid breaking more.
Jan

 Kolderstok models are the real McCoys!


 Seriously though, those planks look they are fitting really well - good job!