Enterprise Maryland 1799 1:51 [COMPLETED BUILD]

Hey @Rowboat,
I was trolling the SOS forum and stumbled across your build log. I just spent my lunch break chuckling and nodding my head knowingly. I, too, am building my first ship and your experiences mirror mine in so many ways! The details are different because we are attempting different ships - but doing - re-doing - starting over has been a constant refrain for me. Anyway, thanks for your light-hearted testimony to the build experience. I'll be tracking along for what remains and cheering you on!
Paul
 
@dockattner ,

Thanks for the compliments.
There are a few other build logs that I've read also filled with entertaining posting.

I try not to make mine to dry, as these build logs get quite long.

Want so more laughs ... currently I'm waiting on the wife to sew the sails for the Enterprise.
She said her sewing machine doesn't work right, it's probably 25 years old, and she could not get the sails done :(

I suggested it's time for a new sewing machine, and she happily agreed.

To shorten this story, she did get a new sewing machine a few weeks ago. Cost $expensive.00 :eek:

I still have no sails :rolleyes:.
Yup. Lots of hidden (and not so hidden) costs wrapped up in this hobby. A happy spouse: PRICELESS!
 
@dockattner ,

Thanks for the compliments.
There are a few other build logs that I've read also filled with entertaining posting.

I try not to make mine to dry, as these build logs get quite long.

Want so more laughs ... currently I'm waiting on the wife to sew the sails for the Enterprise.
She said her sewing machine doesn't work right, it's probably 25 years old, and she could not get the sails done :(

I suggested it's time for a new sewing machine, and she happily agreed.

To shorten this story, she did get a new sewing machine a few weeks ago. Cost $expensive.00 :eek:

I still have no sails :rolleyes:.
The Admiral says our new sewing machine is a lot cheaper than my ships are.
 
So turns out I didn't have the skills to use the sewing machine, ended up making more work for the wife .

The sails were printed on a canvas sheet that came with the kit, we need to map where the sewing will need to go and put on the rope that goes around the sail. I drew lines every 10 millimeters with a pencil to represent the sew lines. After the lines were drawn I cut out each sail.
The wife fixed some stuff but apparently there was to much, .

I've already mentioned my failed attempt(s) using the sewing machine, so I convinced myself that I would do some hand sewing.

The first error I made, "convincing myself to do the hand sewing".
Next, using a needle, OUCH!
Next, threading a needle !
Next, using the same size thread for the rope and the wrapping thread ( Don't judge me ).
That was a painful experience, literally and figuratively !

Next, well ... let's just get to the pictures and quit nitpicking, lol.

Here's the gallient topfore sail, just held in place for now.. As I mentioned I used the same thread for the wrapping and the rope.

DSC01905.thumb.JPG.3412496021c2666871ee83a1f4ea587a.JPG


Next, the topfore sail. A little better, very aggravating making it, #%!! .
DSC01907.thumb.JPG.23c03902555a2807a03533c5ce813923.JPGDSC01910.thumb.JPG.b0920d8226f8022c662aa9aebedcd538.JPG

Lastly, the main fore sail.
Here I realized my mistake of using the same thread for the wrapping and the rope.
I found some thicker dark rope and proceeded to work.
The glue bottle is used to hold the sail in place, that was a challenge in itself.

That awl actually has a 90 degree turn in it, in the pic it looks straight. I used this for making the holes.
The needle, no picture , is a special one that splits so you can thread it easier than the regular eyehole needles.

DSC01906.thumb.JPG.79d51960963e1af91517961b6a684ec1.JPG


Notice anything peculiar here? .... I'll wait....

DSC01909.thumb.JPG.dce7bbd27d62d26bc62a2cd60c281abe.JPG


...... ok, ok, I marked the sewing lines horizontally .

I was so frustrated.

I do not have enough of the dark rope thread for every sail, "what else is new" I say sarcastically.

A rough day in the shipyard yesterday, today looks to be better.
 
Last edited:
Except for the sideways sail. it looks pretty good! Do you plan to leave it that way? It was a lot of work and aggravation getting there. That's why the Admiral does all my sewing. The sails I bought for my Soleil Royal from Cornwall were already stitched, both on the inside and outside.
 
Redoing it, no way. Leaving the main fore sail like that.

My intention is (and has been) to bunch that sail up so one can see more of the rigging and ship work.
I might bunch up the topfore sail as well.

Hopefully it will still look good.

Only us sailor types' will even notice.;)
 
Redoing it, no way. Leaving the main fore sail like that.

My intention is (and has been) to bunch that sail up so one can see more of the rigging and ship work.
I might bunch up the topfore sail as well.

Hopefully it will still look good.

Only us sailor types' will even notice.;)
Good plan!
 
Redoing it, no way. Leaving the main fore sail like that.

My intention is (and has been) to bunch that sail up so one can see more of the rigging and ship work.
I might bunch up the topfore sail as well.

Hopefully it will still look good.

Only us sailor types' will even notice.;)
:pAtta Boy:p
 
Bending the sails to the yards and running the rigging lines continues at a slow pace .
Now that I think about it, everything I do is at a slow pace .

For one, I'm finding that I put the wrong blocks on the mast, when initially built.
The blocks need and eyebolt attached at the bottom, this is where the haylard is tied to when rigging.
Here's a blurry picture showing (barely) the eyebolt.
You may ask " why a blurry picture", because it's better than no picture.
InkedDSC01912_LI.thumb.jpg.32e577b2253defff94d997a4ad5adeab.jpg

In the manual it was difficult, sometimes impossible, to tell when a block needed the eyebolt.
Only upon fitting the yard did I find out.

So, fixed the one for the main top gaff.
Then I attached the sail.
No applause please, "we ain't done".
DSC01911.thumb.JPG.0e09df3a3bab51934851e9472686ee16.JPG

Clearly the right side did not align with the main mast, who's fault is that!
I post another picture of my mistake,,,,,
DSC01915.thumb.JPG.771d2eeac6e62de39f637fc81050bd2b.JPG

Sooooo, take everything off and redo the bending of the sail, because doing it right the first time isn't fun .
 
Last edited:
Bending the sails to the yards and running the rigging lines continues at a slow pace .
Now that I think about it, everything I do is at a slow pace .

For one, I'm finding that I put the wrong blocks on the yards, when initially built.
The blocks need and eyebolt attached at the bottom, this is where the haylard is tied to when rigging.
Here's a blurry picture showing (barely) the eyebolt.
You may ask " why a blurry picture", because it's better than no picture.
InkedDSC01912_LI.thumb.jpg.32e577b2253defff94d997a4ad5adeab.jpg

In the manual it was difficult, sometimes impossible, to tell when a block needed the eyebolt.
Only upon fitting the yard did I find out.

So, fixed the one for the main top gaff.
Then I attached the sail.
No applause please, "we ain't done".
DSC01911.thumb.JPG.0e09df3a3bab51934851e9472686ee16.JPG

Clearly the right side did not align with the main mast, who's fault is that!
I post another picture of my mistake,,,,,
DSC01915.thumb.JPG.771d2eeac6e62de39f637fc81050bd2b.JPG

Sooooo, take everything off and redo the bending of the sail, because doing it right the first time isn't fun .
I have no idea what you just said, but it was funny and I loved it. My only experience with rigging with blocks is with the yard lifts on my Connie. I’m getting close to a baptism of fire on my Black Pearl. I hope it turns out as beautiful as your mistakes.
 
Some things that I did to sew the sails.
1. Well, actually I didn't the wife did, at least the main part

2. I did draw in pencil lines every 10mm to be the stitch lines.
3. Also, marked holes every 10mm for the thread to the rope (Not sure if they should be closer, maybe 5mm)
4. Pierced the holes with a sharp punch (using a regular needle was to tough to pull through)
5. Pierced holes for the rings that would attach from the masts (for those sails that needed it)
6. Used a special needle with a larger eye opening to sew with
1612452077719.png
7. I found that when measuring how much line I would need for a sail I used this technique
For each side, except the side that attaches to the yard, I used 3X that length.

Ex: If right side is 100mm then I measured 300m, if left is 75mm I used 225mm, if the bottom was 90mm I
used 270mm.
The total length was enough to complete the wrapping of the rope and attach the sail to
the yard.
I probably could have used 2X on the longest side and it would still work
8. Wet the line and hung with a weight on it, to get the twisting out ( recommended by a member)
9. Pulled the line through beeswax
10.When hand sewing pull slowly and keep the thread away from itself. Pulling builds up friction and if the line
gets to close to itself, it will attach to itself and start twisting.

Lastly, be patient.
 
Last edited:
Aha, been there, done that.

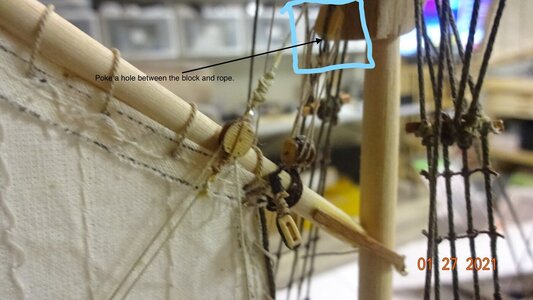
I had to cheat in a couple of places during my build. Instead of taking the block off and adding an eye bolt, I carefully poked a hole in the block between the rope wrapped around the block and the bottom of the block. That way I could thread a line through and tied it of in a slip knot. I simple solution, since that area gets pretty crowded with different size blocks.

Jan

B1A27CB5-18EF-4956-A82F-2E9782CA3099_1_201_a.jpeg
 
Back again after fixing my issue with the bending of the sail to the main mast.
Not to much to say, so just post pics of the work.
Only the sails attached to the main mast are complete and tied off.

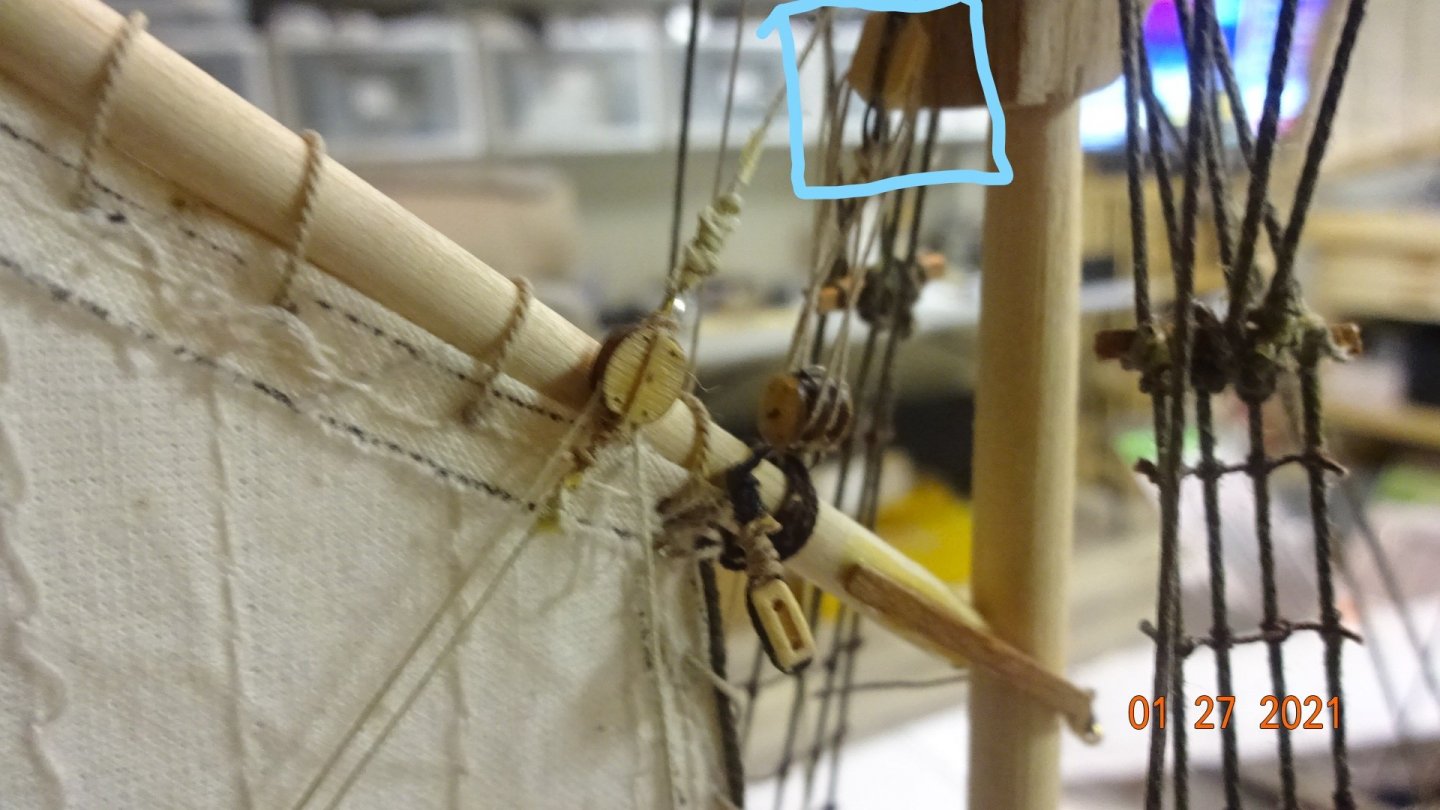
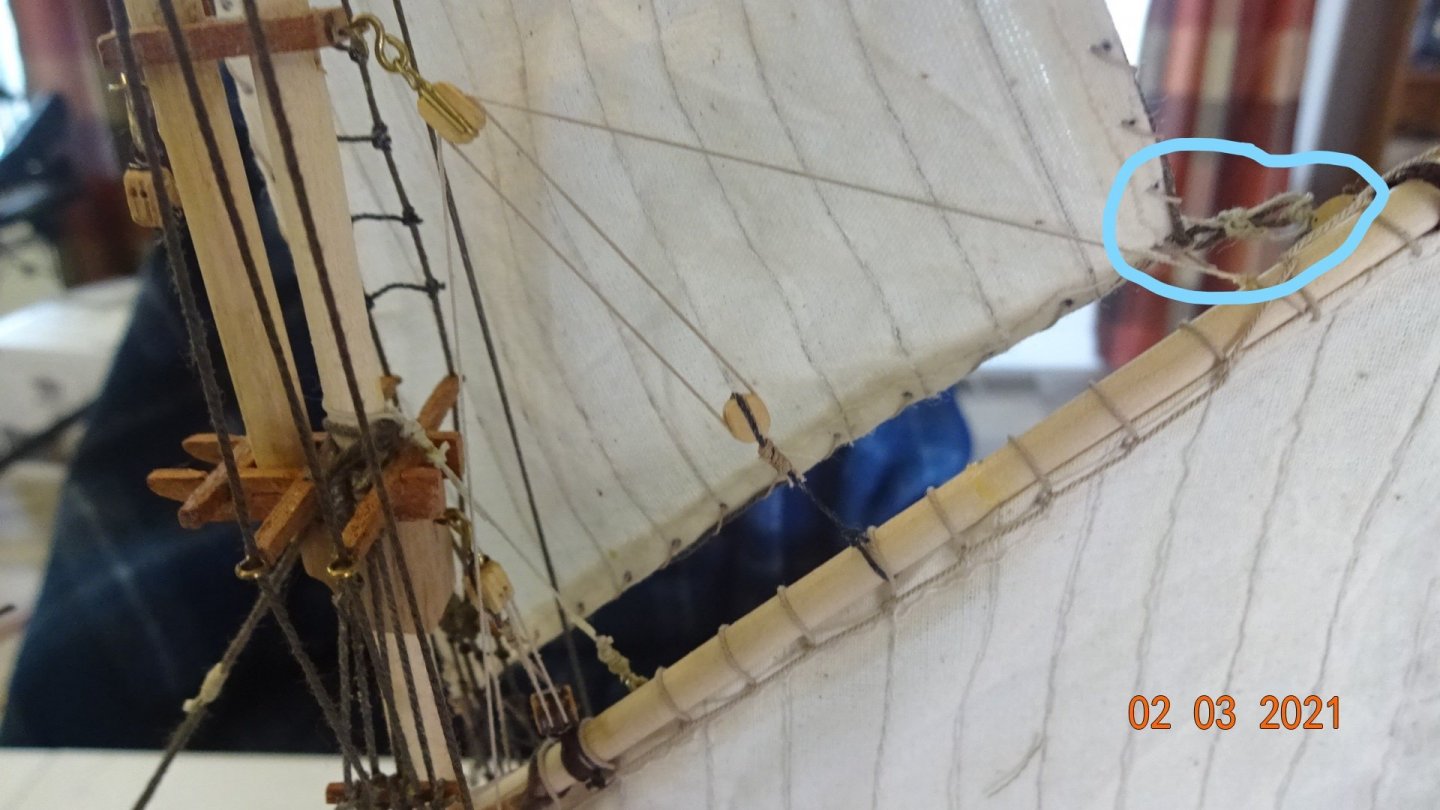
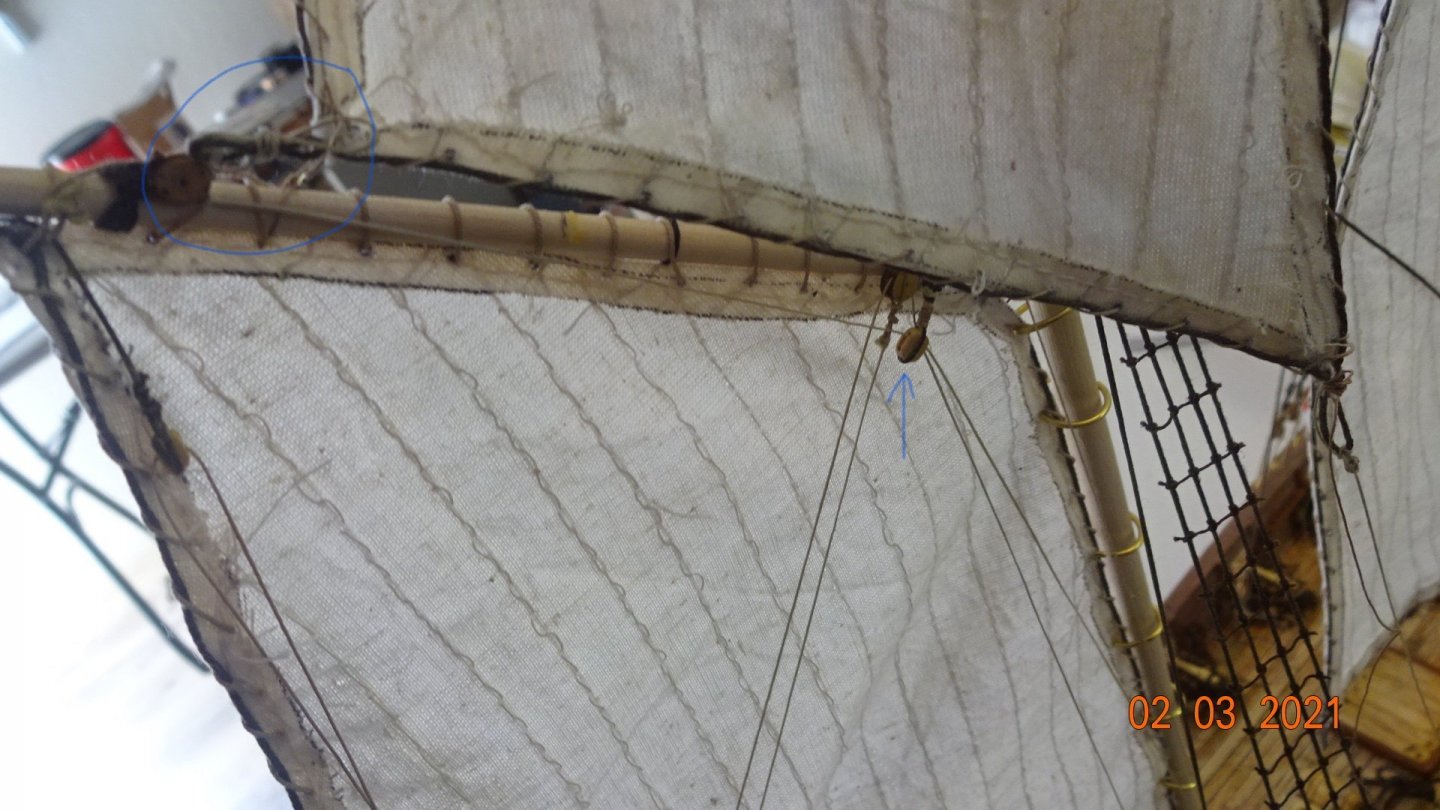
Not sure if I tied off the main mast top sail correctly or not.
I have one rigging line that runs up from a main mast belaying pin , passes through two blocks and ties off on corner of the top sail.
That was my best guess of where that rigging tied off.
InkedDSC01927_LI.thumb.jpg.48b686dad970f2459c0e1d9ca572472f.jpg

InkedDSC01929_LI.thumb.jpg.ed8b283f45b5d346fbdb5ed406071476.jpg

The other side of the sail has the running line tied to a loop on the corner of the sail and is tied directly to a belaying pin on the starboard side of the ship.
This is how I understood the directions.
But I'm not sure if I did this right as the sail angle seems odd.

If anyone can validate this I would appreciate it.
DSC01928.thumb.JPG.01a0ea97a634bc8c44cc6b9c8a7a3d2c.JPG

Next I added the gaff boom to the foremast.
This time corrected all the mistakes of my first attempt on the main mast so things went smoother.
DSC01925.thumb.JPG.4739e142ff072b0419b7eeaa831e2c56.JPG

DSC01926.thumb.JPG.8bce566efb1d1c586d7fe7c817022926.JPG

The rings I had previously put on the mast made attaching the sail easier since I had pre-punched the holes.
Here is the current state of the ship.
DSC01924.thumb.JPG.2cf642523b6e3c5ccaeda94c089fe2d4.JPG

That's about it for now.
Still have 5 sails to wrap
:(
, maybe that's a good thing "only 5 sails to wrap"
:)
.
I'm not looking forward to the sails. That's a very intricate process, isn't it?
 
Concerning the main top gaff sail, did I rig these correctly?
The sail seems at an awkward angle, maybe that's how they are supposed to be.
I'll dig thru my rigging book an see if I can find anything while awaiting your input(s).

Inkedtop gaff sail 2_LI.jpgtop gaff sail 3.jpg
 
Back
Top