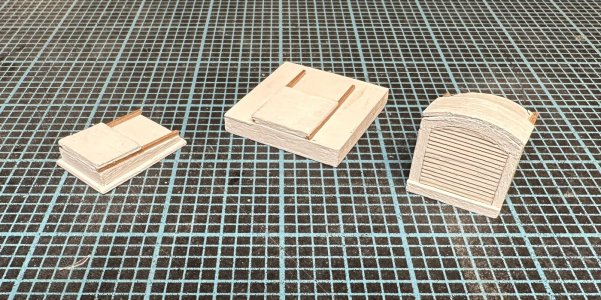
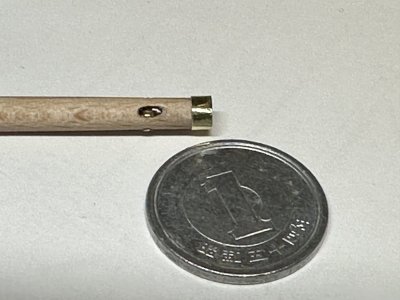
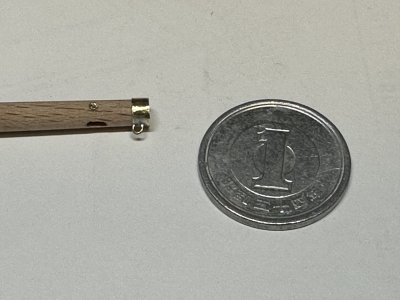
In a bit of a holding pattern for a few days, as one of the belts on my mini lathe parted in the midst of tapering the bowsprit. I've got two of three hatches made, but I figured I need to get the bowsprit and mizzen mast situated first to ensure I don't inadvertently foul the positioning of those if I get the positions of the hatches not quite right. I'll start work on the after-most hatch while I wait for belts. The block supplied with the kit is made of balsa and is too small so I'll need to start from scratch. Plus, Le Biche has a rounded top for that hatch, which I want to replicate.
-
LUCZORAMA SHIPWRECK SCAVENGER HUNT GIVEAWAY. 4 Weeks of Fun • 1 Legendary Prize ((OcCre’s Fram Ship)) • Global Crew Welcome!
**VIEW THREAD HERE**
You are using an out of date browser. It may not display this or other websites correctly.
You should upgrade or use an alternative browser.
You should upgrade or use an alternative browser.
Jumping ahead quite a bit, the plans call for 14 fishing hooks to be strung from the outriggers so I have started making those.
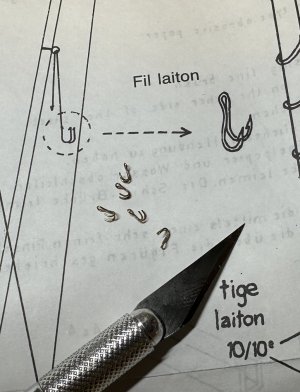
I’m still not 100% sure I will add those because I’m not sure where I will find line small enough and able to maintain a straight appearance with so little weight on the end. Of note, they are absent from the photo of the completed model on the box top.

I’m still not 100% sure I will add those because I’m not sure where I will find line small enough and able to maintain a straight appearance with so little weight on the end. Of note, they are absent from the photo of the completed model on the box top.
Various and sundry progress made. Deadeyes and chains are nearly ready to install; new bales for the windlass done on the lathe (the kit bales were horrible!); hoops for the spanker nearly done. Bowsprit completed and installed.
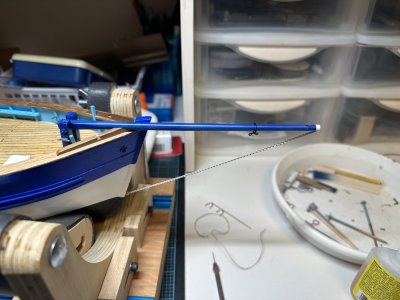
It’s probably a bit early for that, but there are lines that run through the hull that require holes drilled, and I need the bowsprit in place to locate them to avoid fouling the lines.
Mizzen mast is also nearly complete and dry fit to the hull
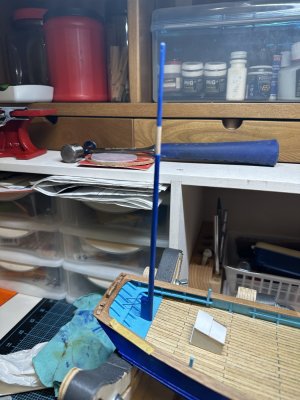
Meager as my skills are, this build is already light-years ahead of the model featured on the box top. One would think the manufacturer would want a quality finished product on the packaging, but Soclaine seem to travel their own road.

It’s probably a bit early for that, but there are lines that run through the hull that require holes drilled, and I need the bowsprit in place to locate them to avoid fouling the lines.
Mizzen mast is also nearly complete and dry fit to the hull

Meager as my skills are, this build is already light-years ahead of the model featured on the box top. One would think the manufacturer would want a quality finished product on the packaging, but Soclaine seem to travel their own road.

Last edited:
On my plans, the blocks are labeled as 3/1, 3/2, 5/3, etc. Can anyone explain how to interpret that? From context, it seems like the second number is the number of sheaves in the block, but don't know what to make of the first number.
Thanks for that response. My thinking was trending in that direction.My guess would be actual size in millimeters. At your scale of 1:50, a 3mm block would be 150mm (6") and 5mm would be 250mm (~10"). Those seem like reasonable sizes for blocks on a vessel of that size.
Not many updates recently as I continue to scratchbuild details in no particular sequence. Trying to get all the deck furniture and fittings installed so I can finally start stepping masts. Will post an update when I get there. In the meantime, the one and only 14mm white metal cleat for securing the boom has gone missing. First attempt at making a replacement from wood did not go well. Would prefer not to buy a whole bag of the things, since i don't foresee much use for cleats that large.
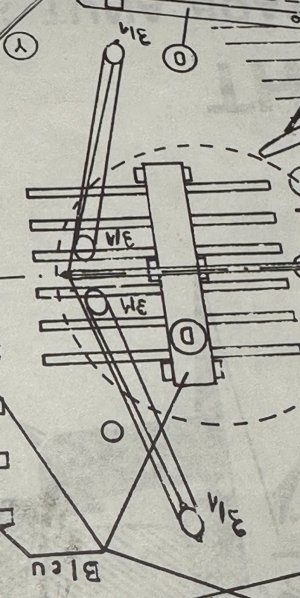
I’ve run into some trouble with the tackle for securing the tiller. This is what the plans show:
And here is a photo in the instructions
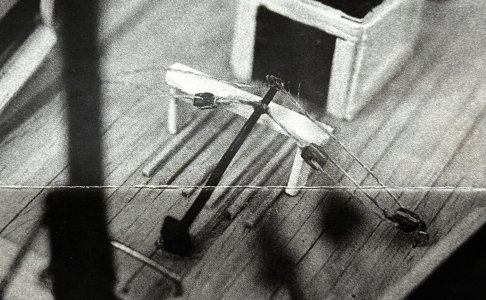
The outboard blocks go into eyes in the deck and the inboard blocks look from the plans like they should hook onto the tiller, but I can’t figure out where the running end of the sheet should be. It’s a tiller, so the rig of necessity would need to be adjustable, but the arrangement in the plans doesn’t seem to permit that.
Anyone have an idea?

And here is a photo in the instructions

The outboard blocks go into eyes in the deck and the inboard blocks look from the plans like they should hook onto the tiller, but I can’t figure out where the running end of the sheet should be. It’s a tiller, so the rig of necessity would need to be adjustable, but the arrangement in the plans doesn’t seem to permit that.
Anyone have an idea?
Good morning. Lovely progress. I agree with your assessment of the tiller tackle. In my view the rope would be tied to the tiller run through the block on the deck back up via the block on the tiller and then back to the deck to be tied off to a cleat or ring. The falls would be looped on the deck.
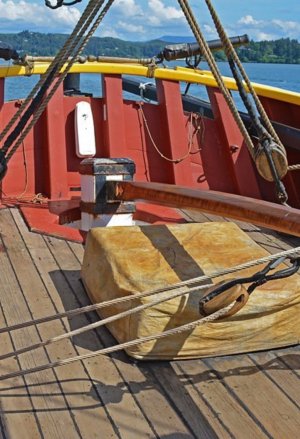
This pic doesn’t show the whole system but you can follow the flow of the tackle.
Cheers Grant

This pic doesn’t show the whole system but you can follow the flow of the tackle.
Cheers Grant
@GrantTyler, thanks for that input. Having looked at photos of Le Biche, I see there are significant differences between the contemporary ship and St Gildas, which I think gives me some leeway for improvisation. I figured maximum mechanical advantage and convenience for the steersman meant tying off near the tiller so I used some artistic license and spare belaying pins to add belay points to the rail beneath the tiller:
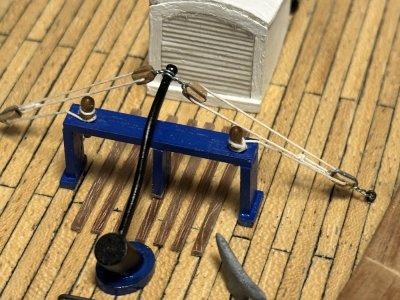
They are attached to the tiller with hooks so they could be easily dropped when frequent changes were called for. I’m still experimenting to get the right look, but will throw some hanks over the belaying pins

They are attached to the tiller with hooks so they could be easily dropped when frequent changes were called for. I’m still experimenting to get the right look, but will throw some hanks over the belaying pins
Well overdue for an update.
Having gotten all furniture and fittings mounted to the deck and bulwarks (I think! Plans are pretty skosh), I’m nearly ready to step the masts and start on rigging in earnest. The mizzen mast is just dry fit right now.
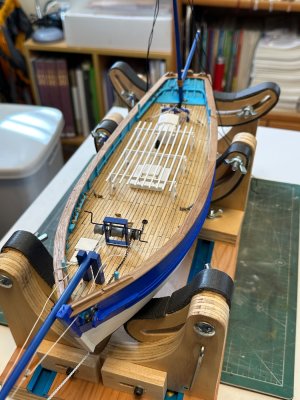
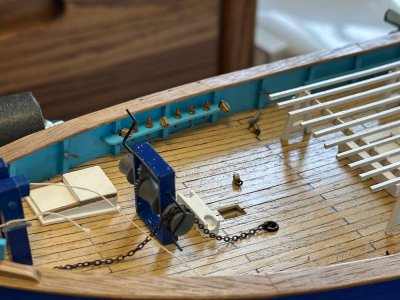
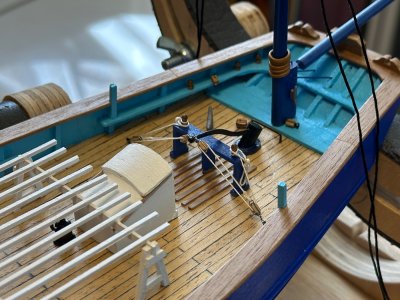
But first, I think it behooves me to get some sails made. Fortunately, the Admiral is out of town for another week so I can spread out my sail loft on her desk.
Having gotten all furniture and fittings mounted to the deck and bulwarks (I think! Plans are pretty skosh), I’m nearly ready to step the masts and start on rigging in earnest. The mizzen mast is just dry fit right now.


But first, I think it behooves me to get some sails made. Fortunately, the Admiral is out of town for another week so I can spread out my sail loft on her desk.
Last edited:
Several abortive attempts at sail-making have netted me only a deeper knowledge of how not to make sails. I’ve spent much time trying to replicate Olga's tutorial from her Ragusian Carack, but there’s magic in her fingertips that isn’t in mine. But I persist and get a little closer each try. Hopefully some demonstrable results in the not too distant future.
Yea Olga has that magic. I have been looking at her sail making videos and she makes it look easy. I do like the way she stains the sails with bitumen and turpentine - it gives a cool finish. Us mortals just keep trying ……good luck with your sail making. Cheers GrantSeveral abortive attempts at sail-making have netted me only a deeper knowledge of how not to make sails. I’ve spent much time trying to replicate Olga's tutorial from her Ragusian Carack, but there’s magic in her fingertips that isn’t in mine. But I persist and get a little closer each try. Hopefully some demonstrable results in the not too distant future.
A note on the sails for the benefit of my future self and anyone else hoping to learn from the mistakes of others.
The pre-printed kit sails had to go because they were of a very course, loose weave and the printing was both crudely done and did not match the plans.
I’m making new sails with fabric I purchased several years ago and is similar to a cheap collared shirt. It’s better than the kit, but still not as tight a weave as I would like. I may yet go buy a good shirt and cut it up. This hobby gets expensive when you start with a cheap kit.
Early attempts taught me that if I lay out the sails, stitch them and cut them out to the plans, they come out too short. That’s caused by the puckering from stitching all the parallel seams. I’ve probably got the tension set wrong somewhere on the sewing machine, I like the look and it’s consistent with Olga’s results.
On this attempt, I laid out copies of the sails from the plans aligned with the seams running in the same direction (and failed to take a photo before I started stitching).
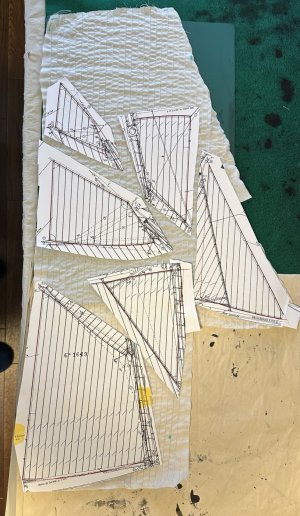
That allowed me to figure out how big a piece of cloth I would need. Next I stitched seams through the whole piece.

That’s where things stand at the moment.
Another lesson learned along the way, for which I will need to find a remedy, is that the fabric and CA glue I used to seal the edges according to Olga's tutorial did not want to cooperate. The CA stained the fabric, and the edges frayed anyway when I was attempting to seize the boltrope to the sail. I've ordered a 1/8" hemmer foot for the sewing machine to see if I can get a decent hem on the sails. Stay tuned for updates.
The pre-printed kit sails had to go because they were of a very course, loose weave and the printing was both crudely done and did not match the plans.
I’m making new sails with fabric I purchased several years ago and is similar to a cheap collared shirt. It’s better than the kit, but still not as tight a weave as I would like. I may yet go buy a good shirt and cut it up. This hobby gets expensive when you start with a cheap kit.
Early attempts taught me that if I lay out the sails, stitch them and cut them out to the plans, they come out too short. That’s caused by the puckering from stitching all the parallel seams. I’ve probably got the tension set wrong somewhere on the sewing machine, I like the look and it’s consistent with Olga’s results.
On this attempt, I laid out copies of the sails from the plans aligned with the seams running in the same direction (and failed to take a photo before I started stitching).

That allowed me to figure out how big a piece of cloth I would need. Next I stitched seams through the whole piece.

That’s where things stand at the moment.
Another lesson learned along the way, for which I will need to find a remedy, is that the fabric and CA glue I used to seal the edges according to Olga's tutorial did not want to cooperate. The CA stained the fabric, and the edges frayed anyway when I was attempting to seize the boltrope to the sail. I've ordered a 1/8" hemmer foot for the sewing machine to see if I can get a decent hem on the sails. Stay tuned for updates.
Last edited:
While I wait for the hemmer foot for the sewing machine to arrive, I’ve been experimenting with other ways to finish the sails in case a full hem turns out to be too difficult or bulky. So far, what seems to work best is to stitch the exact outline of the sail, fold along the stitch, then stitch just inside the fold. Then just cut the excess as close as possible to the stitch with surgical scissors or cuticle scissors. This is what it looks like from the front

Unfortunately, it does leave an unfinished on the other side which means it should only be displayed from one side. This is the back side. Not horrible from a distance, but sub-optimal
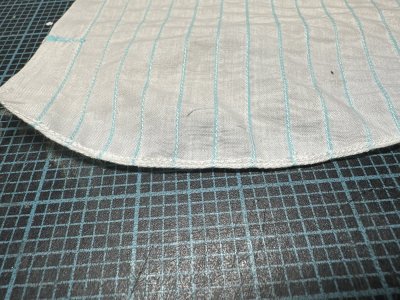
A test at seizing a bolt rope netted reasonable results
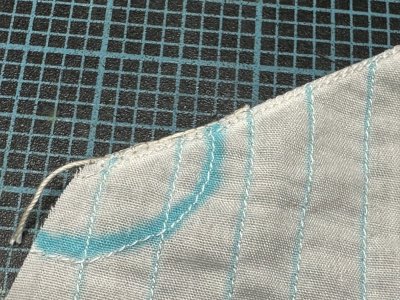

Unfortunately, it does leave an unfinished on the other side which means it should only be displayed from one side. This is the back side. Not horrible from a distance, but sub-optimal

A test at seizing a bolt rope netted reasonable results

LOVE your model! Regarding the cloth, look for the highest thread count material you can find in Egyptian cotton. Bedding can be found with very high TC or better, raw cloth from a bolt. One pillowcase is enough for most any model so there is no need to buy and entire bedding set or even one whole sheet.buy a good shirt and cut it up
If you cannot find any to your liking, silk span is a great alternative. There is a super little book by David Antscherl at Seawatch on sail making and the video by Tom Lauria. My favorite is a combination of these two methods, so it is possible to find what suits you best if you decide to give a go at silk span sails.
Allan
Last edited:
Thanks! Actually, options are limited here—Japanese bedding is quite different than what we’re accustomed to in the US—but may be worth ordering a set on line while I still have my APO mailing address. Ironically, I have not been able to source silkspan here, despite its supposedly being a Japanese product.LOVE your model! Regarding the cloth, look for the highest thread count material you can find in Egyptian cotton. Bedding can be found with very high TC or better, raw cloth from a bolt. One pillowcase is enough for most any model so there is no need to buy and entire bedding set or even one whole sheet.Beware of any cloth claimed to be over about 800 or 1000 TC, as it is not necessarily measured in the same way as so called "industry standard." Even with high TC cloth, sewing machines cannot achieve a scaled stitch. Pencil lines on the panels and hand stitching the outer seam with the bolt rope are often a great solution.
If you cannot find any to your liking, silk span is a great alternative. There is a supe little book by David Antscherl at Seawatch on sail making and the video by Tom Lauria. My favorite is a combination of these two methods, so it is possible to find what suits you best if you decide to give a go at silk span sails.
Allan


