- Joined
- Mar 19, 2021
- Messages
- 98
- Points
- 113

Well, just opened the box tonight and inventoried everything, all seems to be in order. Removed the keel pieces and filed the edge profile on the first piece. I will try to keep track of build time in the log. I expect to be rather slow and cautious as this is my first ship build ever. I will also have tons of questions as the directions are not so great.
Build Time So Far = 30 Minutes
Larry


Build Time So Far = 30 Minutes
Larry


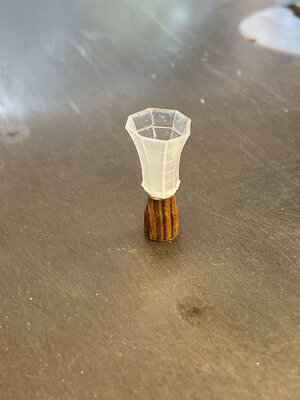
 , I know this is out of order but the Lanterns were calling my name. I don’t like the fiddly collars the kit provides so I decided to fab some wood ones on my lathe. They will require some tweaking when it come times to mount them but I think they will work fine. Process is listed below